Zenoss will add, model, and monitor those devices you add to the system. This section will walk you through adding an individual device.
-
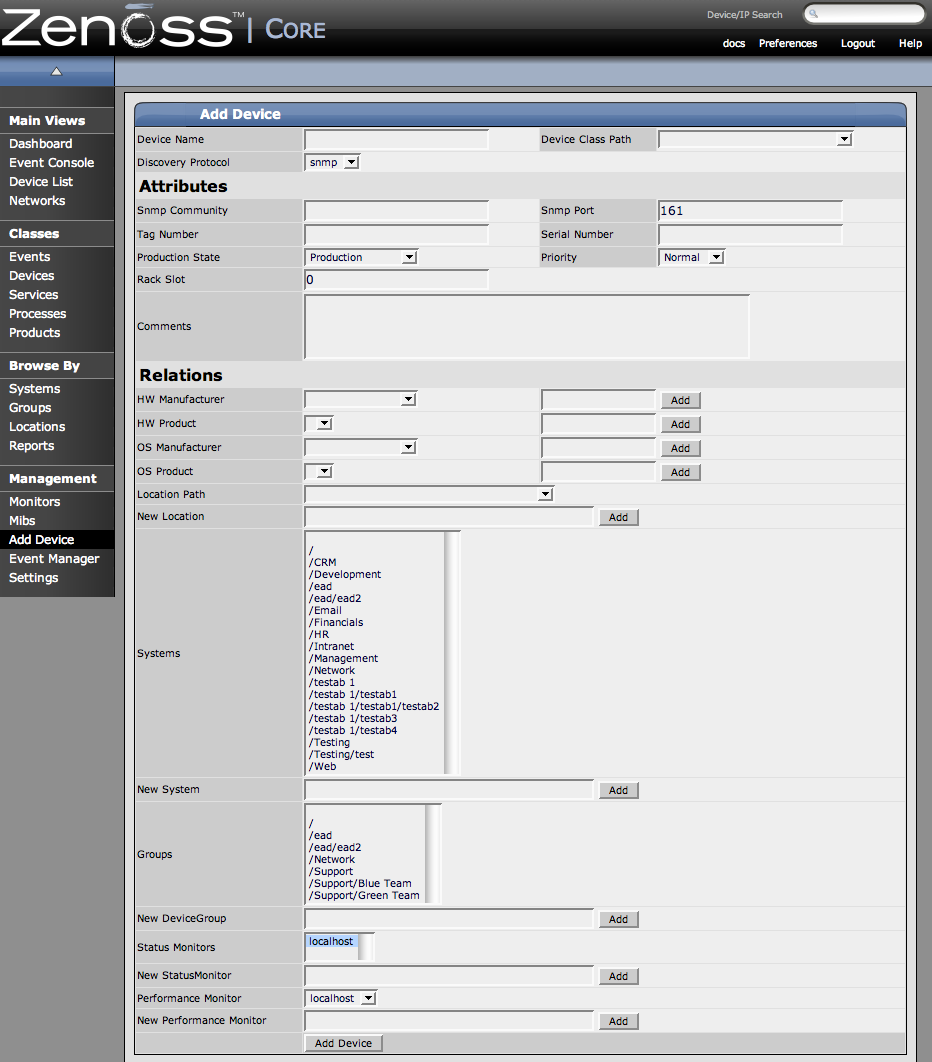
From the menu on the left side of the page, select Add Device.
The Add Device page appears.
-
In the Device Name field, enter the network (DNS) name or IP address of the device. Additionally, you can see all of the fields and areas where you can add additional information about a device.
-
Choose a device class from the Device Class drop-down list. We will classify this sever as a windows server so we choose /Server/Windows as the device class path.
-
Select a discovery protocol. You can choose from snmp, or none.
These methods are described in the above section about how Zenoss models devices.
-
Device Name, Device Class Path and Discovery Protocol are the only required fields for adding a device. Zenoss will attempt to fill in the following fields or they can be filled in later. Information you add here may conflict with information Zenoss discovers about the device.
NOTE: - When adding Cisco routers in classes other than /Network, you should set the zProperty for zIfDescription to True. This will give you additional information about Cisco routers. The option is already set to True by default for the /Network class.
-
Scroll down to the bottom of the page and click the Add Device button.
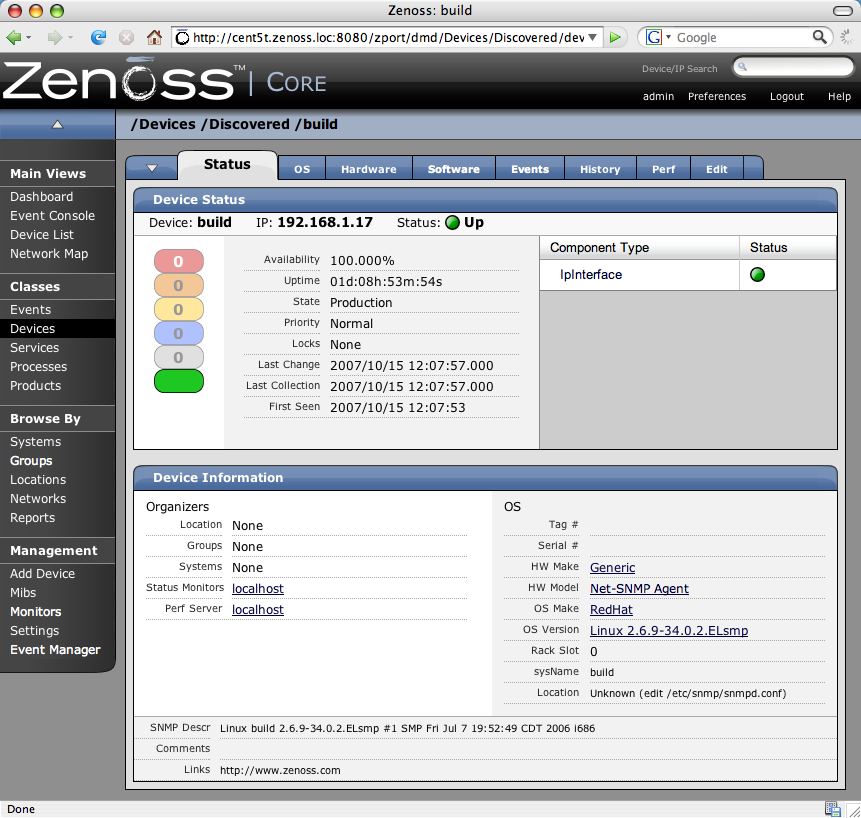
A Status page appears showing a log of the operations Zenoss is using to gather information about the device.
-
Scroll to the bottom of the page that results when you add a device. (You may have to scroll for a bit). There will be a link you can click to navigate to a device. Click the link that says:
Navigate to device <device name>
The Main Device page appears showing the Status Tab.