File sharing and authentication service
Introduction to files sharing and authentication
Zentyal uses Samba to implement SMB/CIFS [4].
| [4] | http://en.wikipedia.org/wiki/Samba_(software) |
Configuring a file server with Zentyal
The file-sharing services are active when the file sharing module is active, regardless of whether the PDC is.
With Zentyal, file sharing is integrated with users and groups. So that each user has a personal directory and each group can be a shared directory for all users.
The user’s personal directory is automatically shared and only can be accessed by the user.
You can also create a shared directory for a group from Groups ‣ Edit group. All group members have access to that directory and can read or write all the files directories within the shared directory.

Creating a shared directory for a group
To configure the general settings of the file sharing service, go to File Sharing ‣ General configuration.
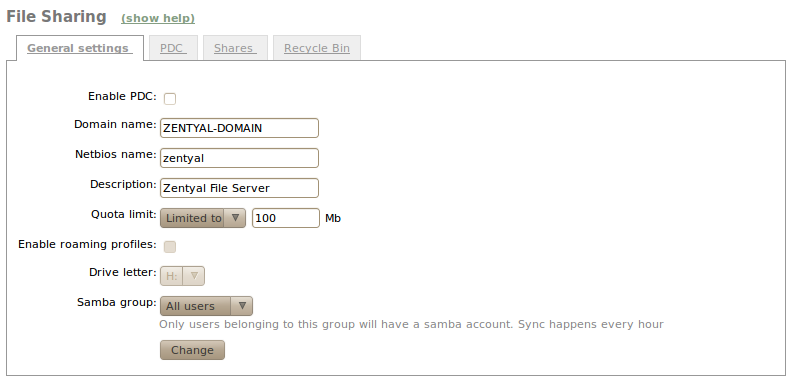
General configuration of file sharing
We set as domain where to work within the Windows local network, and as NetBIOS name the name to identify the Zentyal Server. You can a long description to describe the domain. In adittion, you have the option to set a quota limit. With Samba Group is possible to configure an exclusive group where his users have an account for sharing files.
To create a shared directory, access to File Sharing ‣ Shares and click Add new.
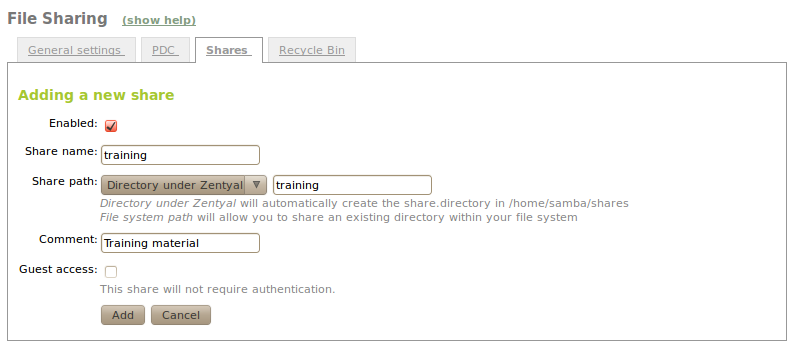
Adding a new share
- Enabled:
- We will leave it checked if you want this directory shared. We can disable to stop sharing maintaining the configuration.
- Share name:
- The name of the shared directory.
- Share path:
- Directory path to share. You can create a subdirectory within Zentyal directory /home/samba/shares, or using directly an existing system path if elected Filesystem path.
- Comment:
- A more detailed description of the shared directory eases management of shared assets.
- Guest access:
- Enable this option will make this shared directory is available without authentication. Any other access settings will be ignored..
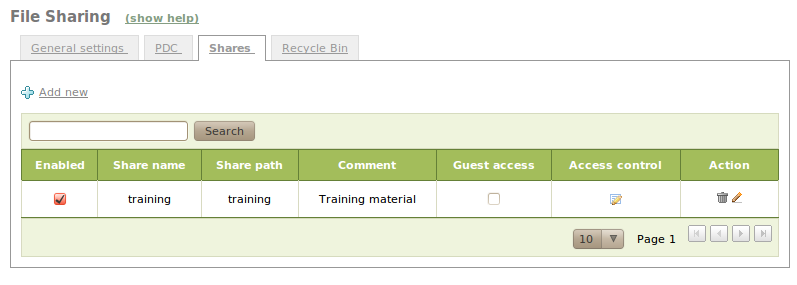
List of shares
From the list of shared directories can be edited the Access control. There, clicking on Add new, we can assign permissions to read, read/write or administration to an user or a group. If an user is a shared directory administrator can read, write and delete any user files within that directory.
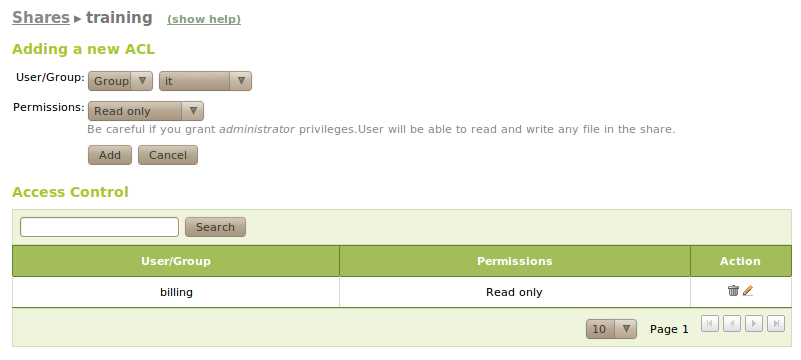
Adding a new ACL (Access Control List)
You can also create share for a group from Users and Groups ‣ Groups. All group members will have access: they can write their own files and read all the files in the directory.
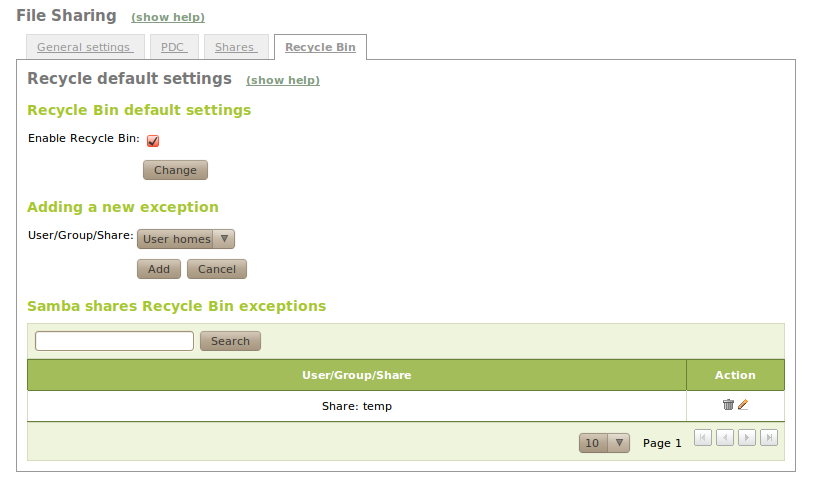
If you want to store deleted files in a special directory called RecycleBin, you can check the box Enable recycle bin at File Sharing ‣ Recycle bin. If you do not want to turn trash to all shared resources, you can add exceptions through Resources excluded from Recycle Bin. You can also change some other default settings for this feature, such as the directory name, editing the file /etc/ebox/80samba.conf.
Recycle bin
At File Sharing ‣ Antivirus there is also a box to enable or disable the scanning of virus in resources sharing and the ability to add exceptions for those in which you do not want to search. Note that to access the configuration of antivirus for file sharing module is required to have the package samba-vscan in the system. Also, the Zentyal module antivirus must be installed and enabled.
Configuring a Zentyal authentication server
To harness the potential of the PDC as authentication server, and its implementation Samba for Linux, we should check the box Enable PDC at Share files ‣ General Configuration.

PDC enabled
If the option Roaming Profiles is enabled, the PDC ser will not only authenticate users, but also will store their profiles. These profiles contain all user information, such as his preferences in Windows, his Outlook email accounts or his documents. When an user logs in, he will get his profile from the PDC server. Thus, the user will have their work environment on multiple computers. Before activating this option, we must consider that the users’ information can hold several gigabytes, the server PDC needs enough disk space. You can also configure the drive letter to which the personal user¡s directory will be linked after authenticating against the PDC in Windows.
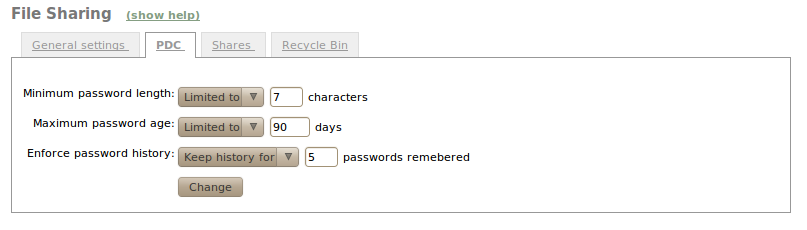
You can set password policies for users through Share Files ‣ PDC.
- Minimum password length.
- Maximum password age, the password must be renewed after passing the days set.
- Enforce password history, this option will force store up passwords, making them impossible to be repeated in subsequent attempts.
These policies are applicable only when you change the Windows password from a machine that is connected to our domain. In fact, Windows will force compliance with this policy to enter a machine registered in the domain.
PDC settings