Printers sharing service
About the printers sharing service
For the management of printers and their access permissions, Zentyal integrates Samba, described in section Configuring a file server with Zentyal. As a printing system, in coordination with Samba, Zentyal integrates CUPS [1], Common Unix Printing System.
| [1] | http://en.wikipedia.org/wiki/Common_Unix_Printing_System |
Printer server configuration with Zentyal
In order to share a printer in our network, allowing or denying users and groups the access, you need to have access to that printer from a host running Zentyal. This can be done through direct connection, parallel port, USB or through the local network. Besides that, you will need to know certain information regarding the manufacturer, the model and the driver of the printer in order to obtain good results on its operation.
First, it is noteworthy that the configuration and maintenance of the printers is not made from Zentyal interface but from the CUPS interface itself. If you administer the Zentyal server locally then you do not need to do anything special, but if you want to access from other machines on the network you must explicitly allow it for the network interface, as by default CUPS will not listen to it for security reasons.
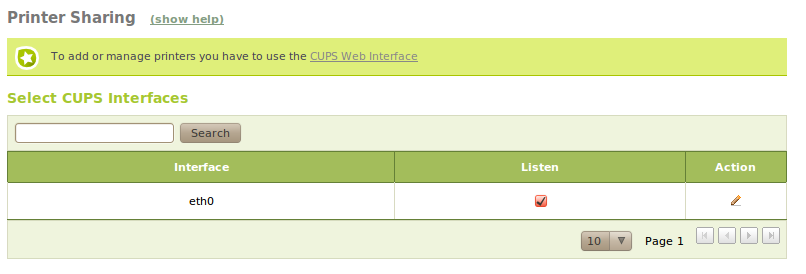
Printer management
The CUPS management port by default is 631 and you can access its management interface by HTTPS protocol through the network interface on which you have enabled CUPS to listen to, or localhost if you are operating directly on the Zentyal host.
https://zentyal_address:631/admin
To make it more convenient, if you are accessing Zentyal interface, you can access CUPS directly through the link CUPS web interface.
For the authentication you will use the same username and password with which you access the Zentyal interface.
Once you have logged onto the CUPS administration interface, you can add a new printer through Printer ‣ Add printer.
In the first step of the wizard for adding a new printer, you select the type of printer. This method depends on the printer model and how it is connected to your network. CUPS also provides a feature for the automatic discovery of printers. Therefore, in most cases it is possible that your printer is automatically detected thus facilitating the configuration.
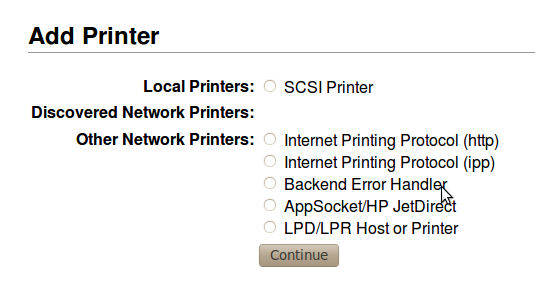
Add printer
Depending on the method you have selected, you might need to configure the connection parameters. For example, for a network printer, you must establish the IP address and the port as shown in the image.
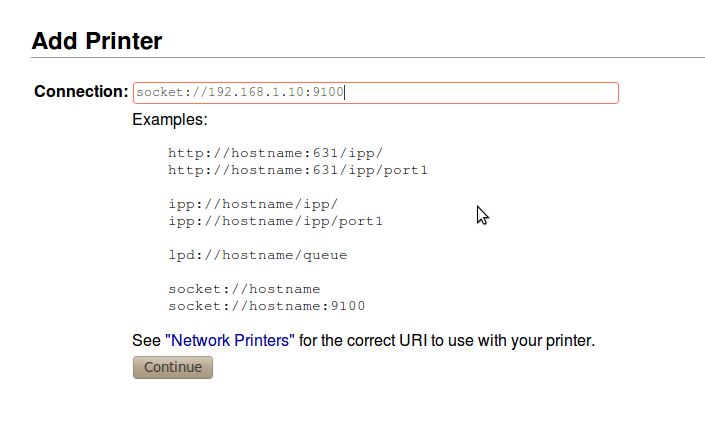
Connection parameters
Later, you must set the manufacturer, model and printer driver to use. Once you have selected the manufacturer, a list of available models will appear, with different drivers for each model on the right, separated by a slash. You also have the option to upload a PPD file provided by the manufacturer, if your printer model does not appear on the list.
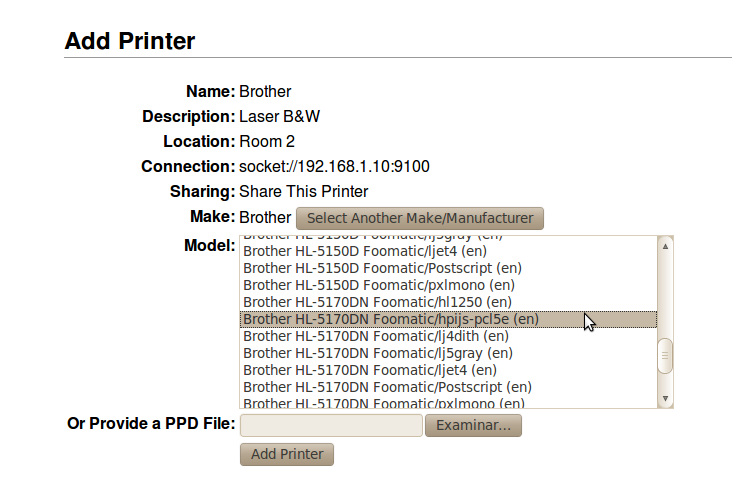
Manufacturer and model
Finally, you will have the option to modify the general settings.
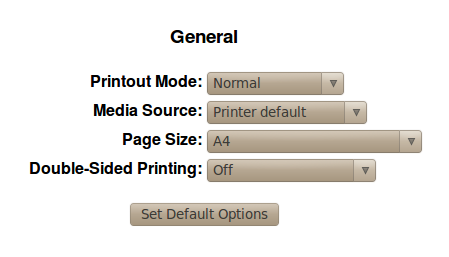
General settings
Once you have completed the wizard, your printer will be configured. You can check which printing jobs are pending or on progress through Jobs ‣ Manage jobs in the CUPS interface. You can perform many other actions, such as print a test page. For more information about printer management with CUPS it is recommended to read its official documentation [3].
| [3] | http://www.cups.org/documentation.php |
Once the printer has been added through CUPS, Zentyal can export it by using Samba.
Once the service is enable and changes are saved, you can start allowing access to these resources by editing groups or users (Groups ‣ Edit Group ‣ Printer o Users ‣ Edit User ‣ Printers).
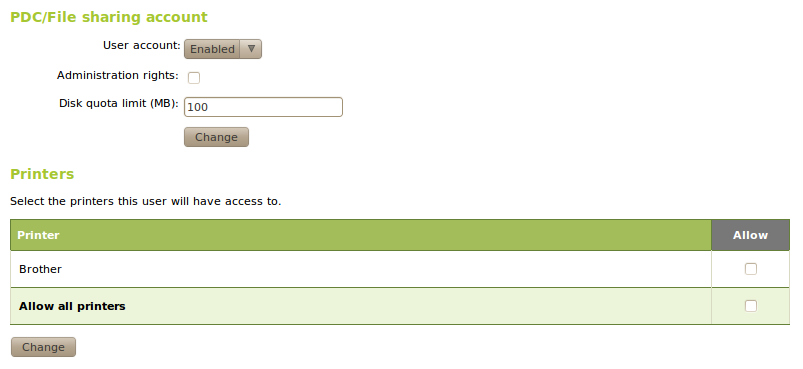
Management of printer access