HTTP Proxy Service
Introduction to HTTP Proxy Service
Zentyal uses Squid [1] as HTTP proxy, along with Dansguardian [2] for the content control.
| [1] | http://www.squid-cache.org/ |
| [2] | http://www.dansguardian.org/ |
HTTP Proxy configuration in Zentyal
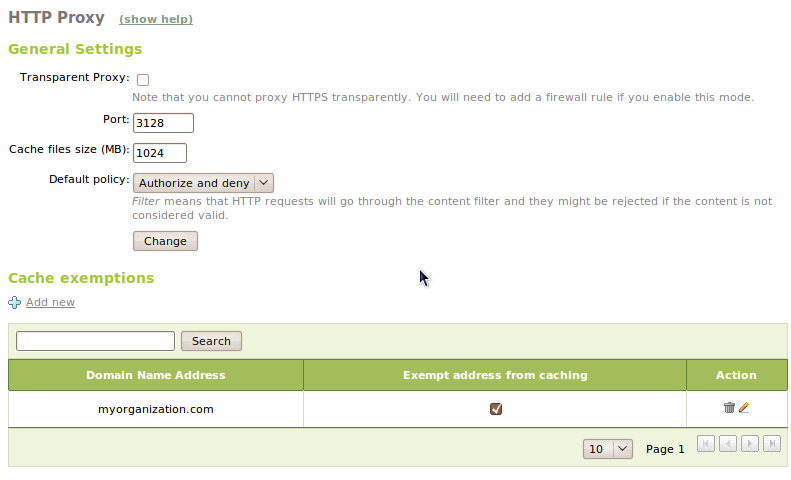
To configure the HTTP Proxy we will go to Proxy HTTP ‣ General. We can define if we want to use the proxy in mode Transparent Proxy if we want to force the configured policies or use a manual configuration. In this case in Port we will stablish the port for incoming connections. The default port will be 3128, other typical ports may be 8000 or 8080. Zentyal proxy will only accept connection that come from internal network interfaces, so we have to use an internal network address in the web browser configuration.
The size of the cache will define the maximum disk space used to temporally store web contents. It’s set in Cache size and it is a system administrator decision to decide which is the optimal value, taking into account the server’s characteristics and expected traffic.
We will also configure here the Default policy for the access to HTTP web contents through the proxy. This politic determines whether we can access the web and if we are going to apply the content filter. We can choose one of the options below:
- Allow All:
- With this politic, we will allow the users to browse the web without any type of restrictions, but will still have the advantages of the cache, traffic saving and better speed.
- Deny All:
- This politic totally denies all the access to the web. Even though it may seem not useful at a first view, given that we can achieve the same effect with a firewall rule, we can stablish later particular politics to different objects, users and groups, using this policy to deny by default and then choosing carefully what we want to accept.
- Filter:
- This politic allows the users to navigate, but activates the content filtering which can deny the access to some of the webs requested by the users.
- Authorize and.. Filter, Allow all, Deny All:
- This politics are versions of the former ones, where we also want to include authentication. The authentication will be explained in HTTP Proxy advanced configuration.
HTTP Proxy
It’s possible to select which domains won’t be stored in the cache. For example if we have local web servers, we won’t speed up the access using the cache and we will waste the memory that can be used to store remote server contents. If a domain is excluded from the cache, when we receive a request for this domain, we will ignore the cache and we will just forward the data from the server without storing it. This domains are defined in Cache exceptions.
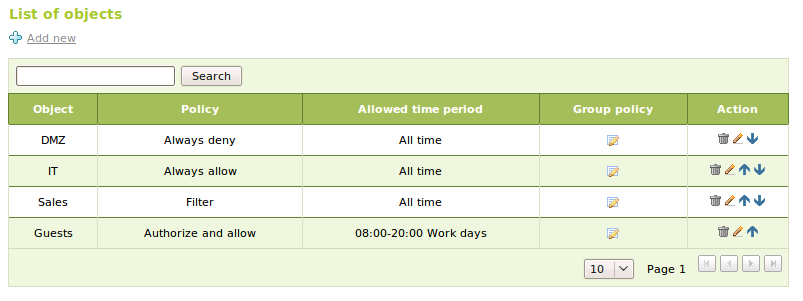
After setting the global policy, we can define more specific policies for Network objects in the menu Proxy HTTP ‣ Object Policy. We can choose any of the six politics for each object; If we access the proxy from any member of the object associated with this policy, it will have preference over the global policy. A network address can be contained in different object, so it’s possible to sort the object to indicate priority. We will apply the object policy with higher priority. We also have the possibility to define a hour range outside which we won’t allow access to the network objetct, but this option is only compatible with Allow or Deny policies, not with filter policies.
Object Policies
Limiting downloads with Zentyal
Another configurable characteristic with Zentyal is to limit the download bandwidth using network objects through the Delay Pools. For configuring this we will go to HTTP Proxy ‣ Limit bandwidth. We can represent the Delay Pools as boxes that contain a limited amount of bandwidth; they are being filled with the time, and using the network empties them, when they are completely empty, bandwidth and download speed is limited. Having in mind this representation, let’s see the values that we can configure:
- Ratio:
- Maximum bandwidth that can be used once the box is empty.
- Volume:
- Maximum capacity of the box in bytes, let’s say that the box will empty if we have transmitted this number of bytes.
With Zentyal we can limit bandwidth using two different methods, Delay Pools class 1 and class 2. The restrictions of the class 1 have priority over class 2 restrictions, if a network object doesn’t match with any of the limitations of the rules, we won’t apply any.
- Class 1 Delay Pools
- They limit the bandwidth globally for a subnet, and allow to configure a limit of transferred data the Maximum network size and a maximum bandwidth restriction, in Network ratio. The limitation will be activated when the data limit has been reached. This Delay Pools are a single box shared for all the network object.
- Class 2 Delay Pools
- This Delay Pools have two types of boxes, a general one where, as in the Class 1 we accumulate all the transmitted traffic and one dedicated to each client. If a member of the subnet empties his box, his bandwidth will be limited to Client Ratio, but it won’t affect other clients. If they empty the shared box, all the client will be limited to the Ratio.

Bandwidth limit
Content filtering with Zentyal
Zentyal supports the web page filtering depending on the content. To do so, it is required to set a global policy or the specific policy of each object that is accessing to be Filter o Authorize and filter.
We can define multiple filtering profiles in HTTP Proxy ‣ Filtering profiles, but if there is no specific profile for this user or object we will apply default.
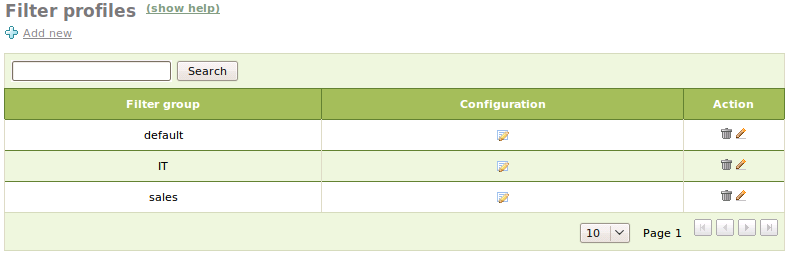
Filtering profiles.
Content filtering for web pages can be done with different methods, including heuristic filtering, MIME type, extensions, white lists and black lists, among others. The final decision is whether a specific web site can be accessed or not.
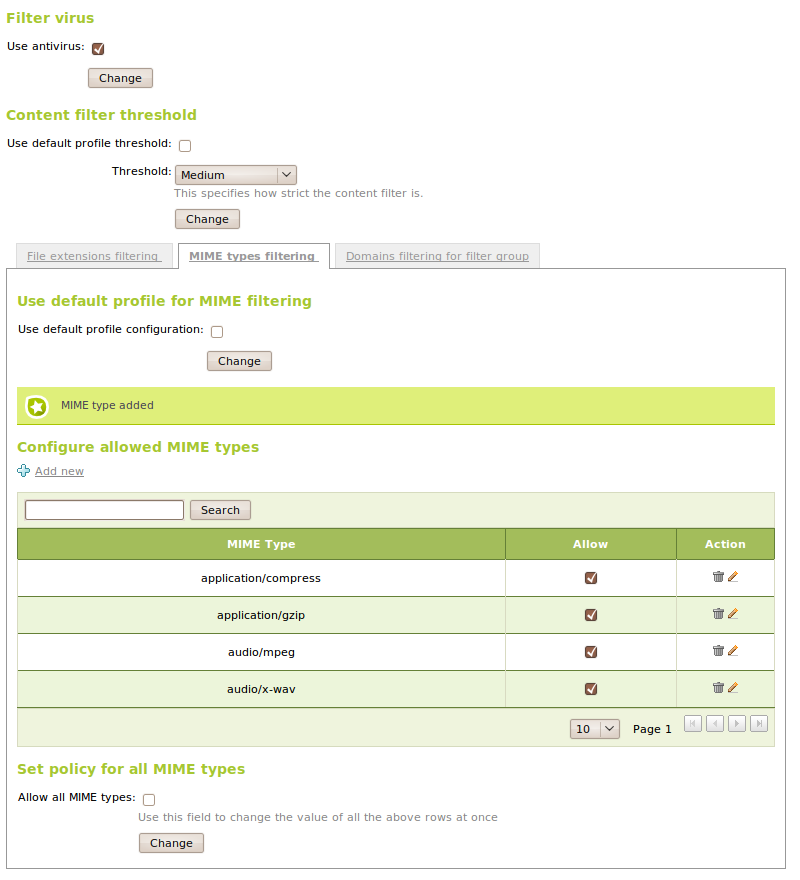
The first filter we can configure is antivirus. In order to use it we have to have the Antivirus module installed and activated. If it’s activated we will block the HTTP traffic that contains detected viruses.
Heuristic filtering consists mainly on the analysis of the texts in web pages, if the content is inappropriate (pornography, racism, violence, etc.) it will block access to the page. To control this process we can establish a threshold more or less restrictive, being the value to be compared with the score assigned to the site. We can set the threshold is the section :guilabel: Content filtering threshold. You can disable this filter by choosing the value : Guilabel: Off. Keep in mind that this analysis can block allowed pages, which is known as a false positive. This problem can be remedied by adding the domains of this site to a whitelist, but there is always the risk of a false positive with new pages.
We also have the File extension filtering, the guilabel:MIME type filtering and the Domain filtering.
Filtering profile
In the tab guilabel:File extension filtering we can select which extension will be blocked. In a similar fashion in MIME type filtering we can select which MIME types we can block and add new if necessary, as with the extensions.
In the tab Domain filtering we will find the filtering configuration based on domains, we Can:
- Block domains specified only as IP, This options blocks the domains
based only on the IP address and not in the domain.
- Block not listed domain, this option blocks all the domains that
are not present in the section Domain rules or in the cathegories present in Domain list files and which policy is not set to Ignore.
Next we have the domain lists, where we can insert domain names and select a politic for them between the following:
- Always allow:
- Access to the domain contents will be always allowed, all the filters are ignored.
- Always deny:
- We will never allow access to the contents of this domain.
- Filter:
- We will apply the usual rules to this domain. It’s useful if we have activated the option Block non listed domains.
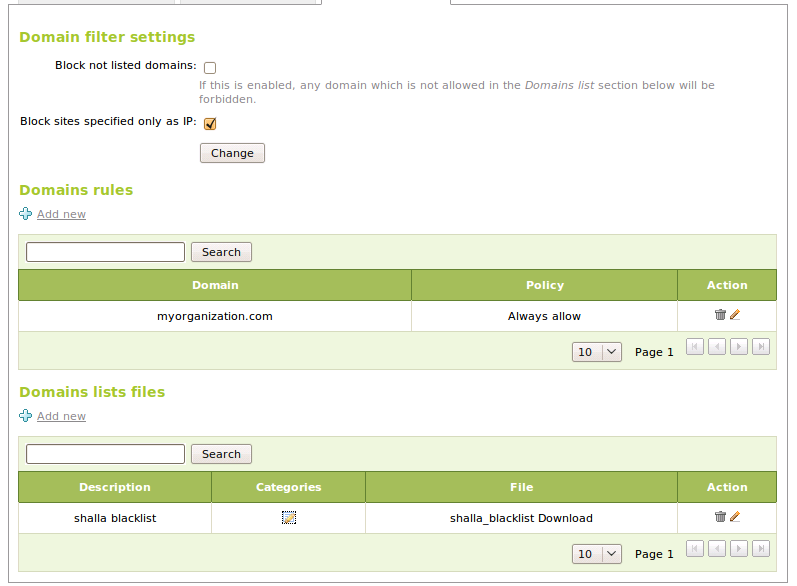
Domain filtering
We can simplify the system administrator work if we use classified domain lists. This lists are normally maintained by third parties and have the advantage of having the domains classified by categories, allowing us to choose a politic for a entire category of domain. This lists are distributed as a compressed file. Once we have downloaded the file, we can incorporate it to our configurations and set policies for the different categories. The politics that can be used in each category are the same that we can use for domains and will applied to all the domains in the category. There is an additional policy Ignore, as the name tells us, it will ignore all this category when filtering. This is the default policy for all the categories.
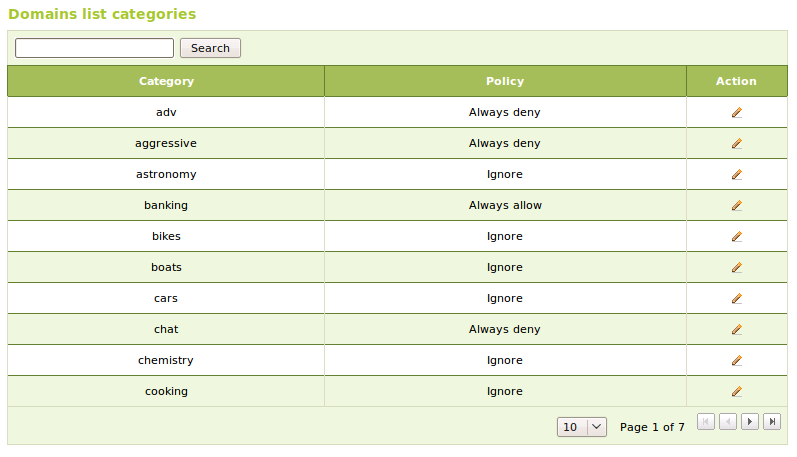
Category list
Using the Advanced Security Updates in Zentyal [3], we can automatically install an updated database of domain categories in order to have a professional level content filtering policy.
| [3] | http://store.zentyal.com/other/advanced-security.html |