Relevant to Blender v2.31
It's time to give Gus some nice cookie-like material:
1. Select Gus. Then, in the Button Window header, select the Shading Context by pressing the red dot button (Figure 4.31, “The Material Buttons window Button.”) or using the F5 key.
2. The Button window will be almost empty because Gus
has no materials yet. To add a material, click on the Menu
Button in the Material Panel
(the one with two triangles, pointing up and down)
and select Add New (Figure 4.32, “The Material Menu button.”).
3. The Buttons window will be populated by Panels and Buttons and a string holding the Material name, "Material" by default, will appear next to the white square button. Change this to something meaningful, like GingerBread.
4. Modify the default values as per Figure 4.33, “The Material Buttons window and a first gingerbread material.” to obtain a first rough material.
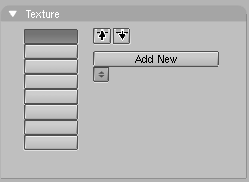
5. Press the Menu Button in the Textures Panel area (Figure 4.34, “The Textures menu button in the Material Buttons”)
and select Add new. We're
adding a texture in the first channel. Call it "GingerTex."
6. Select the Texture Buttons by clicking the button in Figure 4.35, “The Texture Buttons window Button.” or by pressing F6.
7. From the columns of ToggleButtons which appear
in the Texture panel select
Stucci and set all parameters
as in Figure 4.36, “The Texture Buttons window with a stucci texture.”.
8. Return to the Material buttons (F5)
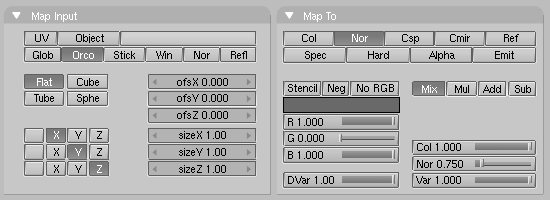
and set the Map Input and Map To
tabs of the Texture Panel as in Figure 4.37, “Settings for the Stucci texture in the Material Buttons
window.”. Release the Col Toggle
Button and set the Nor
Toggle Button, then raise the Nor
slider to 0.75. These changes will make our Stucci
texture act as a "bumpmap" and make Gus
look more biscuit-like.
9. Now add a second texture, name it "Grain,"
and make it affect only the Ref
property with a 0.4 Var (Figure 4.38, “Settings for an additional Noise texture in channel 2.”). The texture itself is a plain
Noise
texture.
Give the ground an appropriate material, such as the dark blue one shown in Figure 4.39, “A very simple material for the ground.”.
To give some finishing touches we'll add eyes and some other details.
1. First make Layer 1 the only one visible by clicking with LMB on the layer 1 button (Figure 4.40, “Layer visibility buttons on toolbar.”). This will hide the lamps, camera, and ground.
2. Place the cursor at the center of Gus's head. (Remember that you are in 3D so be sure to check at least two views to be sure!)
3. Add a sphere
(SPACE>>ADD>>Mesh>>UVsphere).
You will be asked for the number of Segments:
(meridians) and Rings: (parallels)
into which to divide the sphere. The default of 32 is
more than we need here, so use a value of 16 for both.
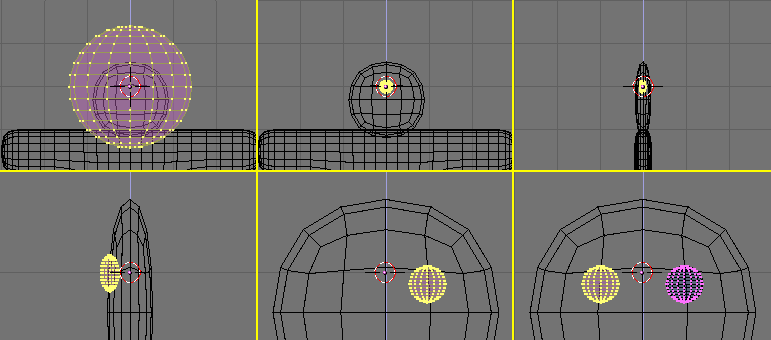
The sphere is in the first image at the top left of the sequence in
Figure 4.41, “Sequence for creation of the eyes.”.
4. Scale the sphere down (SKEY) to a factor 0.1 in all dimensions, then switch to side view (NUM3) and scale it only in the horizontal direction (YKEY) a further 0.5 (see the second two images in Figure 4.41, “Sequence for creation of the eyes.”).
5. Zoom a little if necessary via NUM+, MW, or CTRL-MMB, and drag the sphere (GKEY) to the left so that it is halfway into the head (as shown in the first image in the second row of Figure 4.41, “Sequence for creation of the eyes.”).
6. Return to front view (NUM1) and move the sphere sideways, to the right. Place it where Gus should have an eye.
7. Flip a duplicate around the cursor by following
the sequence you learned when flipping Gus's body.
(Select the crosshair toolbar button, in EditMode
AKEY to select all,
SHIFT-D, ESC MKEY,
Global X Menu entry).
Now Gus has two eyes.
8. Exit EditMode (TAB), and place the cursor as close as you can to the center of Gus's face. Add a new sphere and scale and move it exactly as before, but make it smaller and place it lower than and to the right of the cursor, centered on the SubSurfed mesh vertex Figure 4.42, “Creating a mouth with Spinning tools.”).
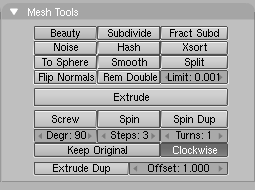
9. Now, in the Edit Buttons (F9), locate
the group of buttons at bottom in the Mesh Tools
Panel (Figure 4.43, “The Spin Tools buttons in the Edit Buttons window.”). Set
Degr: to 90, Steps:
to 3, and verify that the Clockwise:
TogButton is on. Then, with all vertices still selected,
press SpinDup.
This will create three duplicates of the selected vertices
on an arc of 90 degrees, centered around the cursor.
The result should be Gus's mouth, like the last image of
the sequence shown in Figure 4.42, “Creating a mouth with Spinning tools.”.
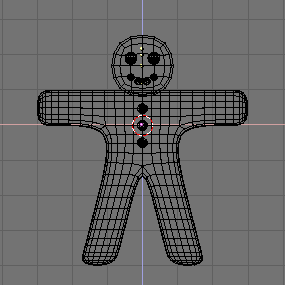
Now that you have learned the trick, add three more of these ellipsoids to form Gus's buttons. Once you have made one button, you can simply exit EditMode, press SHIFT-D to create a duplicate, and move the duplicate into place, as shown in Figure 4.44, “The complete Gus!”.
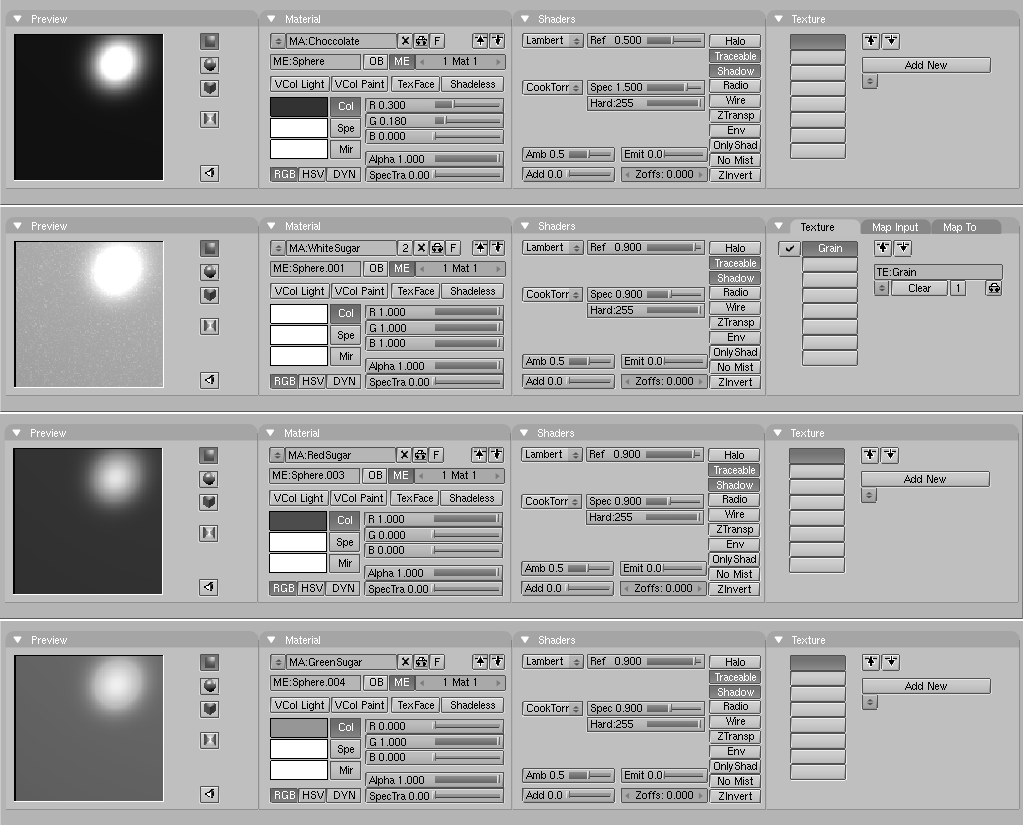
Give the eyes a chocolate-like material, like the one shown at the top in Figure 4.45, “Some other candy materials.”. Give the mouth a white sugar like material, like the second one shown in Figure 4.45, “Some other candy materials.”, and give the buttons a red, white, and green sugar like material. These are shown from top to bottom in Figure 4.45, “Some other candy materials.” too.
Objects sharing a material
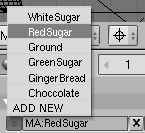
To give one object the same material as another
object, select that material in the Menu list
which appears when you press the Menu Button ButtonWindow
Material Panel.
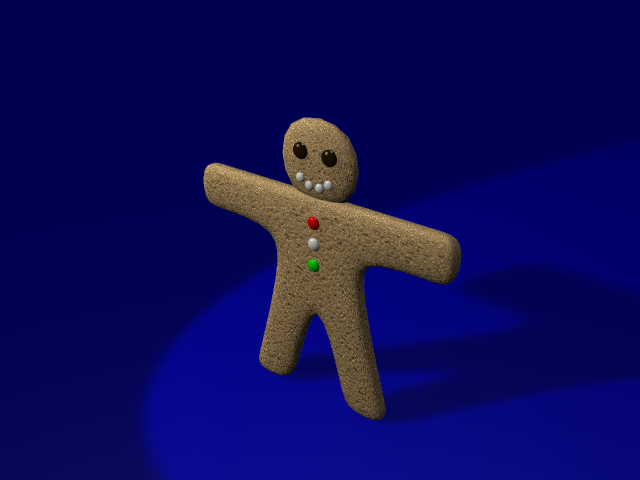
Once you have finished assigning materials, make layer 10 visible again (you should know how), so that lights and the camera also appear, and do a new rendering (F12). The result should look more or less like Figure 4.47, “The complete Gus still rendering.”.
Save your image, if you so wish, by pressing F3. Enter the name of your image in the file window and save.
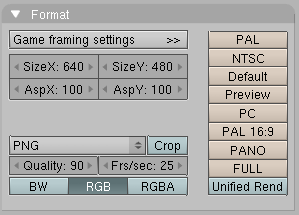
Image types and extension
You must choose the image format (JPEG, PNG, and so on)
by setting it in the Rendering buttons
before pressing F3
(Figure 4.27, “The Rendering buttons window buttons.”) and
using the Menu (Figure 4.48, “File type selection menu in the Rendering Buttons
window.”)
in the Format Panel.
Blender does not
add an extension to the file name; you must enter one if you wish.


