Relevant to Blender v2.31
In this section we look at how to set up the various material parameters in Blender, and what you should expect as a result.
Once an Object is selected, by pressing the F5 key or
 , you switch to Shading context and the Material Buttons window appears. This window will appear
terribly empty, unless the Object already has a material linked to it.
If there is no linked material, add a new one with the menu button
(Figure 10.4, “Add new material.”).
Once
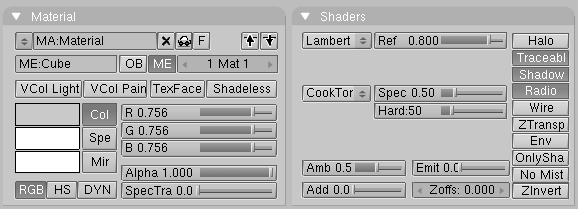
you have added a material the buttons will appear as shown in Figure 10.5, “Material Buttons.”.
Four panels are present, left to right: a Preview panel,
a Material panel, a Shader panel
and a Texture panel.
We will concentrate on the first three, for now.
The Preview panel shows the material preview. By default
it shows a plane seen from the top, but it can be set to a sphere or a cube with
the buttons on the right of the panel (Figure 10.6, “Material Preview, plane (left) sphere (middle) and cube
(right).”).
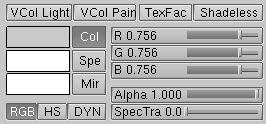
The Material Panel (Figure 10.7, “Material colors buttons.”)
allows, among other things, setting of the material colors.
Each material can exhibit up to three colors:
The basic material color, or the Diffuse color, or, briefly the Color tout court (
Colbutton in the interface) which is the color used by the diffuse shader.The Specular color, indicated by the
Spebutton in the interface, is the color used by the specular shader.The Mirror color, indicated by the
Mirbutton in the interface, is the color used by special textures to fake mirror reflections. (You'll find more information on this in the Environment Mapping section).
The aforementioned buttons select the pertinent color, which is shown
in preview immediately to the left of each button. The three sliders at the right
allow you to change the values for the active
color in both a RGB scheme
and in a HSV scheme. You can select these schemes via the
RGB and HSV buttons at the bottom.
The DYN button is used to set the Dynamic properties
of the Object in the RealTime engine (which is outside the scope
of this book), while the four buttons above
relate to advanced Vertex Paint and
UV Texture.
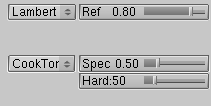
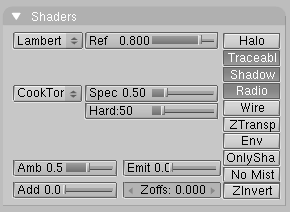
The Shader panel
(Figure 10.8, “Material Shader buttons.”)
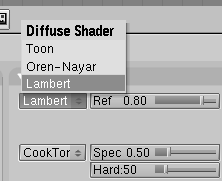
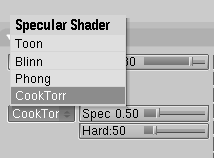
displays two MenuButtons allowing you to select one
diffuse shader (Figure 10.9, “Material Diffuse shaders.”)
and one specular shader (Figure 10.10, “Material Specular shaders.”).
The two sliders on the side, valid for all shaders, determine the intensity
of the Diffusion and Specular phenomena. The Ref slider
has a 0 to 1 range whereas the Spec has a 0 to 2 range.
Speaking in strictly physical terms, if A
is the light energy impinging on the object, Ref times
A is the energy diffused and Spec
times A is the energy specularly reflected. To be
physically correct this must be Ref +
Spec < 1 or the object
would radiate more energy than it receives. But this is CG, so don't be too
strict on physics.
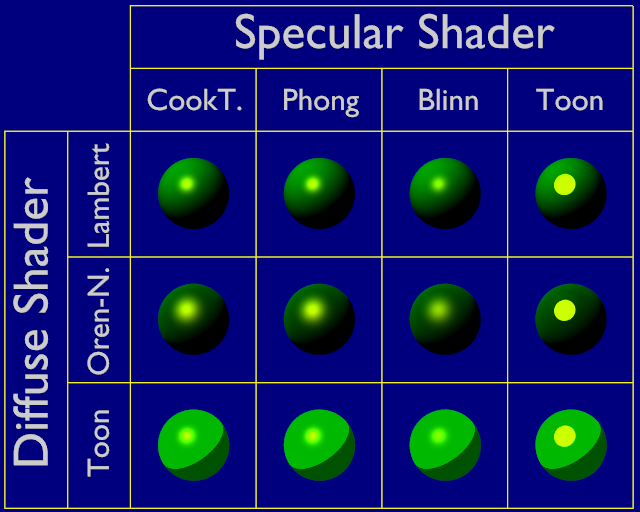
Depending on the chosen shader other sliders may be present, allowing you to set the various parameters discussed in the introduction.
For the sake of completeness, Figure 10.11, “Shader overview.” shows all possible combinations. Of course, since there are so many parameters, these are just a small sample.
The remaining material buttons both in the Material and
Shaders panels perform some interesting effects.
Figure 10.12, “Additional material sliders.” shows some interesting sliders.
Alpha governs the opacity of
the material; 1 is fully opaque and 0 is fully
transparent. SpecTra forces specularity highlights
on transparent bodies to be opaque.
Shadeless makes the material insensitive to its
shading, giving it a uniformly diffuse color.
In the Shaders panel,
the Emit slider gives, if non zero,
an emitting property to the material. This property makes material visible even without
lights and can be itself a source of light if the Radiosity engine
is used. (Figure 10.13, “Regular material (left), material with Alpha < 1 (center)
and material with Emit > 0 (right).”).
The remaining column of buttons (Figure 10.14, “Material special buttons.”)
activates some special features. Top Halo Button
makes the material an 'Halo' material, which will be described later on.
By default the
Traceable, Shadows and Radio
are activated. The first allows the material to cast
shadows, while the second allows the material to receive
shadows; the third allows the material to be taken into account if
a Radiosity rendering is performed.
Wire renders the Object as a wireframe.
ZTransp is necessary to activate
the Alpha transparency effect.
The other buttons are not used that often and are described in the reference section at the end of the book.


