by Kenneth Styrberg
Relevant to Blender v2.34
In many real life situations - like skin or metals - the color of diffuse and specular reflections can differ slightly, based on the amount of energy a surface receives or on the light angle of incidence.
The new Ramp Shader options in Blender now you allow to
set a range of colors for a Material, and define how the
range will vary over a surface, and how it blends with the 'actual color'
(typically from material or as output of texture).
Since texture calculations in Blender happen before shading, the
Ramp Shader can completely replace texture or material
color. But by use of the mixing options and Alpha values it is possible to
create an additional layer of shading in Blender materials.
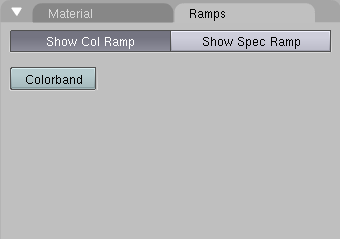
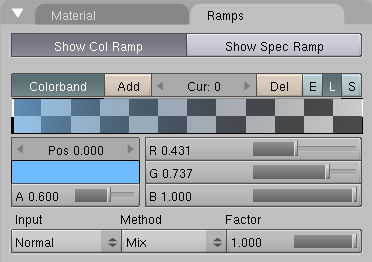
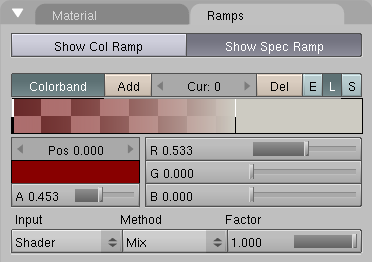
The Ramps panel is located in the
Material context (F5). Here you can use the
top two buttons to show either settings by pressing Show Col
Ramp for diffuse or Show Spec Ramp for specular
ramps. (Figure 10.15, “Ramps Panel.”).
Pressing the button Colorband enables Ramp
Shaders. By default it opens with 2 colors, with the first having
Alpha = 0, and no color. And the second having
Alpha = 1 and a cyan color. (Figure 10.16, “Ramps Panel Colorband.”).
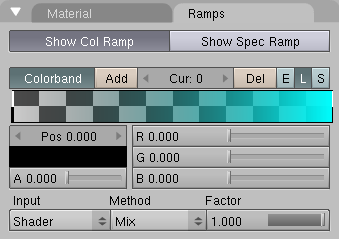
Add - Adds a new color in the middle of the colorband with neutral grey as default color.
Cur - Displays the current selected color number on the colorband.
Del - Deletes the current position.
E/L/S - Defines the type of interpolation between the
Ramp Shadercolor and theMaterialcolor. E - Ease or Qubic, L - Linear and S - B-Spline.Alpha - Defines how much of the
Ramp Shadereffect will be seen. AnAlphavalue of 0 means that theRamp Shaderis totally transparent and will not be seen in the final material. A value of 1 sets theRamp Shaderopaque. If you defined colors with differentAlphavalues, they will be interpolated between each other to get a smooth transition between different transparency settings. You can preview theAlphasettings on the color band with the checker board pattern behind the colorband. If pattern is visible then the transparency is less than 1.R/G/B - The current color RGB values. You can LMB on the color field under the
Posfield to choose a color using theColor Picker.
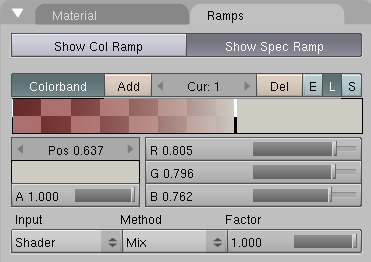
The current color is marked with a slightly thicker bar in the colorband. To
select a color position you can either press LMB on the
desired color position, or step the current color number up and down with the
right and left arrows in the Cur field. You can also
SHIFT-LMB in the field and enter the required color number
manually.
You can move the position of a color by simply pressing the
LMB and dragging over the colorband. There is also a
Pos field where you can move the position with the left and
right arrows or SHIFT-LMB in the field and enter the position
manually.
Note
If you reorder the positions of the colors, they will be renumbered so that they always start with 0 from the left and increment to the right.
The two pop-up buttons and the value slider in the bottom of the panel
defines how the Ramp Shaders work:
Input
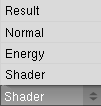
Shader - The value as delivered by the basic shading formula (like Lambert or Phong) defines the color. Here the amount of light doesn't matter for color, only the direction of the light.
Energy - As
Shader, but now also lamp energy, color and distance, is taken into account. This makes the material change color when more light shines on it.Normal - The surface normal, relative to camera, is used for the
Ramp Shader. This is possible with a texture as well, but added for convenience.Result - All three previous options work per lamp, this option only does it in the end of all shading calculation. This allows full control over the entire shading, including 'Toon' style results. Using alpha values here is most useful for tweaking a finishing touch to a
Material.
Method

The Method menu has several options for blending type:
Mix, Add, Subtract, Multiply, Screen, Divide, Difference,
Darken and Lighten.
Method options gives an option to choose how the blending
between the color from Input and the Ramp
Shader will be done.
Factor
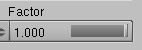
The Factor slider denotes the overall factor of the
Ramp Shader effect: 0 means no effect and
1.0 means full effect.
Let us make a simple example using Ramp Shaders.
1. Remove default cube object from scene and add
a Monkey mesh! (SHIFT-A -> Add -> Mesh -> Monkey).
Press Subsurf and set display and render Subsurf
Subdivision level to 2. Press Set
Smooth to get a nice smooth Monkey! All this in
Edit context. (F9).
2. Now press TAB to exit
EditMode. Press F5 to enter
Material context. In the Material panel
press Add New to add a new material! Change the parameters in
the Shaders tab as Figure 10.20, “Shader settings.”.
3. Press Ramps tab to open the
Ramp Shader panel. Press Colorband to
activate the Ramp Shader effect. Now try to set the
parameters as Figure 10.21, “Ramp Shader settings.”. Remember to set the
Input to Normal. The second color to the
right is set to Alpha = 0 and the color to
pure black!
4. In the Ramps tab press Show
Spec Ramp and try to set the parameters as
Figure 10.22, “Specular Ramp Shader color 0.” and Figure 10.23, “Specular Ramp Shader color 1.”.
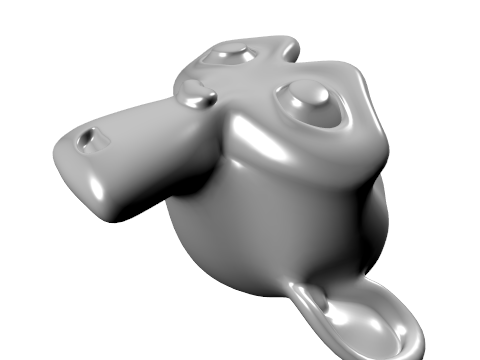
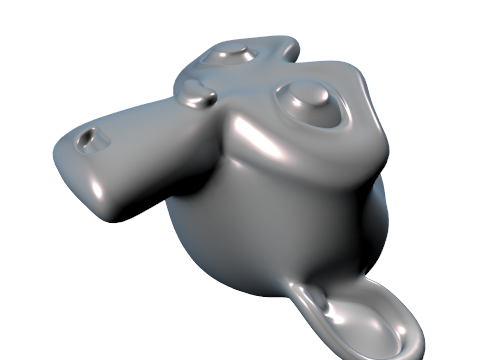
Here is the rendered result of the settings we just entered above. In
Figure 10.24, “No Ramp Shader.” there is no Ramp Shader
active. In Figure 10.25, “Color Ramp.” the Color
Ramp is activated and finally in Figure 10.26, “Both Color and Specular Ramp.”
both Color Ramp and Specular Ramp are
activated!
Remember here we have just demonstrated one effect of the Ramp
Shader. There is much more to explore, try changing the
Input and Method parameters, to see
totally different results from the ones we have just seen in this example.