Start a Visual Studio Project with Templates
Prerequisites
- A local DNN installation with Host permissions.
- Visual Studio 2015 is the recommended IDE for developing DNN modules.
Steps
- Download and install the templates.
For Chris Hammond's templates,
- Run Visual Studio as an administrator.
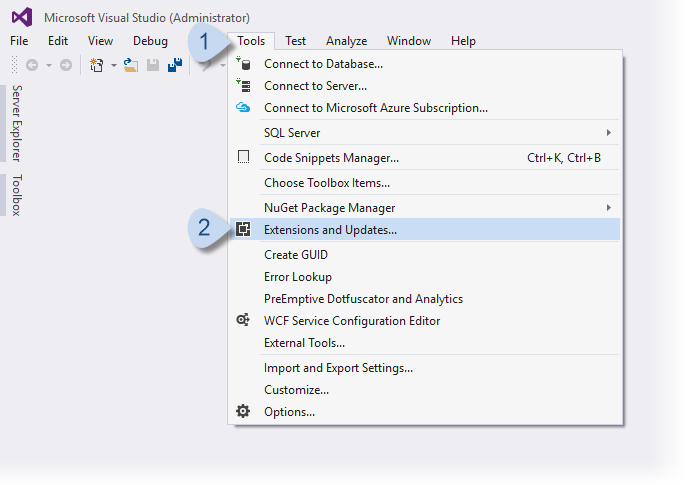
- Go to Tools > Extensions and Updates.

- Highlight the Online > Visual Studio Gallery tree and search for DotNetNuke.

- Click the Download button for the DotNetNuke Project Templates.
Note: See Chris Hammond's instructions for other installation methods.For the DNN 8 templates,- Download the appropriate .vsix file.
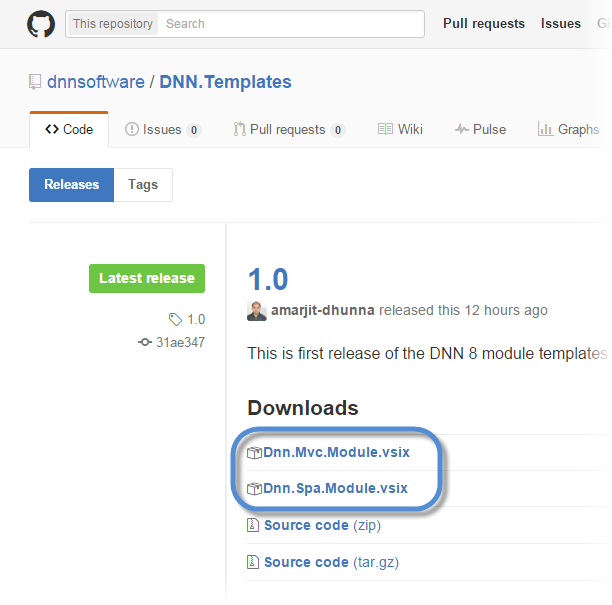
Two are included:
- Dnn.Mvc.Module.vsix
- Dnn.Spa.Module.vsix

- In your download folder, double-click the .vsix file to install the template in Visual Studio.
- Create a new Visual Studio project.
- Run Visual Studio as an administrator.
- File > New > Project
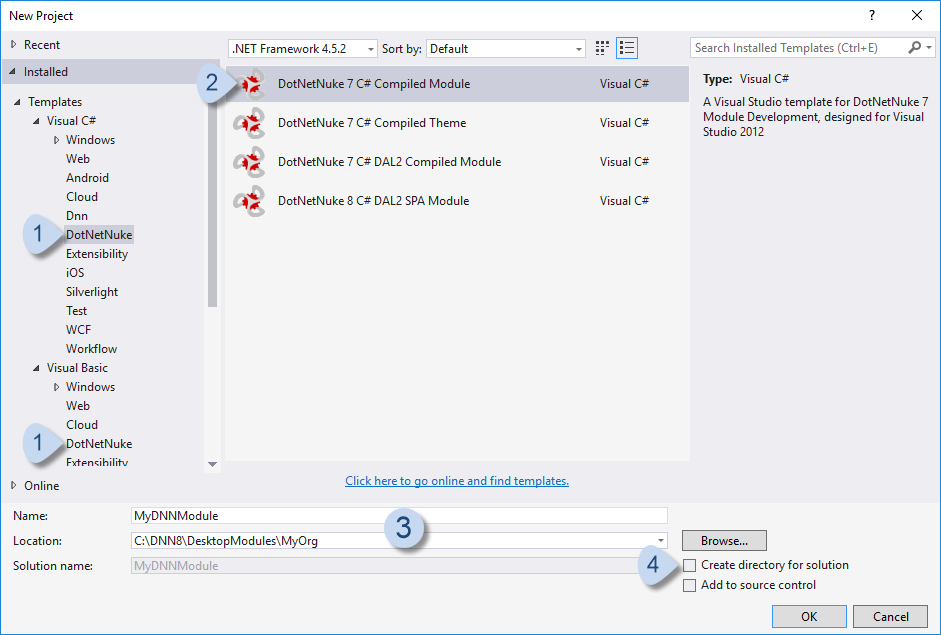
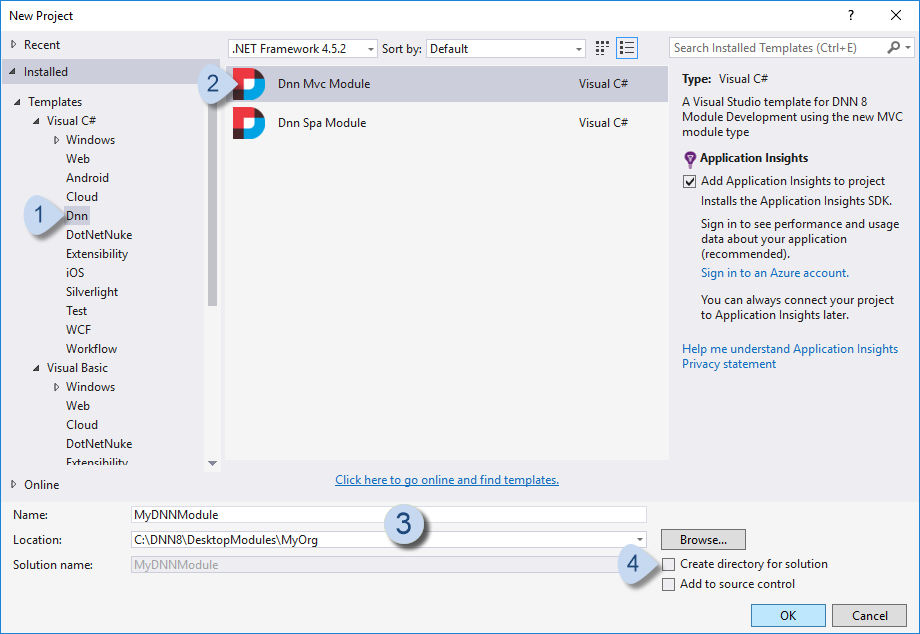
- Select the template for the new project.
For Chris Hammond's templates, go to Installed > Templates > Visual C# or Visual Basic > DotNetNuke.

For the DNN 8 templates, go to Installed > Templates > Visual C# > Dnn.
- Fill in the settings.
- Name: the name of your new module
- Location: a subfolder inside the DesktopModules folder of your DNN installation folder
Tip: Use your company name or a unique name as the subfolder name to avoid conflicts with other module creators in a production environment. - Uncheck Create directory for solution.
The templates expect Visual Studio's solution file (.sln) to be in the same folder as the project file. Checking this option puts the solution file in a different folder, which can cause build errors.
- Modify the Visual Studio project to add functionality to your new module.


