Overview
The DNN Module Creator enables developers to quickly build modules without a full-blown IDE, like Visual Studio. It automates many of the initial module creation tasks so that module developers can focus on writing code. In addition, the Module Creator can be extended with custom templates to further streamline development.
The DNN Module Creator is generally recommended only for simple modules. For more complex modules, you can create a Web Forms module using templates.
Steps
-
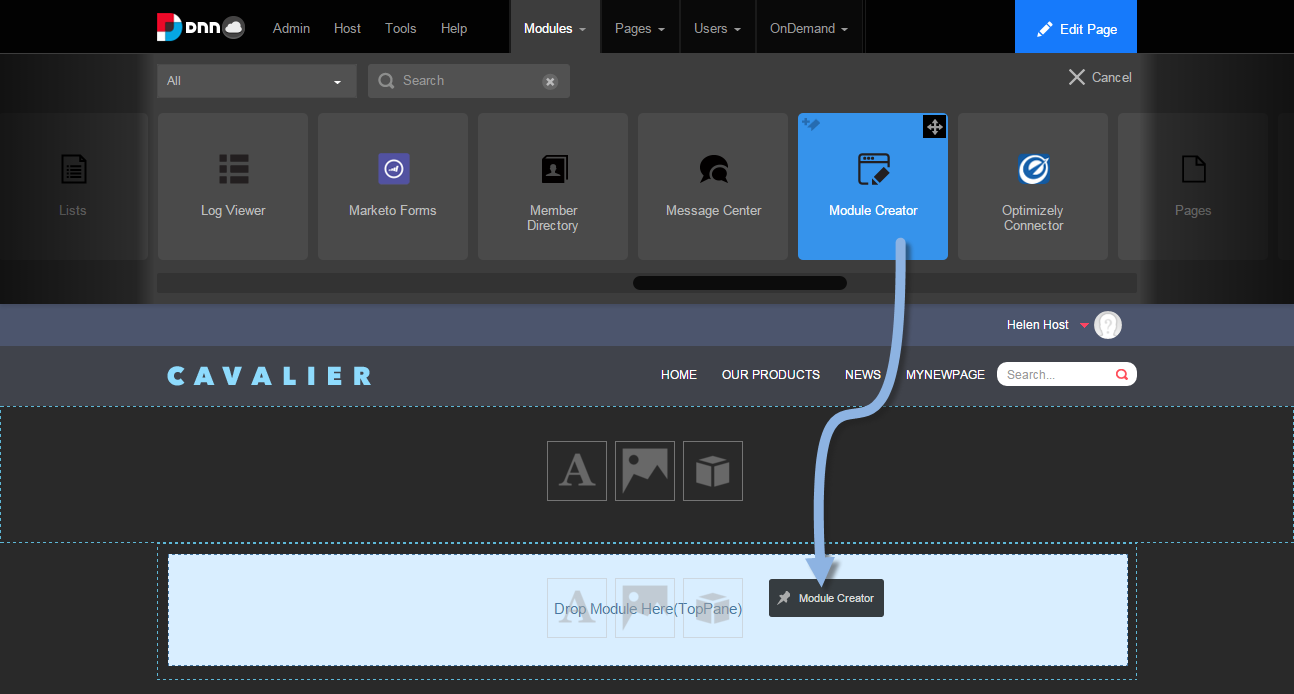
Search for the Module Creator among the installed modules.
-
Drag the Module Creator module to any pane in the webpage.
-
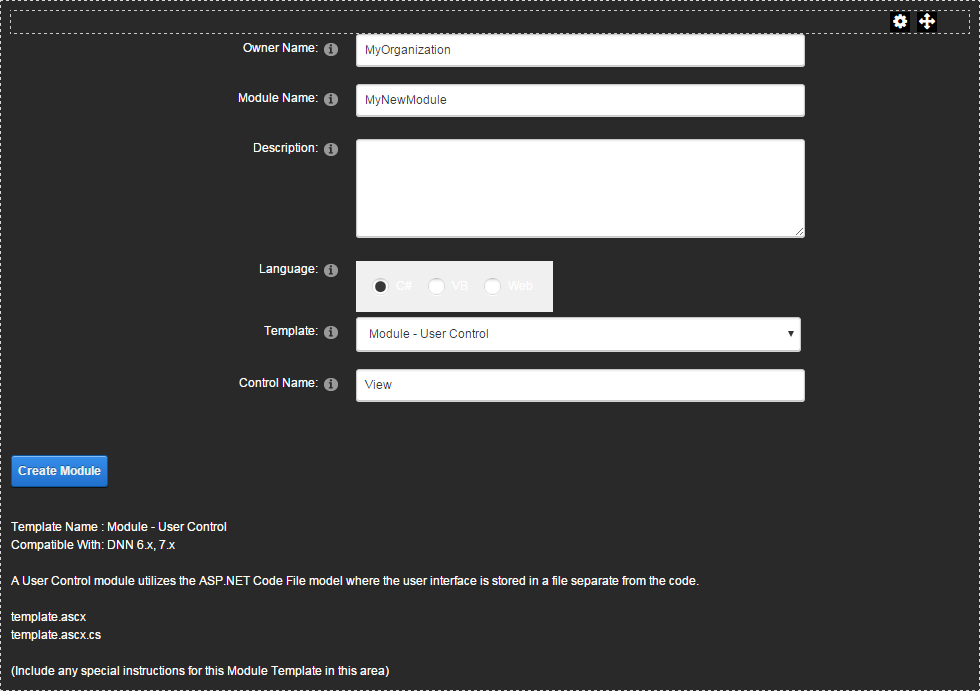
Fill in the Module Creation form.
| Owner Name |
Name of your organization. Must contain only alphanumeric characters. Used to create a folder to distinguish your modules from those created by other module creators. Also used as the namespace for your code. |
| Module Name |
Must contain only alphanumeric characters. Used to create the module's friendly name and full name. The full name is [OwnerName].[ModuleName] with space characters removed. |
| Language |
The selected language (C#, VB, or Web) determines which templates become available. |
|
Template |
For C# and VB, choose among:
- Inline Script. Code is embedded. Also uses user controls.
- Razor. Uses Razor scripts to render views.
- User Control. Code is stored in separate files. Most commonly used.
For Web, the HTML template allows you to use HTML, CSS, and JavaScript.
|
| Control Name |
Name of the primary module control that is registered with DNN. |
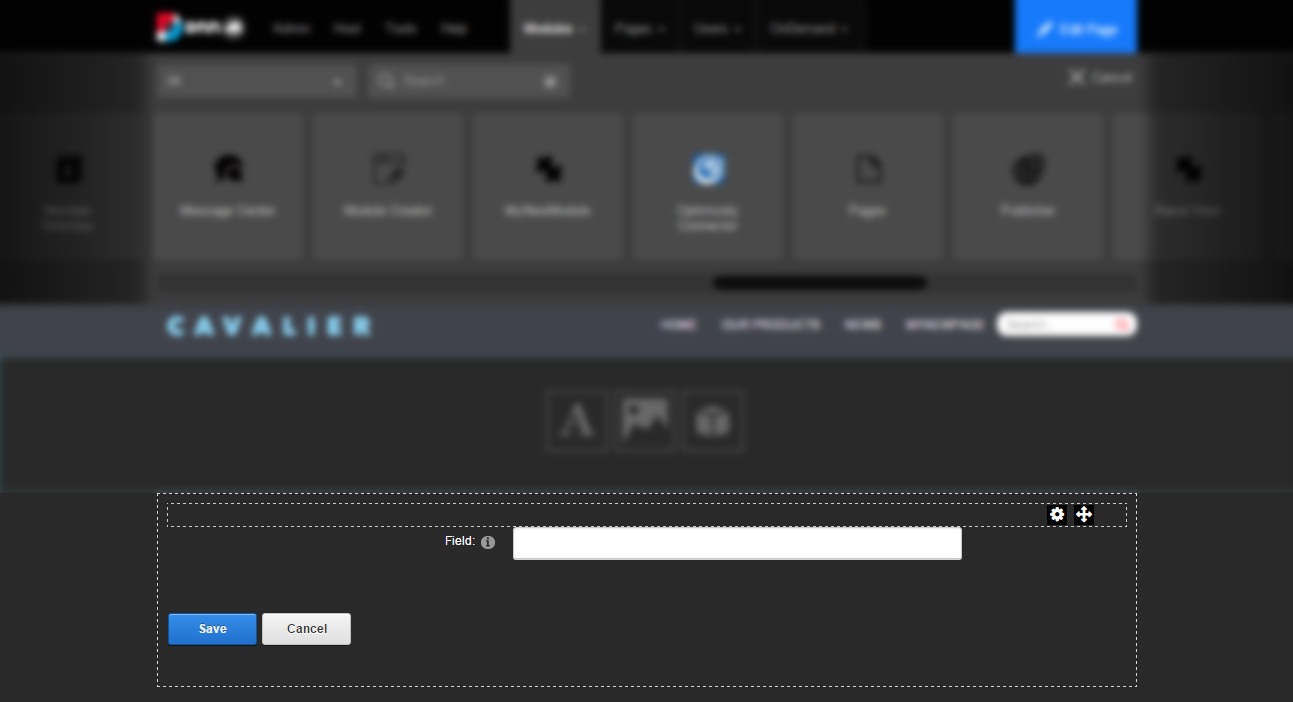
The new module replaces the Module Creator form in the pane.
-
Customize the module.
-
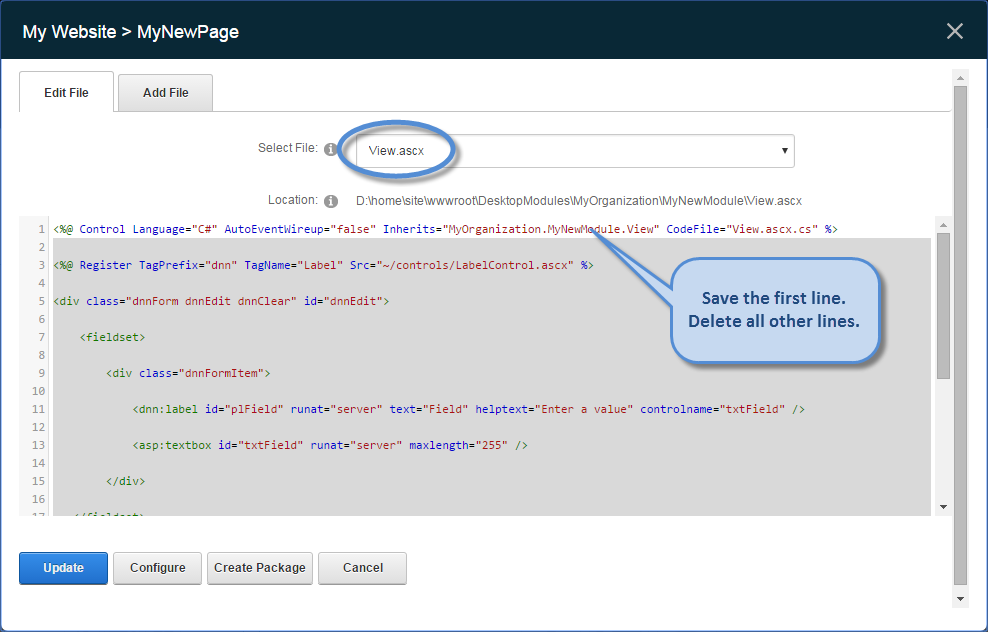
From the gear icon, choose Develop.
-
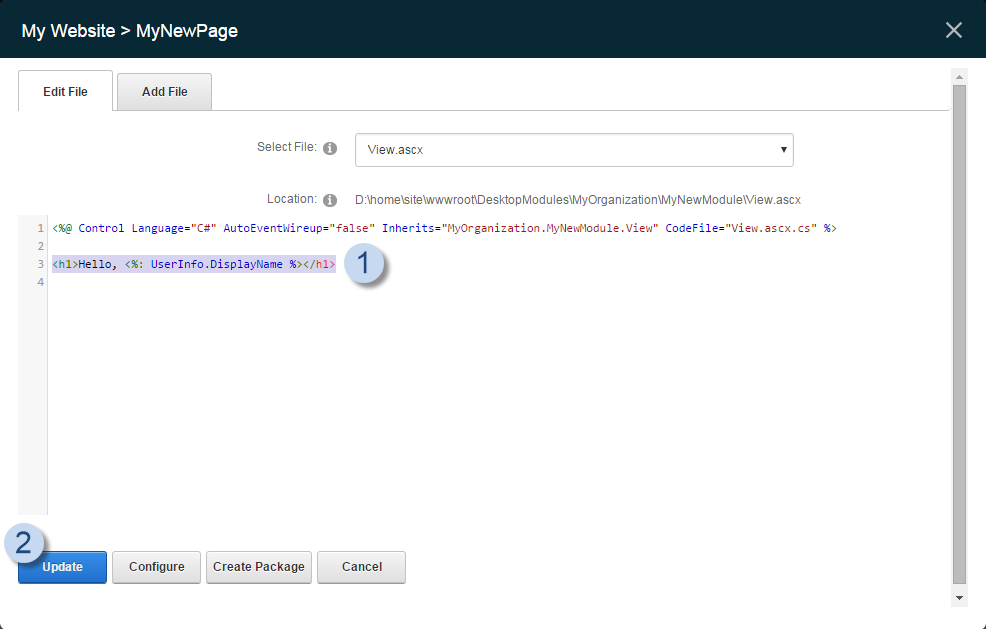
In the View.ascx file, delete all the lines of code, except the first one.
-
Add markup to customize the module. Then click Update to save your changes.
Example:
<h1>Hello, <%: UserInfo.DisplayName %></h1>
-
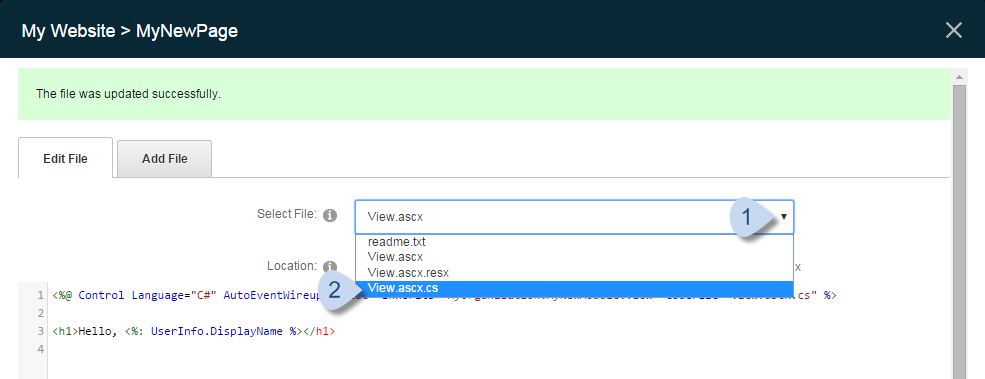
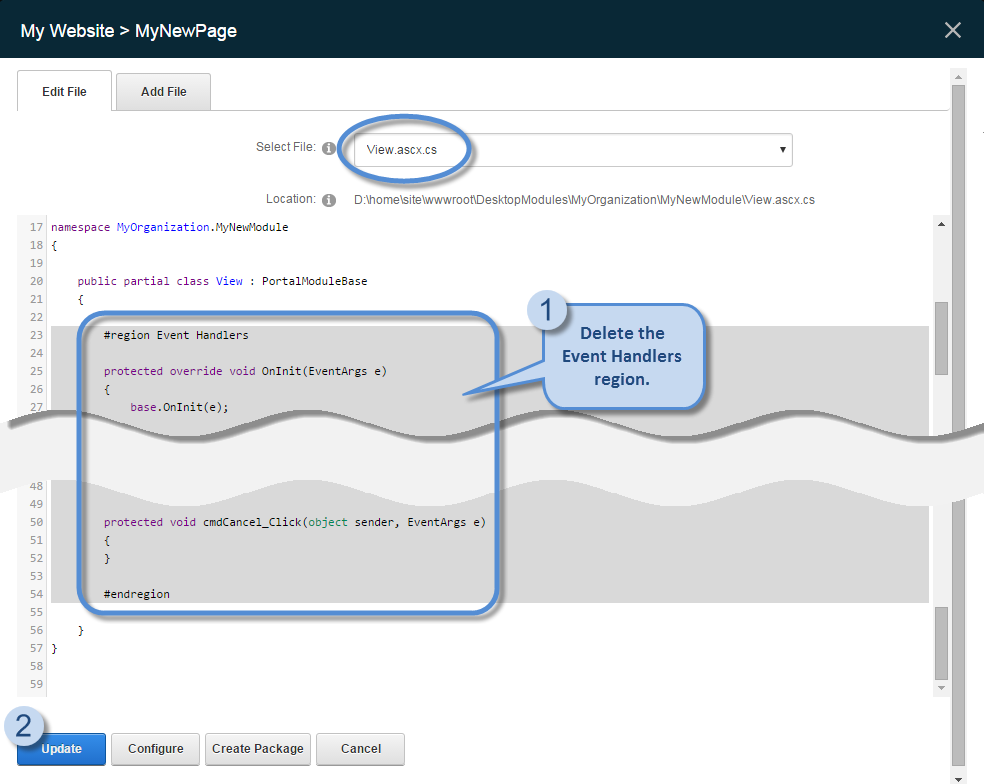
From the Select File dropdown, choose the View.ascx.cs file.
-
Remove all the code in the Event Handlers region and click Update to save your changes.

