Importing 3D meshes
Introduction
Godot supports a flexible and powerful 3D scene importer that allows for full scene importing. For a lot of artists and developers this is more than enough. However, many do not like this workflow as much and prefer to import individual 3D Meshes and build the scenes inside the Godot 3D editor themselves. (Note that for more advanced features such as skeletal animation, there is no option to the 3D Scene Importer).
The 3D mesh import workflow is simple and works using the OBJ file format. The imported meshes result in a .msh binary file which the user can put into a MeshInstance, which in turn can be placed somewhere in the edited scene.
Importing
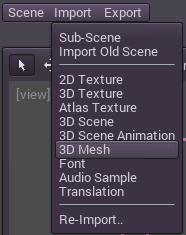
Importing is done through the Import 3D Mesh menu:

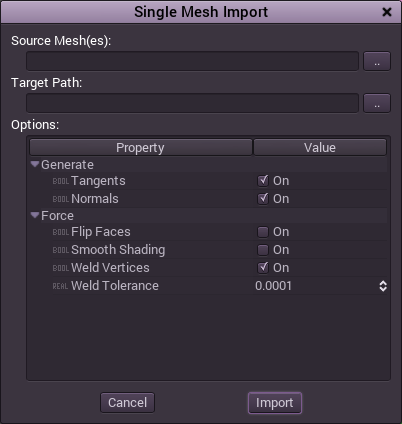
Which opens the Mesh import window:

This dialog allows the import of one more more OBJ files into a target path. OBJ files are converted to .msh files. Files are imported without any material on them, material has to be added by the user (see the Fixed materials tutorial). If the external OBJ file is changed it will be re-imported, while keeping the newly assigned material.
Options
A few options are present. Normals are needed for regular shading, while Tangents are needed if you plan to use normal-mapping on the material. In general, OBJ files describe how to be shaded very well, but an option to force smooth shading is available.
Finally, there is an option to weld vertices. Given OBJ files are text-based, it is common to find some of these with vertices that do not match, which results in strange shading. The weld vertices option merges vertices that are too close to keep proper smooth shading.
Usage
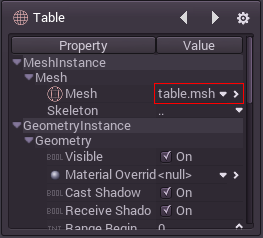
Mesh resources (what this importer imports to) are used inside MeshInstance nodes. Simply set them to the Mesh property of them.

And that is it.