| Inkscape » Quick Start » A Vine Design - A Tiling Example |    |
|---|
| Inkscape » Quick Start » A Vine Design - A Tiling Example | |
|---|
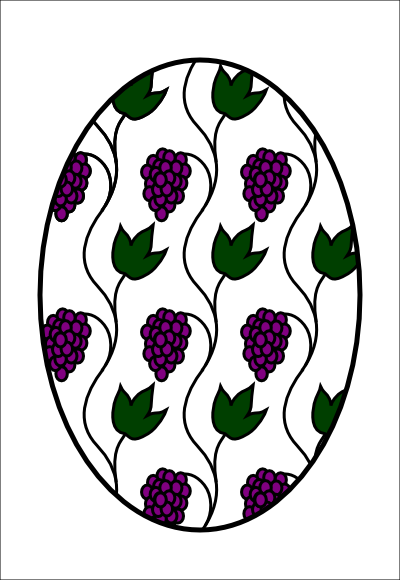
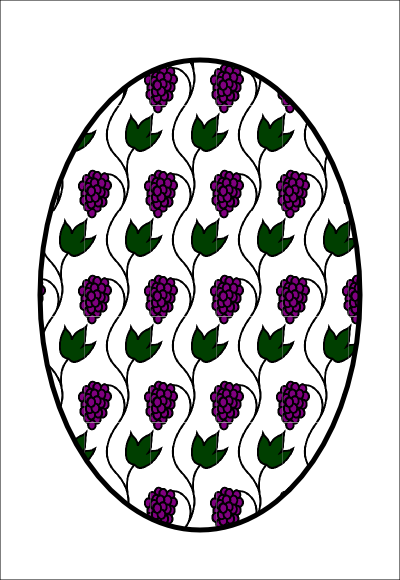
Inkscape has a Create Tiled Clones dialog that can be used to produce complex tilings. This tutorial covers preparing a base tile that can be used for such tilings. The objects in the base tile can overlap the tile boundaries to produce continuous designs, as shown below.
The steps to produce a repeated tiling are:
Start Inkscape and set the drawing size.
Create a tile prototype.
Clone tile.
Decorate tile.
Use base tile for tiling.
Procedure 1.7. Creating a Tile Pattern
Set up the canvas.
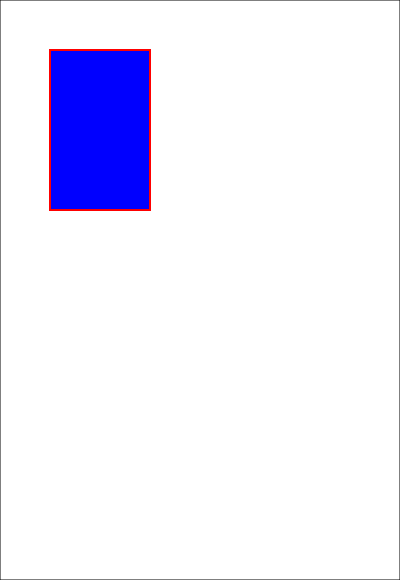
To begin, start Inkscape and set the drawing size to a width of 400 and a height of 460 pixels. Create a Grid with spacing of 10 pixels. Turn on snapping of nodes to Grid (and off snapping of bounding boxes to Grid). Don't forget to turn the Grid on.
Create a tile prototype.
We need to create a tile prototype that consists of a rectangle in a Group. Having a Group will allow adding new objects to the tile. Prior to v0.46, one could only Group two or more objects. This restriction has been removed so that one can put the rectangle in a Group by itself.
Using the Rectangle Tool, create a rectangle 100 pixels wide by 120 pixels tall with the upper-left corner 50 pixels from the left edge and top. This will be the size of our base tile. Tile spacing will be determined by the bounding box of this rectangle. There are two definitions for the bounding box. The first, called the Visual bounding box, includes the Stroke width in the calculation while the second, called the Geometric bounding box, is calculated using just the nodes of an object. It will be easier to make tilings without worrying about the Stroke width, so select the Geometric bounding box in the Tools section of the Inkscape Preferences dialog.
So we can visualize the tiles, give the tiles a Stroke by either using the Fill and Stroke dialog or by using a Shift+Left Mouse Click on one of the color swatches in the Palette. You can also give the tile a Fill by simply clicking on a swatch.
Now Group the tile by selecting the rectangle and using the
→
![]() Group
(Ctrl+G) command.
Group
(Ctrl+G) command.
Clone the tile.
The next step is to clone the tile. This will give you a way to visualize the tile as it is decorated, making sure that objects that are near or overlap the boundary fit in properly.
Bring up the Create Tiled Clones dialog ( → →
![]() Create Tiled Clones...
).
Create Tiled Clones...
).
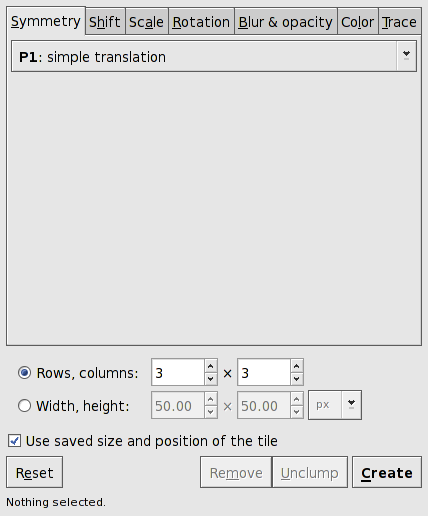
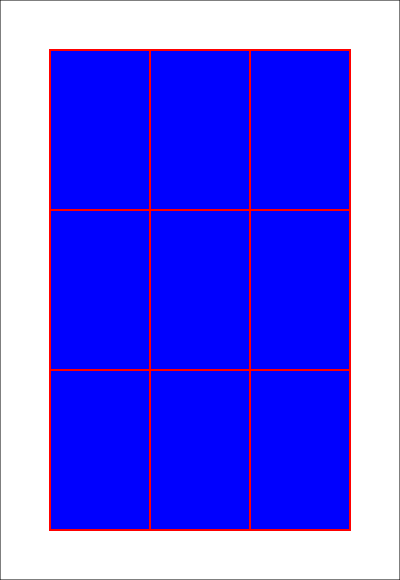
Select P1: simple translation from the drop-down menu on the Symmetry tab. This will produce a rectangular array of tiles. Choose the Rows, columns option and set the number of columns and rows to three by entering 3 in both entry boxes. Make sure the base tile is selected in the drawing (Notification Region should state that a "Group of 1 object" is selected) and click on the Create button in the dialog.
Decorate the tile.
It is time to draw the design on the base tile. Nine copies
(clones) of the base tile have been created, including one on top
of the original tile. It is necessary to modify the original tile
if the copies are also to be modified. Select the original tile by
clicking on any of the clones (Notification Region will indicate
a clone is selected) and using
→ →
![]() Select Original
(Shift+D). The Notification Region should
now say “Group of 1 object.” The original tile is below a
clone. Bring it to the top by using →
Select Original
(Shift+D). The Notification Region should
now say “Group of 1 object.” The original tile is below a
clone. Bring it to the top by using →
![]() Raise to Top
(Home)
(click on the
Raise to Top
(Home)
(click on the
![]() in the Tool Controls bar).
in the Tool Controls bar).
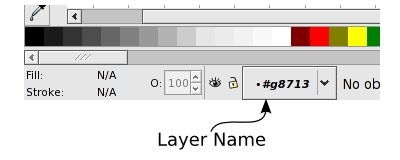
“Enter” the Group by either double clicking on the base tile or selecting Enter group #xxxx from the menu that pops up when you Right Mouse Click the base tile. The Layer name displayed in the Status Bar will start with '#g' indicating that a Group is open for editing (the Group has been temporarily been promoted to a Layer). While the Group is open, any object added to the drawing will be a member of the Group.
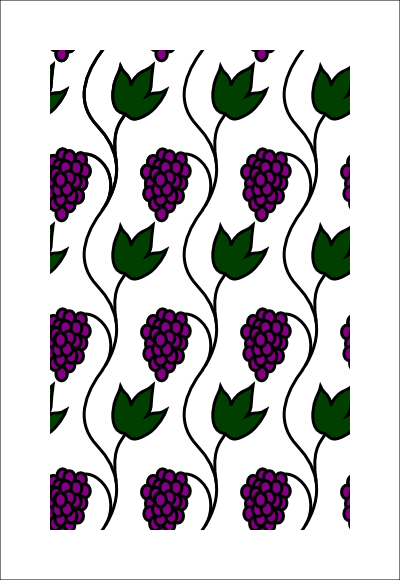
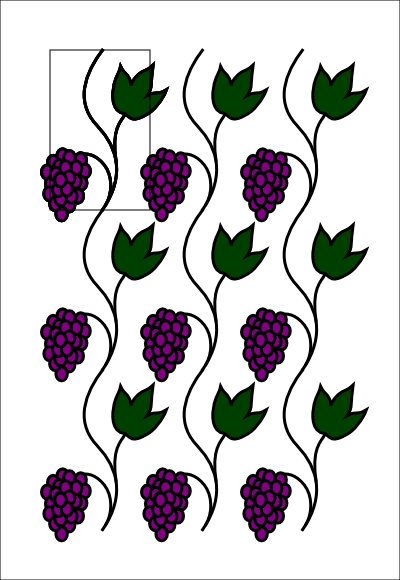
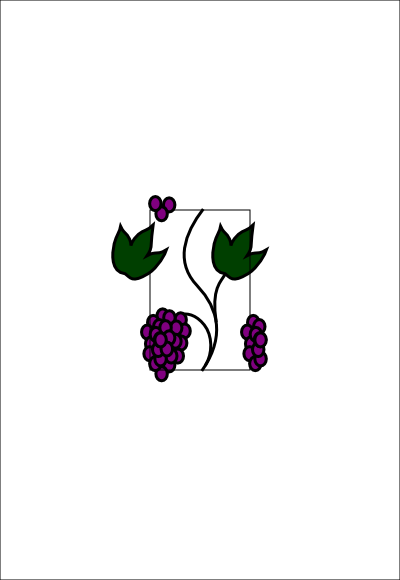
Now that the Group is open, add any details you want. Our example has a continuous grape vine pattern. The main vine is a single line with the place and angle of the ends carefully adjusted for continuity at the base tile boundary. The Fill and Stroke of the base rectangle have been removed (the rectangle, itself, has not been deleted as it will be useful in the next step).
Use the base tile for tiling.
The newly created base tile can be used in several ways to decorate the Fill another object. The easiest way is to use the base tile with the Create Tiled Clones dialog to create a simple tiling that is then clipped with the path of the object.
Delete all the clones of the base tile (either by selecting each clone and deleting or by selecting the base tile and clicking on the Remove button in the Create Tiled Clones dialog).
Select base tile (if not already selected).
With Create Tiled Clones dialog, create a tiling large enough to fill the target object. Make sure Use saved size and position of the tile box is checked. The tiling will then use the saved dimensions of the base tile before it was decorated (the dimensions when the first tiling was made) rather than the current bounding box, which may include objects that extend outside the border. (Once an object has been tile cloned, Inkscape keeps a private record of the original tile size and position that can be used for later recloning.)
If one of the base tile objects has partial transparency it may be necessary to delete (or move) the base tile. If the base tile is deleted, the links to the cloned tiles are broken but the cloned tiles remain.
Group the tiled clones. Move the object to be filled above the grouped clones in z-order. Select both the object and the grouped clones and use the → → command to make the clipping.
The base tile can be used for a Pattern by selecting it and using the command → → (Alt+I). When the Pattern is first used, you will notice that the spacing is wrong if some of the objects extended outside the borders of the base tile. This can be corrected by using the XML Editor. In the svg:defs section, select the svg:pattern item that corresponds to the object with the pattern fill. This entry may be linked to another pattern. Follow the links until you find the entry with height and width attributes (and no other pattern links). Change the height and width attributes to the height and width of the base tile. Note that some SVG renderers will not draw areas that are outside the nominal area of the pattern (defined by the height and width attributes) despite setting the style attribute to “overflow:visible”. Batik (which is used for the PDF version of this book) has rendering problems with this type of pattern. Evince, a popular Linux PDF displayer, also has a different bug rendering Patterns. Acroread will display Patterns correctly.

For some purposes, it may be preferred to have the entire design within the edges of the base tile. This is a bit tricky.
Unlink all the clones by selecting the clones and using
→ →
![]() Unlink Clone
(Shift+Alt+D).
Unlink Clone
(Shift+Alt+D).
Delete the center clone of the 3x3 clone array.
Select base tile and move it to the center (it may be under a clone). Use the Move tab of the Transform dialog to precisely move the base tile (by its width and height). The internal information about the position and size of the base tile that is used for cloning is preserved.
For each object that overlaps the base tile but is not part of
it, enter the Group it belongs to (double click on the
Group), cut the object ( →
![]() Cut
(Ctrl+X)), enter the
Group of the base tile, and paste the object in place
( →
Cut
(Ctrl+X)), enter the
Group of the base tile, and paste the object in place
( →
![]() Paste In Place
(Ctrl+Alt+V)). Pay careful attention to the
Notification Region to keep track of what is selected and the
Layer information in the Status Bar to see which Group
is open.
Paste In Place
(Ctrl+Alt+V)). Pay careful attention to the
Notification Region to keep track of what is selected and the
Layer information in the Status Bar to see which Group
is open.
Delete the clones with the leftover objects.
At this point, one could convert the base tile to a Pattern (see above). There are still problems with some SVG renderers that can be worked around by modifying the transform attribute with a negative translation in x and y for the Group in the Pattern. Note that Inkscape ignores this transform attribute.
In the opened base tile group, select the rectangle and cut it. Exit the group and paste it in place. Select both the base tile group and the rectangle and then use the → → command. The base tile is now finished. You can translate it back to its original position using the Transform dialog.

The base tile can now be used in a tiling.
Using the clipped base tile has one main drawback. There may be drawing artifacts where tiles abut. This is due to weaknesses in the drawing algorithms that don't properly handle cases where the tile's edge doesn't align with a screen pixel or other display quanta.
Note that the clipped tile cannot be used directly as a
Pattern. To create a pattern, first convert the tile into a
bitmap ( →
![]() Make a Bitmap Copy
(Alt+B)), then use that bitmap for the
pattern. This method may also create drawing artifacts.
Make a Bitmap Copy
(Alt+B)), then use that bitmap for the
pattern. This method may also create drawing artifacts.
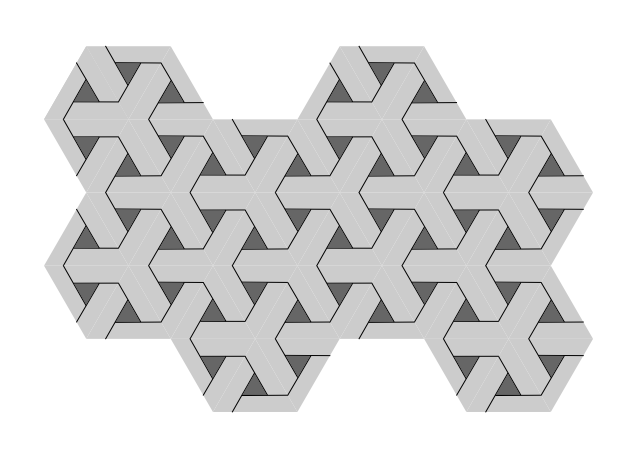
This tutorial has covered creating the most simple base tile. More complex base tiles with different symmetries can be just as easily created, as shown next.
| |  | |
| A Can of Soup - A Three-Dimension Drawing with Gradients |  | A Neon Sign - Animation |
© 2005-2008 Tavmjong Bah. | Get the book. |