Getting Started with RESTful Web Services
REpresentational State Transfer (REST) is an architectural style for
distributed hypermedia systems, such as the World Wide Web. Central to the RESTful
architecture is the concept of resources identified by universal resource identifiers (URIs).
These resources can be manipulated using a standard interface, such as HTTP,
and information is exchanged using representations of these resources.
Contents
|
|
 |
Software Needed for the Tutorial
Before you begin, you need to download and install the following software on your computer:
- NetBeans IDE 6.0 Web & Java EE.
- Java Standard Development Kit (JDK) version 5.0 or above.
- Glassfish V2 or Tomcat Web Server, both of which you can select from the installer
that you use to install NetBeans IDE 6.0.
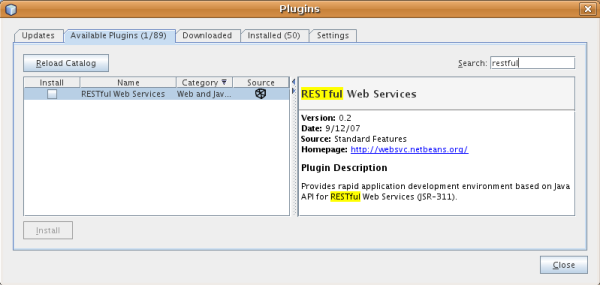
- In the IDE, go to the Plugin Manager, under the Tools menu,
and install the RESTful Web Services plugin, as shown below:
Introduction
RESTful web services are services built using the RESTful architectural style.
Building web services using the RESTful approach is emerging as a popular
alternative to using SOAP-based technologies for deploying services on the
internet, due to its lightweight nature and the ability to transmit data
directly over HTTP.
The IDE supports rapid development of RESTful web services using
JSR 311 - Java API for RESTful Web Services (JAX-RS) and Jersey,
the reference implementation for JAX-RS.
For detailed information, refer to the following:
In addition to building RESTful web services, the IDE also supports testing,
building client applications that access RESTful web services, and generating code
for invoking web services (both RESTful and SOAP-based.)
Here is the list of RESTful features provided by the IDE:
- Rapid creation of RESTful web services from JPA entity
classes and patterns.
- Rapid code generation for invoking web services such as
Google Map, Yahoo News Search, and StrikeIron web services by
drag-and-dropping components from the RESTful component palette.
- Generation of JavaScript client stubs from RESTful web
services for building RESTful client applications.
- Test client generation for testing RESTful web services.
- Logical view for easy navigation of RESTful web service implementation
classes in your project.
In
this
tutorial, you will be shown how the IDE supports you in generating,
implementing, and testing
RESTful web services.
Generating Entity Classes from a Database
The goal of this exercise is to create a project and generate entity classes from a database.
- Choose File > New Project. Under Categories, select Web.
Under Projects, select Web Application and click Next.
- Under Project Name, enter CustomerDB.
- Under Server, select Sun Java System Application Server
or GlassFish. Click Finish.
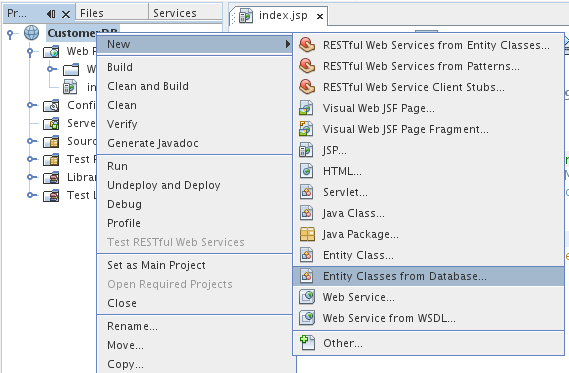
- Right-click the CustomerDB node and
choose Entity Classes from Database,
as shown below:
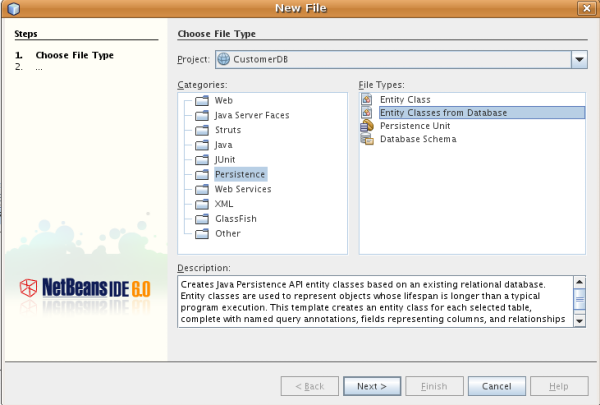
Alternatively, you can select it from the Persistence category in the New File wizard, shown below:
Click Next.
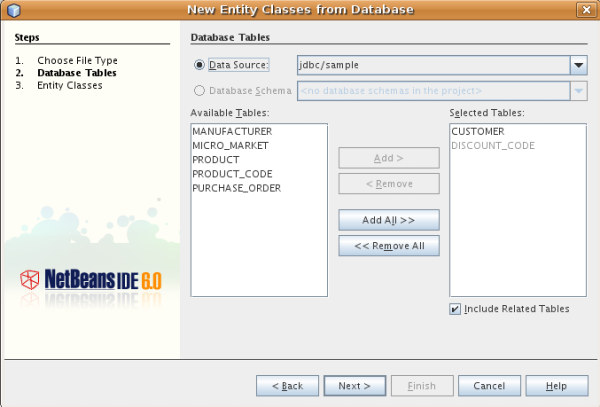
- In the Database Tables panel, select the jdbc/sample data source. Next,
under Available Tables, select CUSTOMER and then click Add. The DISCOUNT_CODE
table, which has a relationship with the CUSTOMER table, is automatically
added to the Selected Tables list. You should now
see the following:
Click Next.
- Under Package, type customerdb. You should now see the following:
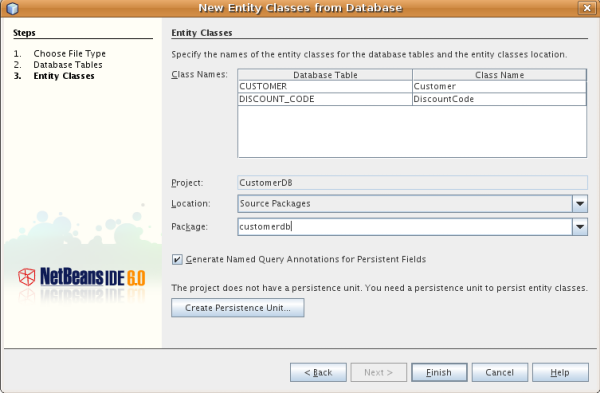
- Click Create Persistence Unit. The following dialog appears:
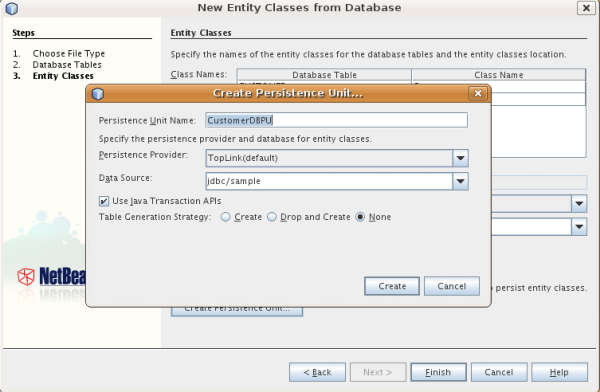
Click Create and then click Finish.
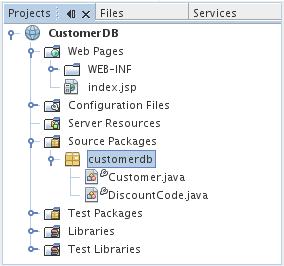
- Look in the Projects window. You should now see
the following:
Generating RESTful Web Services from Entity Classes
The goal of this exercise is to generate
RESTful web services from the entity classes that
we generated in the previous section.
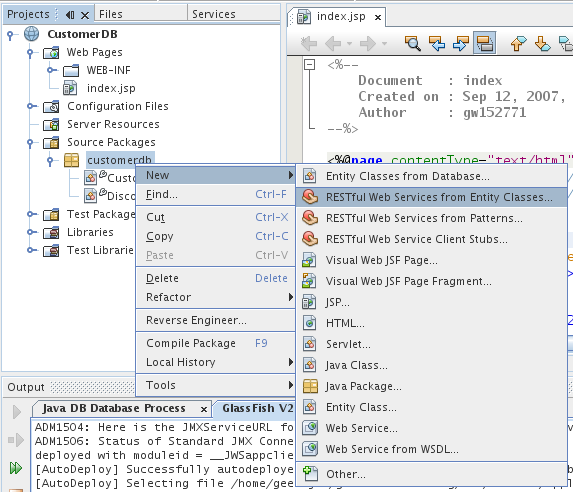
- Right-click the package that contains the entity classes
and choose New > RESTful Web Services from Entity Classes, as shown below:
- In the New RESTful Web Services from Entity Classes wizard, click
Add All. You should now see the following:
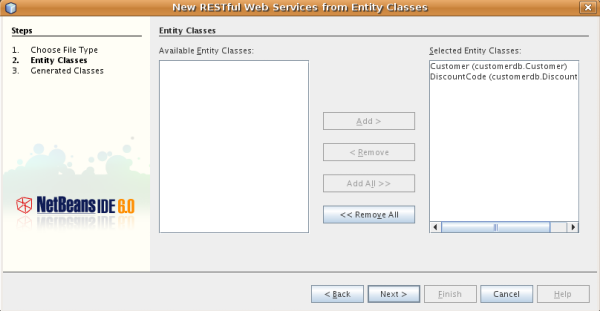
Click Next.
- In the next panel, leave the defaults unchanged, as shown below:
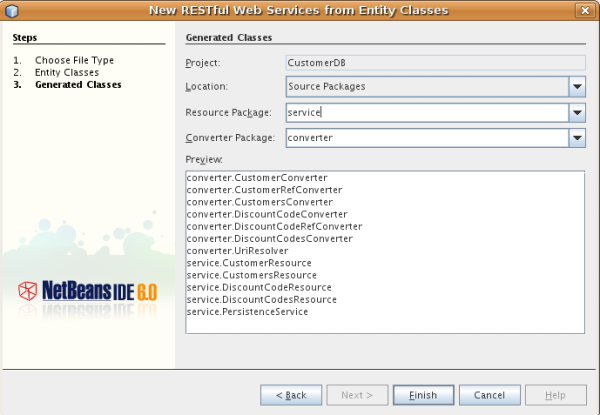
Here you can see everything that the IDE
will generate for you.
The IDE uses the container-item pattern to
generate the resource classes. For example,
for the Customer entity class, the IDE generates
a container resource called CustomersResource
and an item resource called CustomerResource. Also,
for each resource class, the IDE generates a
converter class used for generating the resource
representation from the corresponding entity
instance, such as CustomersConverter and
CustomerConverter. Furthermore, there is an
additional converter class called reference
converter, such as CustomerRefConverter,
for representing relationships.
Click Finish.
- Look in the Projects window. You should now show the following:
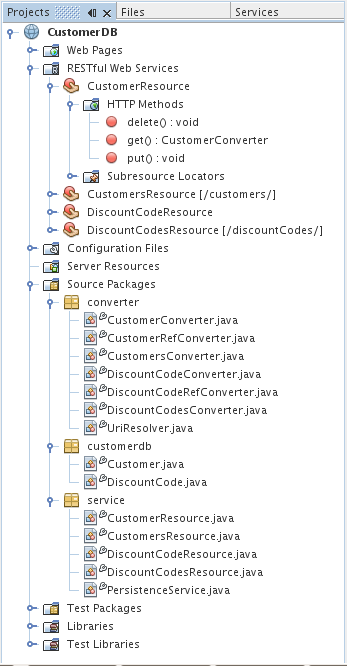
The RESTful Web Services node in the Projects window
displays all the RESTful web services in your project.
The value between the square brackets, such as [/customers/],
is the value for the URI template. You can also navigate to the
source file by doubling click on this node. This view also displays
all the HTTP methods and Sub-resource locator methods. Again, you
can navigate to the methods by double clicking on the nodes.
Now that our entity classes and RESTful web services have been
generated, let's test our application. The IDE provides a useful
utility for testing RESTful web services. We will make use of it
in the next section.
Testing the RESTful Web Services
The goal of this exercise is to try out our application.
- Right-click the project node and choose Test RESTful Web Services, as shown below:
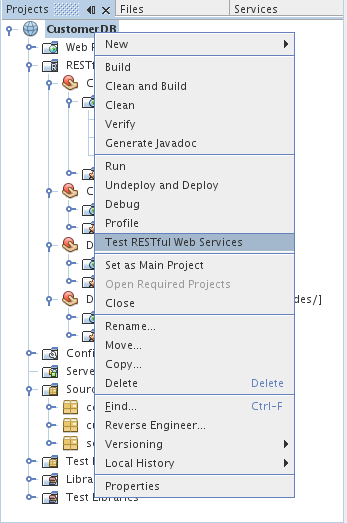
The server starts and the application is deployed.
Finally, the browser should display your application, with a link for
each of the web services:
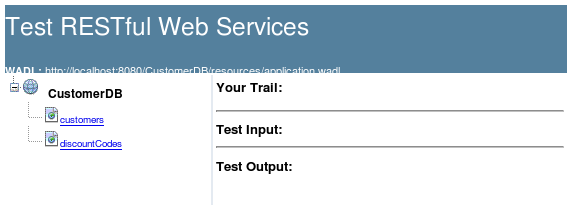
On the left-hand side is the set of root resources, here they
are named customers and discountCodes.
- First select a root resource, such as customers.
Click on the Methods drop-down list to select either
GET(application/xml) or GET(application/json).
Click Test. The result will be displayed in the Test Output section.
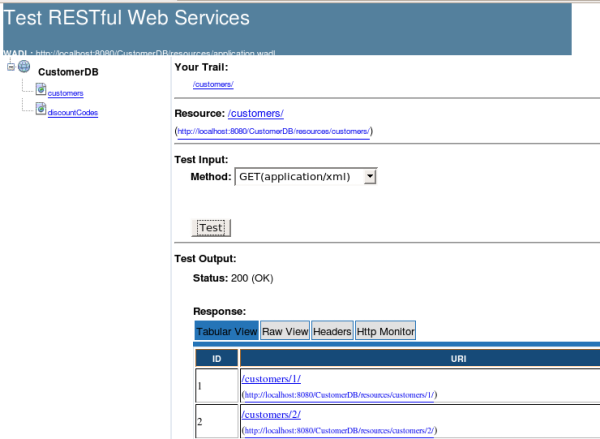
There are 4 tabs in the Test Output section.
The Tabular View is a flattened view that displays all
the URIs in the resulting document, which you can navigate
to by clicking on the links. The Raw View displays
the actual data returned. Depending on which mime type
you selected (application/xml or application/json),
the data displayed will be in either XML or JSON format, respectively.
The Headers Tab displays the HTTP header information. There is also
a tab called HTTP Monitor, which displays the actual HTTP requests
and responses sent and received.
- Exit the browser and return to the IDE.
Adding a Google Map Feature
The goal of this exercise is to add Google map
functionality to our RESTful web services.
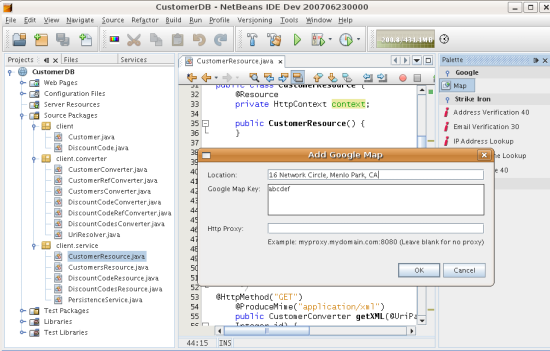
- Open the CustomerResource class
in the editor, as shown below. Notice that a palette appears on the right side
of the editor, containing RESTful code snippets:

- Sign up for a Google map key at http://www.google.com/apis/maps/signup.html.
- From the Google category, drag the Map item and drop it in
the class, and enter the Google Map key into the "Google Map Key" field, as shown here:
- Right-click the project node and choose Test RESTful Web
Services again and, once the browser opens again, click
customers in the left-hand side and then click one of
the resources. When you test the input, as shown below,
one of the links is for Google map:
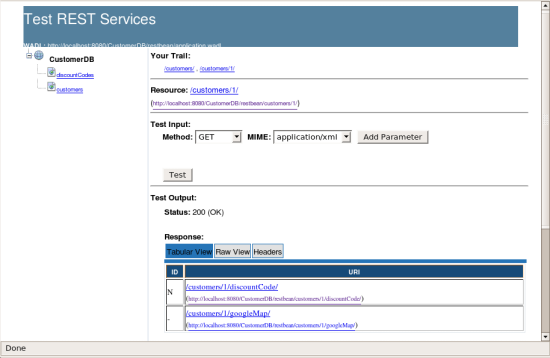
- Click the link and notice that the Google map opens in the browser:
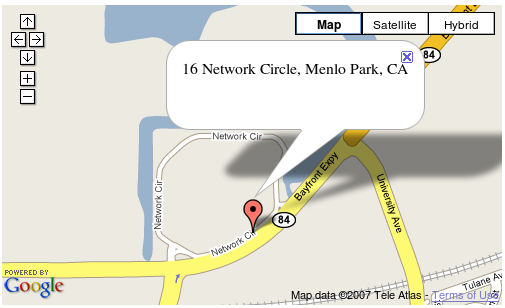
- Whenever you click a Google map link,
the same address will open. That is because
the address is hard coded in the
CustomerResource:
@UriTemplate("googleMap/")
public GoogleMapResource getGoogleMapResource() {
    String address = "16 Network Circle, Menlo Park, CA";
    String mapKey = "abcdef";
    String httpProxy = "";
    return new GoogleMapResource(address, mapKey, httpProxy);
}
Change it to the following:
@UriTemplate("googleMap/")
public GoogleMapResource getGoogleMapResource(@UriParam("customerId") Integer id) {
    Customer c = getEntity(id);
    String address = c.getAddressline1() + " " + c.getAddressline2() +
            " " + c.getCity() + " " + c.getState() + " " + c.getZip();
    String mapKey = "abcdef";
    String httpProxy = "";
    return new GoogleMapResource(address, mapKey, httpProxy);
}
The code extracts the address information from the
customer entity and passes it to the GoogleMapResource instance.
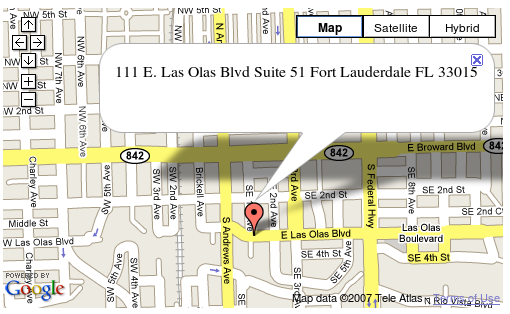
- Test the application again and notice that the correct
Google map entry is now returned for each customer:
Next Steps
For more information about using NetBeans IDE 6.0 to develop Java EE applications, see the following resources:
To send comments and suggestions, get support, and keep informed on the latest
developments on the NetBeans IDE Java EE development features, join
the [email protected] mailing list.