1.19.2. Three steps to your video in the course element «External page»
By means of the course element «External page» you can embed a single video via IP address or even an entire video platform with
integrated player (such as SWITCHcast) in your course navigation.
| Step 1: Open course editor and insert the course element «External page» |
| 1 |
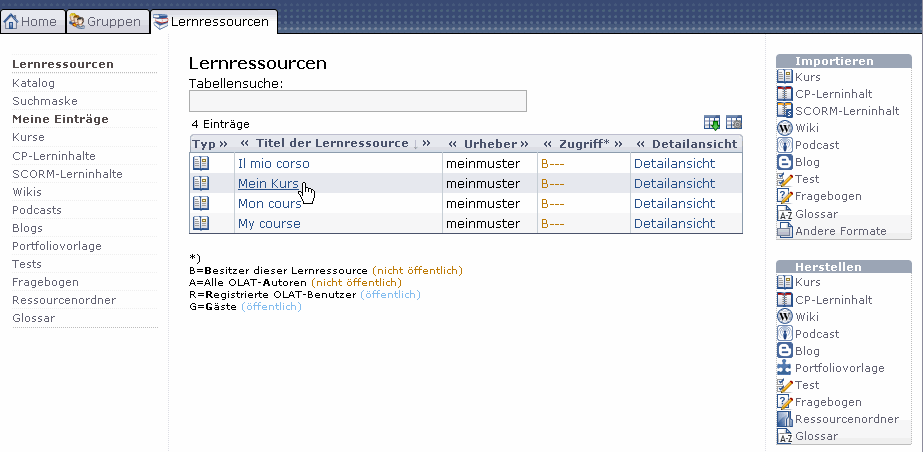
In learning resources search for your course in the section «My entries» before opening
it.
|
 |
| 2 |
Click on «Course editor» in the tool box «Course tools» on your right. |
| 3 |
Select «External page» in the tool box «Insert course elements». |
| 4 |
Determine position of your external-page element before saving your settings. |
| 5 |
In the tab «Title and description» indicate a short title for your course element
and save your settings.
|
| Step 2: Create external page |
| 1 |
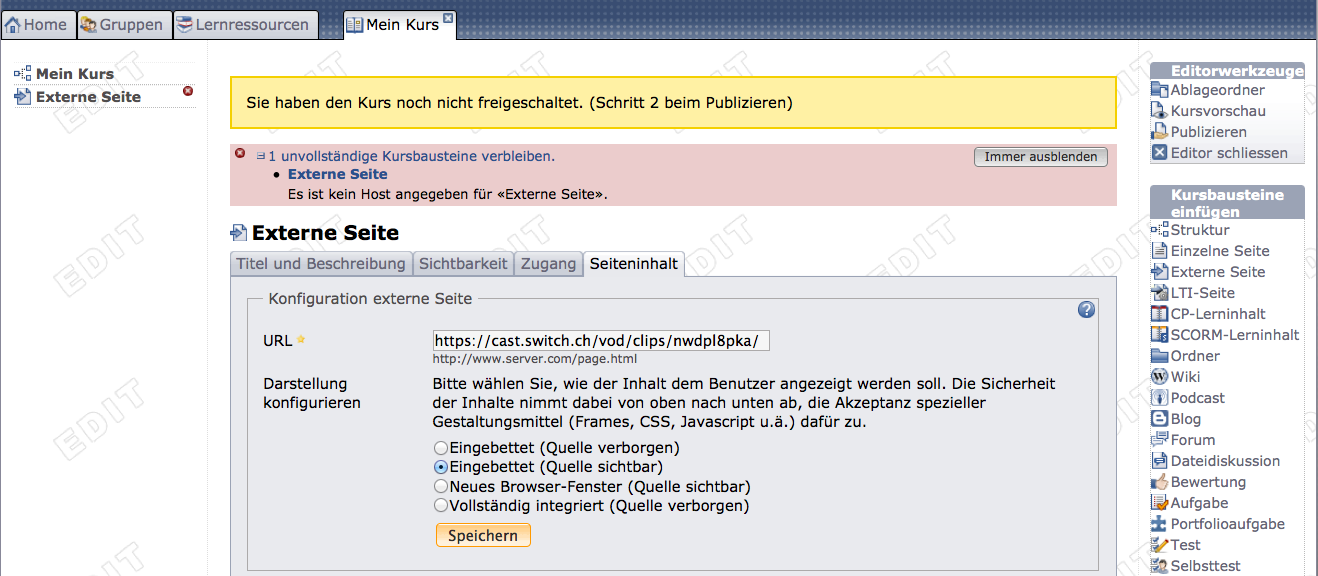
In the tab «Page content» indicate your IP address in the section «URL». |
 |
| 2 |
Determine how your content should be presented to users. We recommend the option «Embedded
(source visible)» for video platforms with integrated player.
|
| 3 |
Click on «Save». |
| Step 3: Publish and activate course |
| 1 |
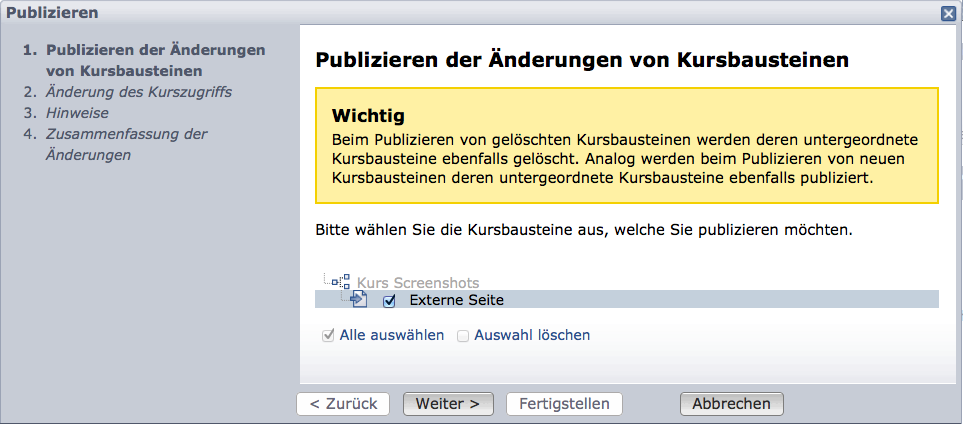
Select «Publish» in the tool box «Editor tools» on your right. |
 |
| 2 |
Click on course element before clicking «Next». |
| 3 |
Select «All registered OLAT users» from the pull-down menu, section «Change course
access».
|
| 4 |
Click on «Finish». |
Your external page is now embedded.

In case you use a SWITCHcast channel (such as SWITCHcast Channel OLAT Help Demo), you should verfiy that this channel is not private. You can adapt this via «Change
permissions» in your SWITCHcast channel. We recommend to use the link «All clips in
this channel» to be found in the clip view on your right, section «Share». This link
should be similar to the one mentioned in the example above.


