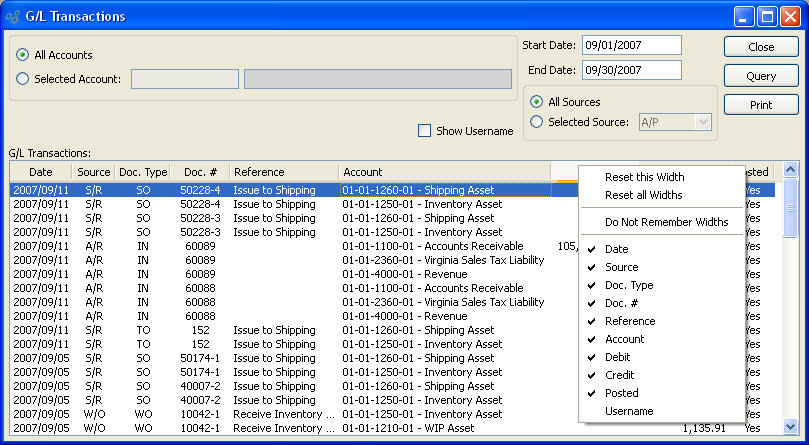
The system gives you the ability to customize the column layout of screens—and once customized, the columns will remember your preferences the next time you visit. To customize the column layout of a screen which supports this feature, simply right-click on any column header, as shown below:

Note
The column configuration options will vary depending on the current status of the screen. And of course, individual column names will differ from screen to screen.
When right-clicking on a column header to configure the column settings, you are presented with the following options:
- Reset this Width
Select this option to reset the selected column to its default, system-defined width. You will only see this option if the width of column has been changed (i.e., made wider or narrower).
- Reset all Widths
Select this option to reset all columns on the screen to the default settings.
- Do Not Remember Widths
Select this option if you do not want the screen to remember column width changes made during active sessions.
- Remember Widths
Select this option if you want the screen to remember column width changes made during active sessions.
Beneath the column width options, you will see a list of all the column names in the screen. As a further customization, you may choose to show or hide as many columns as you want. For example, if you do not need the Username in the G/L Transactions screen, simply uncheck the Username row in the list. The screen will only display columns which have a check mark next to them in the column configuration list.
Another feature of lists is the ability to sort the list by any column simply by clicking on the column header. The first click on the column header will sort the list in ascending order by the contents of the selected column. The second click will sort the list in descending order. Dates and numbers are sorted correctly regardless of their locale format.