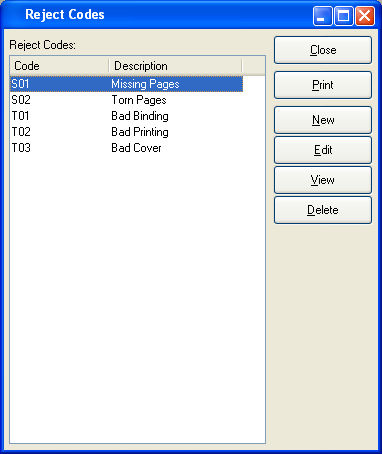
Reject Codes provide a means for labeling purchased Items when and if they are returned to the Vendor who supplied them. A Reject Code explains why an Item is being returned. To access the master list of Reject Codes, select the "Reject Codes" option. The following screen will appear:

The "Reject Codes" screen displays information on all existing Reject Codes, including Reject Code and Reject Code description.
To the far right of the screen, the following buttons are available:
- CLOSE
Closes the screen, returning you to the application desktop.
Runs the report associated with this screen.
- NEW
Opens screen for creating a new Reject Code.
- EDIT
Enables you to edit highlighted Reject Code. The edit screen is the same as that for creating a new Reject Code—except that when editing, the fields will contain Reject Code information. Double-clicking on a Reject Code will also bring you to the editing screen.
- VIEW
Highlight a Reject Code and then select this button to reach a read-only view of the "Edit" screen.
- DELETE
Highlight a Reject Code and then select this button to remove the Reject Code from the list.
To create a new Reject Code, select the NEW button. The following screen will appear:

Tip
Reject Codes are abbreviations used to quickly and easily identify rejected Items. Keep these Codes short and meaningful so employees will have an easy time identifying them.
When creating a new Reject Code, you are presented with the following options:
- Code
Enter a code to identify the Reject Code.
- Description
Enter a brief description of the Reject Code.
To the far right of the screen, the following buttons are available:
- CANCEL
Closes the screen without creating a Reject Code, returning you to the previous screen.
- SAVE
Creates the Reject Code and adds it to the master list of Reject Codes.