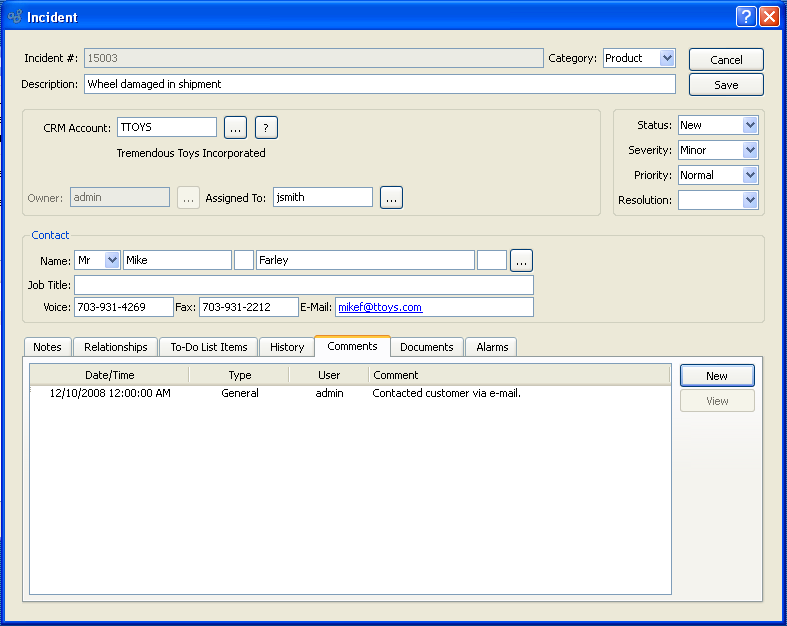
To enter a new Incident, select the "New Incident" option. The following screen will appear:
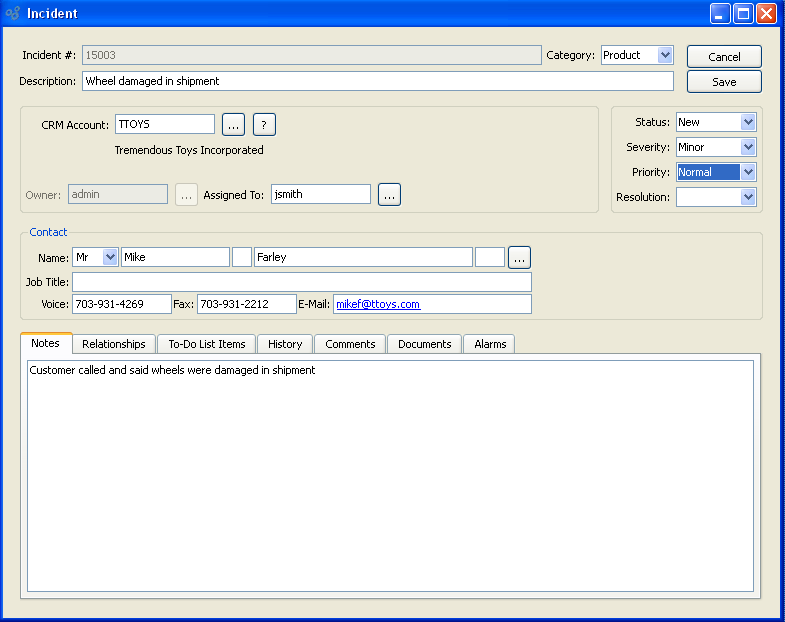
When entering a new Incident, you are presented with the following options:
- Incident #
Displays the Incident Number. You may set a beginning Incident Number at the system level.
- Description
Enter a few words to briefly describe the Incident
- Category
Specify a user-defined Category to assign the Incident.
- CRM Account
Specify the CRM Account the Incident is associated with.
- Assigned To
Specify the user you want to assign the Incident to.
- Status
-
Specify a system-defined Incident status to assign to the Incident from the available options:
- New
This is the default Incident status when a new Incident is entered.
- Feedback
This status can be used for Incidents which require more information before they can be confirmed.
- Confirmed
A confirmed Incident is ready to be acted on.
- Assigned
When Incidents are assigned to a user, they become that user's responsibility.
- Resolve
A resolved Incident is ready to be closed. Typically, users work to resolve the Incidents assigned to them.
- Closed:
This is the final status and indicates an Incident requires no further action. It is completed.
- Severity
Specify a user-defined Severity to assign the Incident.
- Priority
Specify a user-defined Priority to assign the Incident.
- Resolution
Specify a user-defined Resolution to assign the Incident.
- Contact
Manually enter Contact information in the fields below—or use the browse button to select pre-existing Contact information. If the Contact you select is linked to a CRM Account, the Account will be filled in automatically.
- Notes
This is a scrolling text field with word-wrapping for entering general Notes related to the Incident.
To views or edit links an Incident has to other records, select the "Relationships" tab. The following screen will appear:
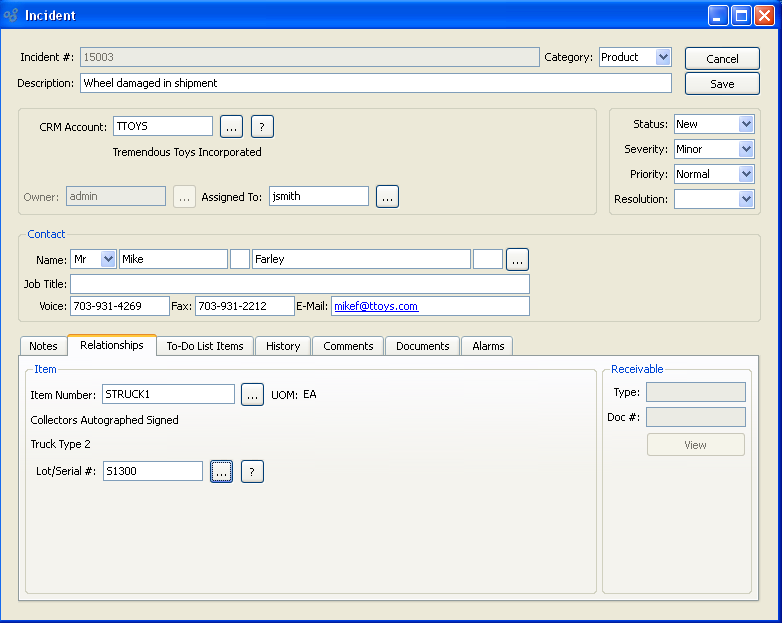
When linking an Incident to a specific Item or Lot/Serial Number, you are presented with the following options:
- Item Number
Enter the Item Number of the Item (if any) you want to associate with the Incident.
- UOM
Inventory Unit of Measure.
- Lot/Serial #
Manually enter a Lot/Serial Number (if any) to associate with the Item—or use the browse button to select pre-existing Lot/Serial Number information.
Incidents may be linked to a specific Receivable Item from the A/R Open Items and A/R Open Items by Customer displays. When an Incident is linked to a specific Receivable Item, you are presented with the following options:
- Type
Displays the type of document associated with the Incident. Document types would include Credit Memo, Debit Memo, Invoice, and Cash Deposit.
- Doc #
Displays the identifying number of the Document.
To the far right of the screen, the following button is available:
To view or associate To-Dos with an Incident, select the "To-Do List Items" tab. The following screen will appear:
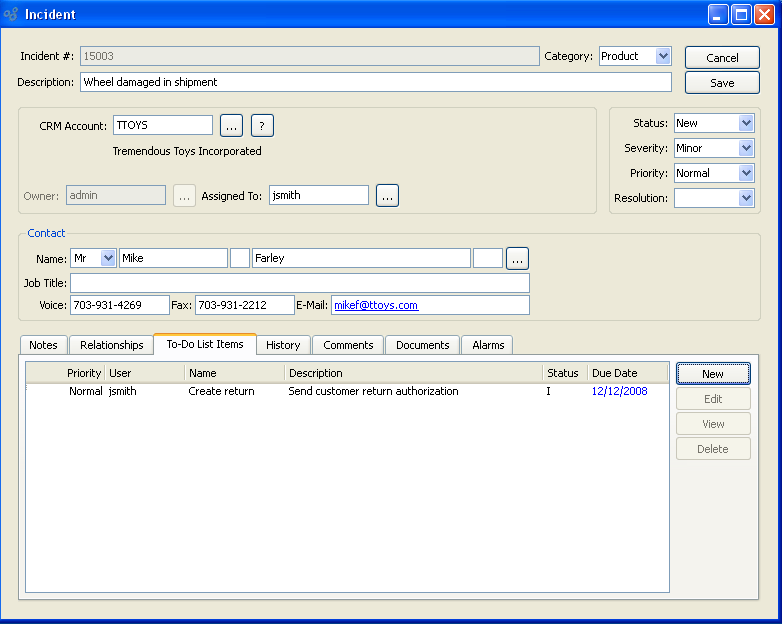
- To-Do List Items
Display lists To-Do List Items associated with the Incident.
To the far right of the screen, the following buttons are available:
Right-clicking on a To-Do item in the list enables you to select from the following menu options:
- Edit
Enables you to edit highlighted To-Do List items. The edit screen is the same as that for creating a new To-Do List item—except that when editing, the fields will contain To-Do List item information. Double-clicking on a To-Do List item will also bring you to the editing screen.
- View
Highlight a To-Do List item and then select this button to reach a read-only view of the "Edit" screen.
To view the history associated with an Incident, select the "History" tab. The following screen will appear:
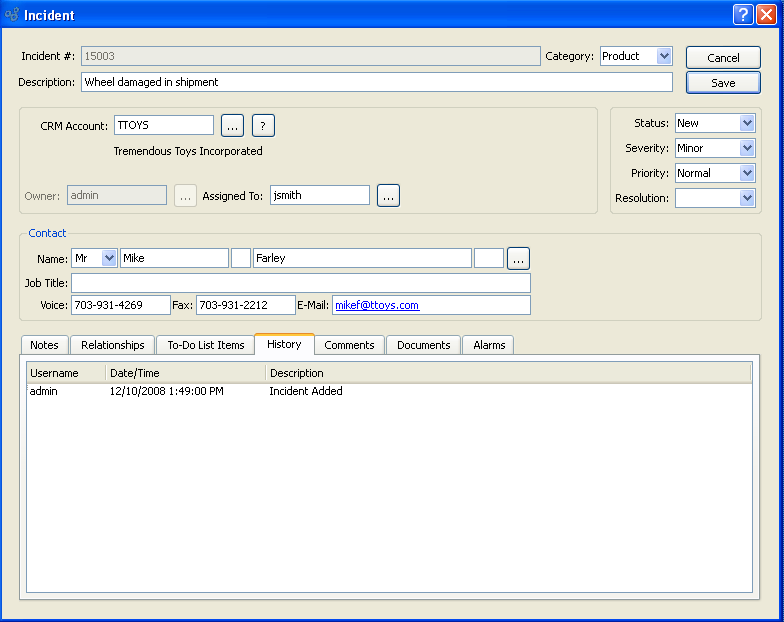
The "History" screen displays information related to the Incident, including username of Incident creator, created date, status, and description.
To view system-generated Comments associated with an Incident—or to add new Comments of your own—select the "Comments" tab. The following screen will appear:
- Comments
Display lists the date Comment entered, Comment Type, user who entered Comment, and a content preview.
To the far right of the screen, the following buttons are available:
- NEW
Opens screen for creating a new Comment.
- VIEW
Highlight a Comment and then select this button to reach a read-only view of the Comment.
To create a new Comment, select the NEW button. The following screen will appear:
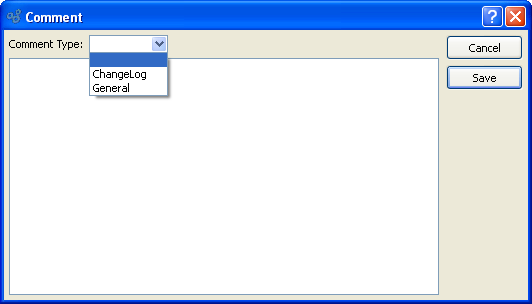
- Comment Type
Specify one of the following Comment Types from the drop-down list: ChangeLog or General. Comment Types are used to categorize Comments. Once you have specified a Comment Type, you may type your Comment in the main text area. The text area features word-wrapping and scroll-bar support for longer Comments.
To the far right of the screen, the following buttons are available:
- CANCEL
Closes the screen without creating the Comment, returning you to the previous screen.
- SAVE
Creates the Comment and adds it to the list of Comments.
To view the documents associated with an Incident, select the "Documents" tab. The following screen will appear:
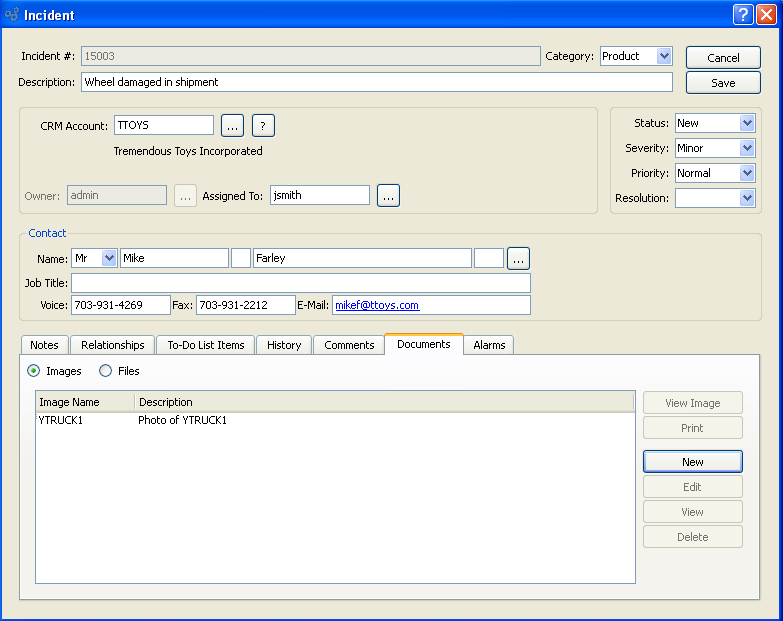
- Images
Display lists information about stored incident Images. To enter Images associated with an Item, select the "Images" radio button.
To the far right of the screen, the following buttons are available:
- VIEW IMAGE
Highlight an Image and then select this button to preview the Image.
Runs the report associated with this screen.
- NEW
Opens master list of stored Item Images.
- EDIT
Enables you to edit highlighted Image definitions. The edit screen is the same as that for creating a new Image definition—except that when editing, the fields will contain Image information. Double-clicking on an Image definition will also bring you to the editing screen.
- VIEW
Highlight an Image and then select this button to view the Image assignment for the Image.
Runs the report associated with this screen.
- DELETE
Highlight an Image definition and then select this button to remove the Item Image from the list.
To specify an assignment for an Image, select the NEW button. The following screen will appear:
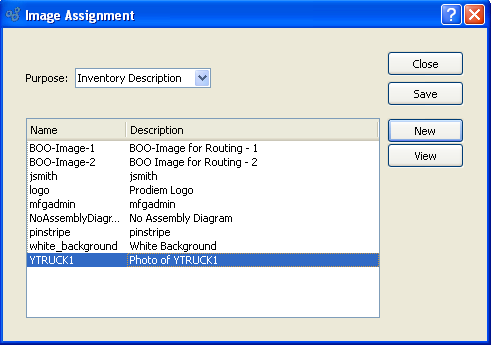
When specifying an assignment for an Image, you are presented with the following options:
- Purpose
-
Select one of the available purposes an Image might serve:
- Inventory Description
Select if the Image describes Inventory.
- Product Description
Select if the Image describes a Product.
- Engineering Reference
Select if the Image serves as an engineering reference.
- Miscellaneous
Select if the Image is a miscellaneous Image.
Note
An Incident may have multiple Images associated with it, but only one Image per purpose.
To the far right of the screen, the following buttons are available:
- CLOSE
Closes the screen, returning you to the previous screen.
- SAVE
Highlight an Image, then select the SAVE button to associate the Image with the specified Item and purpose.
- NEW
Opens screen for adding a new Image to the master list of stored Images.
- VIEW
Allows user to view image.
To add a new Image to the master list of stored Images, select the NEW button. The following screen will appear:
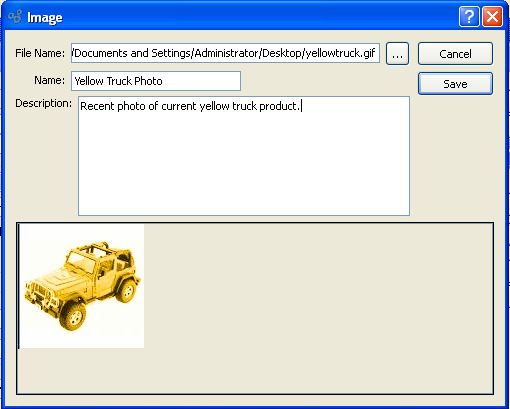
When adding a new Image to the master list of stored Images, you are presented with the following options:
- File Name
Enter the physical directory location of the Image. The browse button enables you to search your system for the physical directory location of the Image file. Once you locate the file, simply select it to have it entered into the "File Name" field.
- Name
Enter a unique name for the Image.
- Description
Enter a description to further identify the Image.
To the far right of the screen, the following buttons are available:
- CANCEL
Closes the screen without adding a new Image to the master list of stored Images.
- SAVE
Creates the Image and adds it to the master list of stored Images.
- Files
Display lists the title and URL for any Files related to the Item. To enter Files associated with an Item, select the "Files" radio button.
To the far right of the screen, the following buttons are available:
- OPEN FILE
Highlight an Item File definition and then select this button to open the URL in a web browser.
- NEW
Opens screen for creating a new Item File.
- EDIT
Enables you to edit highlighted Item File definitions. The edit screen is the same as that for creating a new Item File definition—except that when editing, the fields will contain Item File definition information. Double-clicking on an Item File definition will also bring you to the editing screen.
- VIEW
Highlight an Item File definition and then select this button to reach a read-only view of the "Edit" screen.
- DELETE
Highlight an Item File definition and then select this button to remove the Item File definition from the list.
To create a new Item File, select the NEW button. The following screen will appear:
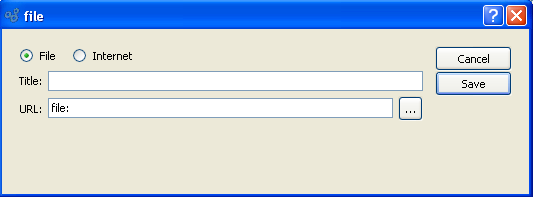
When creating a new Item File, you are presented with the following options:
- File
Select radio button to add file URL from local source.
- Internet
Select radio button to add file URL from the Internet.
- Title
Enter a title to identify the File.
- URL
Enter the URL indicating where the File is located. Users will be able to access the file within a web browser when they select the OPEN button.
To the far right of the screen, the following buttons are available:
- CANCEL
Closes the screen without creating an File, returning you to the previous screen.
- SAVE
Creates the File and adds it to the list of Files.
To view the alarms associated with an Incident, select the "Alarms" tab. The following screen will appear:
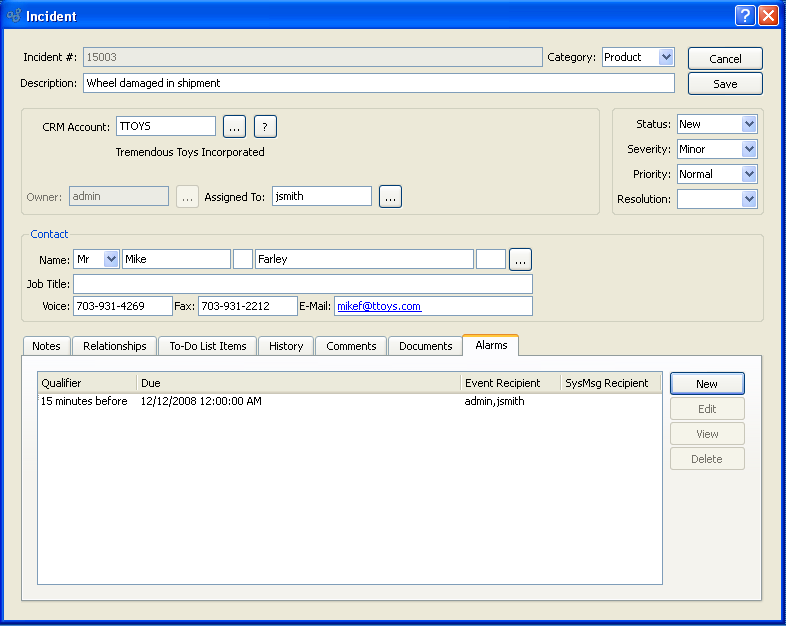
Upon selecting Alarms you are presented with the following options:
- Alarms
Displays a list of Alarms you can create to send reminders to various users associated with an event or system message.
To the far right of the screen, the following buttons are available:
- NEW
Opens screen for entering new Alarm information..
- EDIT
Enables you to edit highlighted Alarm. The edit screen is the same as that for entering new Alarm information—except that when editing, the fields will contain Alarm information.
- VIEW
Highlight an Alarm and then select this button to reach a read-only view of the "Edit" screen. Double-clicking on an Alarm will also bring you to the view screen.
- DELETE
Highlight an Alarm Item and then select this button to remove the Alarm Item from the list.
To create a new Alarm, select the NEW button. The following screen will appear:

When creating a new Alarm you are presented with the following options:
- Due
Add the date and time for which you want the Alarm to alert specific users and contacts.
- Event
Select if you would like an event to trigger the Alarm. You may select from an unlimited list of users to be notified.
Select if you would like an Email notification to be sent as an alarm. You may select from an unlimited list of users to be notified.
- System Message
Select if you would like a system message to be issued as an alarm. You may select from an unlimited list of users to be notified.
To the far right of the screen, the following buttons are available:
- CANCEL
Closes the screen without creating an Alarm, returning you to the previous screen.
- SAVE
Creates the Alarm and adds it to the list of Alarms.
- USER LOOKUP
Allows you to choose unlimited number of users created in the system.
- CONTACT LOOKUP
Allows you to choose from unlimited number of contacts created in the system.