A/P Forms.
To print a Purchase Order, select the "Print Purchase Order" option. The following screen will appear:

When printing a Purchase Order, you are presented with the following options:
- P/O #
Enter the Purchase Order Number of the Purchase Order you want to print.
- Copies
-
Indicate the copies you want to print:
- Vendor
Select to print one Vendor copy of the specified Purchase Order.
- Internal
Select to print internal copies of the specified Purchase Order. When you select this option, the "# of Copies" field will be enabled.
- # of Copies
Specify the number of internal copies you want to print.
To the far right of the screen, the following buttons are available:
- CANCEL
Closes the screen, returning you to the application desktop.
Runs the report associated with this screen.
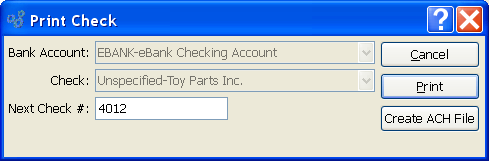
To print an individual Check, select the "Print A/P Check" option. The following screen will appear:
Tip
If Checks being printed contain reference lines which spill over and exceed one standard page, then consider using the report definition CheckMultiPage.xml. This Check Form is designed to support multiple pages for one Check number.
When printing an individual Check, you are presented with the following options:
- Bank Account
Specify the Bank Account for the Check you want to print.
- Check
Specify the Check Number you want to print. Menu will list Checks from prepared Check Runs associated with the specified Bank Account.
- Next Check #
Specify the next Check number.
To the far right of the screen, the following buttons are available:
- CANCEL
Closes the screen without printing a Check, returning you to the application desktop.
Prints the specified Check.
- CREATE ACH FILE
Select to create an Automated Clearing House (ACH) file.
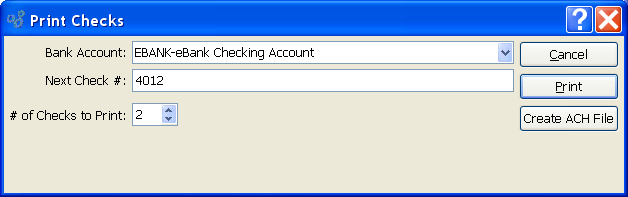
To print a Check Run, select the "Print Check Run" option. The following screen will appear:
Tip
If Checks being printed contain reference lines which spill over and exceed one standard page, then consider using the report definition CheckMultiPage.xml. This Check Form is designed to support multiple pages for one Check number.
When printing a Check Run, you are presented with the following options:
- Bank Account
Specify the Bank Account associated with the Check Run you want to print.
- First Check #
Displays the first available Check Number in the Check Run for the specified Bank Account.
- # of Checks to Print
Specify how many Checks should be printed in the Check Run. Check Numbers increment in intervals of one (1) beginning with the first Check Number displayed above. The maximum possible selection indicates the maximum number of Checks in the Check Run. Selecting a number less than the maximum will cause that number of Checks to be printed, leaving the remaining number still to be printed.
Note
Checks will automatically print by recipient type (Vendor, Tax Authority, Customer) then alphabetically by the recipients number.
To the far right of the screen, the following buttons are available:
- CANCEL
Closes the screen without printing the Check Run, returning you to the application desktop.
Prints the Check Run, using the specified parameters.
- CREATE ACH FILE
Select to create an Automated Clearing House (ACH) file.
If for some reason you experience printing problems when printing a Check Run, select the NO button from the following screen:
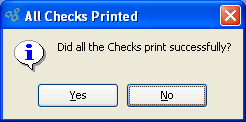
If you select the NO button at the end of printing a Check Run, the following screen will appear:
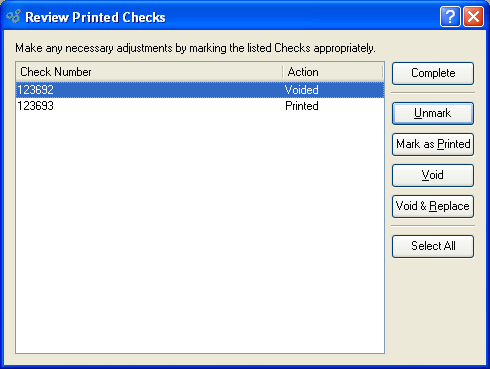
The Review Printed Checks screen lists all the Checks which were included in the Check Run.
Note
The default action listed for all Checks in a Check Run is "Printed." Each Check will be marked as printed when you select the COMPLETE button, unless you specify one of the other possible actions: void, replace, etc.
When reviewing the list of Checks included in a Check Run, you are presented with the following options:
- COMPLETE
Select to perform the specified action associated with each of the listed Checks. This should be the last option selected at the conclusion of your Check Run review. Selecting this option terminates the review process. If no action is specified for a Check, the status of the Check will remain as it was prior to printing the Check Run.
- UNMARK
Highlight a Check Number and then select this option to remove any action associated with the Check. If no action is specified for a Check, the status of the Check will remain as it was prior to printing the Check Run.
Tip
You may select multiple Checks for marking using the SHIFT or CTRL keys and your mouse.
- MARK AS PRINTED
Highlight a Check Number and then select this option to mark the Check as printed. By default, all Checks in a Check Run are marked as printed.
- VOID
Highlight a Check Number and then select this option to mark the Check as voided. Before a Check can be replaced, it must first be voided.
- VOID & REPLACE
Highlight a Check Number and then select this option to mark the Check as voided and then replace the Check with a new Check. Using this option, you can both void and replace a Check in one step.
- SELECT ALL
Use this option to automatically select all Checks for marking, or unmarking.