Whenever you have a chance to make a sale, it is considered an Opportunity. The xTuple Applications make it easy to track these revenue opportunities with the Opportunity Management system.
To create a new Opportunity, select the "New Opportunity" option. The following screen will appear:
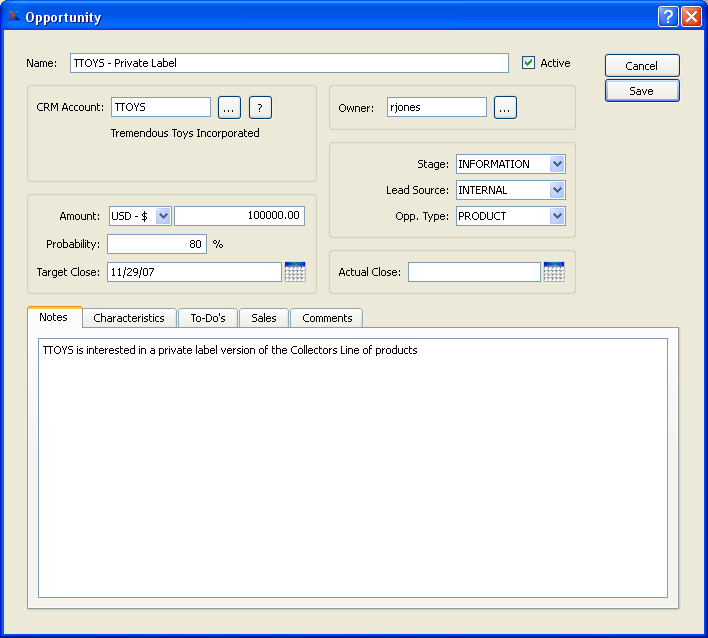
When creating a new Opportunity, you are presented with the following options:
- Name
Enter a name to identify the Opportunity.
- Active
Select to specify the Opportunity is active. If not selected, the Opportunity will be marked as inactive, causing it to be hidden in some lists.
- CRM Account
Specify the CRM Account the Opportunity is associated with.
- Amount
Enter the monetary value of the Opportunity.
- Probability
Project the likelihood the Opportunity will be closed.
- Target Close
Specify the date you expect the Opportunity will close.
- Owner
Specify the user who owns the Opportunity.
- Stage
Specify the current Stage of the Opportunity. It's possible an Opportunity will be automatically marked as inactive when it reaches a certain stage, depending on how your system is configured. To learn more about configuring your system to automatically mark Opportunities as inactive when they reach a certain stage, see Section 9.3.2.1, “Opportunity Stage”.
- Lead Source
Specify the source which generated the Opportunity.
- Opp. Type
Specify the type of Opportunity.
- Actual Close
Specify the date when the Opportunity closed.
- Notes
This is a scrolling text field with word-wrapping for entering Notes related to the Opportunity. Any Notes entered on this screen are for internal purposes only.
To the far right of the screen, the following buttons are available:
- CANCEL
Closes the screen without creating an Opportunity.
- SAVE
Creates the Opportunity and adds it to the master list of Opportunities.
To associate Characteristics with an Opportunity, select the "Characteristics" tab. The following screen will appear:
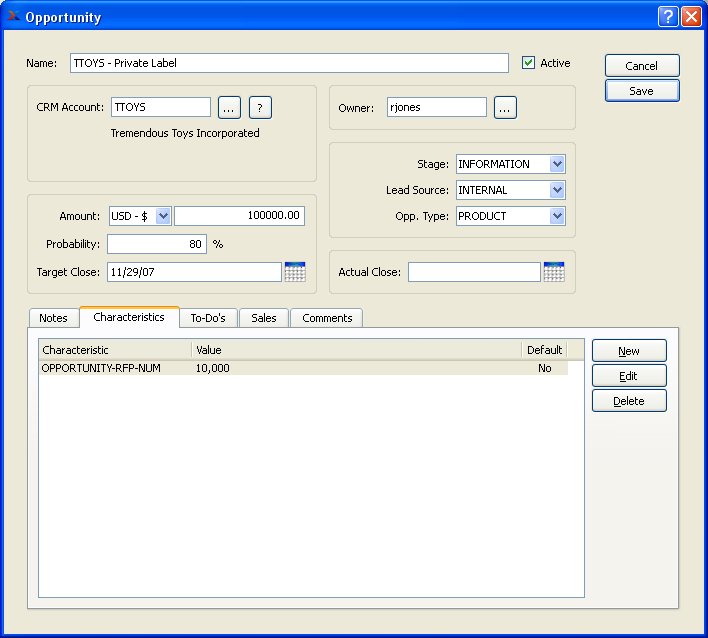
When associating Characteristics with an Opportunity, you are presented with the following options:
- Characteristics
Display lists the Characteristics related to the Opportunity.
To the far right of the screen, the following buttons are available:
- NEW
Opens screen for creating a new Opportunity Characteristic.
- EDIT
Enables you to edit highlighted Opportunity Characteristics. The edit screen is the same as that for creating a new Opportunity Characteristic—except that when editing, the fields will contain Opportunity Characteristic information. Double-clicking on an Opportunity Characteristic will also bring you to the editing screen.
- DELETE
Highlight an Opportunity Characteristic and then select this button to remove the Characteristic from the list.
To create a new Opportunity Characteristic, select the NEW button. The following screen will appear:
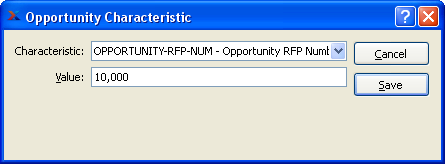
Create New Opportunity Characteristic
To associate To-Do List items with an Opportunity, select the "To-Do"s" tab. The following screen will appear:
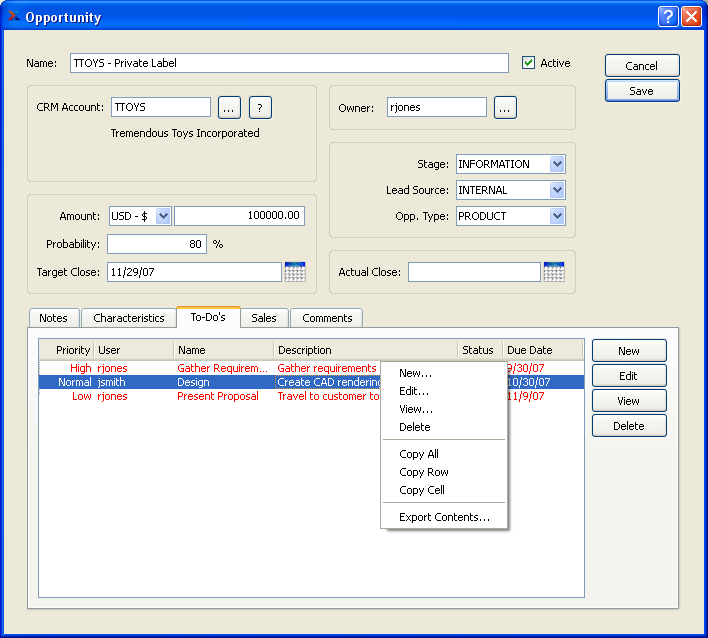
When associating To-Do items with an Opportunity, you are presented with the following options:
- To-Do List
Display lists To-Dos related to the Opportunity.
To the far right of the screen, the following buttons are available:
- NEW
Opens screen for creating a new To-Do List item.
- EDIT
Enables you to edit highlighted To-Do List items. The edit screen is the same as that for creating a new To-Do List item—except that when editing, the fields will contain To-Do List item information. Double-clicking on a To-Do List item will also bring you to the editing screen.
- VIEW
Highlight a To-Do List item and then select this button to reach a read-only view of the "Edit" screen.
- DELETE
Highlight a To-Do List item and then select this button to remove the association between the To-Do List item and the Opportunity
To manage and track Quotes and Sales Orders associated with an Opportunity, select the "Sales" tab. The following screen will appear:
When managing and tracking Quotes and Sales Orders associated with an Opportunity, you are presented with the following options:
- Sales
Display lists Quotes and Sales Orders associated with the Opportunity.
To the far right of the screen, the following buttons are available:
Highlight a Quote, then select this button to print a copy of the selected Quote. If the Customer or Prospect specified on the Quote has an EDI Profile attached or the Prospect has an email address, you may encounter an EDI processing interface when printing the Quote.
- CONVERT
Select to convert a Customer Quote to a Sales Order. All Quote Line Items must have valid Item Sites for a Quote to be converted successfully. Also, you may not convert Quotes written for Prospects.
Note
By default, the Quote Number will be assumed by the Sales Order when a Quote is converted to a Sales Order.
- NEW
Select to create either a new Quote or a new Sales Order for the Opportunity. Any Quotes or Sales Orders created here will also appear in their respective open lists.
- EDIT
Enables you to edit highlighted Quotes and Sales Orders. The edit screen is the same as that for creating a new Quote or Sales Order—except that when editing, the fields will contain Quote or Sales Order information. Double-clicking on a Quote or Sales Order will also bring you to the editing screen.
- VIEW
Highlight a Quote or Sales Order and then select this button to reach a read-only view of the "Edit" screen.
- DELETE
Highlight a Quote or Sales Order and then select this button to remove the document from the list. Keep in mind that any Quotes or Sales Orders you delete on this screen will also be removed from their respective open lists.
- ATTACH
Select to associate a Quote or Sales Order with the Opportunity.
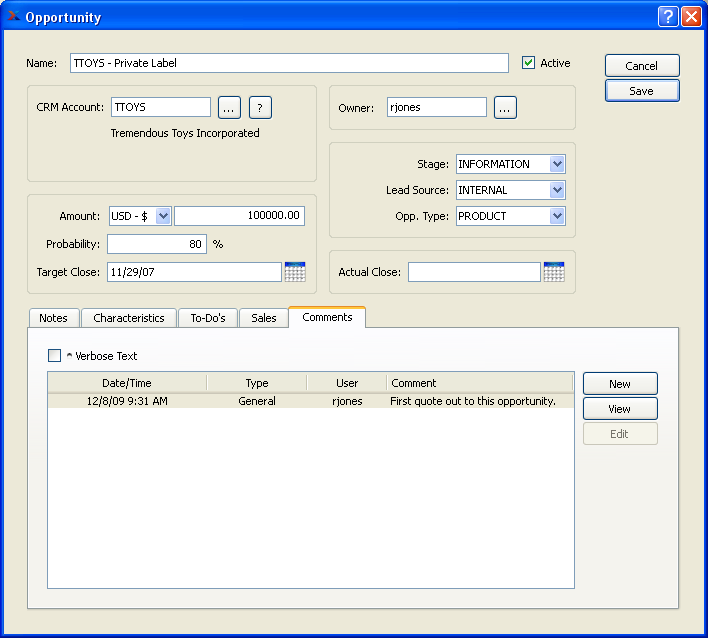
To add Comments to an Opportunity, select the "Comments" tab. The following screen will appear:
When adding or reviewing Comments, you are presented with the following options:
- Verbose Text
Select to display all Comments in the list in an expanded view which includes the entire text of each Comment. To edit a Comment, simply select the "Edit" link next to the Comment. That link will not be shown for Changelog Comments, which can't be edited. If the "Verbose Text" option is not selected, the Comment list will display only header level information for each Comment.
- Comments
Display lists Comments related to the record.
To the far right of the screen, the following buttons are available:
- NEW
Opens screen for creating a new Comment.
- VIEW
Highlight a Comment and then select this button to reach a read-only view of the "Edit" screen.
- EDIT
Enables you to edit highlighted Comments—as long as the Comments are not "ChangeLog" Comments. ChangeLog Comments are system-generated and may not be edited. The edit screen is the same as that for creating a new Comment—except that when editing, the fields will contain Comment information. Double-clicking on a Comment will also bring you to the editing screen.
To enter a new Comment, select the NEW button. The following screen will appear:
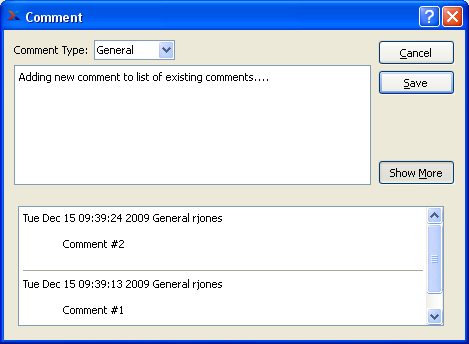
- Comment Type
Select a Comment Type from the drop-down list to classify the Comment. This is a required step. Comment Types may be system-defined (i.e., "ChangeLog" and "General") or user-defined, as described in Section 13.13, “Comment Types”. Once you have specified a Comment Type, begin typing your Comment in the main text area. The text area features word-wrapping and scroll-bar support for longer Comments.
To the far right of the screen, the following buttons are available:
- CANCEL
Closes the screen without creating the Comment, returning you to the previous screen.
- SAVE
Creates the Comment and adds it to the list of Comments.
- SHOW MORE
Select to show the complete list (i.e., "thread") of Comments associated with the record. To hide the list, simply select the SHOW MORE button again. The Comment thread will show the most recent Comment first.
To access the master list of Opportunities, select the "List Opportunities" option. The following screen will appear.
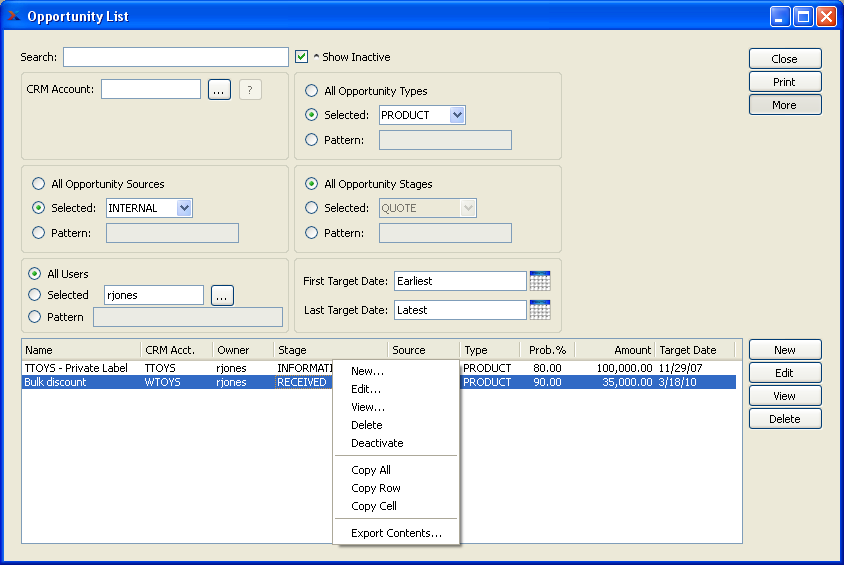
When reviewing Opportunities in the master list, you are presented with the following options:
- Search
To search for an Opportunity in the list, begin typing in the search field. As you type, the list will automatically scroll toward the Opportunity you are typing. You can also search for Opportunities manually by scrolling through the list.
- Show Inactive
Select to include inactive Opportunities in the display.
- All Opportunity Sources
Select to display Opportunities from all Sources.
- Selected
Specify Source whose Opportunities you want to display
- Pattern
Enter a Sources pattern to select a range of Opportunities for those Sources. Refine your search using Regular Expressions.
- All Users
Select to display Opportunities owned by all users.
- Selected
Specify user whose Opportunities you want to display
- Pattern
Enter a user pattern to select a range of Opportunities for those users. Refine your search using Regular Expressions.
- All Opportunity Types
Select to display Opportunities for all Opportunity Types.
- Selected
Specify Opportunity Type whose Opportunities you want to display
- Pattern
Enter an Opportunity Type pattern to select a range of Opportunities for those Opportunity Types. Refine your search using Regular Expressions.
- All Opportunity Stages
Select to display Opportunities at all Stages.
- Selected
Specify Stage whose Opportunities you want to display
- Pattern
Enter a Stage pattern to select a range of Opportunities for those Stages. Refine your search using Regular Expressions.
- First Target Date
Target dates falling on and after this date will be displayed.
- Last Target Date
Target dates falling on and before this date will be displayed.
- Opportunities
Display lists all available Opportunities, using the specified parameters.
To the far right of the list, the following buttons are available:
- CLOSE
Closes the screen, returning you to the application desktop.
Runs the report associated with this screen.
- MORE
Select to display extra information related to the Opportunity. To hide the extra information, simply select the MORE button again.
- NEW
Opens screen for creating a new Opportunity.
- EDIT
Enables you to edit highlighted Opportunities. The edit screen is the same as that for creating a new Opportunity—except that when editing, the fields will contain Opportunity information. Double-clicking on an Opportunity will also bring you to the editing screen.
- VIEW
Highlight an Opportunity and then select this button to reach a read-only view of the "Edit" screen.
- DELETE
Highlight an Opportunity and then select this button to remove the Opportunity from the list.