Information on Employees is contained in this section.
Employees are people who work for your company. An Employee may or may not be an xTuple ERP system user. To create a new Employee, use the following screen:
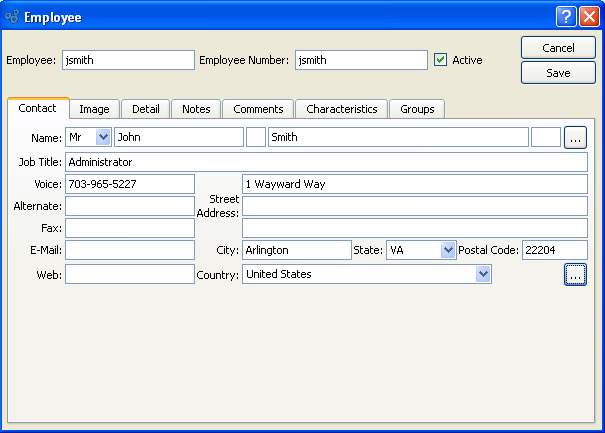
When creating a new Employee, you are presented with the following options:
- Employee
Enter the Employee's name. If the Employee is also an xTuple ERP system user, then you should enter the Employee's system username here.
- Employee Number
Enter a number to uniquely identify the Employee.
- Active
Select if the Employee is currently active. Not selecting makes the Employee inactive.
- Contact
Manually enter Employee Contact information in the fields below—or use the browse buttons to select pre-existing Contact and Address information.
Note
If new Contact or Address information is manually entered here, that information will be added automatically to the master list of Contacts and/or Addresses.
To associate an Image with an Employee, select the "Image" tab. The following screen will appear:
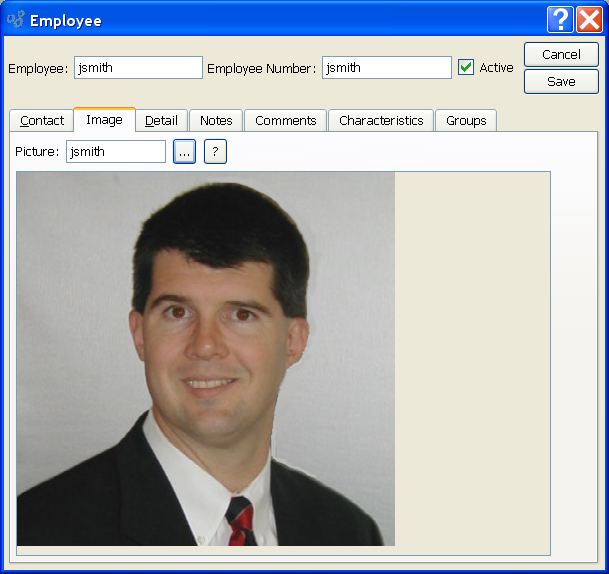
When associating an Image with an Employee, you will be presented with the following options:
- Picture
Select an Image from the list of available Images to associate with the Employee. You can learn more about adding Images to the database here Section 13.2, “Images”.
To specify administrative details related to an Employee, select the "Detail" tab. The following screen will appear:
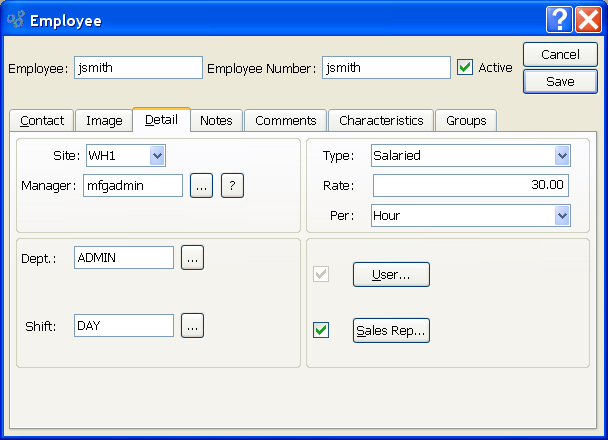
When specifying administrative details related to an Employee, you will be presented with the following options:
- Site
Specify the Site (i.e., Site, Store Location, etc.) where the Employee is principally located.
- Manager
Enter the name of the Employee's manager.
- Dept.
Specify the Employee's Department.
- Shift
Specify the Shift the Employee generally works.
- Type
Specify whether the Employee is paid hourly or on a salary basis.
- Rate
Specify the Employee's compensation rate.
- Per
Specify the period of time corresponding to the Employee's pay rate. The following options are available: Hour, Day, Week, Bi-Weekly, Year
- User
If you have the ability to create new xTuple ERP system users, then select this option to create the Employee as a system user. If the Employee is already a system user, then this option will already be checked.
Tip
To ensure correspondence between the Employee record and the system user record, the Employee name should match the Employee's system username.
- Sales Rep
Select if the Employee is a Sales Representative. If the Employee is already listed as a Sales Rep., then this option will already by checked.
To add Notes to an Employee, select the "Notes" tab. The following screen will appear:
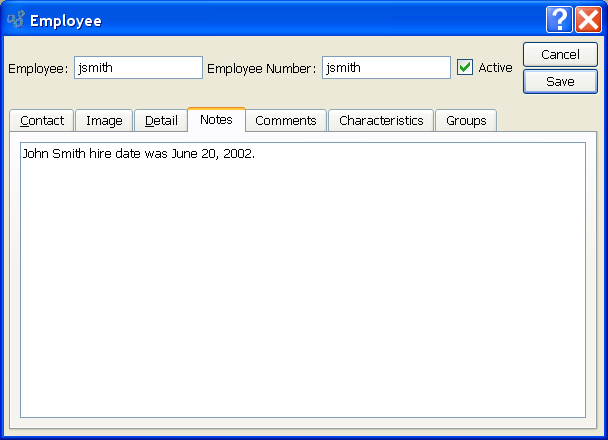
When adding Notes to an Employee, you are presented with the following options:
- Notes
This is a scrolling text field with word-wrapping for entering Notes related to the Employee. Any Notes entered on this screen are for internal purposes only.
To add Comments to an Employee, select the "Comments" tab at the bottom of the "Employee" screen. The following screen will appear:
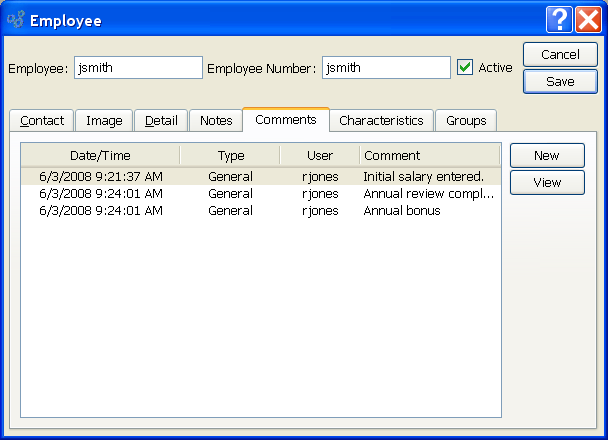
When adding or reviewing Comments, you are presented with the following options:
- Verbose Text
Select to display all Comments in the list in an expanded view which includes the entire text of each Comment. To edit a Comment, simply select the "Edit" link next to the Comment. That link will not be shown for Changelog Comments, which can't be edited. If the "Verbose Text" option is not selected, the Comment list will display only header level information for each Comment.
- Comments
Display lists Comments related to the record.
To the far right of the screen, the following buttons are available:
- NEW
Opens screen for creating a new Comment.
- VIEW
Highlight a Comment and then select this button to reach a read-only view of the "Edit" screen.
- EDIT
Enables you to edit highlighted Comments—as long as the Comments are not "ChangeLog" Comments. ChangeLog Comments are system-generated and may not be edited. The edit screen is the same as that for creating a new Comment—except that when editing, the fields will contain Comment information. Double-clicking on a Comment will also bring you to the editing screen.
To enter a new Comment, select the NEW button. The following screen will appear:
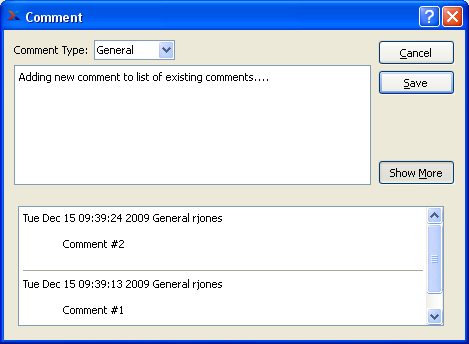
- Comment Type
Select a Comment Type from the drop-down list to classify the Comment. This is a required step. Comment Types may be system-defined (i.e., "ChangeLog" and "General") or user-defined, as described in Section 13.13, “Comment Types”. Once you have specified a Comment Type, begin typing your Comment in the main text area. The text area features word-wrapping and scroll-bar support for longer Comments.
To the far right of the screen, the following buttons are available:
- CANCEL
Closes the screen without creating the Comment, returning you to the previous screen.
- SAVE
Creates the Comment and adds it to the list of Comments.
- SHOW MORE
Select to show the complete list (i.e., "thread") of Comments associated with the record. To hide the list, simply select the SHOW MORE button again. The Comment thread will show the most recent Comment first.
Employee Characteristics are user-defined definitions of an Employee which may be used to provide additional layers of description. To enter Characteristics associated with an Employee, select the "Characteristics" tab. The following screen will appear:
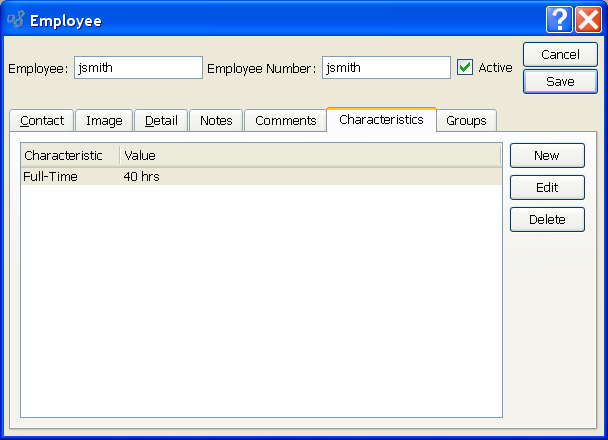
When associating Characteristics with an Employee, you are presented with the following options:
- Characteristics
Displays the Characteristics related to the Employee.
To the far right of the screen, the following buttons are available:
- NEW
Opens screen for creating a new Employee Characteristic.
- EDIT
Enables you to edit highlighted Employee Characteristics. The edit screen is the same as that for creating a new Employee Characteristic—except that when editing, the fields will contain Employee Characteristic information. Double-clicking on an Employee Characteristic will also bring you to the editing screen.
- DELETE
Highlight an Employee Characteristic and then select this button to remove the Employee Characteristic from the list.
To create a new Employee Characteristic, select the NEW button. The following screen will appear:
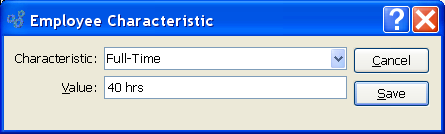
When creating a new Employee Characteristic, you are presented with the following options:
- Characteristic
Select a Characteristic from the list of Characteristics designated as being available for use as Employee Characteristics.
- Value
Enter a value to associate with the Employee Characteristic.
To the far right of the screen, the following buttons are available:
- CANCEL
Closes the screen without creating the Employee Characteristic, returning you to the previous screen.
- SAVE
Creates the Employee Characteristic and adds it to the list of Employee Characteristics.
To associate group memberships with an Employee, select the "Group Membership" tab. The following screen will appear:
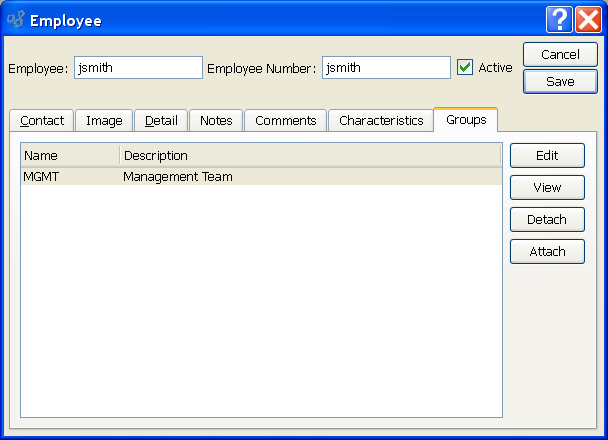
When associating group memberships with an Employee, you are presented with the following options:
- EDIT
Enables you to edit highlighted Employee Groups. The edit screen is the same as that for creating a new Employee Group—except that when editing, the fields will contain Employee Group information. Double-clicking on an Employee Group will also bring you to the editing screen.
- VIEW
Highlight an Employee Group and then select this button to reach a read-only view of the "Edit" screen.
- DETACH
Highlight an Employee Group and then select this button to remove the association between the Employee Group and the Employee.
- ATTACH
Select to associate a new Employee Group with the Employee.
To access the master list of Employees, select the "Employees" option. The following screen will appear:
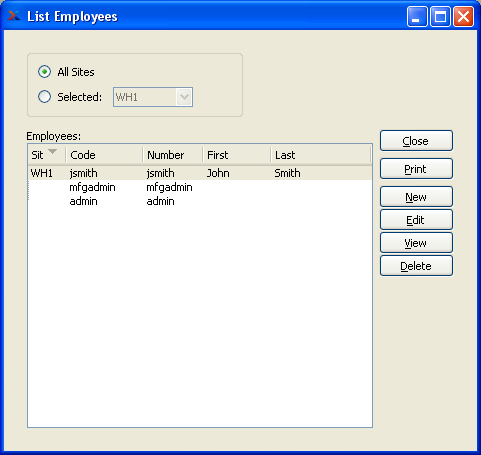
The "Employees" screen displays information on all existing Employees, including Employee code and Employee number.
- All Sites
Select to show Employees who have permissions for all sites.
- Selected
Select to show Employees who have permissions for site specified from drop down list.
- Employees
Display lists your Employees, using the specified parameters.
To the far right of the screen, the following buttons are available:
- CLOSE
Closes the screen, returning you to the application desktop.
Runs the report associated with this screen.
- NEW
Opens screen for creating a new Employee.
- EDIT
Enables you to edit highlighted Employees. The edit screen is the same as that for creating a new Employee—except that when editing, the fields will contain Employee information. Double-clicking on an Employee will also bring you to the editing screen.
- VIEW
Highlight an Employee and then select this button to reach a read-only view of the "Edit" screen.
- DELETE
Highlight an Employee and then select this button to remove the Employee from the list.
To search for an Employee, select the "Search for Employee" option. The following screen will appear:
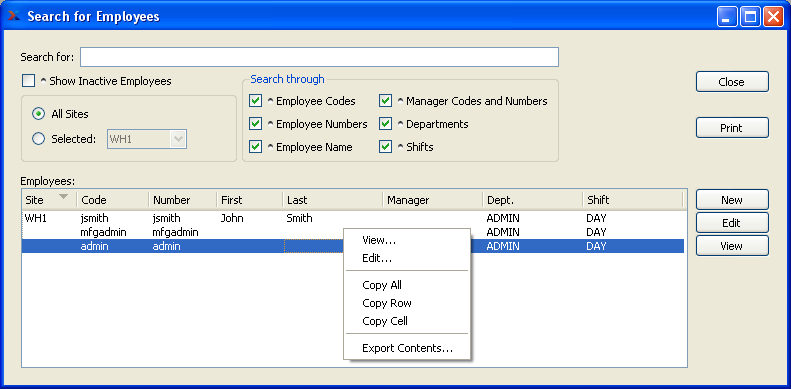
When searching to retrieve Employee information from the database, you are presented with the following options:
- Search for
Enter any character or combination of characters you want to match, followed by the TAB key. The "Search for" field supports pattern matching with Regular Expressions.
Tip
Hitting the TAB key activates the search operation.
- Show Inactive Employees
Select to show inactive Employees as well as active Employees. By default, inactive Employees are not displayed.
- All Sites
Select to show Employees who have permissions for all sites.
- Selected
Select to show Employees who have permissions only for site specified from drop down list.
- Search through
Specify which of the following criteria you want to include in the search:
- Employee Codes
Select to search by Employee code.
- Employee Numbers
Select to search by Employee number.
- Manager Codes and Numbers
Select to search by Manager codes and numbers.
- Departments
Select to search by Department.
- Shifts
Select to search by Shift.
- Employees
Display will show search results for Employees, using specified parameters.
To the far right of the screen, the following buttons are available:
- CLOSE
Closes the screen, returning you to the application desktop.
- EDIT
Enables you to edit highlighted Employee. The edit screen is the same as that for creating a new Employee—except that when editing, the fields will contain Employee information. Double-clicking on an Employee will also bring you to the editing screen.
- VIEW
Highlight an Employee and then select this button to reach a read-only view of the "Edit" screen.
Employee Groups are used for categorizing groups of related Employees. To access the master list of Employee Groups, select the "Employee Groups" option. The following screen will appear:
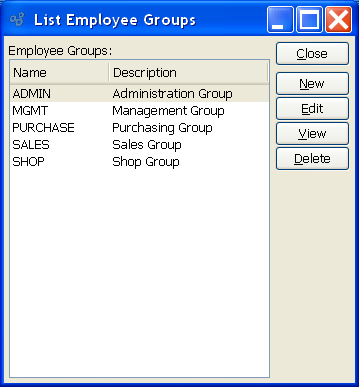
The "Employee Groups" screen displays information on all existing Employee Groups, including Employee Group names and descriptions.
To the far right of the screen, the following buttons are available:
- CLOSE
Closes the screen, returning you to the application desktop.
Runs the report associated with this screen.
- NEW
Opens screen for creating a new Employee Group.
- EDIT
Enables you to edit highlighted Employee Groups. The edit screen is the same as that for creating a new Employee Group—except that when editing, the fields will contain Employee Group information. Double-clicking on an Employee Group will also bring you to the editing screen.
- VIEW
Highlight an Employee Group and then select this button to reach a read-only view of the "Edit" screen.
- DELETE
Highlight an Employee Group and then select this button to remove the Employee Group from the list.
To create a new Employee Group, use the following screen:
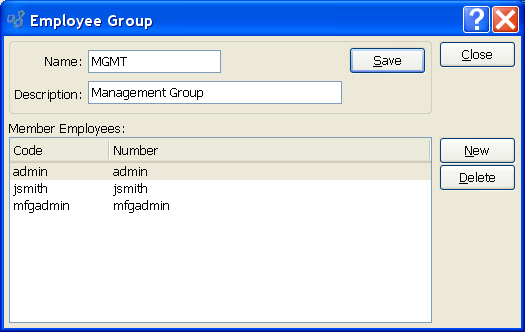
When creating a new Employee Group, you are presented with the following options:
- Name
Enter a name to identify the Employee Group.
- Description
Enter a brief description of the Employee Group.
- Member Employees
Displays information about any Employees who have been added to the Employee Group.
To the far right of the screen, the following buttons are available:
- NEW
Opens screen for adding a new Employee to the Employee Group.
- DELETE
Highlight an Employee and then select this button to remove the Employee from the Employee Group.
To the far right of the screen, the following buttons are available:
- CANCEL
Closes the screen without creating the Employee Group, returning you to the previous screen.
- SAVE
Creates the Employee Group and adds it to the list of Employee Groups.