Prerequisites
This documentation assumes that you have a fully functional PredictionIO setup. If you have not installed PredictionIO yet, please follow these instructions.
Preparing IntelliJ for Engine Development
Installing IntelliJ Scala Plugin
First of all, you will need to install the Scala plugin if you have not already done so.
Go to the Preferences menu item, and look for Plugins. You should see the following screen.
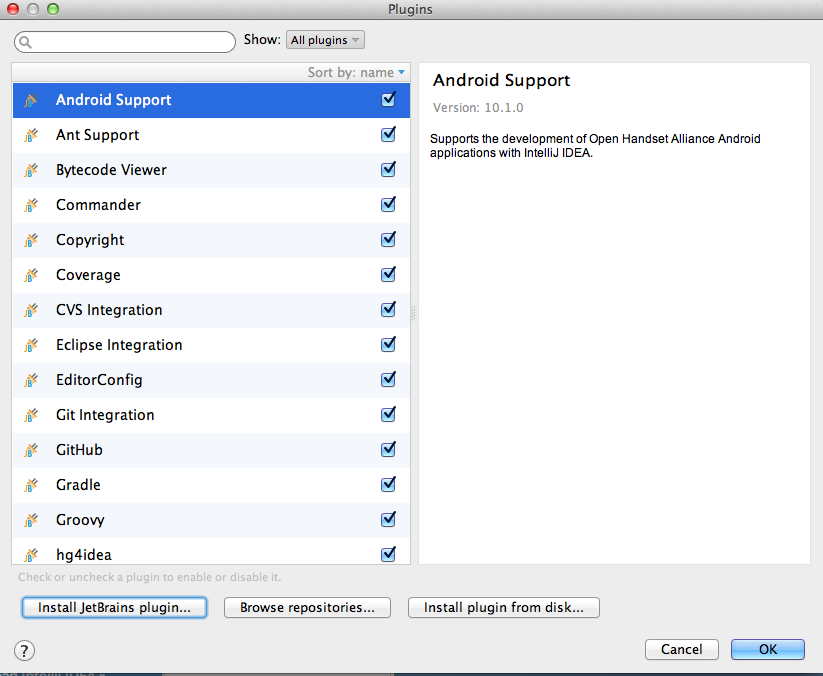
Click Install JetBrains plugin..., the search for Scala. You should arrive at something similar to the following.
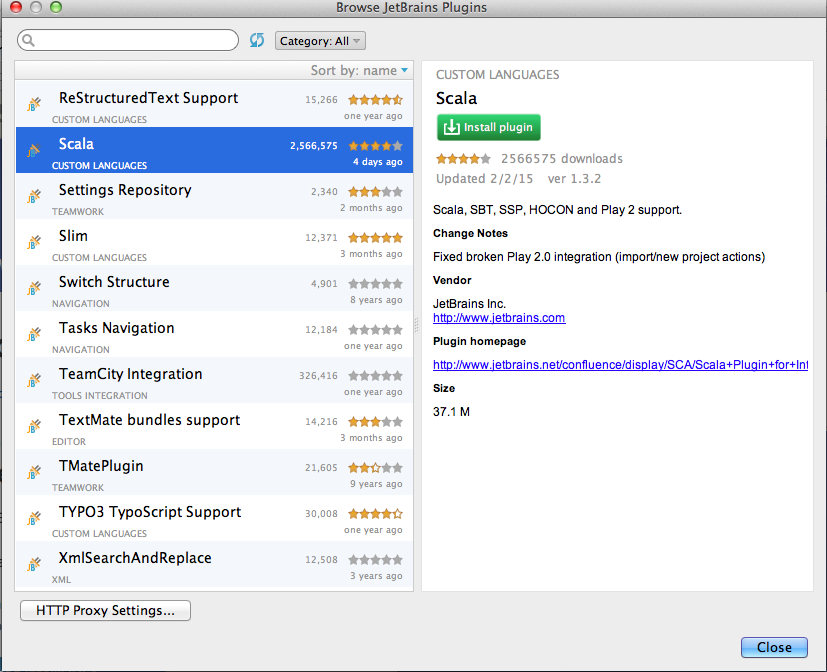
Click the green Install plugin button to install the plugin. Restart IntelliJ IDEA if asked to do so.
Setting Up the Engine Directory
Create an engine directory from a template. This requires that you install a template that you wish to start from or modify. Follow template install and deploy instructions or go through the Quick Start if you are planning to modify a recommender. Make sure to build, train, and deploy the engine to make sure all is configured properly.
From IntelliJ IDEA, choose File > New > Project from Existing Sources.... When asked to select a directory to import, browse to the engine directory that you downloaded too and proceed. Make sure you pick Import project from external model > SBT, then proceed to finish.
You should be able to build the project at this point. To run and debug PredictionIO server, continue on to the rest of the steps.
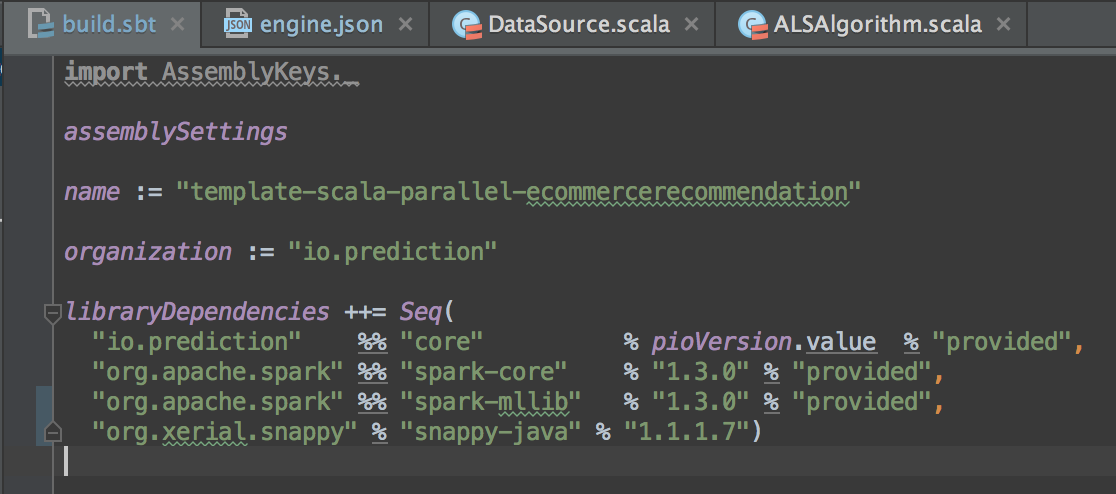
Edit build.sbt and add the following under libraryDependencies
1 | "org.xerial.snappy" % "snappy-java" % "1.1.1.7" |
When you are done editing, IntelliJ should either refresh the project automatically or prompt you to refresh.
Dependencies
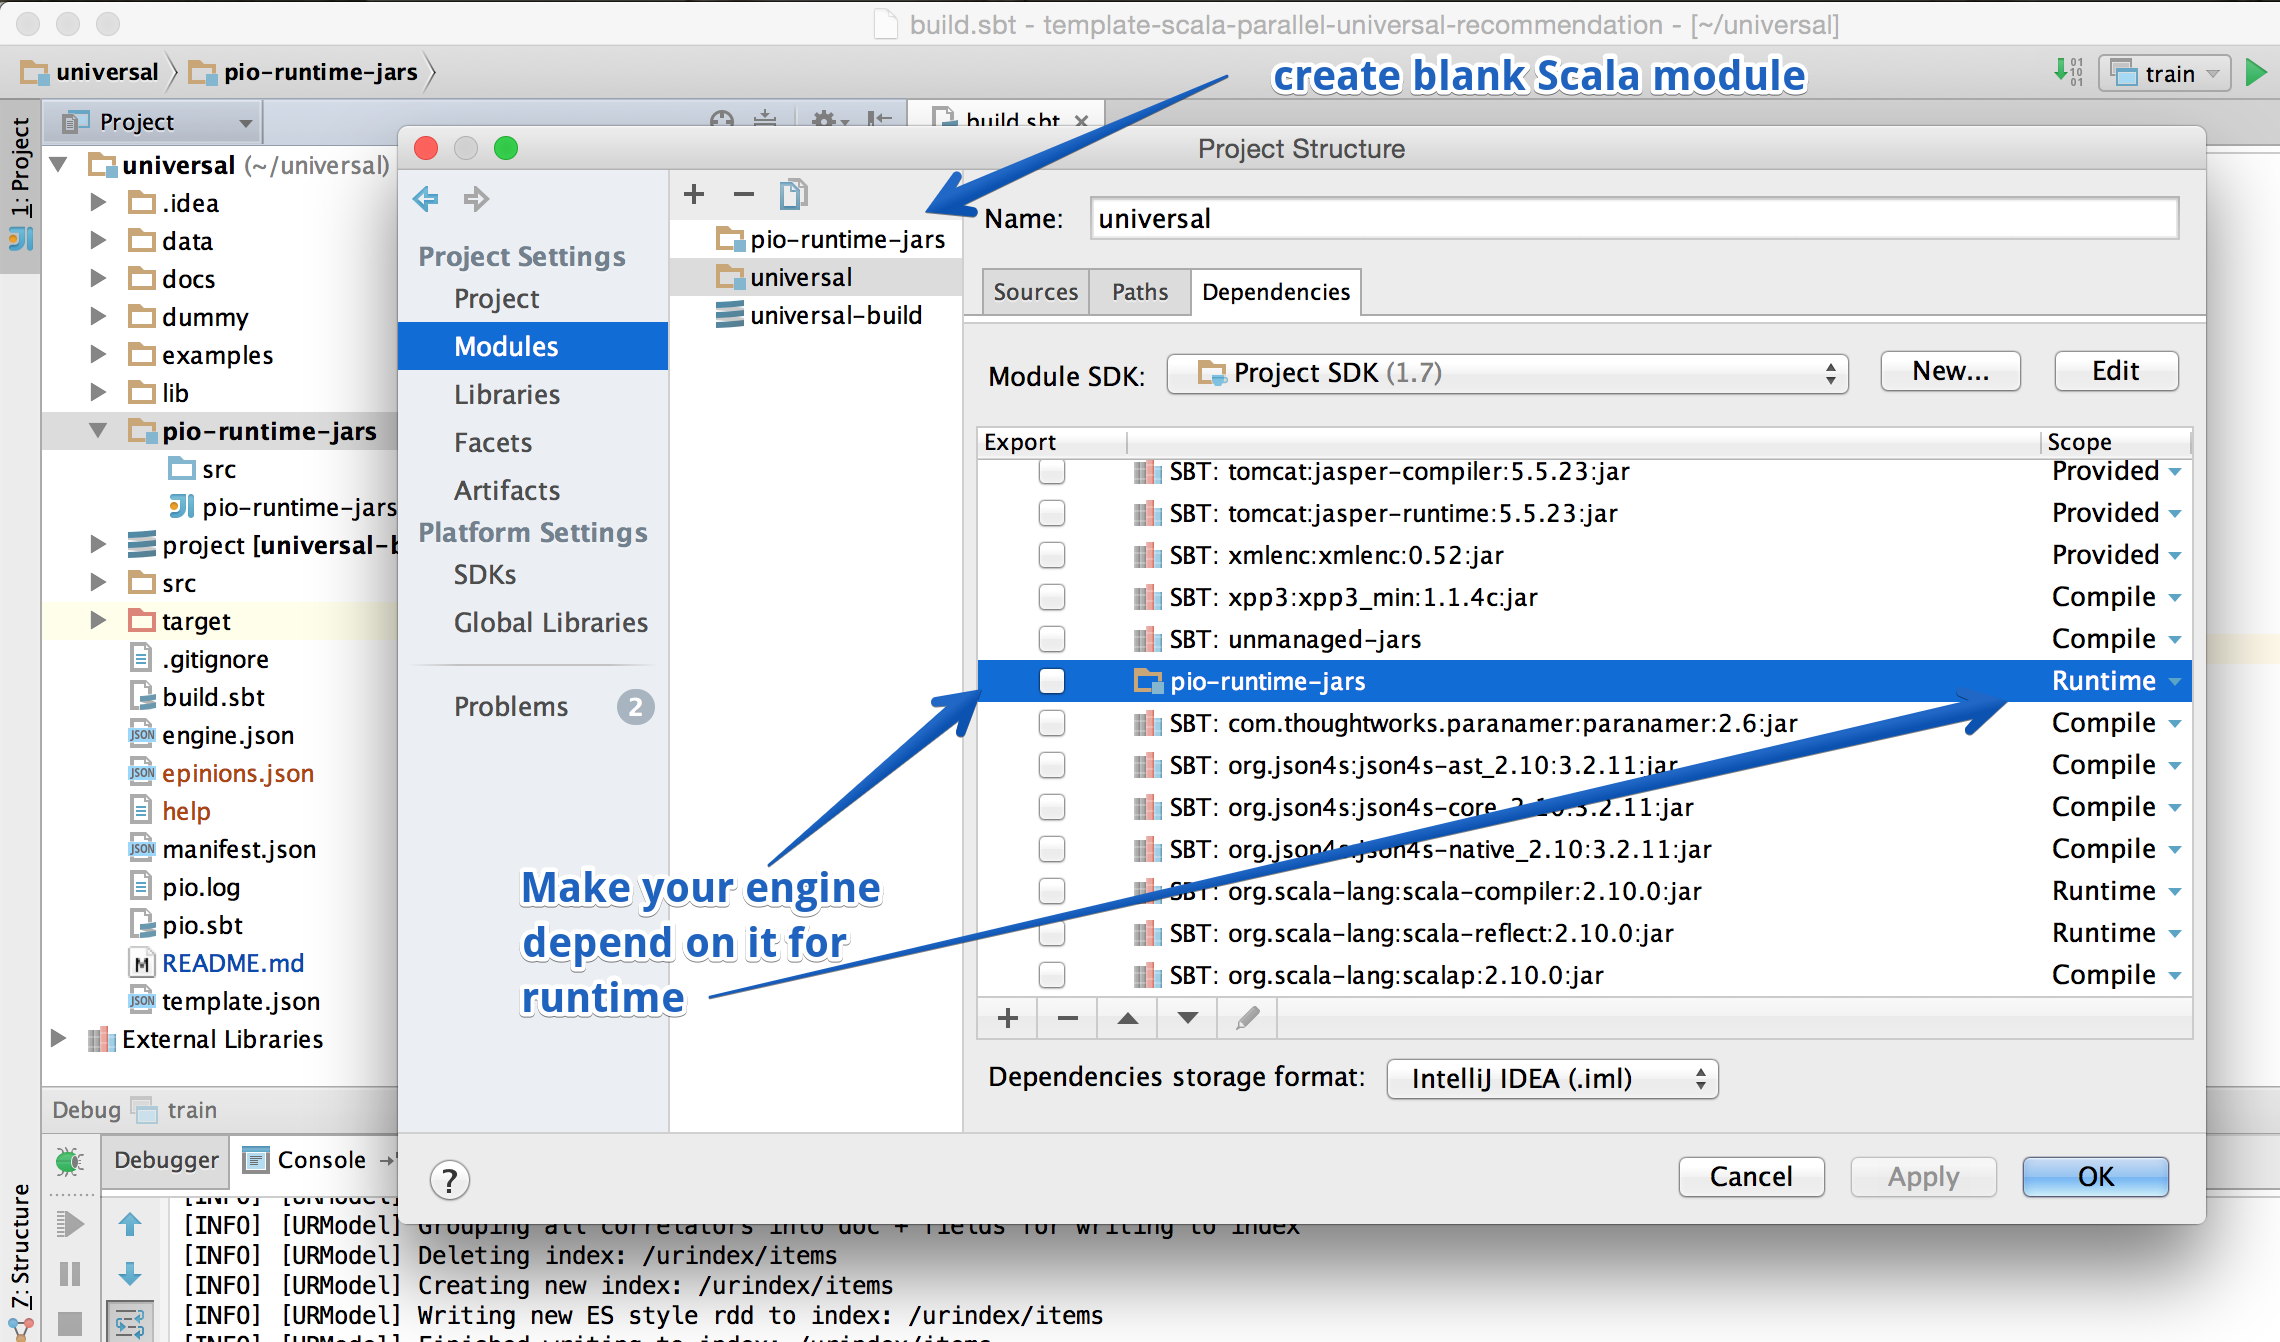
IntelliJ has the annoying tendency to drop some dependencies when you refresh your build.sbt after any changes. To avoid this we put any jars that must be available at runtime into a separate empty module in the project then we make the main engine project depend on this dummy module for runtime classes.
Right click on the project and click Open Module Settings. In the second modules column hit + and create a new Scala module. Name it pio-runtime-jars and add these assemblies under the module dependencies tab and remember to change the scope of the jars to runtime:
pio-assembly-0.9.6.jarThis JAR can be found inside the
assemblyorlibdirectory of your PredictionIO installation directory.spark-assembly-1.5.2-hadoop2.4.0.jarThis JAR can be found inside the
assemblyorlibdirectory of your Apache Spark installation directory.
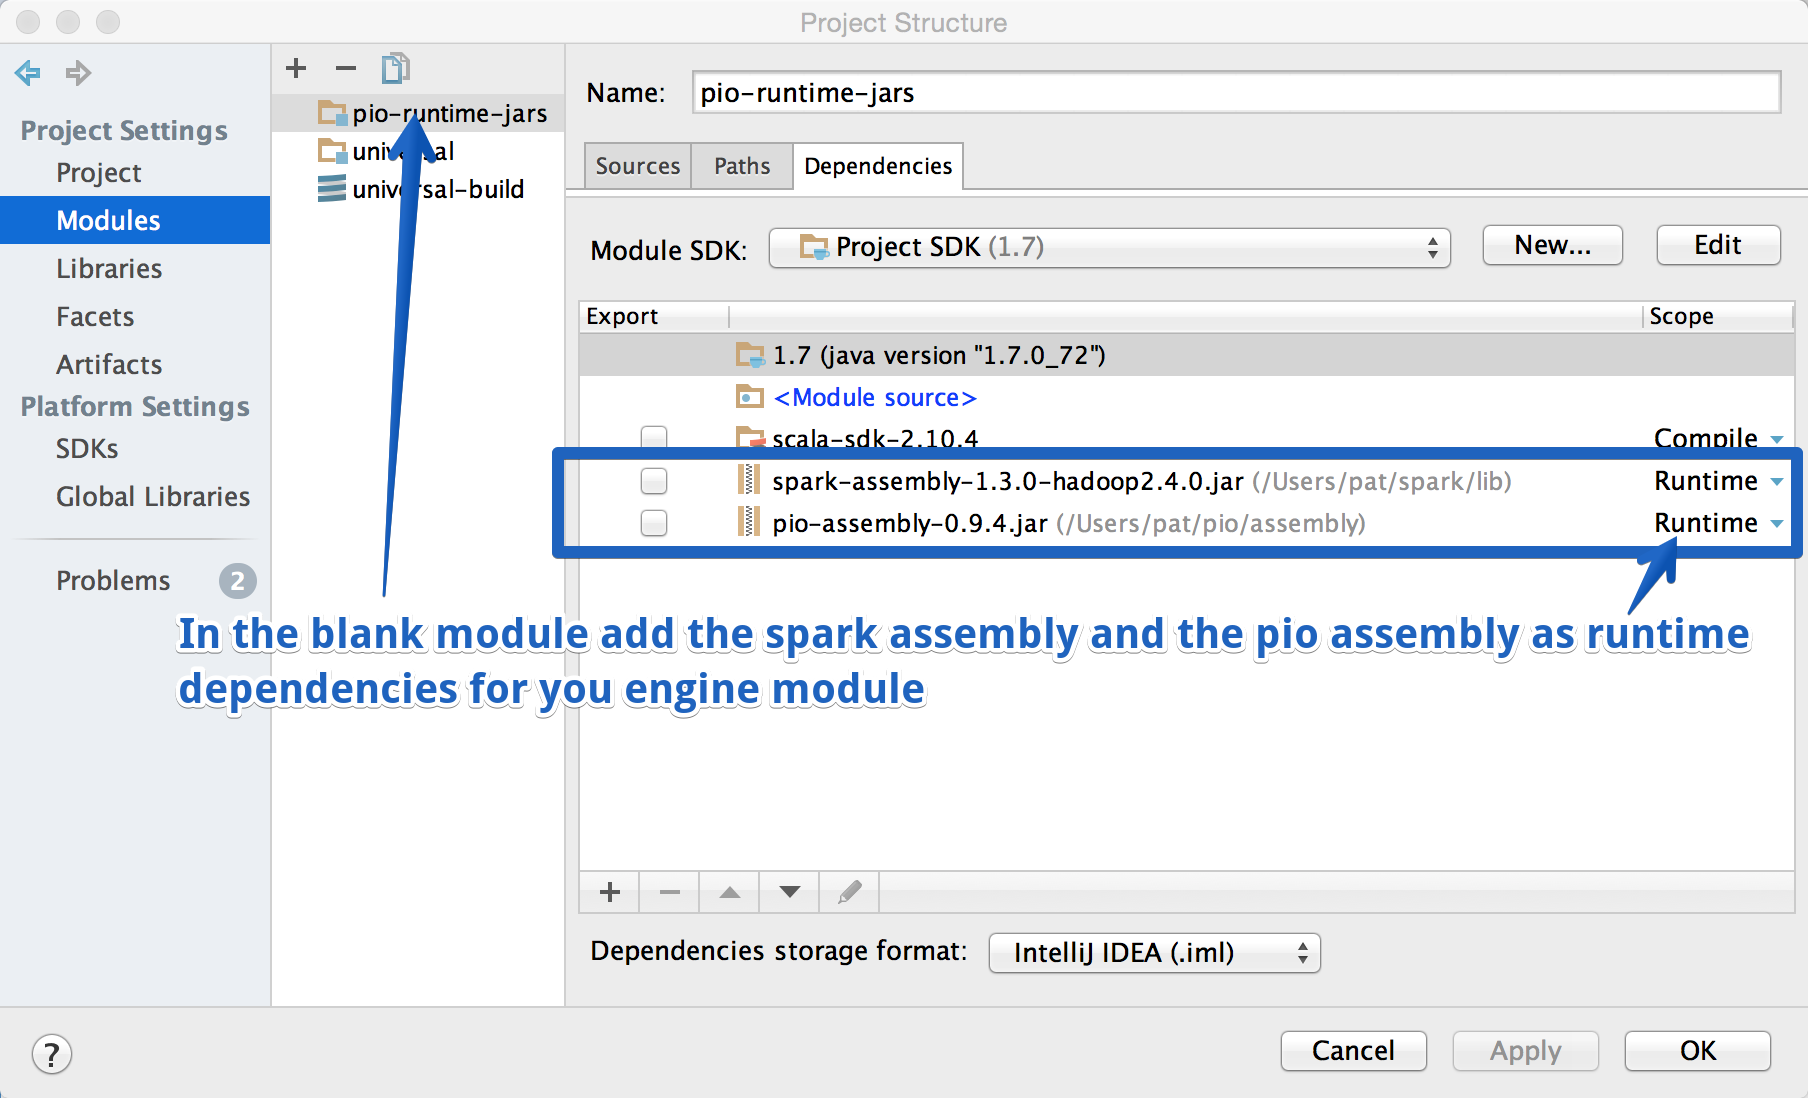
Now make your engine module dependent on the pio-runtime-jars module for scope = runtime.
Running and Debugging in IntelliJ IDEA
Simulating pio train
Create a new Run/Debug Configuration by going to Run > Edit Configurations.... Click on the + button and select Application. Name it pio train and put in the following.
1 2 3 | Main class: io.prediction.workflow.CreateWorkflow VM options: -Dspark.master=local -Dlog4j.configuration=file:/**replace_with_your_PredictionIO_path**/conf/log4j.properties Program arguments: --engine-id dummy --engine-version dummy --engine-variant engine.json |
Click the ... button to the right of Environment variables, and paste the following.
1 2 3 4 5 6 7 8 9 10 11 12 13 14 15 16 17 18 19 20 21 | SPARK_HOME=/**reaplce_w_your_spark_binary_path** PIO_FS_BASEDIR=/**replace_w_your_path_to**/.pio_store PIO_FS_ENGINESDIR=/**replace_w_your_path_to**/.pio_store/engines PIO_FS_TMPDIR=/**replace_w_your_path_to*/.pio_store/tmp PIO_STORAGE_REPOSITORIES_METADATA_NAME=predictionio_metadata PIO_STORAGE_REPOSITORIES_METADATA_SOURCE=ELASTICSEARCH PIO_STORAGE_REPOSITORIES_MODELDATA_NAME=pio_ PIO_STORAGE_REPOSITORIES_MODELDATA_SOURCE=LOCALFS PIO_STORAGE_REPOSITORIES_APPDATA_NAME=predictionio_appdata PIO_STORAGE_REPOSITORIES_APPDATA_SOURCE=ELASTICSEARCH PIO_STORAGE_REPOSITORIES_EVENTDATA_NAME=predictionio_eventdata PIO_STORAGE_REPOSITORIES_EVENTDATA_SOURCE=HBASE PIO_STORAGE_SOURCES_ELASTICSEARCH_TYPE=elasticsearch PIO_STORAGE_SOURCES_ELASTICSEARCH_HOSTS=localhost PIO_STORAGE_SOURCES_ELASTICSEARCH_PORTS=9300 PIO_STORAGE_SOURCES_LOCALFS_TYPE=localfs PIO_STORAGE_SOURCES_LOCALFS_HOSTS=/**replace_w_your_path_to**/.pio_store/models PIO_STORAGE_SOURCES_LOCALFS_PORTS=0 PIO_STORAGE_SOURCES_HBASE_TYPE=hbase PIO_STORAGE_SOURCES_HBASE_HOSTS=0 PIO_STORAGE_SOURCES_HBASE_PORTS=0 |
The end result should look something similar to this.
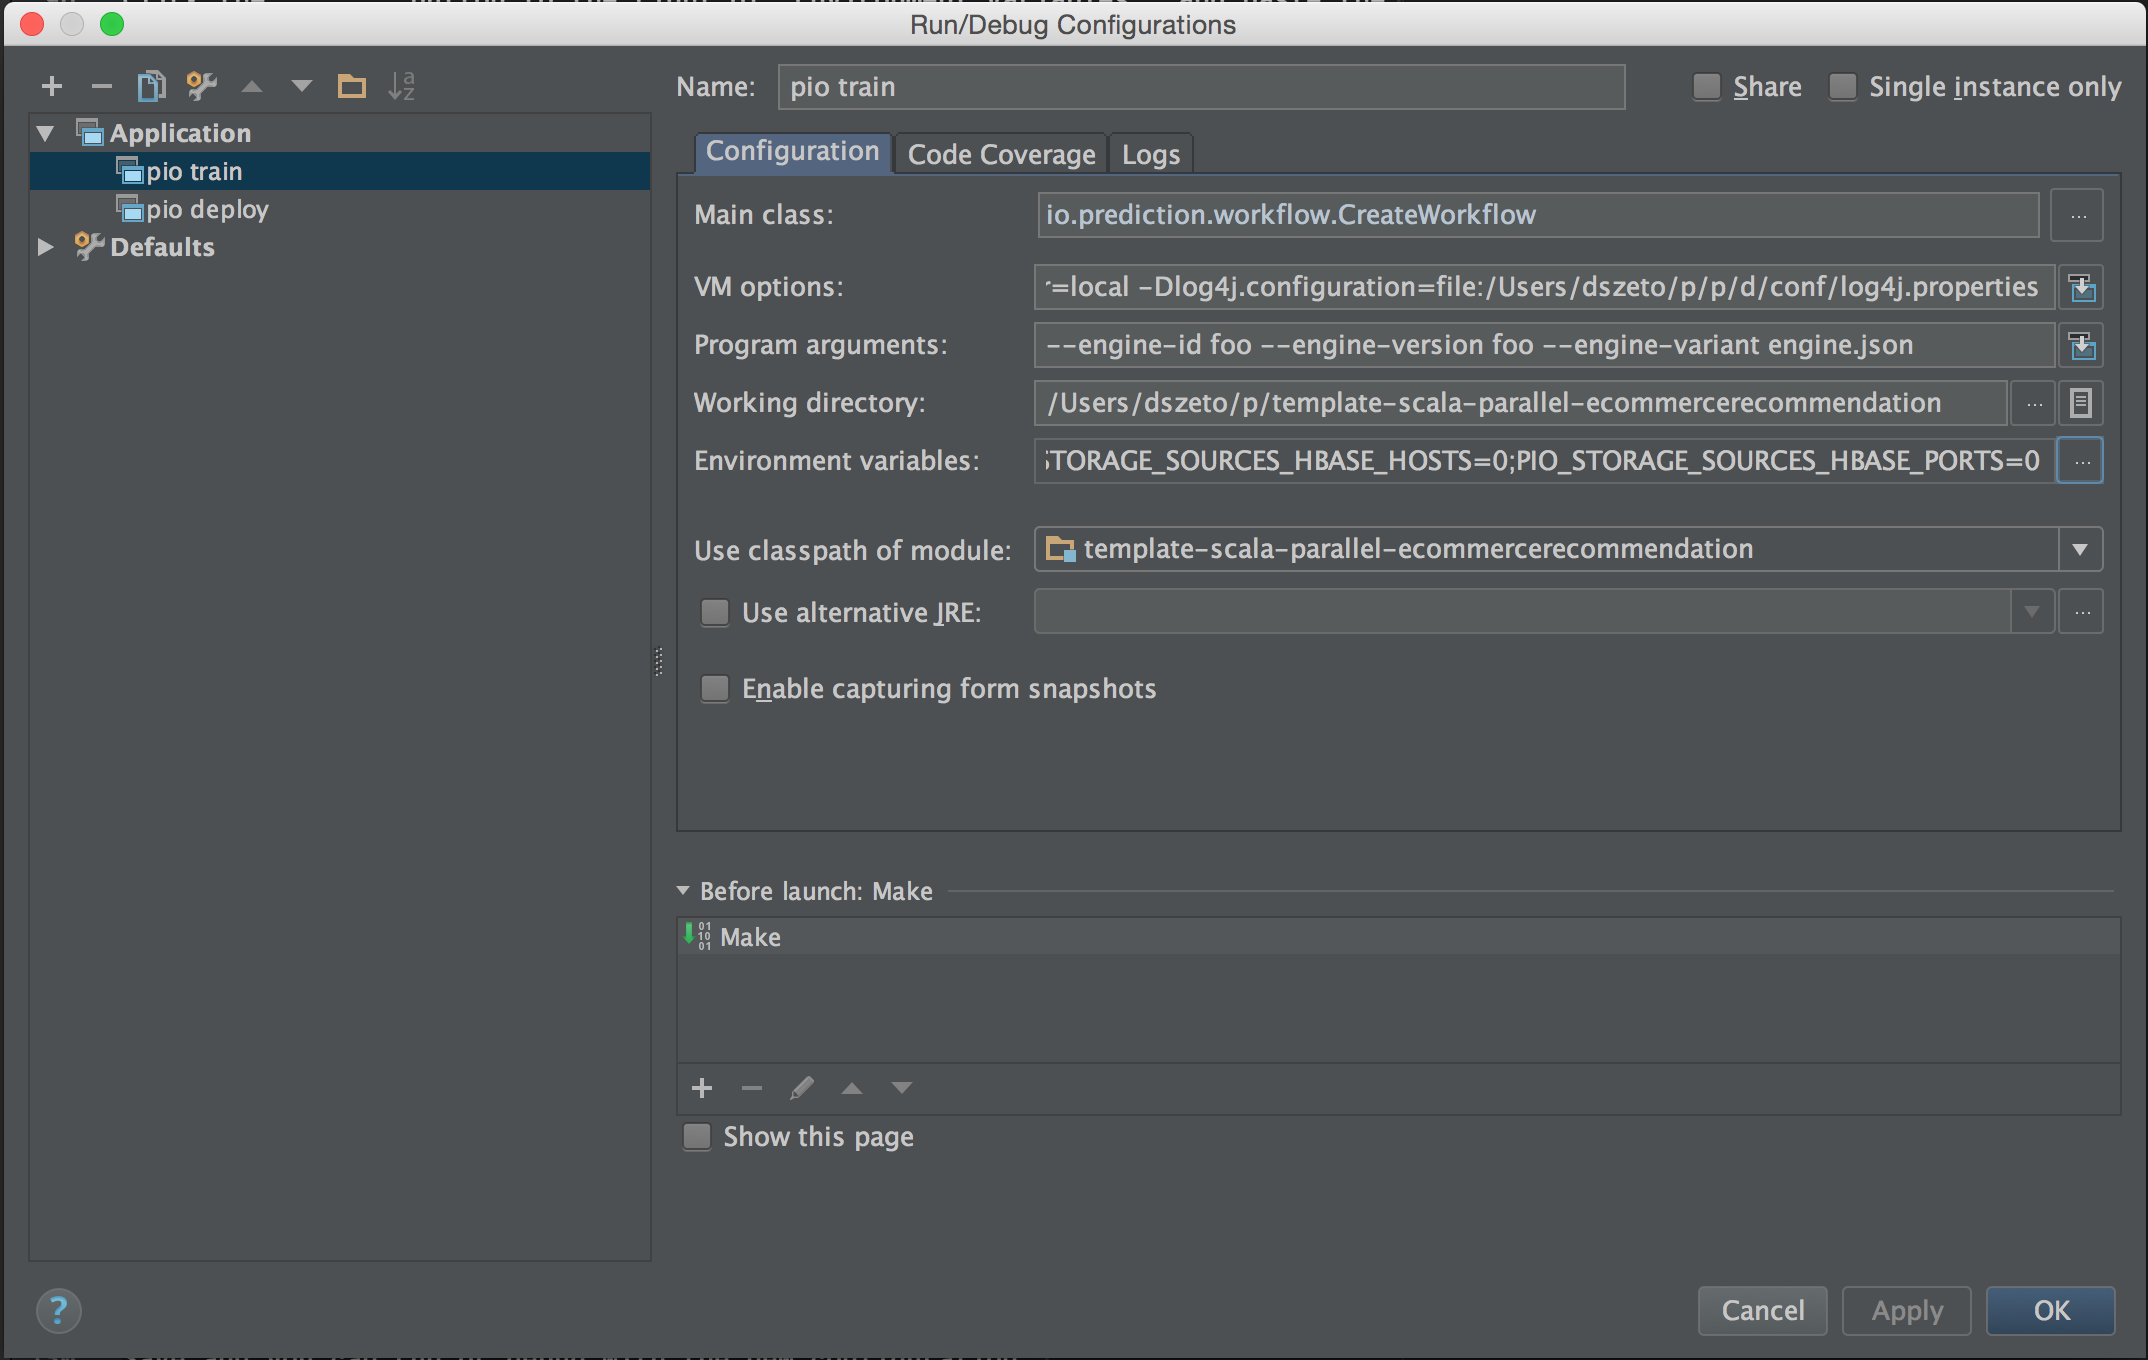
Save and you can run or debug pio train with the new configuration!
Simulating pio deploy
For pio deploy, simply duplicate the previous configuration and replace with the following.
1 2 | Main class: io.prediction.workflow.CreateServer Program Arguments: --engineInstanceId **replace_with_the_id_from_pio_train** |
Executing a Query
You can execute a query with the correct SDK. For a recommender that has been trained with the sample MovieLens dataset perhaps the easiest query is a curl one. Start by running or debuging your deploy config so the service is waiting for the query. Then go to the "Terminal" tab at the very bottom of the IDEA window and enter the curl request:
$ curl -H "Content-Type: application/json" -d '{ "user": "1", "num": 4 }' http://localhost:8000/queries.json
This should return something like:
1 2 3 4 5 6 | {"itemScores":[ {"item":"52","score":9.582509402541834}, {"item":"95","score":8.017236650368387}, {"item":"89","score":6.975951244053634}, {"item":"34","score":6.857457277981334} ]} |
Loading a Template Into Intellij IDEA
To customize an existing template using Intellij IDEA, first pull it from the template gallery:
1 | $ pio template get <Template Source> <New Engine Directory>
|
Now, before opening the template with Intellij, run the following command in the new engine template directory
1 | $ pio build
|
This should update the pioVersion key in SBT to the version of PredictionIO you have installed, so that Intellij loads the correct JARS via its Auto-Import feature. Now, you can go ahead and open the file build.sbt with Intellij IDEA. You are now ready to customize your new engine template.