| Prev | Part II. Guided Tour and Tutorial Chapter 4. Introduction To The Guided Tour and Tutorial |
 |
Next |
This tour is a practical introduction to ProActive, giving an illustrated introduction to some of the functionality and facilities offered by the library, by means of a step-by-step tutorial.
We will introduce several features of the library through examples, in Chapter 5, ProActive Example Applications. If after reading the chapter you need further details on how the examples work, visit the ProActive applications page.
Chapter 6, Active Object Tutorial will give you practical experience on how to program using ProActive by showing how to write your own client-server monitoring agent with active objects. The chapter will show different basic features of ProActive through examples that increase in complexity.
The second part of the tutorial will show how to program using the ProActive high level APIs. It will introduce the MasterWorker API, programming with components and the ProActive Scheduler.
To get started follow the instructions for downloading and installing ProActive, in Chapter 2, ProActive And IC2D Installation.
The example applications in Chapter 5, ProActive Example
Applications part can
be run by going to ProActive/scripts/unix/ or
ProActive\scripts\windowsand starting the coresponding script.
You do not need to set up any enviroment variables as these are set up automatically by the
scripts. The scripts are platform dependant: use the .sh files
on Linux and the .bat files on
Windows.
For the programming examples you will need to use a policy file, such as
ProActive/scripts/proactive.security.policy, with the JVM option
-Djava.security.policy=/filelocation/proactive.java.policy.
You will also need a log4j configuration file. An example file you can use is
ProActive/compile/proactive-log4j.
The JVM option for the log4j configuration file is
-Dlog4j.configuration=file:/filelocation/proactive-log4j
We recommend you use the Eclipse IDE to develop your ProActive applications. You can get this tool on the Eclipse website. Just unzip and launch the eclipse executable. In order to develop your own ProActive application, you will need to create an Eclipse project :
File -> New ... -> Project
Then choose Java Project. A wizard will appear and ask you to enter the project name :
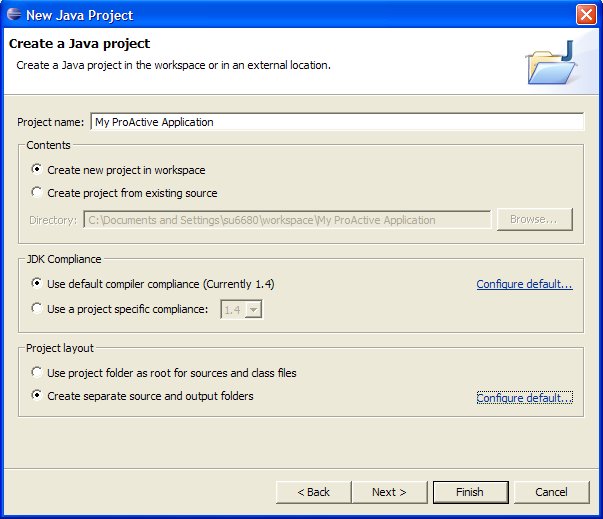
In order to separate class files from source files (it can be useful if you write scripts which refer to these classes), you can check the Create separate source and ouput folders in the Project Layout Frame, and click on Configure Default ... to choose the folders names. Once you have choosen all informations about Project Name , Project location , you can click on Next .
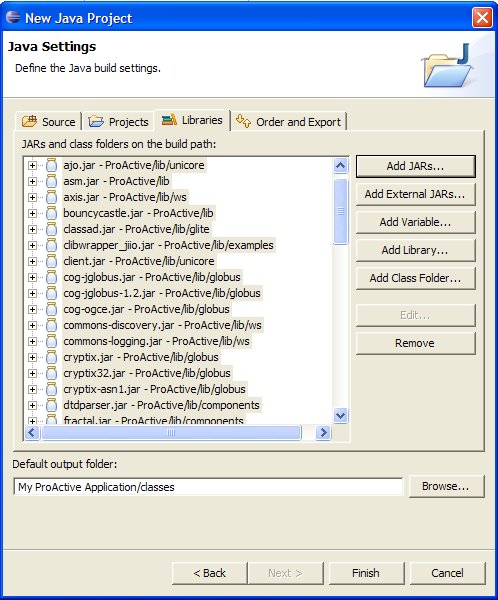
You have to specify some Java settings in order to set the application classpath. Select the Libraries tab and click on the Add External Jar... button. Add the ProActive.jar and the librairies contained in the ProActive/dist/lib/ directory of the ProActive distribution.
The Librairies tab should look like this :
You can see now on the navigator tab on the left side, that there is a new Project with the source and output folders you've just created :
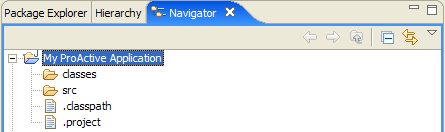
You are now able to create classes and packages that use the ProActive library.
All is now configured to create your ProActive application. Click on the Finish button.
We have developed an Eclipse application that will help developers to easily monitor ProActive applications. Have a look at the documentation page, Chapter 39, IC2D: Interactive Control and Debugging of Distribution.
© 1997-2008 INRIA Sophia Antipolis All Rights Reserved