Live Management: Controlling Puppet
NOTE: Live management and MCollective are not yet supported on Windows nodes.
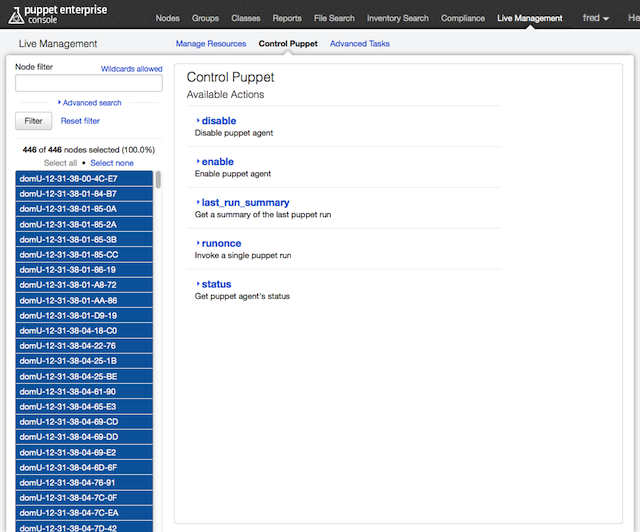
Use the “Control Puppet” tab to immediately trigger a puppet agent run on any of your nodes. You can also check puppet agent’s status, and enable or disable it to control the spread of new configurations.
Be aware that the “Control Puppet” tab cannot trigger a node’s first puppet agent run. A node’s first run will happen automatically within 30 minutes after you sign its certificate.
Invoking an Action
The “Control Puppet” tab can perform five actions:
- Disable
- Enable
- Last Run Summary
- Runonce
- Status
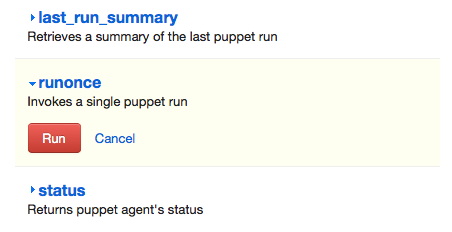
To use one, click the name of the action, then confirm with the red “Run” button.
Running an action returns a results view. Results views will attempt to group similar results to reduce noise; click the “on N nodes” links to see which nodes returned a given result.
A collapsed results view:
An expanded results view:
Actions
Run Puppet Once
Use the “runonce” action to make the selected nodes immediately pull and apply their configurations from the puppet master.
Normally, puppet agent pulls configurations at a regular interval (30 minutes, by default). However, when testing new Puppet classes, you’ll probably need to trigger agent runs at irregular times on your test nodes.
Nodes where puppet agent is disabled will ignore this action.
Enable and Disable
Use the “enable” and “disable” actions to control whether puppet agent does anything. When you disable Puppet on a node, the agent daemon will continue running, but it will not pull configurations from the master.
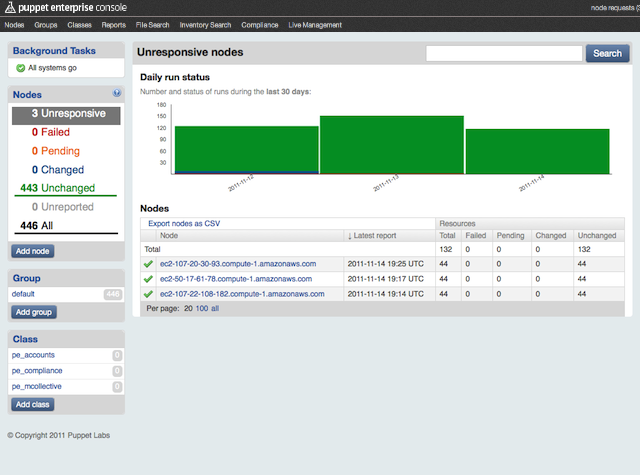
After a node has been disabled for an hour, it will appear as “unresponsive” in the console’s node views, and will stay that way until it is re-enabled. Disabled nodes will ignore runonce commands from the “Control Puppet” tab.
Disabling nodes is great for hedging your bets when you’ve made major changes to an existing Puppet module:
- Filter the node list by Puppet class to find every node that will be affected by the change
- Disable Puppet on all but a few of these nodes
- Run Puppet on the test nodes, and carefully examine the reports to make sure the changes worked
- Re-enable Puppet on the rest of your nodes (or a subset thereof, if you think you need more testing)
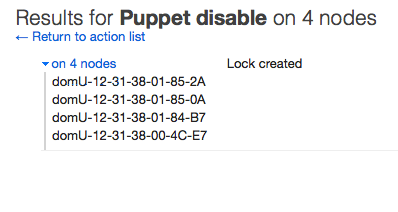
A confirmation screen will appear after disabling some nodes:
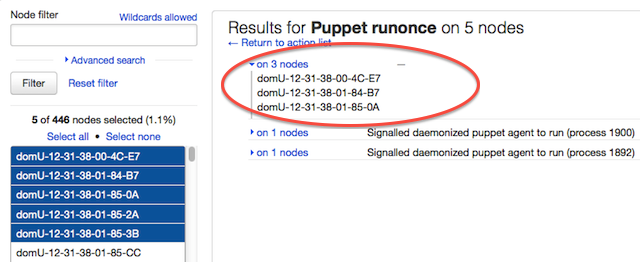
Results after trying to run a mix of enabled and disabled nodes — note the three nodes whose only response was “—”:
A view of unresponsive nodes in the console (note that node certnames on EC2 don’t necessarily align with hostnames):
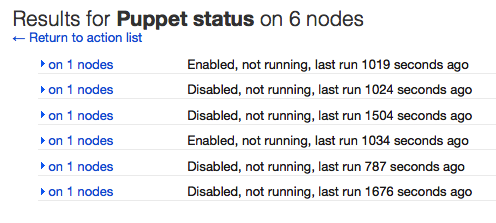
Status
Use the “status” action to check up on puppet agent.
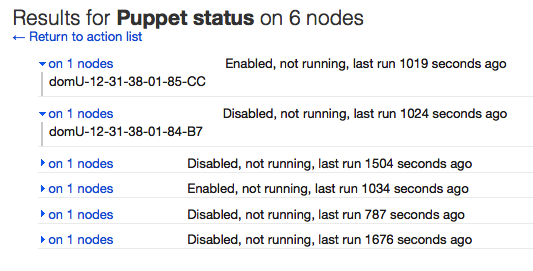
The status action gets three pieces of information from each node:
- Whether Puppet is enabled or disabled
- Whether Puppet is idle (“not running”) or actively applying a configuration (“running”)
- When the last Puppet run occurred
The results of the status action, with a mix of enabled and disabled nodes:

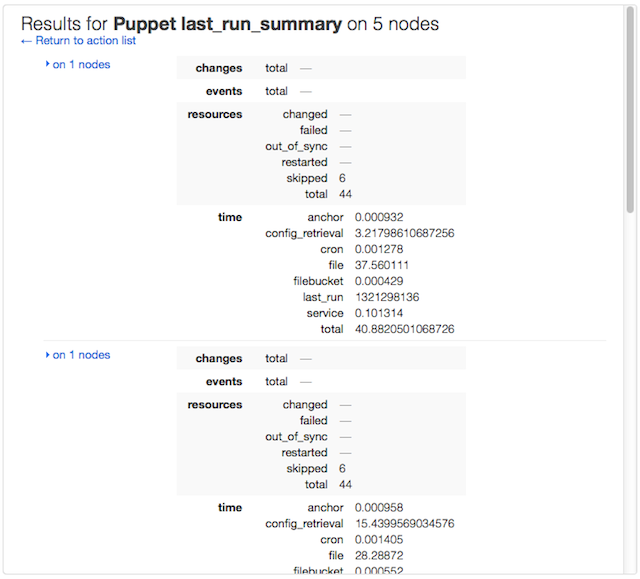
Last Run Summary
Use the “last_run_summary” action for a quick view of what the most recent Puppet run did.
Usually, you should use the graphs and reports on the console’s node views to investigate previous Puppet runs; they are more detailed, and provide more historical context. However, the overview provided by this action can be useful when combined with live management’s class and fact filtering.
Part of a last run summary results view: