| Home · All Classes · Main Classes · Grouped Classes · Modules · Functions |
Qtopia Core applications write directly to the framebuffer, eliminating the need for the X Window System and saving memory. For development and debugging purposes, a virtual framebuffer can be used, allowing Qtopia Core programs to be developed on a desktop machine, without switching between consoles and X11.
QVFb is an X11 application supplied with Qt/X11 that provides a virtual framebuffer for Qtopia Core to use. To use it, you need to configure and install Qt/X11 according

The virtual framebuffer emulates a framebuffer using a shared memory region and the qvfb tool to display the framebuffer in a window. The qvfb tool also supports a feature known as a skin which can be used to change the look and feel of the display. The tool is located in Qt's tools/qvfb directory, and provides several additional features accessible through its File and View menus.
Please note that the virtual framebuffer is a development tool only. No security issues have been considered in the virtual framebuffer design. It should be avoided in a production environment, i.e. do not configure production libraries with the -qvfb option.
To run the qvfb tool displaying the virtual framebuffer, the Qtopia Core library must be configured and compiled with the -qvfb option:
 cd path/to/Qtopia/Core
 ./configure -qvfb
 make
Then compile and run the qvfb tool as a normal Qt/X11 application (i.e. do not compile it as a Qtopia Core application):
 cd path/to/Qt/tools/qvfb
 make
 ./qvfb
The qvfb application supports the following command line options:
| Option | Description |
|---|---|
| -width <value> | The width of the virtual framebuffer (default: 240). |
| -height <value> | The height of the virtual framebuffer (default: 320). |
| -depth <value> | The depth of the virtual framebuffer (1, 8 or 32; default: 8). |
| -nocursor | Do not display the X11 cursor in the framebuffer window. |
| -qwsdisplay <:id> | The Qtopia Core display ID (default: 0). |
| -skin <name>.skin | The preferred skin. Note that the skin must be located in Qt's /tools/qvfb/ directory. |
| -zoom <factor> | Scales the application view with the given factor. |
A skin is a set of XML and pixmap files that tells the vitual framebuffer what it should look like and how it should behave; a skin can change the unrealistic default display into a display that is similar to the target device. To access the qvfb tool's menus when a skin is activated, right-click over the display.
Note that a skin can have buttons which (when clicked) send signals to the Qtopia application running inside the virtual framebuffer, just as would happen on a real device.
| Target Device Environment The qvfb tool provides various skins by default, allowing the user to view their application in an environment similar to their target device. The provided skins are:
In addition, it is possible to create custom skins. |
|
|
Creating Custom Skins
The XML and pixmap files specifying a custom skin must be located in subdirectory of the Qt's /tools/qvfb directory, called /customskin.skin. See the ClamshellPhone skin for an example of the file structure:
cd path/to/Qt/tools/qvfb/ClamshellPhone.skin/
The /ClamshellPhone.skin directory contains the following files:
Note that the defaultbuttons.conf file is only necessary if the skin is supposed to be used with Qtopia (The file customizes the launch screen applications, orders the soft keys and provides input method hints). See the Qtopia documentation for more information.
| The ClamshellPhone Skin | ||
|---|---|---|
 [SkinFile]
 Up=ClamshellPhone1-5.png
 Down=ClamshellPhone1-5-pressed.png
 Closed=ClamshellPhone1-5-closed.png
 Screen=72 84 176 208
 Areas=22

 "Power"     0x0100000a 205 563 249 586
 "1"         0x0031      62 414 119 438
 "2"         0x0032     130 414 189 438
 "3"         0x0033     198 413 257 438
 "4"         0x0034      54 444 117 470
 "5"         0x0035     128 444 189 471
 "6"         0x0036     202 444 264 471
 "7"         0x0037      47 477 113 507
 "8"         0x0038     126 477 190 507
 "9"         0x0039     205 478 270 509
 "*"         0x002a      39 515 110 552
 "0"         0x0030     122 515 195 553
 "#"         0x0023     207 516 280 553
 "Context1"  0x01100000 137 360 108 383 123 410 90 409  60 387  63 378
                        100 362
 "Back"      0x01000061 184 361 206 376 213 387 197 410 226 410 256 392
                        258 381 244 369
 "Backspace" 0x01000003  68 563 113 587
 "Select"    0x01010000 160 391 172 390 181 386 184 381 180 377 173
                        373 165 372 155 372 145 375 138 378 136
                        382 138 387 147 390
 "Left"      0x1000012  141 390 136 385 136 381 143 375 132 371 120
                        380 121 393 129 401
 "Down"      0x1000015  143 389 130 402 162 412 191 404 175 390
 "Right"     0x1000014  186 370 176 375 184 382 182 387 175 390 190 404
                        201 396 202 375
 "Up"        0x1000013  133 370 143 374 176 374 185 370 169 362 149 362
 "Flip"      0x01100006  98 325 225 353
The ClamShellPhone.skin file quoted above, specifies three pixmaps: One for the normal skin (Up), one for the activated skin (Down) and one for the closed skin (Closed). In addition, it is possible to specify a pixmap for the cursor (using a Cursor variable). The file also specifies the screen size (Screen) and the number of available buttons (Areas). Then it describes the buttons themselves; each button is specified by its name, keycode and coordinates. The coordinates are a list of at least 2 points in clockwise order that define a shape for the button; a click inside this shape will be treated as a click on that button. While pressed, the pixels for the button are redrawn from the activated skin. | ||
|
|
|
| ClamshellPhone1-5-closed.png | ClamshellPhone1-5.png | ClamshellPhone1-5-pressed.png |

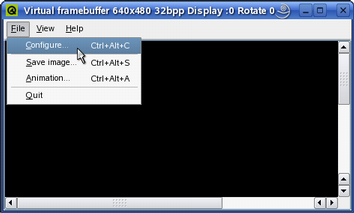
The File menu allows the user to configure the virtual framebuffer display (File|Configure...), save a snapshot of the framebuffer contents (File|Save Image...) and record the movements in the framebuffer (File|Animation...).
When choosing the File|Configure menu item, the qvfb tool provides a configuration dialog allowing the user to customize the display of the virtual framebuffer. The user can modify the size and depth as well as the Gamma values, and also select the preferred skin (i.e. making the virtual framebuffer simulate the target device environment). In addition, it is possible to emulate a touch screen and a LCD screen.
Note that when configuring (except when changing the Gamma values only), any applications using the virtual framebuffer will be terminated.

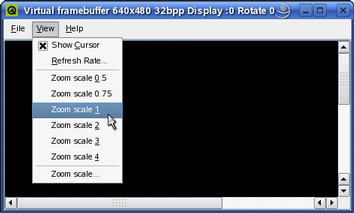
The View menu allows the user to modify the target's refresh rate (View|Refresh Rate...), making qvfb check for updated regions more or less frequently.
The regions of the display that have changed are updated periodically, i.e. the virtual framebuffer is displaying discrete snapshots of the framebuffer rather than each individual drawing operation. For this reason drawing problems such as flickering may not be apparent until the program is run using a real framebuffer. If little drawing is being done, the framebuffer will not show any updates between drawing events. If an application is displaying an animation, the updates will be frequent, and the application and qvfb will compete for processor time.
The View menu also allows the user to zoom the view of the application (View|Zoom *).
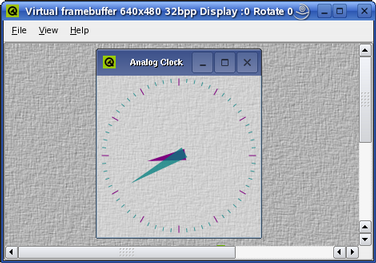
Once the virtual framebuffer (the qvfb application) is running, it is ready for use: Start a server application (i.e. construct a QApplication object with the QApplication::GuiServer flag or use the -qws command line parameter. See the running applications documentation for details). For example:
 cd path/to/Qtopia/Core/examples/widgets/analogclock
 make
 ./analogclock -qws
Note that as long as the virtual framebuffer is running and the current Qtopia Core configuration supports qvfb, Qtopia Core will automatically detect it and use it by default. Alternatively, the -display option can be used to specify the virtual framebuffer driver. For example:
 cd path/to/Qtopia/Core/examples/widgets/analogclock
 make
 ./analogclock -qws -display QVFb:0
Warning: If qvfb is not running (or the current Qtopia Core configuration doesn't support it) and the driver is not explicitly specified, Qtopia Core will write to the real framebuffer and the X11 display will be corrupted.
| Copyright © 2007 Trolltech | Trademarks | Qt 4.2.3 |