Chapter 5. Red Hat Network Registration Client
Before you begin using Red Hat Network, you need to create a username, password, and System Profile. The Red Hat Network Registration Client walks you through this process.
 | Warning |
|---|---|
Only systems running Red Hat Enterprise Linux 2.1 need to use this separate Red Hat Network Registration Client before starting the Red Hat Update Agent. Systems running Red Hat Enterprise Linux 3 have this registration functionality built into the Red Hat Update Agent. After registering your system, refer to Chapter 2 Red Hat Update Agent for instructions on starting the Red Hat Update Agent and begin steps listed in Section 2.3 Setup and Use. |
5.1. Configuring the Red Hat Network Registration Client
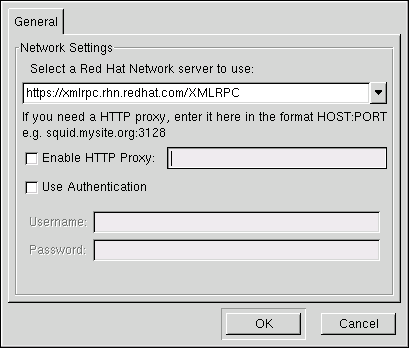
To start the graphical interface for configuring the application to connect through an HTTP proxy server, type the following command at a shell prompt:
rhn_register --configure |
The window shown in Figure 5-1 will appear.
To start the command line version, use the command:
rhn_register --nox --configure |
It has more configuration options than the graphical version.
You will be presented with a list of options and their current values:
0. enableProxyAuth No 1. noSSLServerURL http://xmlrpc.rhn.redhat.com/XMLRPC 2. oemInfoFile /etc/sysconfig/rhn/oeminfo 3. enableProxy No 4. networkSetup Yes 5. httpProxy 6. proxyUser 7. serverURL https://xmlrpc.rhn.redhat.com/XMLRPC 8. proxyPassword 9. debug No Enter number of item to edit <return to exit, q to quit without saving>: |
Enter the number of the item that you want to modify, and enter a new
value for the option. When you finish changing your configuration, press
The most common options configured are enableProxy and httpProxy to enable a proxy server. To enable a proxy server, change the value for enableProxy to Yes and the value of httpProxy to the name of the proxy server and port number in the format http://HOST:PORT. For example, to use the proxy server http://squid.mysite.org on port 3128, you would change the value to http://squid.mysite.org:3128.
If you require a proxy username and password, set enableProxyAuth to Yes to enable username/password authentication for the proxy, and set proxyUser and proxyPassword to the appropriate username and password for the proxy.
To bypass SSL, in /etc/sysconfig/rhn/rhn_register change the protocol for serverURL from https to http.