Particle System Reference (Shuriken)
Particle Systems in Unity are used to make clouds of smoke, steam, fire and other atmospheric effects.
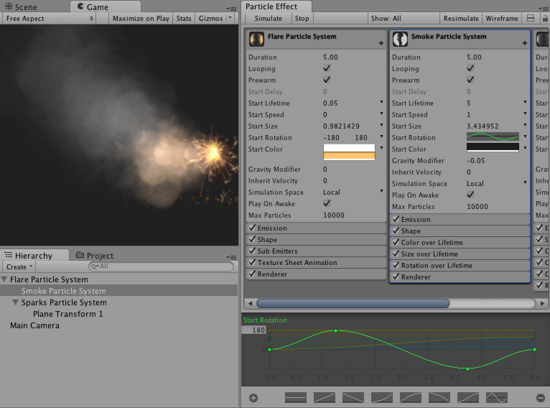
You can create a new particle system by creating a Particle System GameObject (menu -> -> ) or by creating an empty GameObject and adding the ParticleSystem component to it (in ->)
The Particle System Inspector (Shuriken)
The shows one particle system at a time (the currently selected one), and it looks like this:
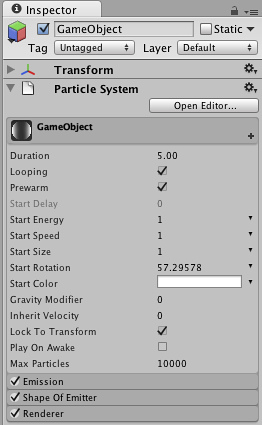
Individual particle systems can take on various complex behaviors by using Modules.
They can also be extended by being grouped together into Particle Effects.
If you press the button , this will open up the Extended , that shows all of the particle systems under the same root in the scene tree. For more information on particle system grouping, see the section on Particle Effects.
Scene View Editing
When creating and editing Particle Systems, you either work with the or the extended , and your changes are reflected in the . The scene view has a , where playback of the currently selected can be controlled in Edit Mode, with actions like , , and

Scrubbing play back time can be performed by dragging on the label Playback Time. All Playback controls have shortcut keys which can be customized in the Preferences window.
Particle System Curve Editor
MinMax curves
Many of the properties in the particle system modules describe a change of a value with time. That change is described via MinMax Curves. These time-animated properties (for example size and speed), will have a pull down menu on the right hand side, where you can choose between:

Constant: The value of the property will not change with time, and will not be displayed in the Curve Editor
Curve: The value of the property will change with time based on the curve specified in the Curve Editor
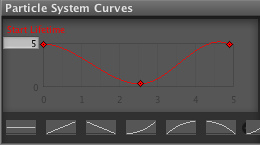
Random between constants: The value of the property will be selected at random between the two constants
Random between curves: A curve will be generated at random between the min and the max curve, and the value of the property will change in time based on the generated curve
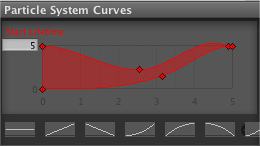
A property animated as Random Between Two Curves
In the Curve Editor, the x-axis spans time between 0 and the value specified by the Duration property, and the y-axis represents the value of the animated property at each point in time. The range of the y-axis can be adjusted in the number field in the upper right corner of the Curve Editor. The Curve Editor currently displays all of the curves for a particle system in the same window.
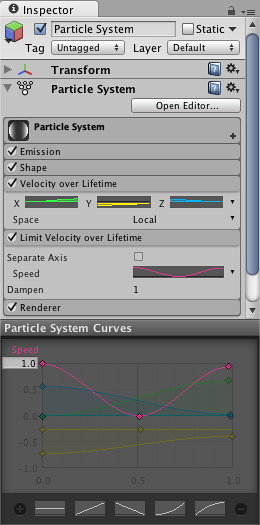
Note that the "-" in the bottom-right corner will remove the currently selected curve, while the "+" will optimize it (that is make it into a parametrized curve with at most 3 keys).
For animating properties that describe vectors in 3D space, we use the TripleMinMax Curves, which are simply curves for the x-,y-, and z- dimensions side by side, and it looks like this:

Managing many curves in the curve editor
To avoid cluttering in the Curve Editor, it is possible to toggle curves on and off, by clicking on them in the inspector. The Particle System Curve Editor can also be detached from the Inspector by right-clicking on the Particle System Curves title bar, after which you should see something like this:
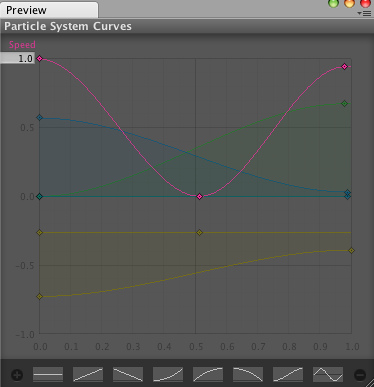
A detached Curve Editor that can be docked like any other window
For more information on working with curves, take a look at the Curve Editor documentation
Colors and Gradients in the Particle System (Shuriken)

For properties that deal with color, the Particle System makes use of the Color and Gradient Editor. It works in a similar way to the Curve Editor.
The color-based properties will have a pull down menu on the right hand side, where you can choose between:
Gradient: The gradient (RGBA) will vary throughout time, edited in the Gradient Editor
Random Between Two Gradients: The gradient (RGBA) varies with time and is chosen at random between two values specified Gradient Editor
Page last updated: 2013-08-02