First steps with Zentyal
Administrative web interface of Zentyal
Once you have installed Zentyal, you can access to the administrative web interface of Zentyal both through its own graphical environment included in the installer and from anywhere on the internal network, using the address: https://ip_address/, where ip_address is the IP address or the hostname on which Zentyal is installed and that resolves to that address. Because access is through HTTPS, the first time the browser will ask you whether you trust the site. Then you simply accept the self-generated certificate and you will not be asked this again.
Warning
To access to the web interface, you must use Mozilla Firefox. Please note that other browsers such as Microsoft Internet Explorer are not supported.
The first screen asks for the username and password. Both the user created during the installation and any other user of the admin group can authenticate as administrator.
Login
Once authenticated, you will see the administrative interface, which is divided in three main parts:
- Left side menu:
- Contains links to all services that can be configured by using Zentyal, separated into categories. When you select a service in this menu, a submenu might appear to configure a particular issue in the selected service.
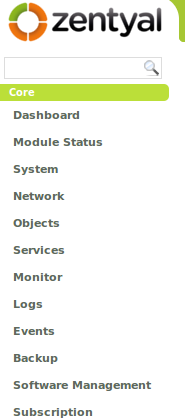
Side menu
- Top menu:
- Contains the actions: save the changes made in the contents, make the changes effective and log out.

Top menu
- Main content:
- The content that occupies the central part, consists of one or more forms or tables with information about service configuration selected through the left side menu and its submenus. Sometimes in the top you can see a bar with tabs: here each tab represents a different subsectiong within the section you have accessed.
Contents of a form
Dashboard
Dashboard is the initial interface screen. It contains a series of widgets that can be configured. You can reorganize the widgets at all times by clicking on the titles and dragging them.
By clicking on Configure Widgets the interface changes, allowing you to remove and add new widgets. To add a new widget, you need to search it from the top menu and drag it to the central part. To remove a widget, click on the X in the upper right corner of the window.

Dashboard configuration
One of the important widgets of the Dashboard shows the status of all the modules installed on Zentyal.
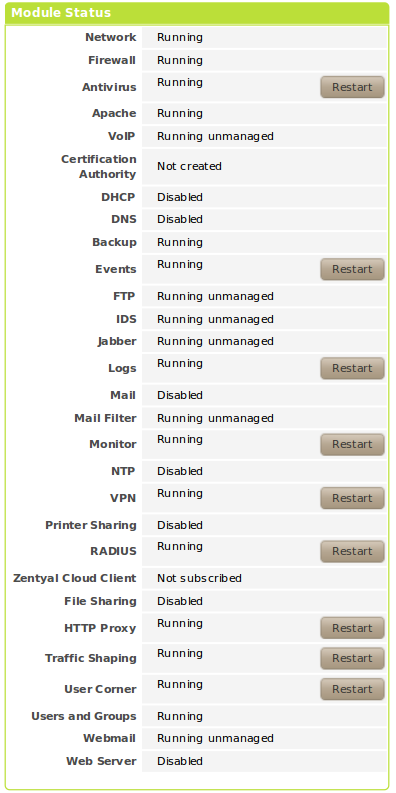
Widget showing status of the modules
The image shows the status of a service and the action you can carry out for this service. The available status are the following:
- Running:
- The service is running and listening to client connections. You can restart a service using Restart.
- Running unmanaged:
- If you haven’t enabled the module yet, it will be running with the default configuration of the distribution.
- Stopped:
- The service is stopped either because administrator has stopped it or because a problem has ocurred. You can restart the service by clicking on Restart.
- Disabled:
- The module has been explicitly disabled by the administrator.
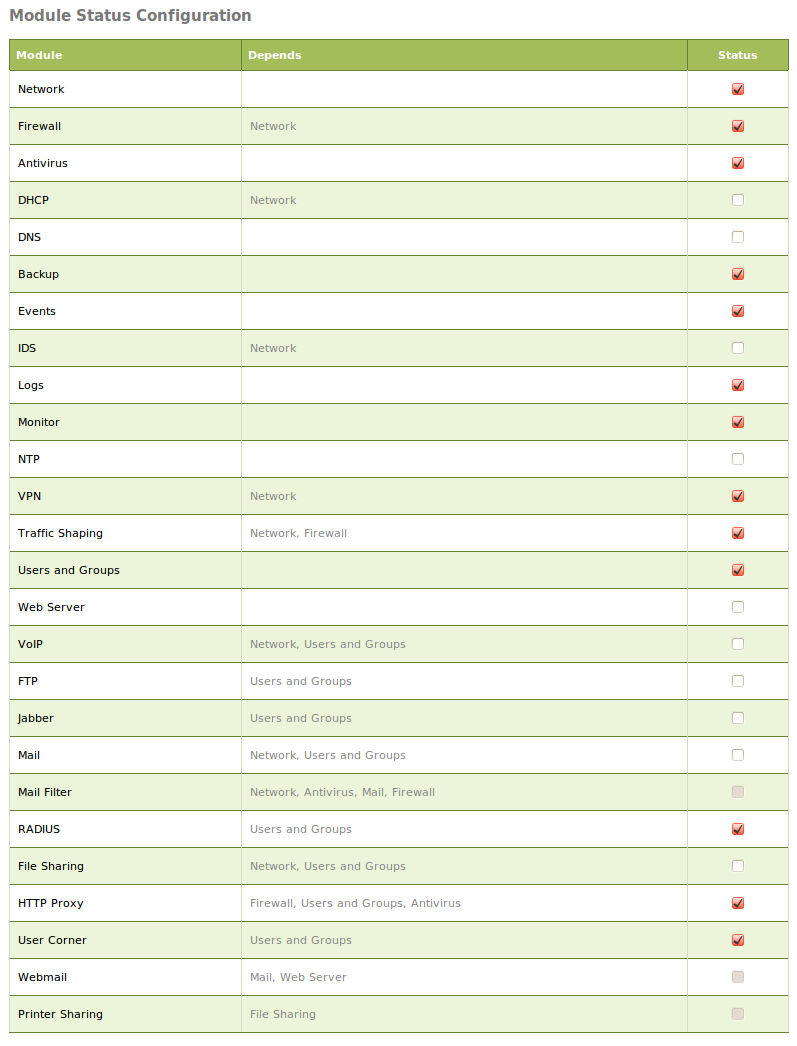
Configuration of the module status
Zentyal uses modular design in which each module manages a different service. To configure each one of these services you must enable the corresponding modules from Module Status. All those functions that have been selected during the installation will be enabled automatically.
Configuration of the status module
Each module may have dependencies on others in order to work. For instance, DHCP module needs to have the network module enabled so that it can server IP addresses through the configured network interfaces. The dependencies are shown in the Depends column and until these aren’t enabled, you can’t enable the module.
The first time you enable a module, you are asked to accept the set of actions that will be carried out and configuration files that will be overwritten. After you have accepted all the actions and files, you must save changes to apply the configuration.
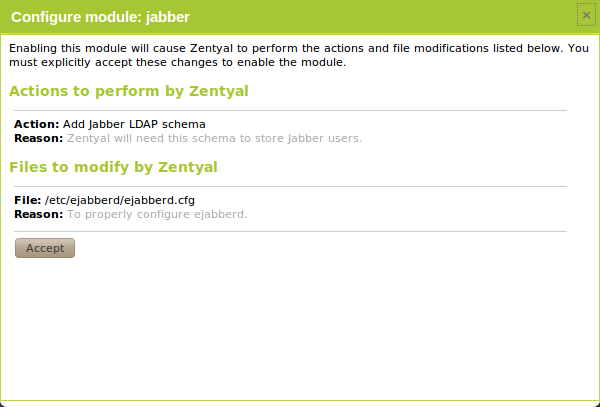
Confirmation to enable a module
Applying the configuration changes
An important feature to consider when working with Zentyal is they way configuration changes are applied when made through the interface. To do this, first of all, you have to accept changes in the form, but to make these changes effective and apply them permanently you must click on Save Changes in the top menu. This button will change to red if there are any unsaved changes. Failure to follow this procedur will result in the loss of all the changes you have made during the session once you end it. An exception to this rule is the users and groups management: here the changes are applied directly.

Save Changes
Warning
If you change the network interfaces configuration, firewall or administrative interface port, you might loose the connection. In this case you should change the URL in the browser or to reconfigure through the local GUI.
General configuration
There are several parameters in the general configuration of Zentyal that can be modified in System ‣ General.

General configuration
- Password:
- You can change the password of an user. It will be necessary to introduce
- his/her Username, Current password, New password and to confirm the password again in the Change password section.
- Language:
- You can change the interface language at Select a language.
- Administrative interface port:
- By default, it is the HTTPS port 443, but if you want to use it for the web server, you must change it to another port and specify it in the URL when you access https://ip_address:port/.
- Hostname:
- It is possible to change the hostname or the hostname, for example zentyal.home.lan. The hostname is helpful to identify it from other hosts in the same network.
Location in a Zentyal network
Zentyal can be used in two fundamental ways:
- gateway and firewall for Internet connection,
- server for network (local or Internet) services.
You can decide to install everything in one single host or to separate the different services into several hosts, depending on the characteristics of each deployment.
The image Locations in the network shows the different locations a Zentyal server can take within a network, both working as a link between networks or as a server within the network itself.
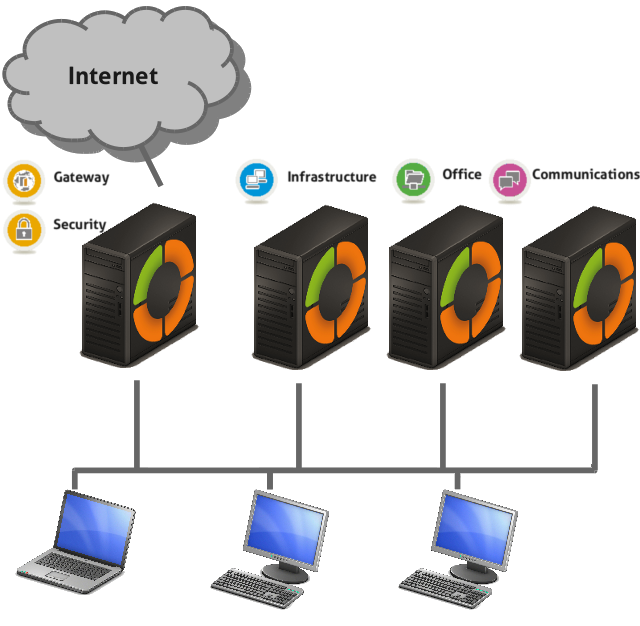
Locations in the network
In this documentation you will find out how to configure Zentyal as a gateway and firewall. And of course you will also see how to configure Zentyal when it acts as yet another server within a network.
Network configuration with Zentyal
Through Network ‣ Interfaces you can access the configuration of each network card detected by the system and you can select between static configuration (manually configured), dynamic (DHCP configuration), VLAN (802.1Q) trunk, PPoE or bridged.
In addition, you can define each interface as External if it is connected to an external network, such as Internet, to apply more strict firewall policies. If you don’t do this, the interface is considered internal, connected to a local network.
When you configure an interface as DHCP, you don’t configure only the IP address, but also the DNS servers and gateway. This is usual in hosts within the local network or with external interfaces connected to the ADSL routers.

DHCP configuration of the network interface
If you decide to configure a static interface you must specify the IP address and the network mask. You can also associate one or more Virtual Interface to this real interface to get additional IP addresses.
These additional addresses are useful to provide a service in more than one IP address or subnetwork, to facilitate the migration from a previous scenario or to have a web server with different domains using SSL certificates.
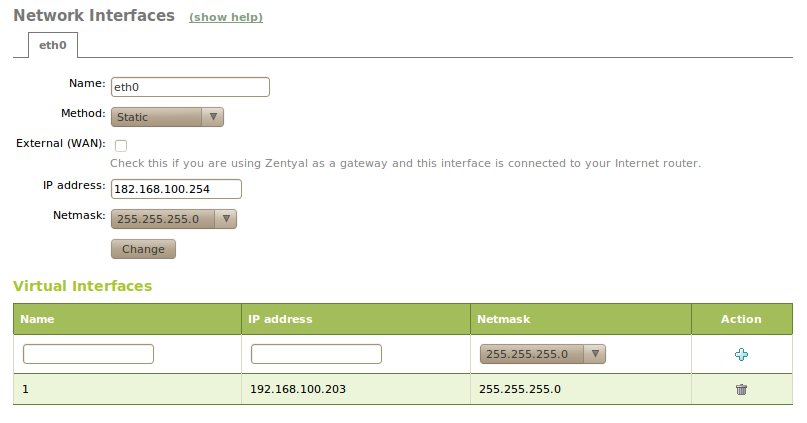
Static configuration of the network interface
If you have an ADSL router PPPoE [1] (a connection method used by some Internet providers), you can also configure this type of connections. To do this, you only have to select PPPoE and introduce the Username and Password given by your provider.
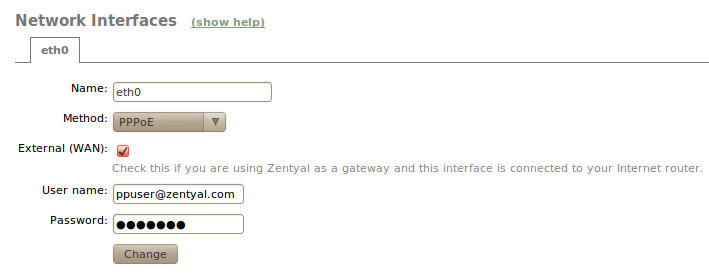
PPPoE configuration of the network interface
In case you have to connect the server to one or more VLAN networks, select Trunk (802.11q). Once you have selected this method you can create as many interfaces associated to tag as you wish and you can consider them as if they were real interfaces.
The VLAN network infrastructure allows you to segment the local network to improve performance and security without the need to invest in hardware that would be necessary for each segment.
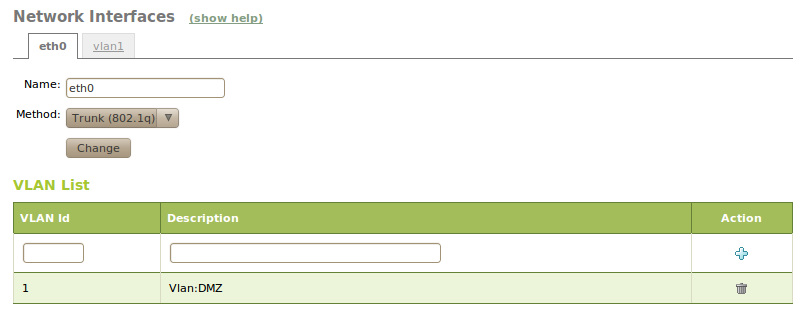
VLAN configuration of the network interface
The bridged mode consists of associating two physical network interfaces of your server that are connected to two different networks. For example, one card connected to the router and another card connected to the local network. By using this association you can redirect the network traffic in transparent more from one card to the other.
The main advantage of this is that you won’t need to make absolutely any change in the configuration of the clients of the local network when you install Zentyal server as a gateway and nevetherless, you can manage the traffic that goes through your server with firewall, content filtering or intrusion detection system.
You can create this association by changing the method of the interfaces to Bridged network. You can see how by choosing this option a new selector, Bridged network, appears so that you can choose the group of interfaces you want to associate to this interface.
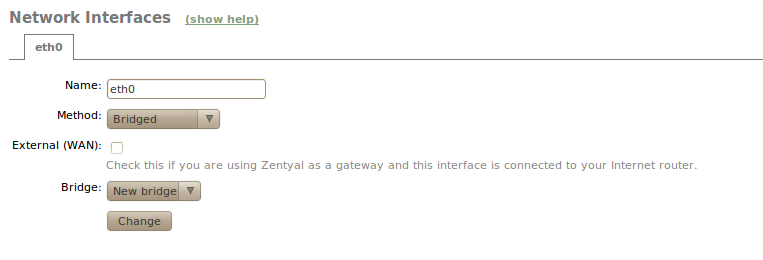
Creation of a bridge
This will create a new virtual interface bridge that will have its own configuration as a real interface and therefore, even the traffic will go throught in transparent mode, it can be used to offer other services such as could be the proper administrative interface of Zentyal or a file server.
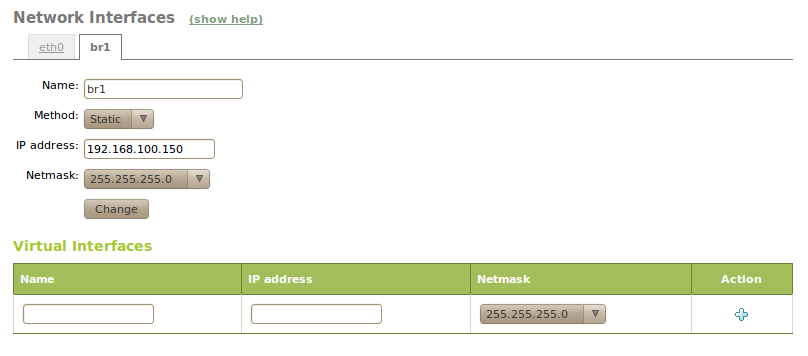
Configuration bridged interfaces
In case you want to configure the network interface manually, you should define the gateway to Internet in Network ‣ Gateways. Normally this is done automatically if you use DHCP or PPPoE, but it doesn’t happen in the rest of the cases. For each gateway we can indicate the Name, IP address, Interface to which it is connected, its Weight that defines the priority in comparation with other gateways and if it is the Predetermined of all of them.
In addition, if it is necessary to use HTTP proxy for Internet access, you can also configure it in this section. This proxy will be used by Zentyal for connections such as update and installation of packages or update of the antivirus.
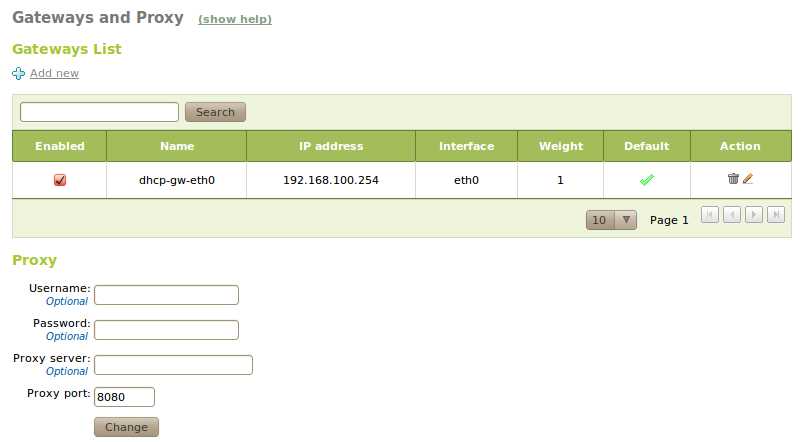
Configuration of gateways
To allow the system to resolve domain names, you must indicate the address of one or several name servers in Network ‣ DNS.
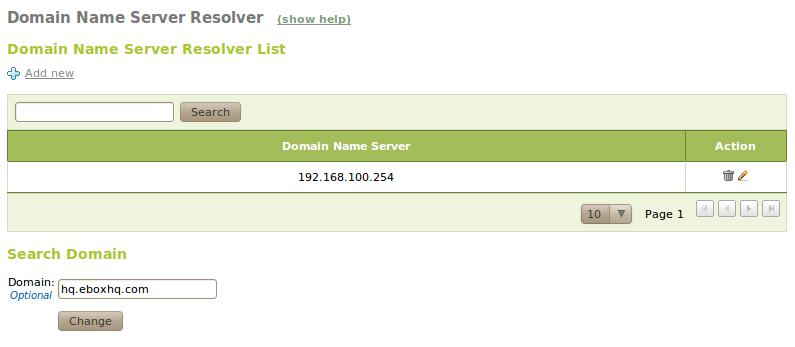
Configuration of DNS servers
If the Internet connection assigns a dynamic IP address and you want a domain name to direct towards it, you need a provider of dynamic DNS. By using Zentyal you can configure some of the most popular providers of dynamic DNS.
To do this, you must go to Network ‣ DynDNS where you can select the Service provider, Username, Password and Hostname that you want to update when the public address will change, and then select Enable dynamic DNS.
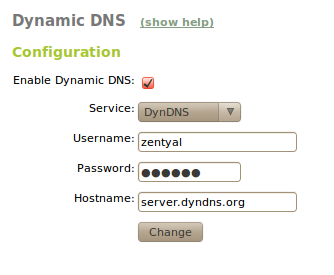
Configuration of Dynamic DNS
Zentyal connects to the provider to obtain a public IP address avoiding any translation of the network address (NAT) between the server and Internet. If you are using this feature in multirouter [2] scenario, you must not forget to create a rule that makes the connectios to the provider to use always the same gateway.
| [1] | http://en.wikipedia.org/wiki/PPPoE |
| [2] | Check Configuring of the balancing with Zentyal for more details. |
Network diagnosis
To check if you have configured the network correctly, you can use the tools available in Network ‣ Diagnosis.
Ping is a tool that uses the ICMP network diagnosis protocol to observe whether a particular remote host is reachable by means of a simple “echo request”.
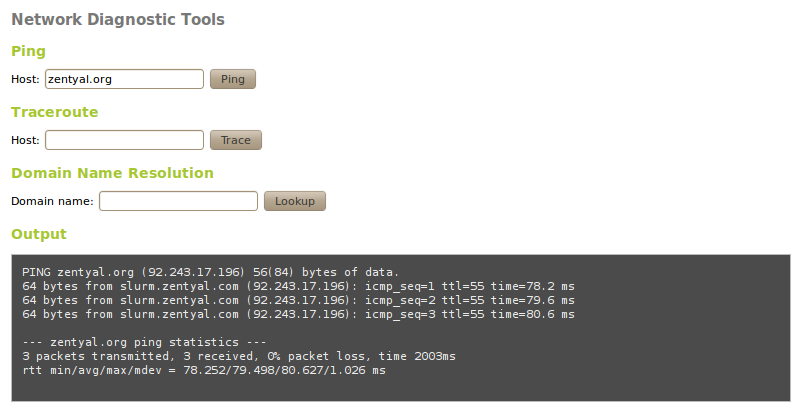
Network diagnosis tools, ping
You can also use the traceroute tool that is used to determine the route taken by packages across different networks until reaching the given remote host.
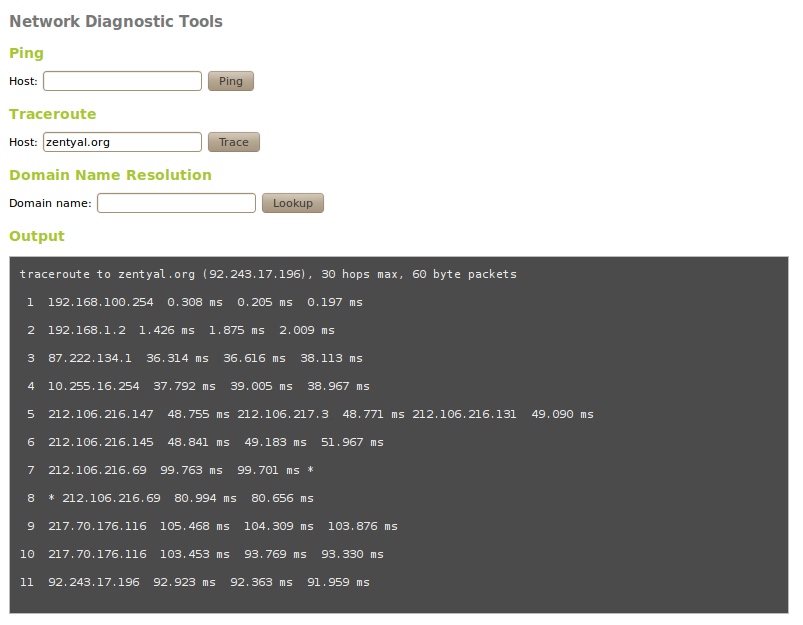
Tool traceroute
Besides, you can use the domain name resolution tool, which is used to verify the correct functioning of the name service.
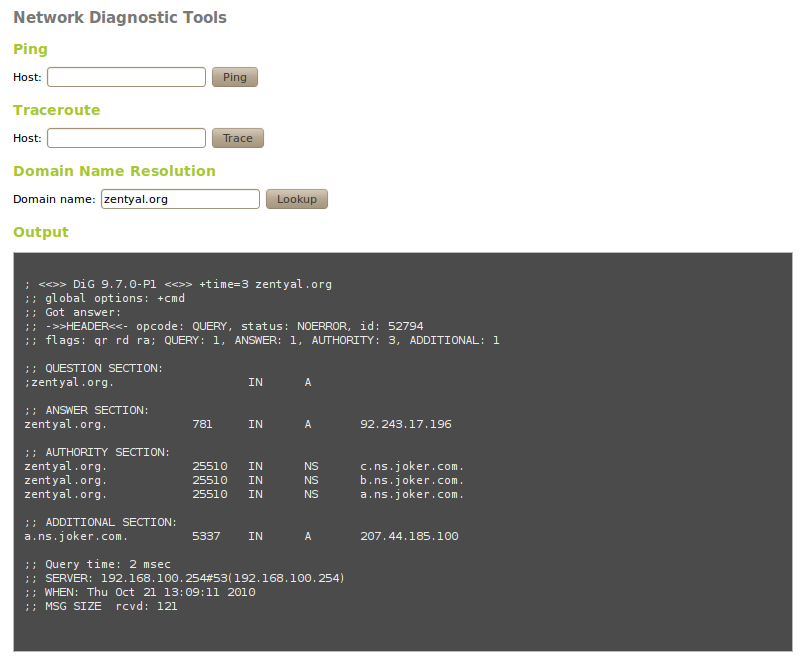
Domain name resolution