Shader materials
Introduction
For the most common cases, Fixed materials are enough to create the desired textures or look and feel. Shader materials are a step beyond that, adding a huge amount of flexibility. With them, it is possible to:
- Create procedural textures.
- Create complex texture blendings.
- Create animated materials, or materials that change with time.
- Create refractive effects or other advanced effects.
- Create special lighting shaders for more exotic materials.
- Animate vertices, like tree leaves or grass.
- And much more!
Traditionally, most engines will ask you to learn GLSL, HLSL or CG, which are pretty complex for the skillset of most artists. Godot uses a simplified version of a shader language that will detect errors as you type, so you can see your edited shaders in real-time. Additionally, it is possible to edit shaders using a visual, node-based graph editor.
Creating a ShaderMaterial
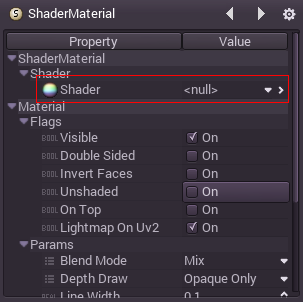
Create a new ShaderMaterial in some object of your choice. Go to the “Shader” property, then create a new “MaterialShader” (use “MaterialShaderGraph” for access to the visual graph editor):

Edit the newly created shader, and the shader editor will open:

There are three code tabs open, the first is for the vertex shader, the second for the fragment and the third for the lighting. The shader language is documented in Shading language so a small example will be presented next.
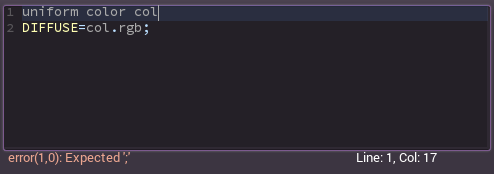
Create a very simple fragment shader that writes a color:
uniform color col;
DIFFUSE = col.rgb;
Code changes take place in real-time. If the code is modified, it will be instantly recompiled and the object will be updated. If a typo is made, the editor will notify of the compilation failure:

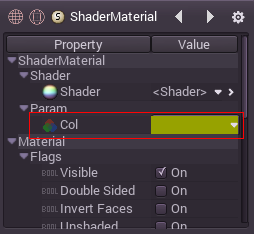
Finally, go back and edit the material, and the exported uniform will be instantly visible:

This allows to very quickly create custom, complex materials for every type of object.