Shadow mapping
Introduction
Simply throwing a light is not enough to realistically illuminate a scene. It should be, in theory, but given the way video hardware works, parts of objects that should not be reached by light are lit anyway.
Most people (including artists), see shadows as something projected by light, as if they were created by the light itself by darkening places that are hidden from the light source.
This is actually not correct and it’s important to understand that shadows are places where light simply does not reach. As a rule (and without counting indirect light) if a light is turned off, the places where shadow appear should remain the same. In other words, shadows should not be seen as something “added” to the scene, but as an area that “remains dark”.
All light types in Godot can use shadow mapping, and all support several different techniques that trade quality by performance. Shadow mapping uses a texture storing the “depth view” of the light and checks against it in real-time for each pixel it renders.
The bigger the resolution of the shadow map texture, the more detail the shadow has, but more video memory and bandwidth consumed (which means frame-rate goes down).
Shadows by light type
Directional light shadows
Directional lights can affect a really big area. The bigger the scene, the bigger the affected area. Given the shadow map resolution stays the same, the same amount of shadow pixels cover a bigger area, resulting in blocky shadows. Multiple techniques exist to deal with resolution problems, but the most common one is PSSM (Parallel Split Shadow Maps):
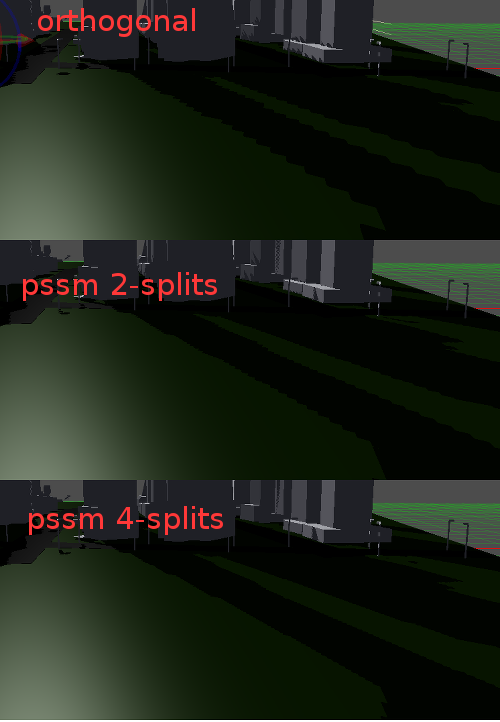
These techniques divide the view in 2 or 4 sections, and a shadow is rendered for each. This way, close objects can use larger shadow while further away objects will use one in less detail, but in proportion this seems to make the shadow map size increase while it’s actually kept the same. Of course, this technique is not free, the more splits the more the performance goes down. On mobile, it is generally inconvenient to use more than 2 splits.
An alternative technique is PSM (Perspective Shadow Mapping). This technique is much cheaper than PSSM (as cheap as orthogonal), but it only really works for a few camera angles respect to the light. In other words, PSM is only useful for games where the camera direction and light direction are both fixed, and the light is not parallel to the camera (which is when PSM completely breaks).
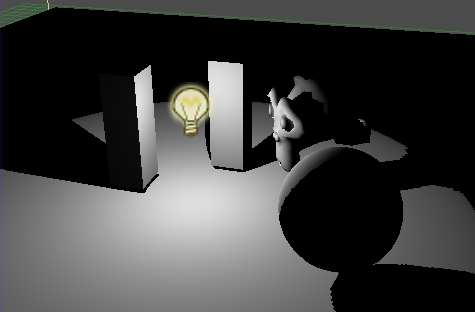
Omni light shadows
Omnidirectional lights are also troublesome. How to represent 360 degrees of light with a single texture? There are two alternatives, the first one is to use DPSM (Dual Paraboloid Shadow Mapping). This technique is fast, but it requires DISCARD to be used (which makes it not very usable on mobile). DPSM can also look rather bad if the geometry is not tessellated enough, so more vertices might be necessary if it doesn’t look tight. The second option is to simply not use a shadow map, and use a shadow cubemap. This is faster, but requires six passes to render all directions and is not supported on the current (GLES2) renderer.
As few considerations when using DPSM shadow maps:
- Keep Slope-Scale on 0.
- Use a small value for Z-Offset, if this look wrong, make it smaller.
- ESM filtering can improve the look.
- The seams between the two halves of the shadow are generally noticeable, so rotate the light to make them show less.
Spot light shadows
Spot light shadows are generally the simpler, just needing a single texture and no special techniques.

Shadows parameters
The fact that shadows are actually a texture can generate several problems. The most common is Z fighting (lines at the edge of the objects that cast the shadows. There are two ways to fix this, the first is to tweak the offset parameters, and the second is to use a filtered shadow algorithm, which generally looks better and has not as many glitches, but consumes more GPU time.
Adjusting z-offset
So, you have decided to go with non-filtered shadows because they are faster, you want a little more detail or maybe you just like the sexy saw-like shadow outlines because they remind you of your favorite previous-gen games. Truth is, this can be kind of be a pain, but most of the time it can be adjusted to have nice results. There is no magic number and whatever result you come up will be different from scene to scene, it just takes a while of tweaking. Let’s go step by step.
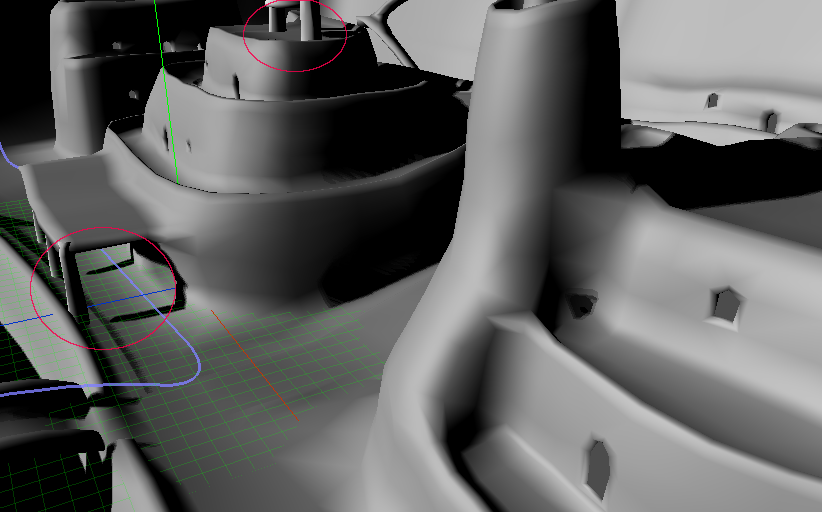
First step is to turn on the shadows, let’s assume that both Z-Offset and Z-Slope-Scale are at 0. You will be greeted by this:
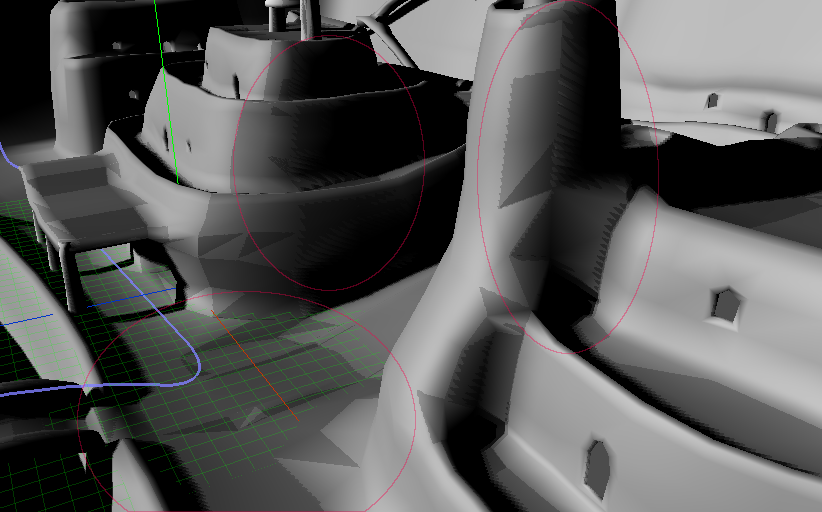
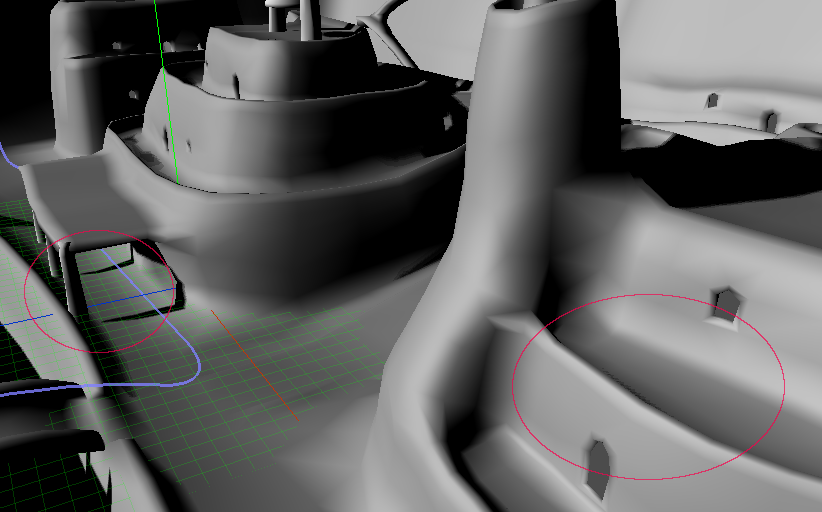
Holy crap, the shadow is all over the place and extremely glitchy! This happens because the shadow is fighting with the same geometry that is casting it. This is called “self-shadowing”. To avoid this meaningless fight, you realize you need to make peace between the shadow and the geometry, so you push back the shadow a little by increasing the shadow Z-Offset. This improves things a lot:
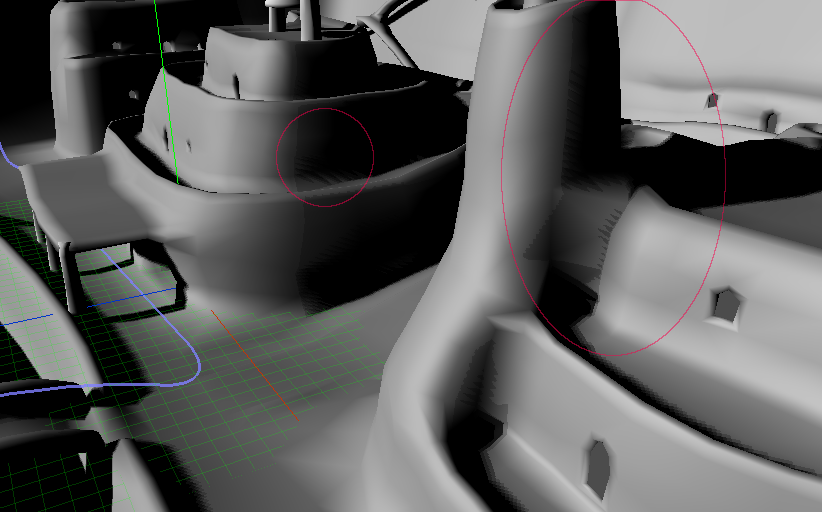
But it’s not quite perfect, self shadowing did not disappear completely. So close to perfection but still not there.. so in a turn of greed you increase the Z-Offset even more!
And it gets rid of those self-shadowings! Hooray! Except something is wrong.. oh, right. Being pushed back too much, the shadows start disconnecting from their casters, which looks pretty awful. Ok, you go back to the previous Z-offset.
This is when Z-Slope-Scale comes to save the day. This setting makes shadow caster objects thinner, so the borders don’t self-shadow:

Aha! Finally something that looks acceptable. It’s perfectly acceptable and you can perfectly ship a game that looks like this (imagine you are looking at Final Fantasy quality art btw, not this horrible attempt at 3D modelling). There may be very tiny bits left of self shadowing that no one cares about, so your inextinguishable greed kicks in again and you raise the Z-Slope Scale again:
Well, that was too much, shadows casted are way too thin and don’t look good anymore. Well, though luck, the previous setting was good anyway, let’s accept that perfection does not exist and move on to something else.
Important!
If you are using shadow maps with directional lights, make sure that the view distance of the camera is set to an optimal range. This means, if the distance between your camera and the visible end of the scene is 100, then set the view distance to that value. If a greater than necessary value is used, the shadow maps will lose detail as they will try to cover a bigger area.
So, always make sure to use the optimal range!
Shadow filtering
Raw shadows are blocky. Increasing their resolution just makes smaller blocks, but they are still blocks.
Godot offers a few ways to filter them (shadow in the example is low-resolution on purpose!):
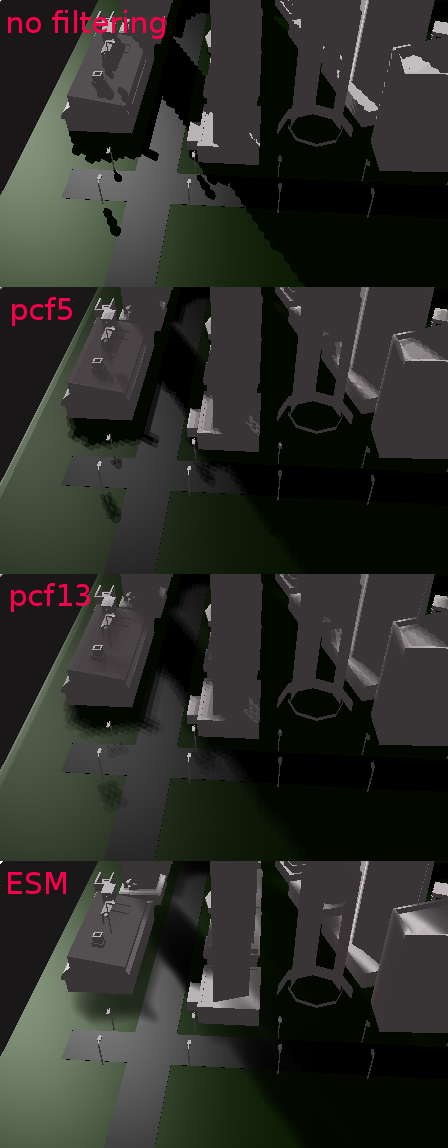
PCF5 and PCF13 are simple texture-space filtering. Will make the texture a little more acceptable but still needs considerable resolution for it to look good.
ESM is a more complex filter and has a few more tweaking parameters. ESM uses shadow blurring (amount of blur passes and multiplier can be adjusted).