Simple 2D game
Pong
In this simple tutorial, a basic game of Pong will be created. There are plenty of more complex examples in the demos included with the engine, but this should get one introduced to basic functionality for 2D Games.
Assets
Some assets are included for this tutorial:
pong_assets.zip.
Scene setup
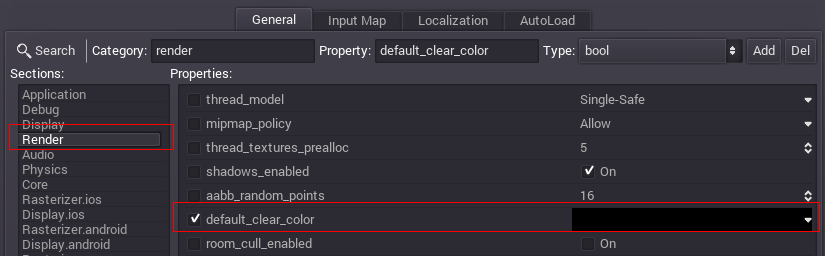
For the sake of the old times, the game will be in 640x400 pixels resolution. This can be configured in the Project Settings (see Configuring the project). The default background color should be set to black:
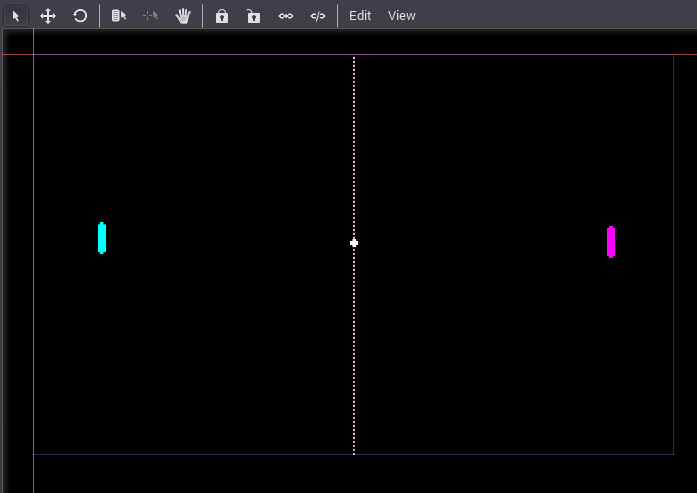
Create a Node2D node for the project root. Node2D is the base type for the 2D engine. After this, add some sprites (Sprite node) and set each to the corresponding texture. The final scene layout should look similar to this (note: the ball is in the middle!):
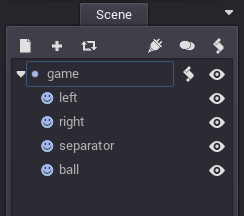
The scene tree should, then, look similar to this:
Save the scene as “pong.scn” and set it as the main scene in the project properties.
Input actions setup
There are so many input methods for video games... Keyboard, Joypad, Mouse, Touchscreen (Multitouch). Yet this is pong. The only input that matters is for the pads going up and down.
Handling all possible input methods can be very frustrating and take a lot of code. The fact that most games allow controller customization makes this worse. For this, Godot created the “Input Actions”. An action is defined, then input methods that trigger it are added.
Open the project properties dialog again, but this time move to the “Input Map” tab.
On it, add 4 actions:
left_move_up, left_move_down, right_move_up, right_move_down.
Assign the keys that you desire. A/Z (for the left player) and Up/Down (for the right player) as keys
should work in most cases.

Script
Create a script for the root node of the scene and open it (as explained in Adding a script). The script will inherit Node2D:
extends Node2D

func _ready():
    pass
In the constructor, two things will be done. The first is to enable processing, and the second to store some useful values. Such values are the dimensions of the screen and the pad:
extends Node2D

var screen_size
var pad_size

func _ready():
    screen_size = get_viewport_rect().size
    pad_size = get_node("left").get_texture().get_size()
    set_process(true)
Then, some variables used for in-game processing will be added:
#speed of the ball (in pixels/second)

var ball_speed = 80
#direction of the ball (normal vector)

var direction = Vector2(-1, 0)
#constant for pad speed (also in pixels/second)

const PAD_SPEED = 150
Finally, the process function:
func _process(delta):
Get some useful values for computation. The first is the ball position
(from the node), the second is the rectangle (Rect2) for each of the pads.
Sprites center their textures by default, so a small adjustment of pad_size / 2
must be added.
var ball_pos = get_node("ball").get_pos()
var left_rect = Rect2( get_node("left").get_pos() - pad_size/2, pad_size )
var right_rect = Rect2( get_node("right").get_pos() - pad_size/2, pad_size )
Since the ball position was obtained, integrating it should be simple:
ball_pos += direction * ball_speed * delta
Then, now that the ball has a new position, it should be tested against everything. First, the floor and the roof:
if ( (ball_pos.y < 0 and direction.y < 0) or (ball_pos.y > screen_size.y and direction.y > 0)):
    direction.y = -direction.y
If one of the pads was touched, change direction and increase speed a little.
if ( (left_rect.has_point(ball_pos) and direction.x < 0) or (right_rect.has_point(ball_pos) and direction.x > 0)):
    direction.x = -direction.x
    ball_speed *= 1.1
    direction.y = randf() * 2.0 - 1
    direction = direction.normalized()
If the ball went out of the screen, it’s game over. Game restarts:
if (ball_pos.x < 0 or ball_pos.x > screen_size.x):
    ball_pos = screen_size * 0.5  # ball goes to screen center
    ball_speed = 80
    direction = Vector2(-1, 0)
Once everything was done with the ball, the node is updated with the new position:
get_node("ball").set_pos(ball_pos)
Only update the pads according to player input. The Input class is really useful here:
#move left pad
var left_pos = get_node("left").get_pos()

if (left_pos.y > 0 and Input.is_action_pressed("left_move_up")):
    left_pos.y += -PAD_SPEED * delta
if (left_pos.y < screen_size.y and Input.is_action_pressed("left_move_down")):
    left_pos.y += PAD_SPEED * delta

get_node("left").set_pos(left_pos)

#move right pad
var right_pos = get_node("right").get_pos()

if (right_pos.y > 0 and Input.is_action_pressed("right_move_up")):
    right_pos.y += -PAD_SPEED * delta
if (right_pos.y < screen_size.y and Input.is_action_pressed("right_move_down")):
    right_pos.y += PAD_SPEED * delta

get_node("right").set_pos(right_pos)
And that’s it! A simple Pong was written with a few lines of code.