Kickstart configuration files allow administrators to create an environment for automating otherwise time-consuming system installations, such as multiple servers or workstations. Kickstart files can be created, modified, and managed within the RHN Satellite interface, and customized by the RHN Satellite web-based interface.
To satisfy the provisioning needs of customers, RHN Satellite provides an interface for developing kickstart profiles that can be used to install Red Hat Enterprise Linux or other operating systems on either new or already-registered systems. This enables systems to be installed automatically to particular specifications.
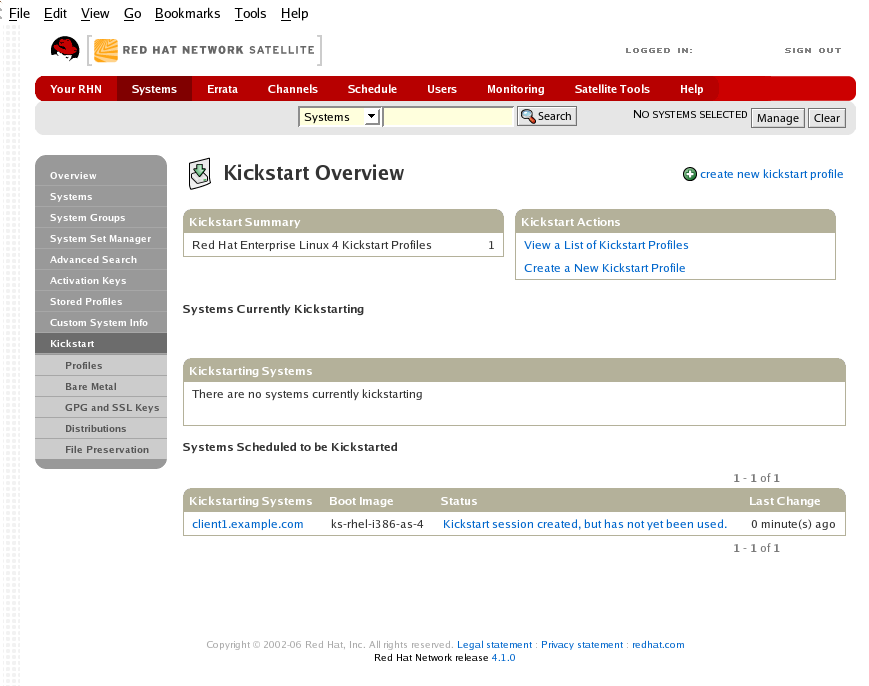
This overview page displays the status of kickstart on your client systems: the types and number of profiles you have created and the progress of systems that are scheduled to be kickstarted. In the upper right is the Kickstart Actions section, which contains a series of links to management actions for your kickstart profiles. Before explaining the various kickstart options that are available from this page, the next section provides some introduction to the subject of kickstart.
7.4.9.1. Introduction to Kickstart
Many system administrators would prefer to use an automated installation method to install Red Hat Enterprise Linux on their machines. To answer this need, Red Hat created the kickstart installation method. Using kickstart, a system administrator can create a single file containing the answers to all the questions that would normally be asked during a typical installation.
Kickstart files can be kept on a single server system and read by individual computers during the installation. This installation method can support the use of a single kickstart file to install Red Hat Enterprise Linux on multiple machines, making it ideal for network and system administrators.
7.4.9.1.1. Kickstart Explained
When a machine is to receive a network-based kickstart, the following events must occur in this order:
After being placed on the network and turned on, the machine's PXE logic broadcasts its MAC address and a request to be discovered.
If a static IP address is not being used, the DHCP server recognizes the discovery request and extends an offer of network information needed for the new machine to boot. This includes an IP address, the default gateway to be used, the netmask of the network, the IP address of the TFTP or HTTP server holding the bootloader program, and the full path and file name of that program (relative to the server's root).
The machine applies the networking information and initiates a session with the server to request the bootloader program.
The bootloader, once loaded, searches for its configuration file on the server from which it was itself loaded. This file dictates which kernel and kernel options, such as the initial RAM disk (initrd) image, should be executed on the booting machine. Assuming the bootloader program is SYSLINUX, this file is located in the pxelinux.cfg directory on the server and named the hexadecimal equivalent of the new machine's IP address. For example, a bootloader configuration file for Red Hat Enterprise Linux AS 2.1 should contain:
port 0
prompt 0
timeout 1
default My_Label
label My_Label
kernel vmlinuz
append ks=http://myrhnsatellite/ initrd=initrd.img network apic
The machine accepts and uncompresses the init image and kernel, boots the kernel, and initiates a kickstart installation with the options supplied in the bootloader configuration file, including the server containing the kickstart configuration file.
This kickstart configuration file in turn directs the machine to the location of the installation files.
The new machine is built based upon the parameters established within the kickstart configuration file.
7.4.9.1.2. Kickstart Prerequisites
Although Red Hat Network has taken great pains to ease the provisioning of systems, some preparation is still required for your infrastructure to handle kickstarts. For instance, before creating kickstart profiles, you may consider:
A DHCP server is not required for kickstarting, but it can make things easier. If you are using static IP addresses, you should select static IP while developing your kickstart profile.
An FTP server can be used in place of hosting the kickstart distribution trees via HTTP.
If conducting a bare metal kickstart, you should 1)Configure DHCP to assign required networking parameters and the bootloader program location. 2)Specify within the bootloader configuration file the kernel to be used and appropriate kernel options.
7.4.9.1.3. Building Bootable Kickstart ISOs
While you can schedule a registered system to be kickstarted to a new operating system and package profile, it is also useful to be able to kickstart a system that is not registered with RHN, or does not yet have an operating system installed. One common method of doing this is to create a bootable CD-ROM that is inserted into the target system. When the system is rebooted, it boots from the CD-ROM, loads the kickstart configuration from the RHN Servers or your Satellite, and proceeds to install Red Hat Enterprise Linux according to the kickstart profile you have created.
To do this, copy the contents of /isolinux from the first CD-ROM of the target distribution. Then edit the isolinux.cfg file to default to 'ks'. Change the 'ks' section to the following template:
label ks
kernel vmlinuz
append text ks={url} initrd=initrd.img lang= devfs=nomount ramdisk_size=16438 \
{ksdevice}
IP addressed-based kickstart URLs will look something like this:
http://my.sat.server/kickstart/ks/mode/ip_range
The kickstart distribution selected by the IP range should match the distribution from which you are building, or errors will occur. {ksdevice} is optional, but looks like:
ksdevice=eth0
It is possible to change the distribution for a kickstart profile within a family, such as Red Hat Enterprise Linux AS 4 to Red Hat Enterprise Linux ES 4, by specifying the new distribution label. Note that you cannot move between versions (2.1 to 3) or between updates (U1 to U2).
Next, you may customize isolinux.cfg further for your needs, such as by adding multiple kickstart options, different boot messages, shorter timeout periods, etc.
Next, create the ISO as described in the Making an Installation Boot CD-ROM section of the Red Hat Enterprise Linux 3 Installation Guide. Alternatively, issue the command:
mkisofs -o file.iso -b isolinux.bin -c boot.cat -no-emul-boot -boot-load-size 4 \
-boot-info-table -R -J -v -T isolinux/
Note that isolinux/ is the relative path to the directory containing the isolinux files from the distribution CD, while file.iso is the output ISO file, which is placed into the current directory.
You may then burn the ISO to CD-ROM. To use the disc (assuming you left the label for the kickstart boot as 'ks'), boot the system and type "ks" at the prompt. When you press Enter, the kickstart should begin.
7.4.9.1.4. Integrating Kickstart with PXE
In addition to CD-ROM-based installs, RHN supports kickstarts through a Pre-Boot Execution Environment (PXE). This is less error-prone than CDs, enables kickstarting from bare metal, and integrates with existing PXE/DHCP environments.
To use this method, make sure your systems have network interface cards (NIC) that support PXE, install and configure a PXE server, ensure DHCP is running, and then place the appropriate files on an HTTP server for deployment. Once the kickstart profile has been created, use the URL from the Kickstart Details page, as for CD-ROM-based installs.
To obtain specific instructions for conducting PXE kickstarts, refer to the PXE Network Installations chapter of the Red Hat Enterprise Linux 4 System Administration Guide.
Tip
Upon running the Network Booting Tool as described in the Red Hat Enterprise Linux 4: System Administration Guide, ensure that you select "HTTP" as the protocol and include the domain name of the RHN Satellite in the Server field if you intend to use it to distribute the installation files.
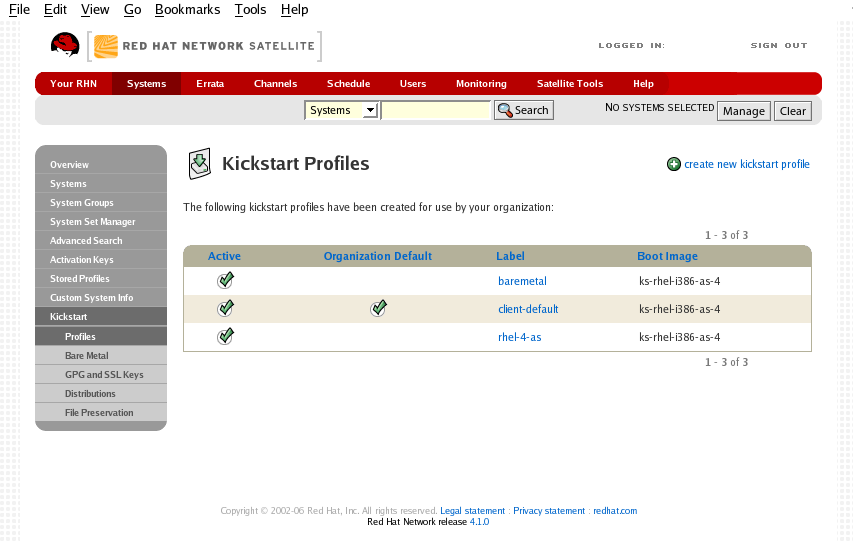
The following sections describe the kickstart options available from the Systems ⇒ Kickstart page.
7.4.9.3. Create a New Kickstart Profile
Click on the Create a New Kickstart Profile link from the Systems ⇒ Kickstart page to start the brief wizard that populates the base values needed for a kickstart profile.
On the first line, enter a kickstart profile label. This label cannot contain spaces, so use dashes (-) or underscores (_) as separators.
Select a Base Channel for this profile, which consists of packages based on a specific architecture and Red Hat Enterprise Linux release, such as Red Hat Enterprise Linux (v.5 for 32-bit x86).
Select a kickstartable tree for this profile. The kickstartable tree drop-down menu is only populated if one or more distributions have been created for the selected base channel.
Select the
Virtualization Type from the drop-down menu. For more information about virtualization, refer to
Chapter 10, Virtualization.
Note
If you do not intend to use the kickstart profile to create virtual guest systems, you can leave the drop-down at the default KVM Virtualized Guest choice.
On the second page, select (or enter) the URL of the kickstart tree.
On the third page, select a root password for the system. Be sure to follow the password recommendations from the
Password Security section of the
Red Hat Enterprise Linux Security Guide, available at
http://www.redhat.com/docs/manuals/enterprise/.
Depending on your base channel, your newly created kickstart profile may be subscribed to a channel that is missing required packages. In order for kickstart to work properly, the following packages should be present in this kickstart's base channel: pyOpenSSL, rhnlib, libxml2-python, and spacewalk-koan and associated packages.
To resolve this issue, ensure that the following items are correct:
Make sure that the rhn-tools child software channel for the kickstart profile's base channel is available to your organization. If it is not, you must request entitlements for the rhn-tools software channel from the Satellite administrator.
Make sure that the rhn-tools child channel for this kickstart profile's base channel is available to your RHN Satellite. If it is not, contact the Satellite administrator and request a satellite-sync of the rhn-tools.
Make sure that the rhn-kickstart and associated packages corresponding to this kickstart are available in the kickstart rhn-tools child channel. If it is not, you must make them available for this kickstart profile to function properly.
The final stage of the wizard presents the Kickstart Details ⇒ Details tab. On this tab and the other sub-tabs, nearly every option for the new kickstart profile can be customized. The following sections describe the options available on each sub-tab.
7.4.9.3.1. Kickstart Details ⇒ Details —

The figure above shows the sub-tabs that are available from the Kickstart Details tab.
From the Kickstart Details ⇒ Details sub-tab, you can:
Rename the profile
Change the operating system it installs by clicking (Change)
Change the Virtualization Type
Note
Changing the Virtualization Type may require changes to the kickstart profile bootloader and partition options, potentially overwriting user customizations. Consult the Partitioning tab to verify any new or changed settings.
Change the amount of Virtual Memory (in Megabytes of RAM) allocated to virtual guests kickstarted with this profile
Change the number of Virtual CPUs for each virtual guest
Change the the Virtual Storage Path from the default in /var/lib/xen/
Change the amount of Virtual Disk Space (in Gigabytes) alloted to each virtual guest
Change the Virtual Bridge for networking of the virtual guest
Deactivate the profile so that it cannot be used to schedule a kickstart by removing the Active checkmark
Check whether to enable logging for custom %post scripts to the /root/ks-post.log file
Check whether to enable logging for custom %pre scripts to the /root/ks-pre.log file
Check whether to preserve the ks.cfg file and all %include fragments to the /root/ directory of all systems kickstarted with this profile.
Select whether this profile is the default for all of your organization's kickstarts by checking or unchecking the box.
Add any Kernel Options in the corresponding text box.
Add any Post Kernel Options in the corresponding text box.
Enter comments that are useful to you in distinguishing this profile from others
7.4.9.3.2. Kickstart Details ⇒ Operating System —
From this page, you can make the following changes to the operating system that the kickstart profile installs:
- Change the base channel
Select from the available base channels, such as Red Hat Enterprise Linux v.5 for 32-bit x86. Satellite administrators can see a list of all base channels that are currently synced to the Satellite.
- Child Channels
Subscribe to any available child channels of the base channel, such as the rhn-tools* channel.
- Available Trees
Use the drop-down menu to choose the available trees that are associated with the base channel.
- File Location
The exact location from which the kickstart tree is mounted. This value is determined when the profile is created. You can view it on this page but you cannot change it.
7.4.9.3.3. Kickstart Details ⇒ Variables
Kickstart variables can be used to substitute values into kickstart profiles. To define a variable, create a name-value pair (name/value) in the text box.
For example, if you wanted to kickstart a system that joins the network for specified department (for example the Engineering organization) you can create a profile variable to set the ip address and the gateway server address to a variable that any system using that profile will use. Add the following line to the Variables text box.
IPADDR=192.168.0.28
GATEWAY=192.168.0.1
To use the profile variable, you can use the name of the variable within the profile to substitute in the value. For example, the network portion of a kickstart file looks like the following:
network --bootproto=static --device=eth0 --onboot=on --ip=$IPADDR
--gateway=$GATEWAY
The $IPADDR will be 192.168.0.28, and the $GATEWAY will be 192.168.0.1
Note
There is a hierarchy when creating and using variables in kickstart files. System kickstart variables take precedence over Profile variables, which in turn take precendence over Distribution variables. Understanding this hierarchy can alleviate confusion when using variables in kickstarts.
Using variables are just one part of the larger Cobbler infrastructure for creating templates that can be shared between multiple profiles and systems. For more information about Cobbler and kickstart templates, refer to
Chapter 11, Cobbler.
7.4.9.3.4. Kickstart Details ⇒ Advanced Options —
From this page, you can toggle several installation options on and off by checking and unchecking the boxes to the left of the option. For most installations, the default options are correct. The Red Hat Enterprise Linux System Administration Guide discusses each of these options in detail.
7.4.9.3.5. Kickstart Details ⇒ Bare Metal Kickstart —
This sub-tab provides the information necessary to kickstart systems that are not currently registered with RHN. Using the on-screen instructions, you may either kickstart systems using boot media (CD-ROM) or by IP address.
7.4.9.3.6. System Details ⇒ Details —
The figure above shows the sub-tabs that are available from the System Details tab.
From the System Details ⇒ Details sub-tab, you can:
Select from DHCP and static IP, depending on your network
Choose the level of SELinux that is configured on kickstarted systems
Enable configuration management or remote command execution on kickstarted systems
Change the root password associated with this profile
7.4.9.3.7. System Details ⇒ Locale —
From this sub-tab, you can change the timezone associated with kickstarted systems.
7.4.9.3.8. System Details ⇒ Partitioning —
From this sub-tab, you can indicate the partitions that you wish to be created during installation. For example:
partition /boot --fstype=ext3 --size=200
partition swap --size=2000
partition pv.01 --size=1000 --grow
volgroup myvg pv.01 logvol / --vgname=myvg --name=rootvol --size=1000 --grow
7.4.9.3.9. System Details ⇒ File Preservation —
If you have previously created a file preservation list, you may include that list as part of the kickstart. This will prevent the files in that list from being over-written during the installation process. Refer to
Section 7.4.9.7, “Kickstart ⇒ File Preservation —
” for information on how to create a file preservation list.
7.4.9.3.10. System Details ⇒ GPG and SSL —
From this sub-tab, select the GPG keys and/or SSL certificates to be imported to the kickstarted system during the %post section of the kickstart. For Satellite customers, this list includes the SSL Certificate used during the installation of the Satellite.
Note
Any GPG key you wish to import to the kickstarted system must be in ASCII rather than binary format.
7.4.9.3.11. System Details ⇒ Troubleshooting —
From this sub-tab, you can change information that may help with troubleshooting hardware problems:
- Bootloader
For some headless systems, it is better to select the non-graphic LILO bootloader.
- Kernel Parameters
Enter kernel parameters here that may help to narrow down the source of hardware issues.
7.4.9.3.12. Software ⇒ Package Groups —
The figure above shows the sub-tabs that are available from the Software tab.
Enter the package groups, such at @office or @admin-tools you would like to install on the kickstarted system in the large text box on this page. If you would like to know what package groups are available, and what packages they contain, refer to the RedHat/base/ file of your kickstart tree. Satellite customers will most likely locate this file here: /var/www/satellite/rhn/kickstart/<kickstart label>/RedHat/base/comps.xml.
7.4.9.3.13. Software ⇒ Package Profiles —
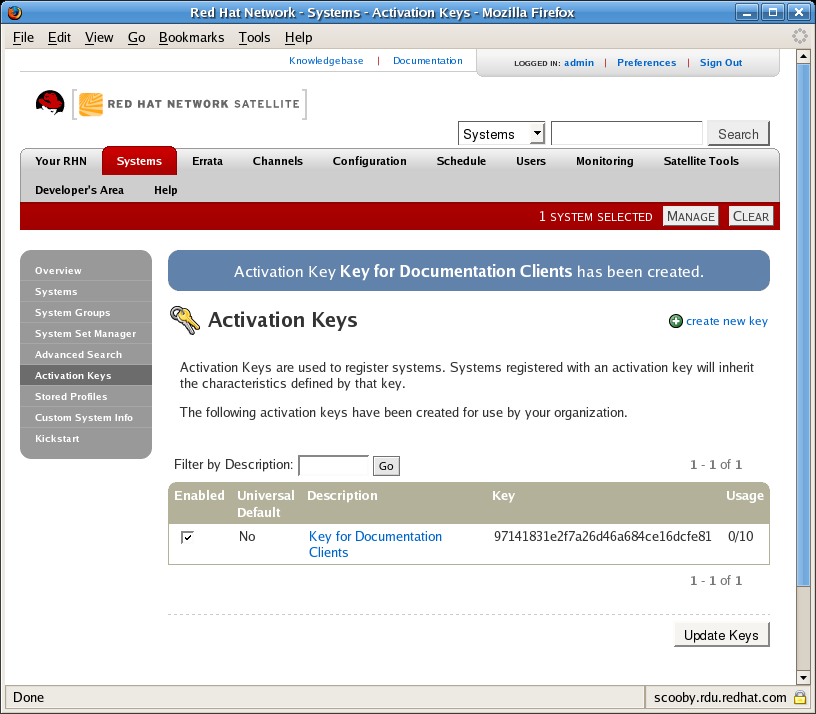
7.4.9.3.14. Activation Keys —
The Activation Keys tab, which has no sub-tabs, allows you select Activation Keys to include as part of the kickstart profile. These keys, which must have been created previous to creating the kickstart profile, will be used when re-registering kickstarted systems.
7.4.9.3.15. Scripts —
The Scripts tab, which has no sub-tabs, is where %pre and %post scripts are created. This page lists any scripts that have already been created for this kickstart profile. To create a new kickstart script:
Click the add new kickstart script link in the upper right
Enter the path to the scripting language used to create the script, such as /usr/bin/perl
Enter the full script in the large text box
Indicate whether this script is to be executed in the %pre or %post section of the kickstart process
Indicate whether this script is to run outside of the chroot environment. Refer to the Post-installation Script section of the Red Hat Enterprise Linux System Administration Guide for further explanation of the nochroot option
Note
RHN supports the inclusion of separate files within the Partition Details section of the kickstart profile. For instance, you may dynamically generate a partition file based on the machine type and number of disks at kickstart time. This file can be created via %pre script and placed on the system, such as /tmp/part-include. Then you can call for that file by including the following line within the Partition Details field of the System Details ⇒ Partitioning tab:
%include /tmp/part-include
7.4.9.3.16. Kickstart File —
The Kickstart File tab, which has no sub-tabs, allows you to view or download the kickstart profile that has been generated from the options chosen in the previous tabs.
7.4.9.5. Kickstart ⇒ GPG and SSL Keys —
Lists keys and certificates available for inclusion in kickstart profiles and provides a means to create new ones. This is especially important for customers of RHN Satellite or RHN Proxy Server because systems kickstarted by them must have the server key imported into RHN and associated with the relevant kickstart profiles. Import it by creating a new key here and then make the profile association in the GPG and SSL keys subtab of the Kickstart Details page.
To develop a new key/certificate, click the create new stored key/cert link in the upper-right corner of the page. Enter a description, select the type, upload the file, and click the Update Key button. Note that a unique description is required.
Important
The GPG key you upload to RHN must be in ASCII format. Using a GPG key in binary format causes anaconda, and therefore the kickstart process, to fail.
7.4.9.6. Kickstart ⇒ Distributions —
The Distributions page enables you to find and create custom installation trees that may be used for kickstarting.
Note
The Distrbutions page does not display Red Hat distributions already provided. They can be found within the Distribution dropdown menu of the Kickstart Details page.)
Before creating a distribution, you must make an installation tree available, as described in the Kickstart Installations chapter of the Red Hat Enterprise Linux System Administration Guide. This tree must be located in a public directory on an HTTP or FTP server.
Important
RHN Satellite users should note that channels imported with satellite-sync are made available automatically and do not require the creation of a separate installation tree. These trees are available to client systems that kickstart through the Satellite. While you may be able to access the files from a non-kickstarting client, this functionality is not supported and may be removed at any time in the future.
To create a new distribution, enter a label (without spaces) in the Distribution Label field, such as my-orgs-rhel-as-5. In the Tree Path field, paste the path or URL to the base of the installation tree. (You can test this by appending "README" to the URL in a Web browser, pressing Enter, and ensuring that the distribution's readme file appears.)
Select the matching distribution from the Base Channel and Installer Generation dropdown menus, such as Red Hat Enterprise Linux (v. 5 for 32-bit x86) and Red Hat Enterprise Linux 5, respectively. When finished, click the Create Kickstart Distribution button.
7.4.9.6.1. Kickstart ⇒ Distributions ⇒ Variables
Kickstart variables can be used to substitute values into kickstart profiles. To define a variable, create a name-value pair (name/value) in the text box.
For example, if you wanted to kickstart a system that joins the network for specified department (for example the Engineering organization) you can create a profile variable to set the ip address and the gateway server address to a variable that any system using that profile will use. Add the following line to the Variables text box.
IPADDR=192.168.0.28
GATEWAY=192.168.0.1
To use the distribution variable, you can use the name of the variable within the profile to substitute in the value. For example, the network portion of a kickstart file looks like the following:
network --bootproto=static --device=eth0 --onboot=on --ip=$IPADDR --gateway=$GATEWAY
The $IPADDR will be 192.168.0.28, and the $GATEWAY will be 192.168.0.1
Note
There is a hierarchy when creating and using variables in kickstart files. System kickstart variables take precedence over Profile variables, which in turn take precendence over Distribution variables. Understanding this hierarchy can alleviate confusion when using variables in kickstarts.
Using variables are just one part of the larger Cobbler infrastructure for creating templates that can be shared between multiple profiles and systems. For more information about Cobbler and kickstart templates, refer to
Chapter 11, Cobbler.
7.4.9.7. Kickstart ⇒ File Preservation —
Collects lists of files to be protected and re-deployed on systems during kickstart. For instance, if you have many custom configuration files located on a system to be kickstarted, enter them here as a list and associate that list with the kickstart profile to be used.
To use this feature, click the create new file preservation list link at the top and enter a relevant label and all files and directories to be preserved on the resulting page. Enter absolute paths to all files and directories. Then click Create List.
Important
Although file preservation is useful, it does have limitations. First, each list is limited to a total size of 1 MB. Further, special devices like /dev/hda1 and /dev/sda1 are not supported. Finally, only file and directory names may be entered. No regular expression wildcards can be included.