Amazon EC2
Amazon supplies a prebuilt Stackato AMI on its EC2 platform.
Initial Setup
Request access to the Stackato AMI.
You will need to provide your AWS Account ID (12-digit number) and will receive a confirmation email from ActiveState when the AMI have been successfully provisioned into your AWS Account. It will appear in the US East (Virginia) Private Images section.
Launch a Medium or larger (2GB+ RAM) 64-bit instance.
At Advanced Instance Details, just press Continue. At the next page, provide a value for key Name to track the instance you are working with. No key pair is necessary.
Create New Security Group, because the default only allows ports 80 and 22. Allow SSH/HTTP(S). You can allow all ICMP if you want to be able to ping the machine. See the Security Groups section for details.
After launching the image, associate an Elastic IP with it. Elastic IP allocates a static external address for your cluster and exposes this address on the border router where the cluster is hosted. The router associates this address with a corresponding dynamic address local to your cluster. This address is leased over DHCP, along with the address of the local DNS server, which in turn keeps track of private addresses allocated by the DHCP server. Thus each node in your cluster automatically knows the private address of the head node, while outside traffic knows the public address.
Publish this external address for your chosen domain name via either DNS or dynamic DNS. For example, a static DNS zone file for "stackato-test" in "example.com" would have these entries:
stackato-test     IN  A       AWS-Elastic-IP.
*.stackato-test   IN  CNAME   stackato-test
(Note the "." ending the A record.)
See the DNS section for other guidance on DNS configuration.
Once the Stackato server is launched, login via ssh as user stackato with password stackato:
$ ssh [email protected]
Do not change the password in this step - it will happen in the console setup.
In this example, stackato-test.ddns.us will be the fully qualified domain name (FQDN) resolved by dynamic DNS at domain ddns.us:
$ kato node rename stackato-test.ddns.us
At this point you can complete the configuration of the Stackato micro cloud via the Management Console. Direct your browser to the hostname you've configured above, and step through the Welcome pages to create the first admin user. The password you use here will become the stackato system user password for subsequent logins via ssh.
To setup a multi-node, clustered Stackato PaaS, follow the steps outlined in the Cluster Setup documentation.
Security Group Settings
Create a new "Stackato" AWS Security Group or modify an existing one to fulfils the requirements listed here. The Security Group settings will vary depending on whether Stackato is configured as a stand-alone micro cloud, or a full cluster.
Security groups can be managed from either the AWS Console or EC2 commands such as ec2-create-group and ec2-authorize.
Single AWS Instance
For a single micro cloud Stackato instance, only the following TCP ports are required:
Port Service Source 22 ssh 0.0.0.0/0 (or specific IP) 80 http 0.0.0.0/0 443 https 0.0.0.0/0
This will allow administrative access via SSH and general user access via HTTP and HTTPS. In a micro cloud configuration, all Stackato components communicate with one another via localhost (127.0.0.1), so additional port access should not be required.
AWS Cluster
With a Stackato cluster, you must allow TCP access on all ports (0 - 65535) between the nodes of the cluster. The easiest way to do this is to specify the "Stackato" Security Group (or the name of your existing one) as the Source in this rule:
Port Service Source 0 - 65535 various Stackato 22 ssh 0.0.0.0/0 (or specific IP) 80 http 0.0.0.0/0 443 https 0.0.0.0/0
When adding "Stackato" to the Source field in AWS Management Console, the name is translated into the Security Group ID (e.g. "sg-0cdb4362 (Stackato)").
This configuration exposes ssh, HTTP, and HTTPS access to all nodes in the cluster, which you may not want. You could further lock down access by creating a second "Stackato-Internal" Security Group which exposes all TCP ports only to the Stackato and Stackato-Internal groups. This allows access on all TCP ports, but only for the Stackato and Stackato-Internal groups.
Port Service Source 0 - 65535 various Stackato 0 - 65535 various Stackato-Internal
All DEA and Data Service nodes would use the "Stackato-Internal" group, while externally facing nodes (e.g. Router) would use the "Stackato" group.
Note
Harbor (Port Service) Node Configuration
The optional Harbor TCP/UDP port service must be set up on a node with a public network interface if you wish to enable port forwarding for user applications. The security group or firewall settings for this node should make the configured port range accessible publicly. See Harbor Setup for full configuration instructions.
Note
See Stackato port requirements for more information on how these ports are used.
Verify /etc/hosts
See Modifying /etc/hosts.
System Monitoring with Nagios
If Nagios is installed on your EC2 instances, you can use it to monitor and report resource utilization. See the Best Practices Guide for details.
Persistent storage for /var/vcap
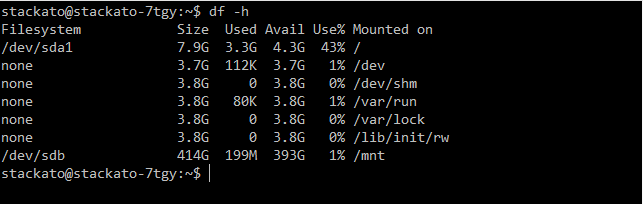
The default set of disks in an EC2 instance is rather limited. Root volumes are of limited size, and the disk mounted on /mnt is ephemeral. The size of the ephemeral disk varies by the instance type. Stackato stores its services data on the root filesystem.
It's therefore prudent to check EC2 instances for disk utilization. In the following example, run on a fresh medium Stackato instance, we can see that the root filesystem is already almost half full:
$ df -h
You can create a more robust instance by moving the Stackato service data and droplets onto an Amazon EBS (Elastic Block Store) volume. Assuming that you have signed up for EBS, the procedure is as follows:
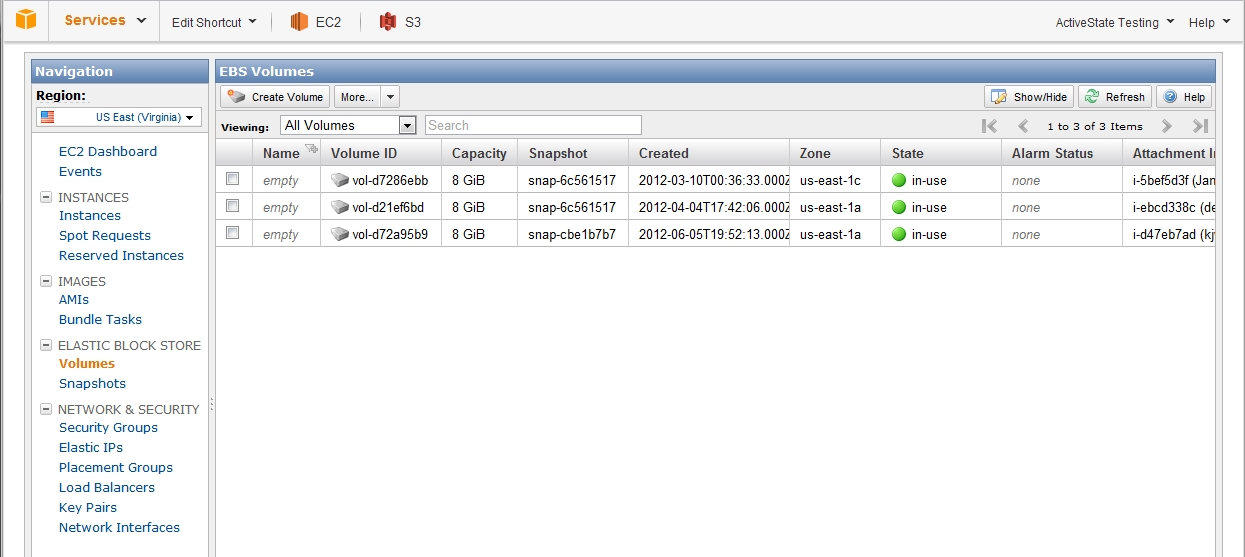
Create the EBS Volume
In the EC2 console, click on the Volumes entry under the Elastic Block Store section.
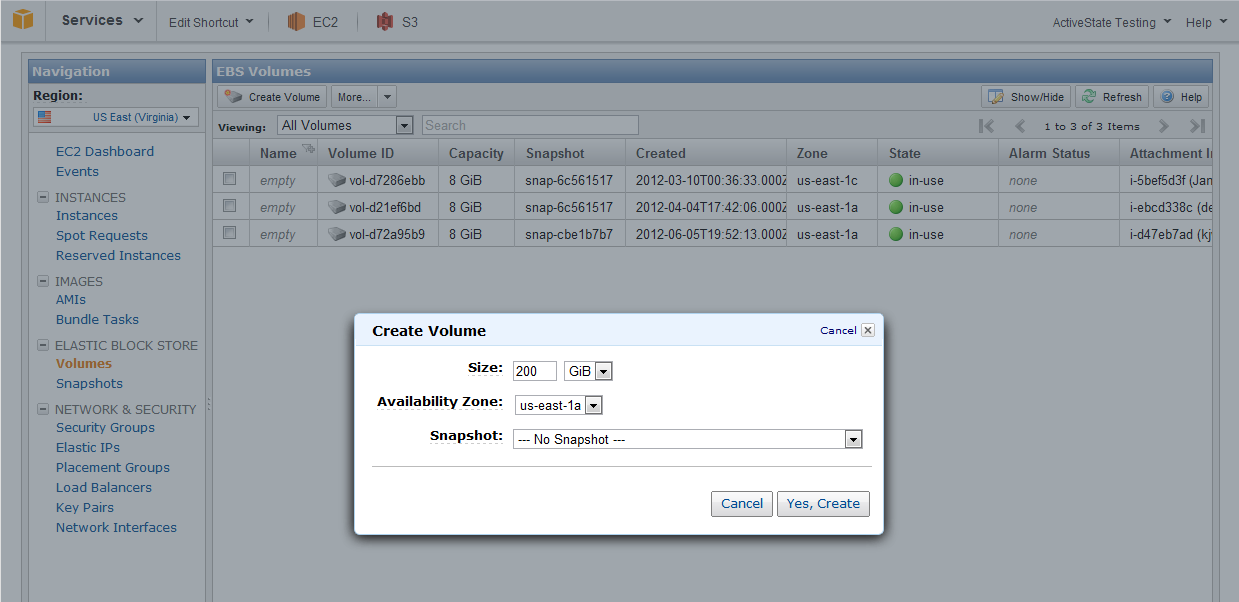
Click the Create Volume button and enter the size you wish your EBS volume to have. Make sure you set the Availability Zone to match the zone your instance is running in.
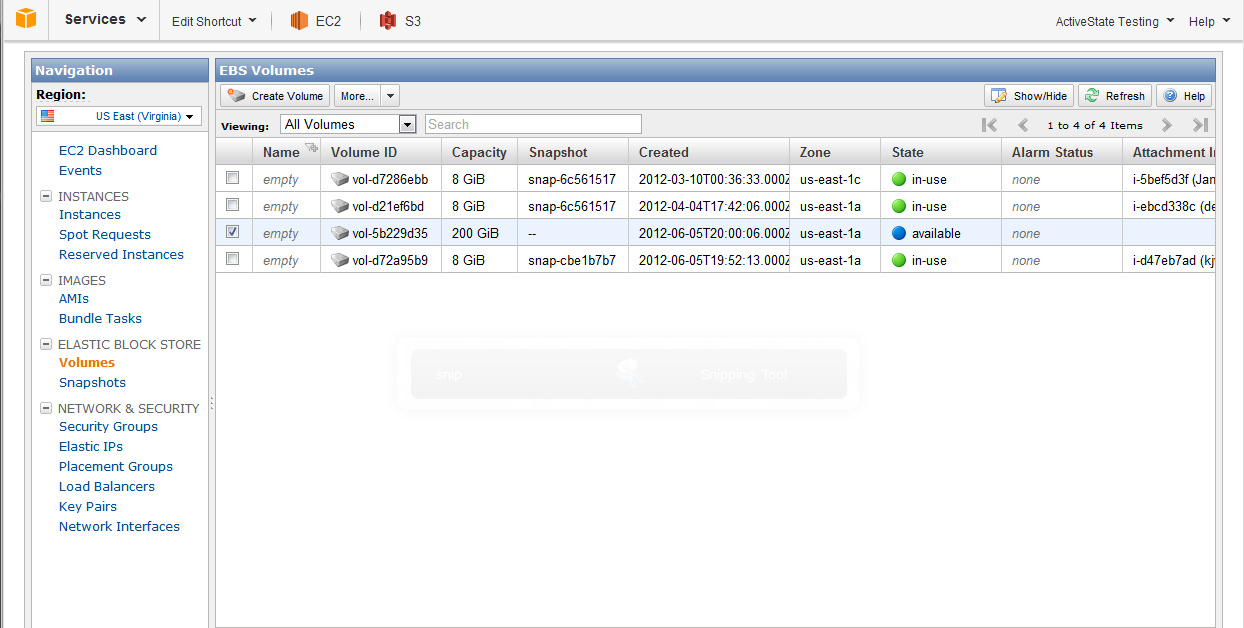
Your volume is now ready to attach and will be marked as "Available".
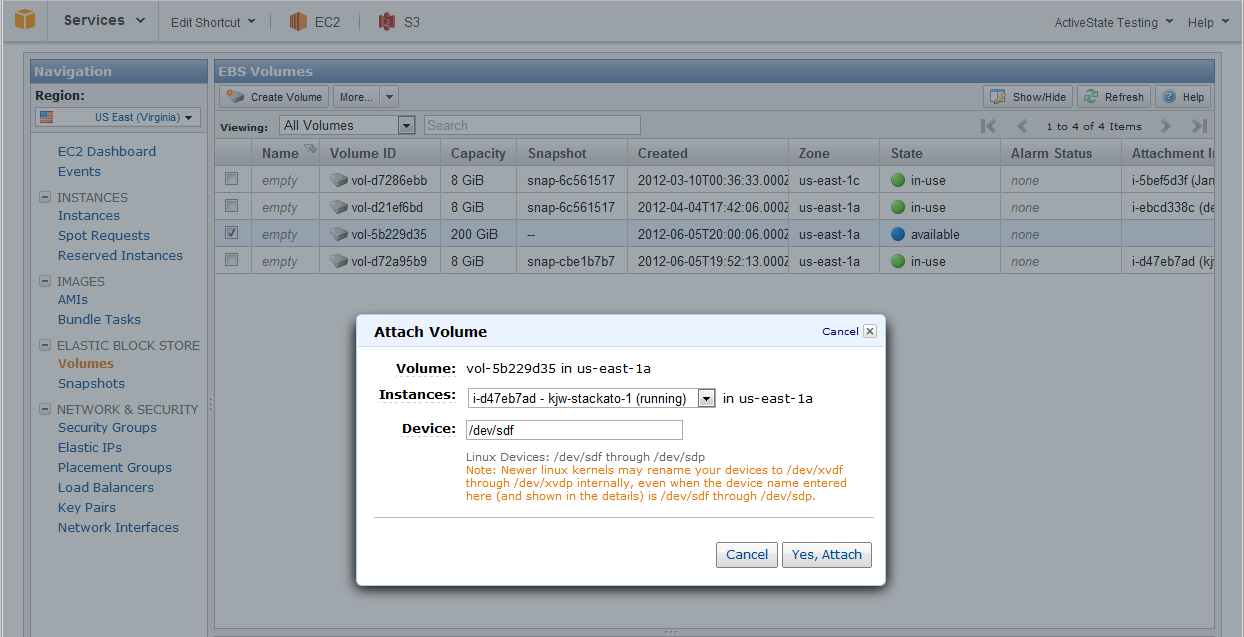
Under the More menu at the top of the screen, choose Attach Volume.
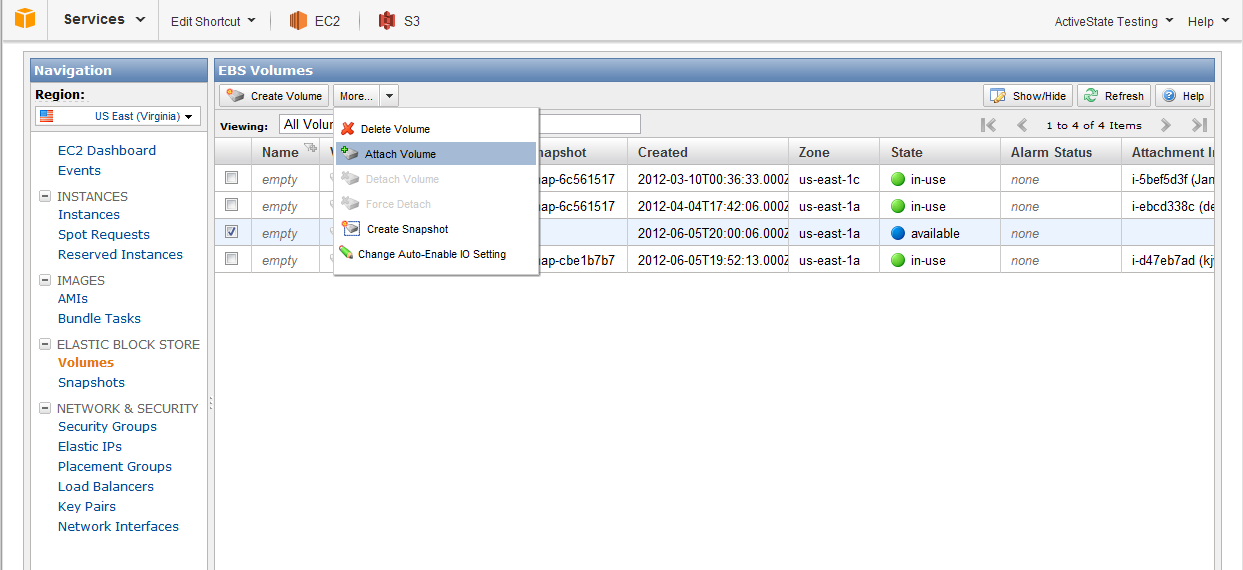
Select your instance from the drop-down list. Ensure the device name specified isn't already in use by your instance. Use mount or df to see which devices are already in use on your system.
Identify the Device Name of the Volume
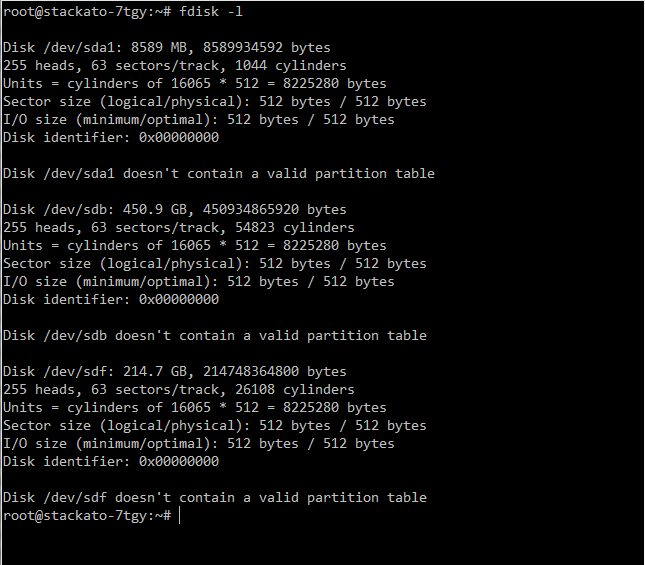
When you do an fdisk -l you should see your new device listed. In this case, it’s /dev/sdf. Note that there is no need to partition the device before building a filesystem on it:
$ sudo fdisk -l
Create a Filesystem on the Volume
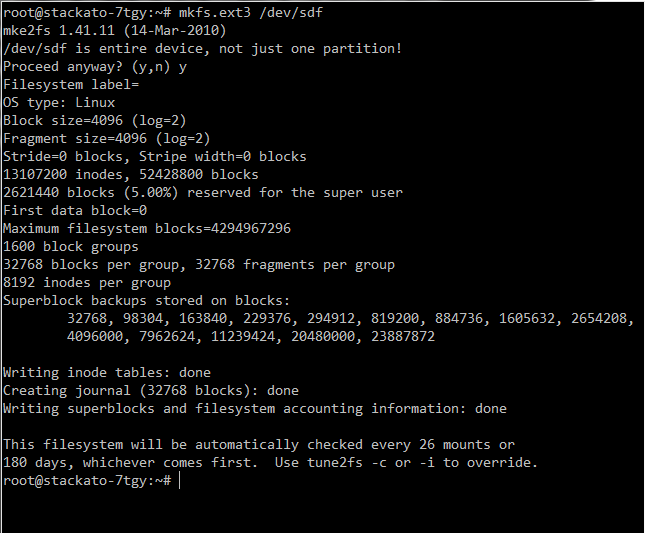
Use mkfs to make a new filesystem on the device. Use the filesystem type that matches your root partition for maximum compatibility. In this case, we specify ext3:
$ sudo mkfs -t ext3 /dev/sdf
Mount the Filesystem
Create a directory to serve as the mount point, add it to /etc/fstab, and mount the EBS volume. See Enabling Filesystem Quotas for instructions on mounting volumes with quotas enabled.
Move Data to the Filesystem
As the Stackato user, relocate the services (and droplets as necessary) using the kato relocate command, as described in the Relocating Services, Droplets, and Containers section.
(Alternative) Manual Relocation
To perform the relocation manually, stop Stackato first:
$ kato stop
Copy /var/vcap/services and /var/vcap/shared directories into the new target filesystem. Ensure that the symlink targets themselves (in this case /data/vcap/services and /data/vcap/shared) are set to chmod 755.
Note
Do not relocate /var/vcap itself but just these two subdirectories.
When copying using cp, the -p option is required, otherwise you will run into various file permission issues.
Alternatively you can use the following pipe to preserve all file attributes including permissions and dates:
$ sudo
# (cd /var; tar cf - vcap/services vcap/shared) | (cd /data; tar xfBp -)
# ls -ld /data/vcap/services /data/vcap/shared
# exit
Finally, as root, move the original /var/vcap/services or /var/vcap/shared directories out of the way, then symlink to the relocated directories. Hard links cannot span filesystems so "ln -s" is the command used for this:
$ cd /var/vcap
$ mv -i services services.backup
$ mv -i shared shared.backup
$ ln -s /data/vcap/services
$ ln -s /data/vcap/shared
At this point you can restart Stackato and things should work as usual:
$ kato start