Connect to a Spark Cluster
Anaconda Enterprise contains numerous example projects, including a Spark/Hadoop project. This project includes Sparkmagic, so that you can connect to a Spark cluster with a running Livy server.
You can use Spark with Anaconda Enterprise in two ways:
- Starting a notebook with one of the Spark kernels, in which case all code
will be executed on the cluster and not locally.
Note that a connection and all cluster resources will be
assigned as soon as you execute any ordinary code cell, that is, any cell not
marked as
%%local. - Starting a normal notebook with a Python kernel, and using
%load_ext sparkmagic.magics. That command will enable a set of functions to run code on the cluster. See examples (external link).
To display graphical output directly from the cluster, you must use SQL
commands. This is also the only way to have results passed back to your local
Python kernel, so that you can do further manipulation on it with pandas or
other packages.
In the common case, the configuration provided for you in the Session will be correct and not require modification. However, in other cases you may need to use sandbox or ad-hoc environments that require the modifications described below.
Supported versions
The following combinations of the multiple tools are supported:
- Python 2 and Python 3, Apache Livy 0.5, Apache Spark 2.1, Oracle Java 1.8
- Python 2, Apache Livy 0.5, Apache Spark 1.6, Oracle Java 1.8
Overriding session settings
Certain jobs may require more cores or memory, or custom environment variables
such as Python worker settings. The configuration passed to Livy is generally
defined in the file ~/.sparkmagic/conf.json.
You may inspect this file, particularly the section "session_configs", or
you may refer to the example file in the spark directory,
sparkmagic_conf.example.json. Note that the example file has not been
tailored to your specific cluster.
In a Sparkmagic kernel such as PySpark, SparkR, or similar, you can change the
configuration with the magic %%configure. This syntax is pure JSON,
and the values are passed directly to the driver application.
Example:
%%configure -f
{"executorMemory": "4G", "executorCores":4}
If you are using a Python kernel and have done %load_ext sparkmagic.magics,
you can use the %manage_spark command to set configuration options. The
session options are in the “Create Session” pane under “Properties”.
Overriding basic settings
In some more experimental situations, you may want to change the Kerberos or Livy connection settings. For example, when first configuring the platform for a cluster. This is likely to be done by an administrator with intimate knowledge of the cluster’s security model.
In these cases, we recommend creating a krb5.conf file and a
sparkmagic_conf.json file in the project directory so they will be saved
along with the project itself. An example Sparkmagic configuration is included,
sparkmagic_conf.example.json, listing the fields that are typically set. Of
particular importance are the "url" and "auth" keys in each of the
kernel sections.
The krb5.conf file is normally copied from the Hadoop cluster, rather than
written manually, and may refer to additional configuration or
certificate files. These files must all be uploaded using the interface.
To use these alternate configuration files, set the
KRB5_CONFIG variable default to point to the full path of krb5.conf and
set the values of SPARKMAGIC_CONF_DIR and SPARKMAGIC_CONF_FILE to point
to the Sparkmagic config file. You can set these either by using the Project
pane on the left of the interface, or by directly editing the
anaconda-project.yml file.
For example, the final file’s variables section may look like this:
variables:
  KRB5_CONFIG:
    description: Location of config file for kerberos authentication
    default: /opt/continuum/project/krb5.conf
  SPARKMAGIC_CONF_DIR:
    description: Location of sparkmagic configuration file
    default: /opt/continuum/project
  SPARKMAGIC_CONF_FILE:
    description: Name of sparkmagic configuration file
    default: sparkmagic_conf.json
NOTE: You must perform these actions before running kinit or starting
any notebook/kernel.
Kerberos
To authenticate and connect to a Kerberized Spark cluster, you need the
appropriate configuration to execute a kinit command in a terminal on the
project session.
NOTE: For more information, see the authentication section in Kerberos Configuration.
Managing Kerberos and Sparkmagic Configuration
Both Kerberos and Sparkmagic configuration files are managed with Kubernetes
secrets and can easily be created with the anaconda-enterprise-cli tool. This
allows system administrators to populate Kerberos and Sparkmagic configurations
for all projects.
To create a kubernetes secret for both Kerberos and Sparkmagic, execute the following:
anaconda-enterprise-cli spark-config --config /etc/krb5.conf krb5.conf \
                  --config /opt/continuum/.sparkmagic/config.json config.json
This will create a yaml file anaconda-config-files-secret.yaml with the data
converted for Kubernetes and AE5. Next, upload the file:
sudo kubectl replace -f anaconda-config-files-secret.yaml
When new projects are created, /etc/krb5.conf and ~/.sparkmagic/conf.json
are populated with the appropriate data.
The Sparkmagic configuration file, commonly config.json, must set
the auth field in the kernel_python_credentials section:
{
  "kernel_python_credentials" : {
    "url": "http://<LIVY_SERVER>:8998",
    "auth": "Kerberos"
  }
}
Finally, in the same config.json file set the
home_path in handlers to ~/.sparkmagic-logs.
Example:
"logging_config": {
  "handlers": {
    "magicsHandler": {
      "class": "hdijupyterutils.filehandler.MagicsFileHandler",
      "formatter": "magicsFormatter",
      "home_path": "~/.sparkmagic-logs"
    }
  }
}
Using Custom Anaconda Parcels and Management Packs
Anaconda Enterprise provides functionality to generate custom Anaconda parcels for Cloudera CDH or custom Anaconda management packs for Hortonworks HDP, which allows administrators to distribute customized versions of Anaconda across a Hadoop/Spark cluster using Cloudera Manager for CDH or Apache Ambari for HDP.
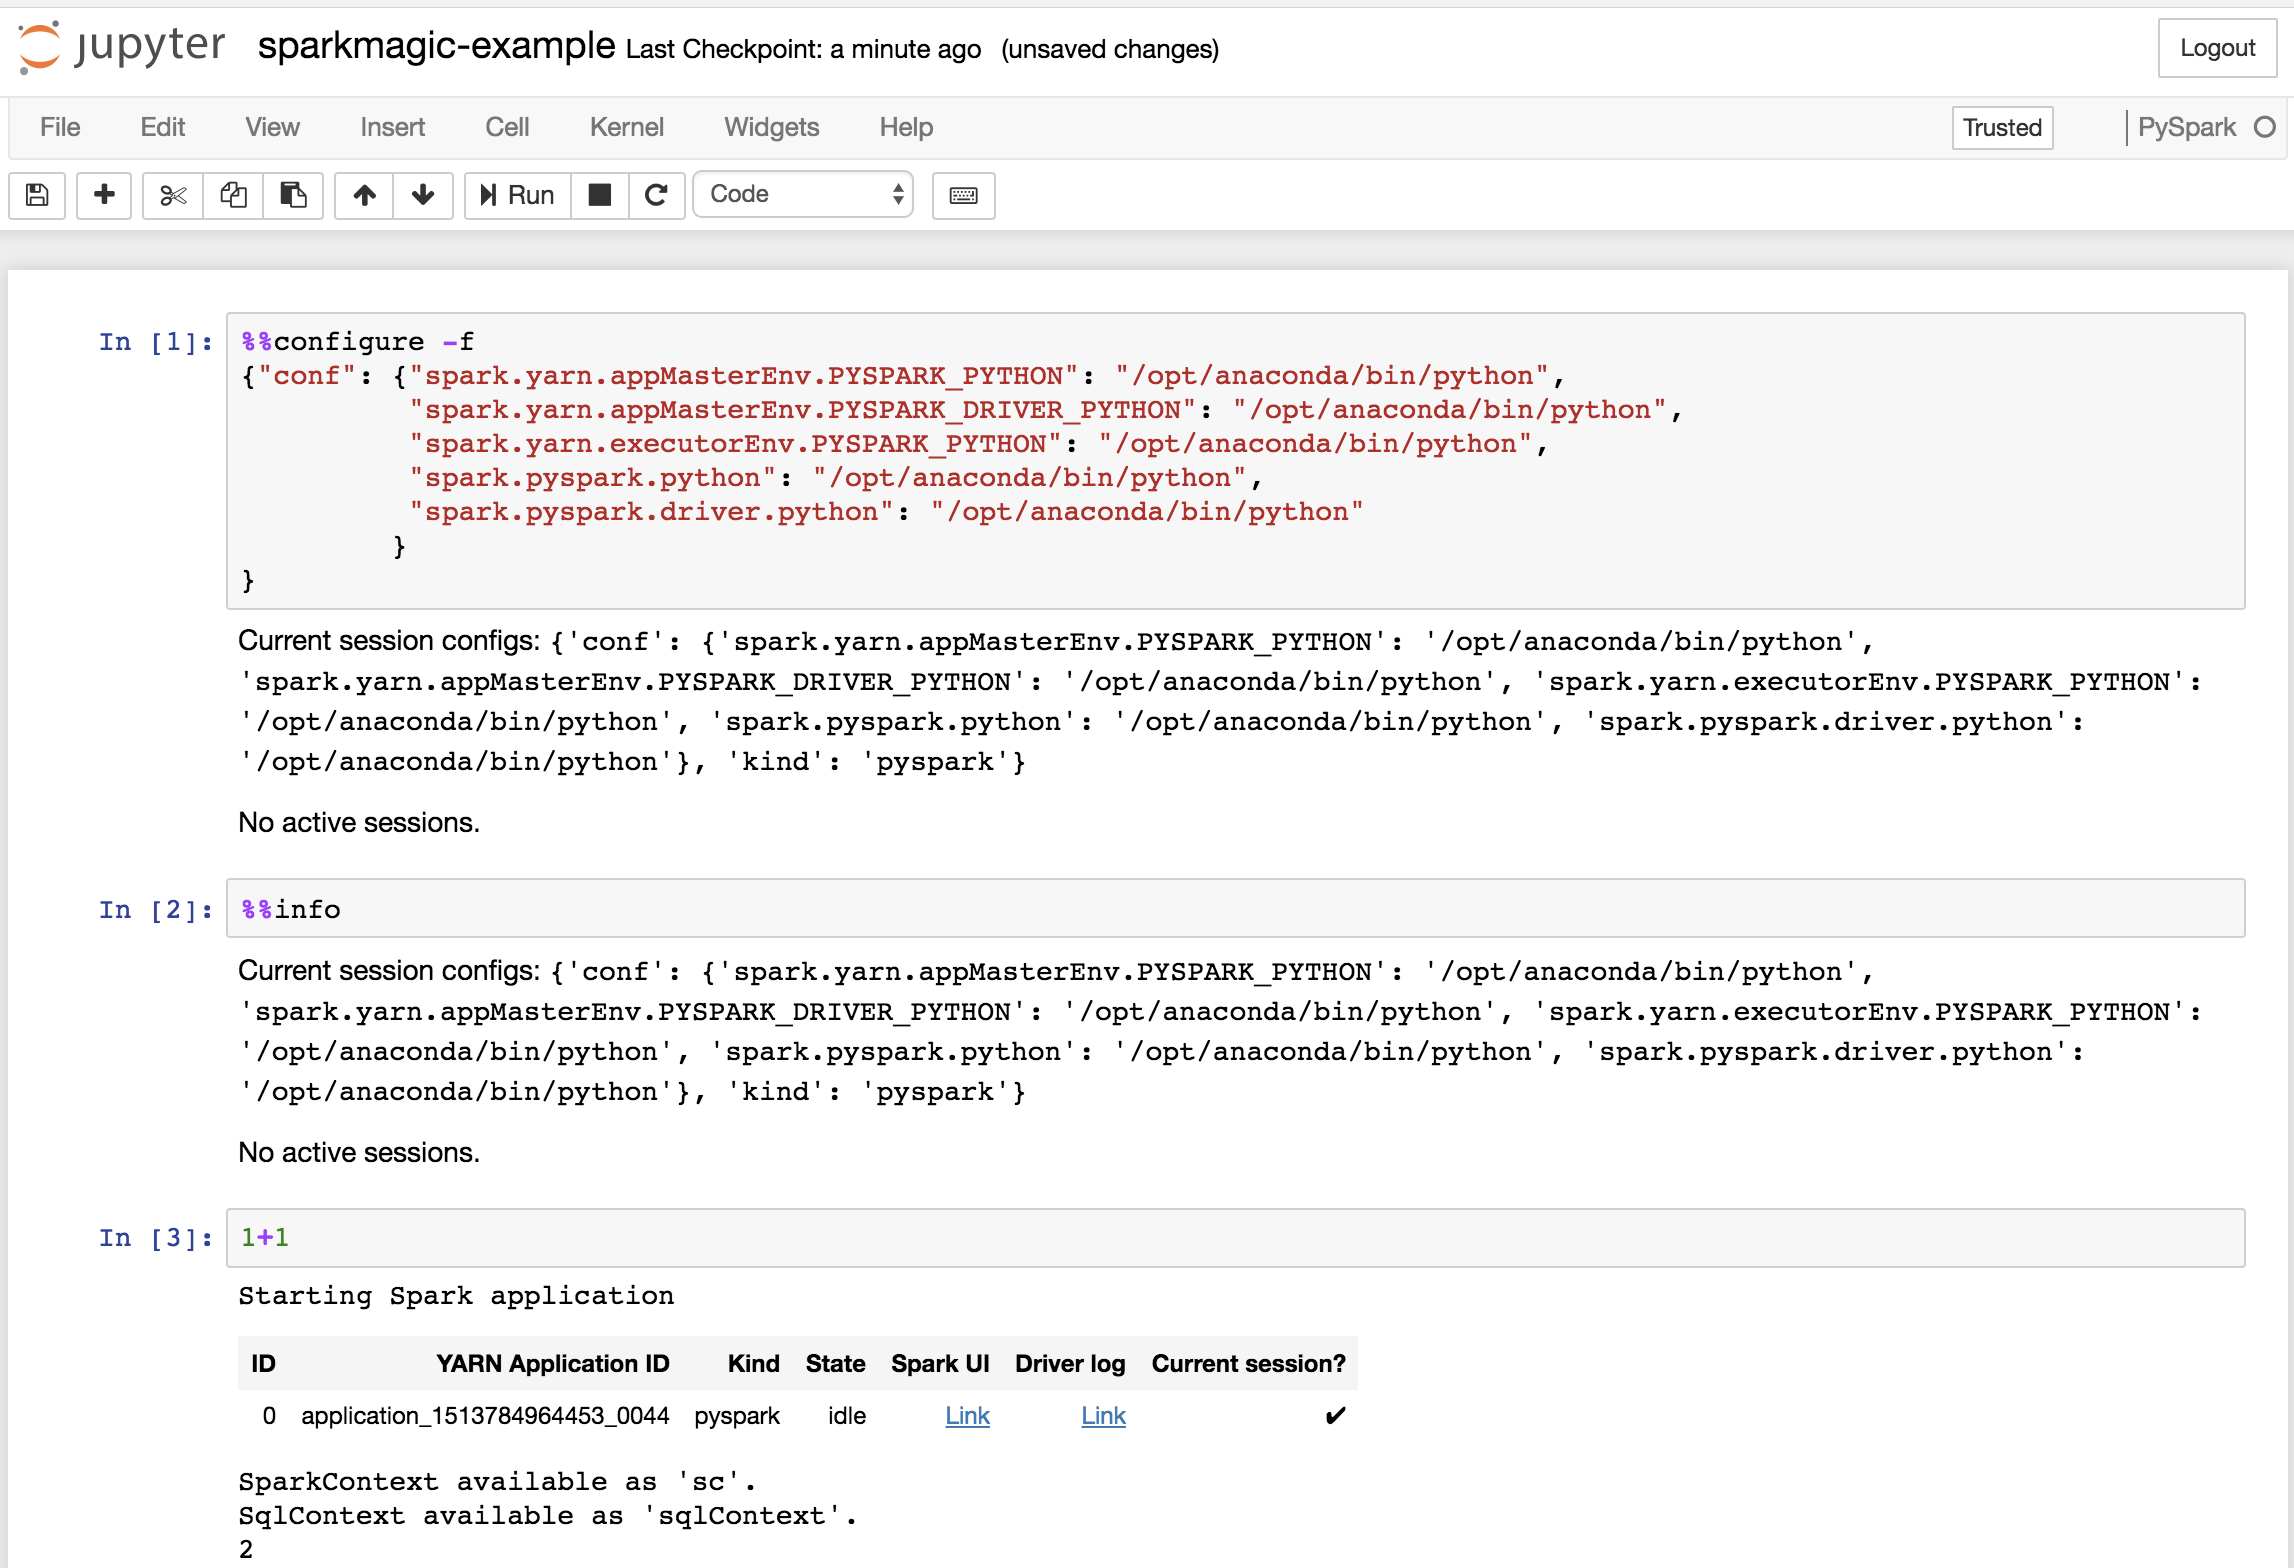
Data scientists can then select a specific version of Anaconda and Python on a per-project basis by including the following configuration in the first cell in a Sparkmagic-based Jupyter Notebook:.
Example:
%%configure -f
{"conf": {"spark.yarn.appMasterEnv.PYSPARK_PYTHON": "/opt/anaconda/bin/python",
          "spark.yarn.appMasterEnv.PYSPARK_DRIVER_PYTHON": "/opt/anaconda/bin/python",
          "spark.yarn.executorEnv.PYSPARK_PYTHON": "/opt/anaconda/bin/python",
          "spark.pyspark.python": "/opt/anaconda/bin/python",
          "spark.pyspark.driver.python": "/opt/anaconda/bin/python"
         }
}
NOTE: Replace /opt/anaconda/ with the prefix of the install name
and location for the particular Parcel/MPack installed.