Migrating AE Notebook Projects
If you have been an Anaconda Enterprise Notebooks user, you are likely to have some 4.x projects that you would like to use in Enterprise v5.
Before you start
If your project contains several notebooks, check that they all are using the same kernel/environment.
NOTE: These instructions are for notebooks that use the same kernel or environment only.
On your AE Notebook server
Log onto your Notebooks server.
Open a Terminal window and activate the environment that contains your project.
Install anaconda project in the environment:
conda install anaconda-project=0.6.0
If you get a
not foundmessage, install it from Anaconda.org:conda install -c anaconda anaconda-project=0.6.0
Export your environment to a file:
`conda env export -n default -f _env.yml`
<default>is the name of the environment where the notebook runs.Check the format of the environment to be sure it looks like this, without any warning exclamation points:
yaml
channels:
- wakari
- r
- https://conda.anaconda.org/wakari
- defaults
- anaconda-adam
prefix: /projects/anaconda/MigrationExample/envs/default
dependencies:
- _license=1.1=py27_1
- accelerate=2.3.1=np111py27_0
- accelerate_cudalib=2.0=0
- alabaster=0.7.9=py27_0
# ... etc ...
NOTE: Check to see if your file contains warning exclamation marks like this example:
yaml
name: default
channels:
- wakari
- r
- https://conda.anaconda.org/wakari
- defaults
- anaconda-adam
dependencies:
- _license=1.1=py27_1'
# ...
If you see any warning exclamation points, run this script to modify the encoding and remove the warnings:
import ruamel_yaml
with open("_env.yml") as env_fd:
    env = ruamel_yaml.load(env_fd)
with open("environment.yml", "w") as env_fd:
    ruamel_yaml.dump(env, env_fd, Dumper=ruamel_yaml.RoundTripDumper)
Create a Project compatible for Enterprise v5:
anaconda-project init
Remove the platforms, Windows and macOS from the file
anaconda-project.ymlsince AEN is linux only. Run:anaconda-project remove-platforms win-64 osx-64
Verify using:
anaconda-project list-platforms
Lock the project dependencies:
anaconda-project lock
Compress your project:
anaconda-project archive WAKARI_PROJECT_NAME.tar.gz
Note: If you get a permission denied error for .indexer.pid, add /.indexer.pid to the .projectignore
file. To remove all .git directories, add .git to the .projectignore file.
In Anaconda Enterprise Notebooks, from your project home page, open the Workbench. In the file list, locate your file
WAKARI_PROJECT_NAME.tar.gz. To download the project, right-click the file name and select Download.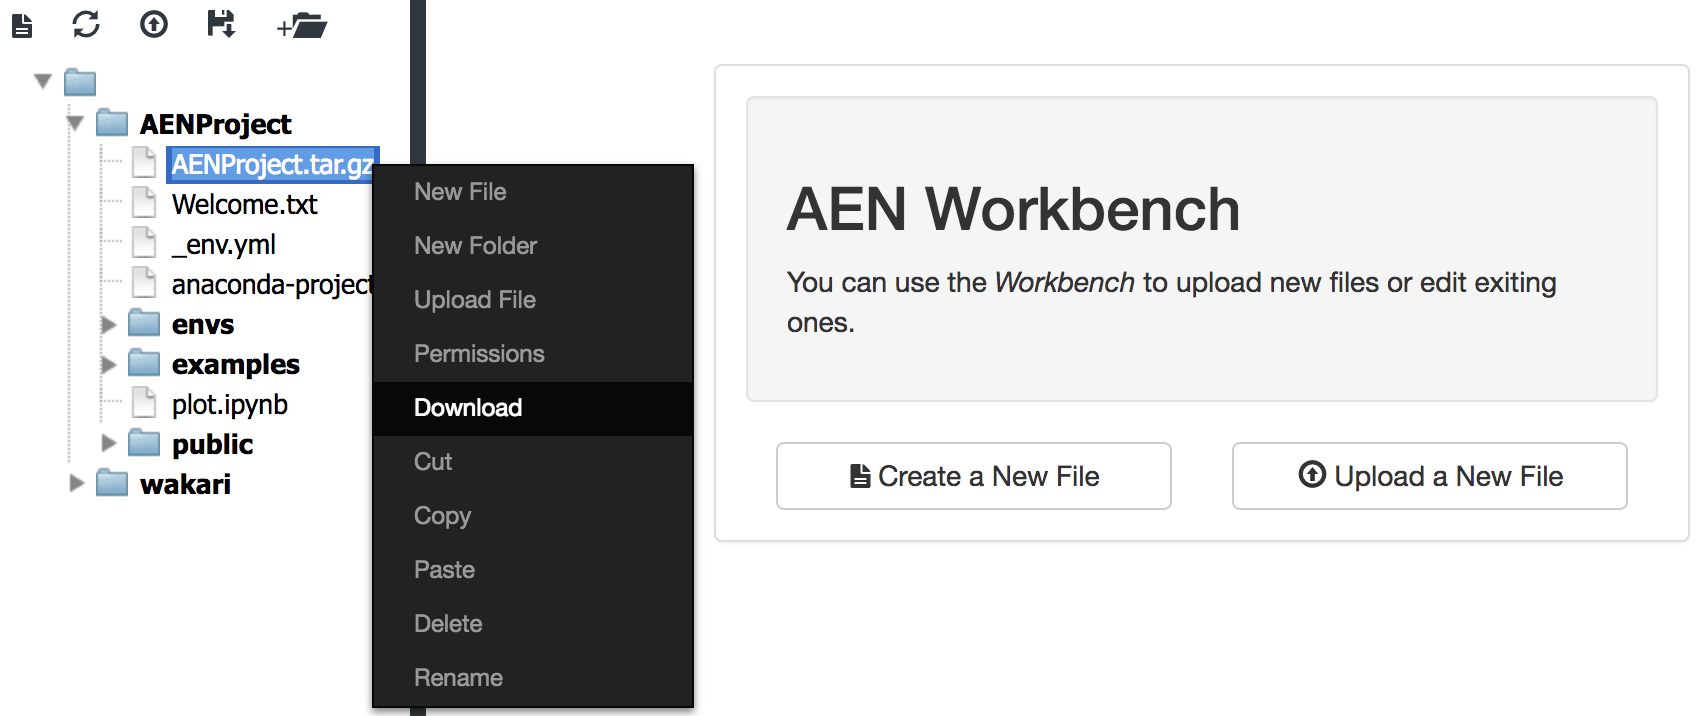
Upload to Enterprise version 5
Log onto the Enterprise v5 interface and upload FILENAME.tar.gz:
On the Projects page, click the Add (+) button, click on “Upload project” and select your file.
Troubleshooting
- Does your project refer to channels in your on-premises repository or other channels in anaconda.org? Those channels should be migrated to Enterprise by your system administrator.
- Does your project use packages which are not in anaconda? If so, upload those packages to AE v5.
- Does your notebook refer to multiple kernels/environments? Try setting the kernel to just one environment.