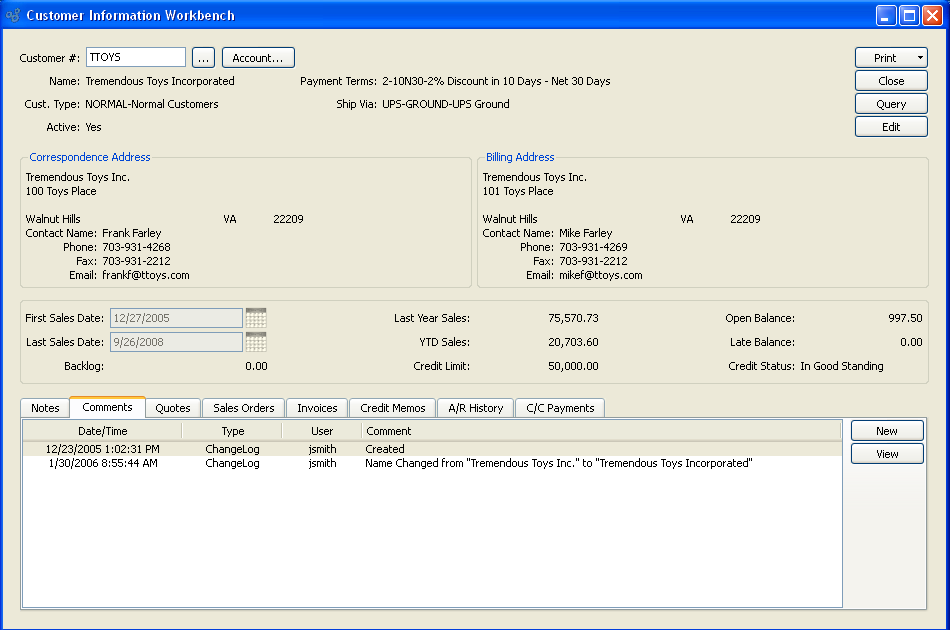
The Customer Information Workbench groups together in one location a wide range of both current and historical Customer information. To access the Customer Information Workbench, select the "Customer Information Workbench" option from the "Orders" menu. The following screen will appear:

When displaying Customer information, you are presented with the following options:
- Customer #
Enter the Customer Number of the Customer whose information you want to view.
- Name
Displays Customer name automatically when Customer Number is entered.
- ACCOUNT
Select this button to open the CRM Account record associated with the Customer.
- Cust. Type
Displays the Customer Type for the specified Customer.
- Payment Terms
Displays the Customer's default Terms.
- Ship Via
Displays the Customer's preferred Ship Via.
- Correspondence Address
Displays Customer's correspondence address.
- Billing Address
Displays Customer's billing address.
- First Sales Date
Displays date of first sale made to the Customer.
- Last Sales Date
Displays date of last sale made to the Customer.
- Backlog
Displays Customer's backlog.
- Last Year Sales
Displays total sales to Customer for previous year.
- YTD Sales
Displays year-to-date sales made to the Customer.
- Credit Limit
Displays the Customer's credit limit.
- Open Balance
Displays Customer's open balance.
- Late Balance
Displays Customer's late balance.
- Credit Status
Displays Customer's credit status.
- Notes
Displays any Notes entered on the Customer master for the specified Customer. To modify the notes, you must edit the Notes found under the "Notes" tab on the Customer master. To reach the Customer master, select the EDIT button.
To the far right of the screen, the following buttons are available:
Runs the reports associated with this screen, including customer information and statement.
- CLOSE
Closes the screen, returning you to the application desktop.
- QUERY
Select to re-generate and update the information on the screen.
- EDIT
Select to edit the Customer master for the specified Customer.
To view Comments associated with the Customer, select the "Comments" tab. The following screen will appear:
- Comments
Display lists Comments related to the Customer.
To the far right of the screen, the following buttons are available:
- NEW
Opens the screen for creating a new Customer Comment.
- VIEW
Opens a read-only view of the Customer Comment.
To enter a new Customer Comment, select the NEW button. The following screen will appear:
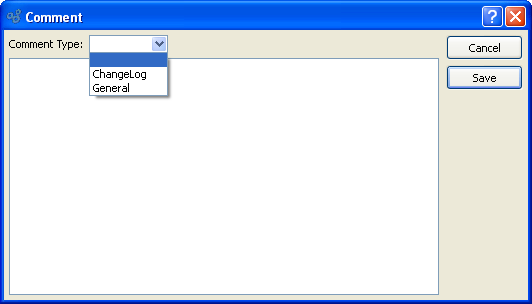
- Comment Type
Specify one of the following Comment Types from the drop-down list: ChangeLog or General. Comment Types are used to categorize Comments. Once you have specified a Comment Type, you may type your Comment in the main text area. The text area features word-wrapping and scroll-bar support for longer Comments.
To the far right of the screen, the following buttons are available:
- CANCEL
Closes the screen without creating the Customer Comment, returning you to the previous screen.
- SAVE
Creates the Comment and adds it to the list of Customer Comments.
To view current Quotes associated with the Customer, select the "Quotes" tab. The following screen will appear:
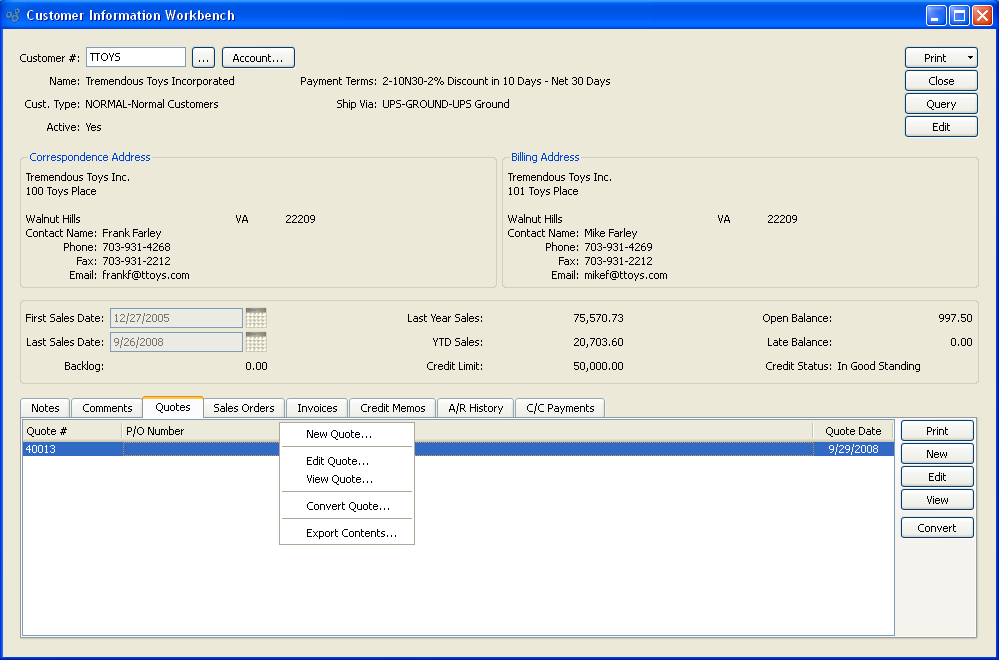
When displaying the list of current Quotes associated with the Customer, you are presented with the following options:
- Quotes
Displays the list of current Quotes for the specified Customer. This is the same information as displayed in the Quotes master list screen.
To the far right of the screen, the following buttons are available:
- NEW
Opens screen for creating a new Quote, as described in Section 8.1.1, “ New Quote”.
Right-clicking on a Quote in the Quotes list enables you to select from the following menu options:
- New Quote
Opens screen for creating a new Quote, as described in Section 8.1.1, “ New Quote”.
- Edit Quote
Enables you to edit highlighted Quotes. The edit screen is the same as that for creating a new Quote—except that when editing, the fields will contain Quote information. Double-clicking on a Quote will also bring you to the editing screen.
To view open Sales Orders associated with the Customer, select the "Sales Orders" tab. The following screen will appear:
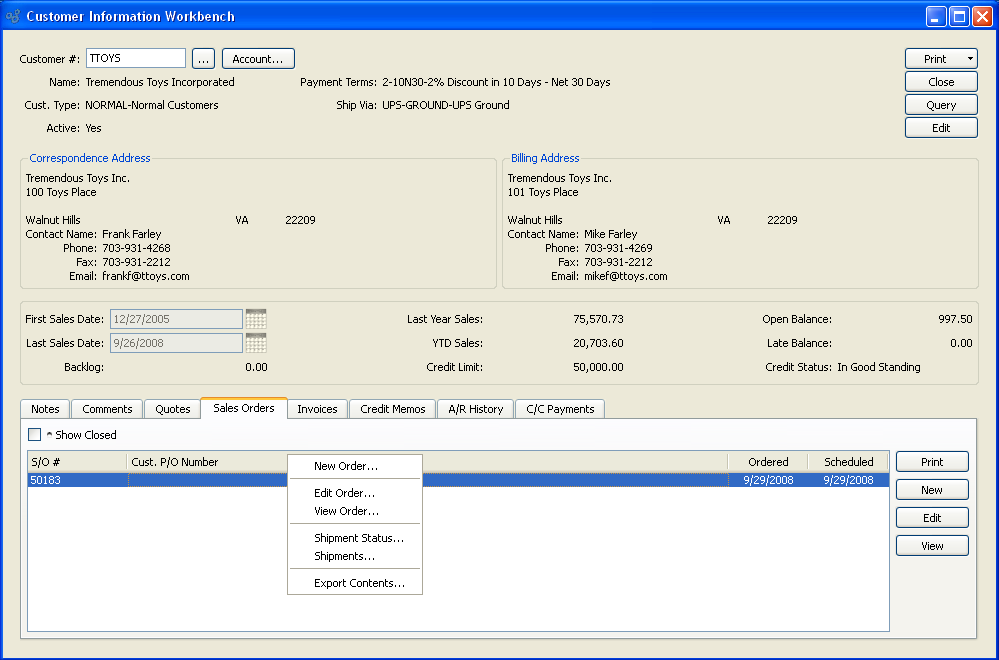
When displaying the list of open Sales Orders associated with the Customer, you are presented with the following options:
- Sales Orders
Displays the current list of open Sales Orders for the specified Customer. This is the same information as displayed in the Open Sales Orders master list screen.
- Show Closed
Select to include closed Sales Orders in the display.
To the far right of the screen, the following buttons are available:
-
Highlight a Sales Order and then select this button to print the Sales Order.
Tip
You must have a Form "keyed on" Sales Orders to successfully print a Sales Order. The keyed on process is described here: Section 10.14.4.1, “Form”.
- NEW
Opens screen for creating a new Sales Order, as described in Section 8.2.1, “New Sales Order”.
Right-clicking on an Order in the Sales Orders list enables you to select from the following menu options:
- New Order
-
Highlight a Sales Order and then select this button to print the Sales Order.
Tip
You must have a Form "keyed on" Sales Orders to successfully print a Sales Order. The keyed on process is described here: Section 10.14.4.1, “Form”.
- Edit Order
Enables you to edit highlighted Sales Order. The edit screen is the same as that for creating a new Sales Order—except that when editing, the fields will contain Sales Order information. Double-clicking on a Sales Order will also bring you to the editing screen.
To view Invoices associated with the Customer, select the "Invoices" tab. The following screen will appear:
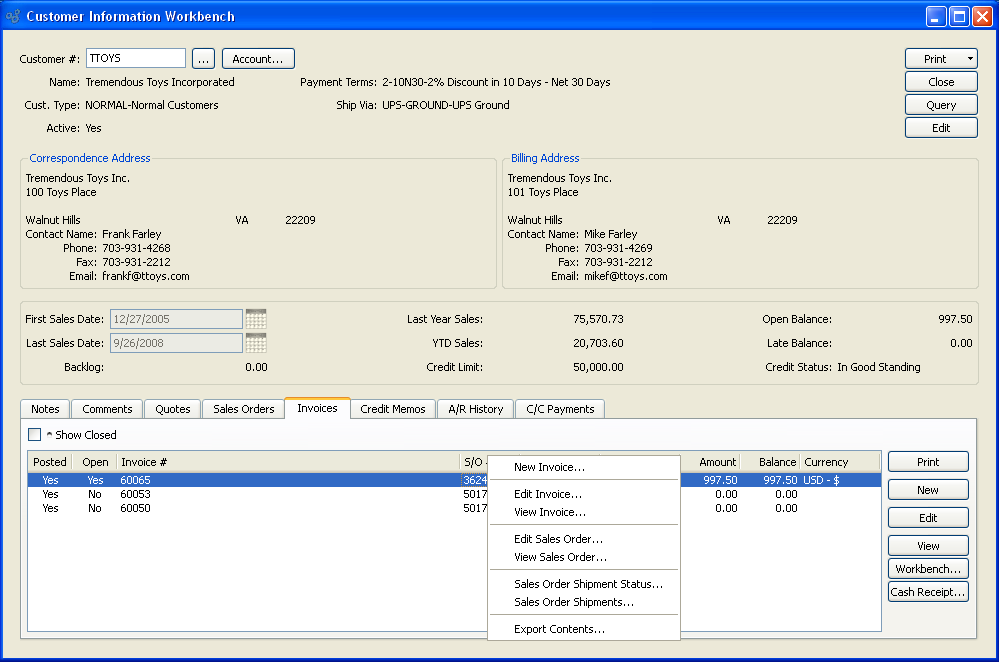
When displaying the list of Invoices associated with the Customer, you are presented with the following options:
- Show Closed
Select to include closed Invoices in the display.
- Invoices
-
Displays the list of Invoices associated with the specified Customer.
Note
Late Invoices will display in red type.
To the far right of the screen, the following buttons are available:
Highlight an Invoice and then select this button to print the Invoice.
- EDIT
Enables you to edit highlighted Invoices. The edit screen is the same as that for selecting a new Invoice—except that when editing, the fields will contain Invoice information. Double-clicking on an Invoice will also bring you to the editing screen.
- VIEW
Highlight an Invoice and then select this button to reach a read-only view of the "Edit" screen.
- WORKBENCH
Select to open the A/R Workbench for the specified Customer.
- CASH RECEIPT
Select to enter a Cash Receipt for the specified Customer.
Right-clicking on an Invoice in the Invoices list enables you to select from the following menu options:
To view Credit Memos associated with the Customer, select the "Credit Memos" tab. The following screen will appear:
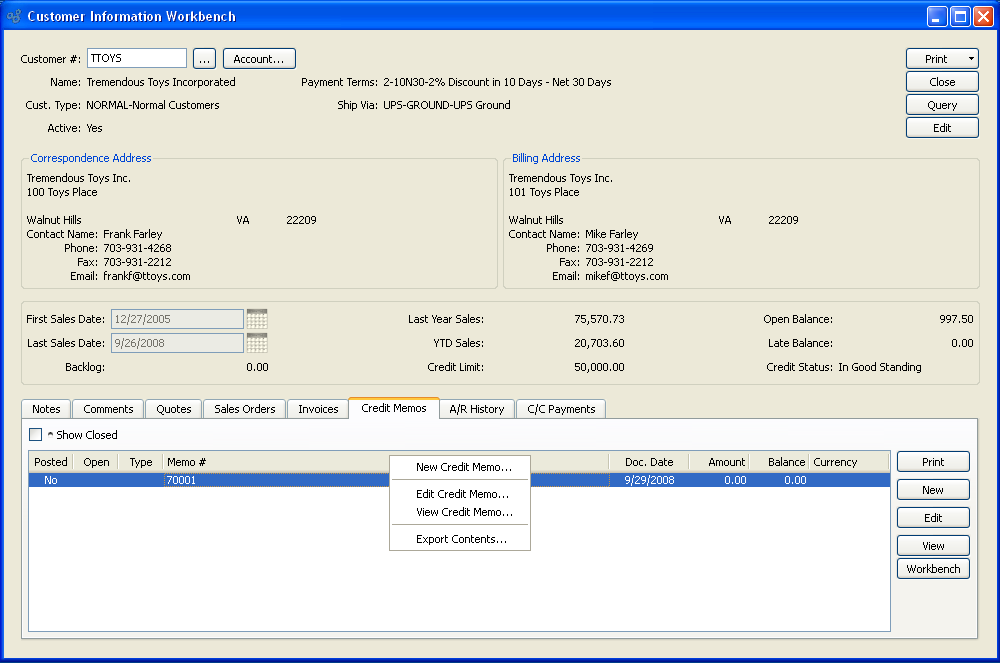
When displaying the list of Credit Memos associated with the Customer, you are presented with the following options:
- Credit Memos
Displays the list of posted and unposted Credit Memos associated with the specified Customer.
To the far right of the screen, the following buttons are available:
-
Highlight a sales Credit Memo and then select this button to print the Sales Credit Memo.
Note
Printing is supported for sales Credit Memos only—not for miscellaneous Credit Memos.
- NEW
Opens screen for creating a new Sales Order Credit Memo, as described in Section 8.3.2.1, “ New Credit Memo”.
- EDIT
Enables you to edit highlighted Credit Memos. The edit screen will vary, depending on whether you are editing a Sales Order Credit Memo or a miscellaneous Credit Memo. Double-clicking on a Credit Memo will also bring you to the editing screen.
- VIEW
Highlight a Credit Memo and then select this button to reach a read-only view of the "Edit" screen.
- WORKBENCH
Select to open the A/R Workbench for the specified Customer.
Right-clicking on a Credit Memo in the Credit Memos list enables you to select from the following menu options:
- New Credit Memo
Opens screen for creating a new Sales Order Credit Memo, as described in Section 8.3.2.1, “ New Credit Memo”.
- Edit Credit Memo
Enables you to edit highlighted Credit Memos. The edit screen will vary, depending on whether you are editing a Sales Order Credit Memo or a miscellaneous Credit Memo. Double-clicking on a Credit Memo will also bring you to the editing screen.
To view sales history for the Customer, select the "A/R History" tab. The following screen will appear:
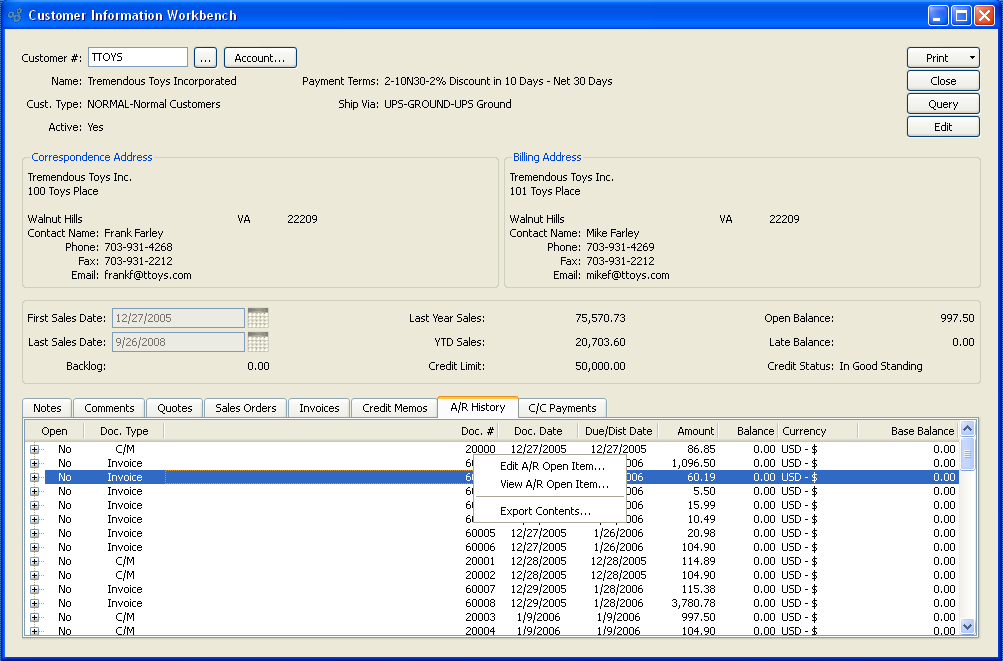
When displaying sales history for the Customer, you are presented with the following options:
- A/R History
Display lists sales history for the specified Customer.
To the far right of the screen, the following buttons are available:
- CLOSE
Closes the screen, returning you to the application desktop.
Runs the report associated with this screen.
Right-clicking on an Item in the A/R History list enables you to select from the following menu options:
To view Credit Card activity associated with the Customer, select the "CC Payments" tab. The following screen will appear:
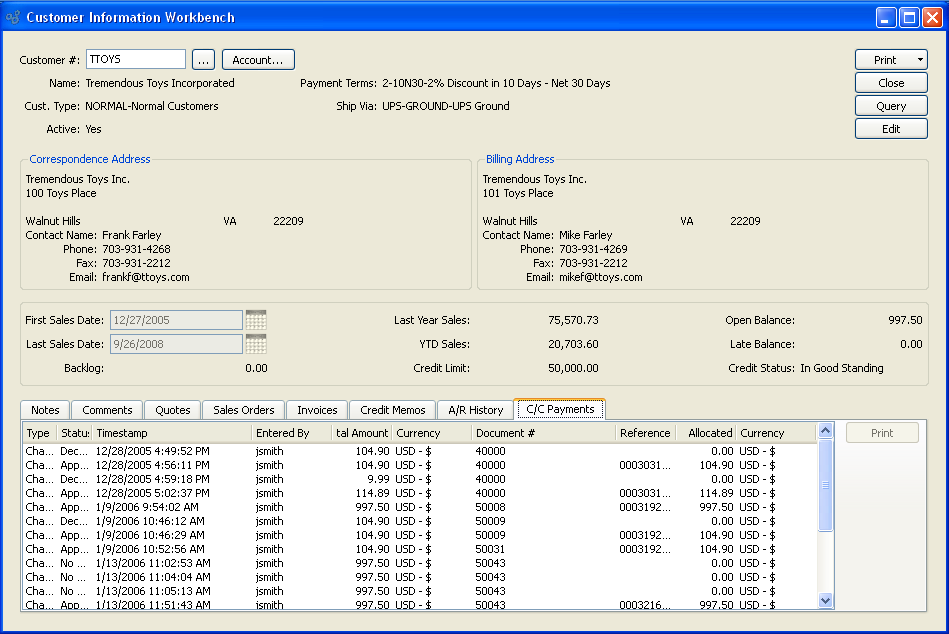
When displaying Credit Card activity associated with the Customer, you are presented with the following options:
- C/C Payments
Display lists Credit Card activity for the specified Customer.
To the far right of the screen, the following button is available:
Highlight an credit card transaction and then select this button to print the credit card receipt.