|
|
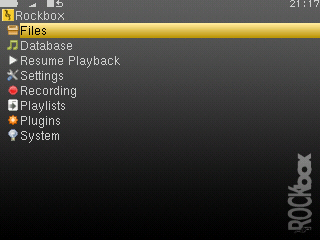
The Main Menu is the screen from which all of the Rockbox functions can be accessed. This is the first screen you will see when starting Rockbox. To return to the Main Menu, press the Menu button.
All settings are stored on the unit. However, Rockbox does not spin up the disk solely for the purpose of saving settings. Instead, Rockbox will save settings when it spins up the disk the next time, for example when refilling the MP3 buffer or navigating through the File Browser. Changes to settings may therefore not be saved unless the player is shut down safely (see section 3.1.2).
|
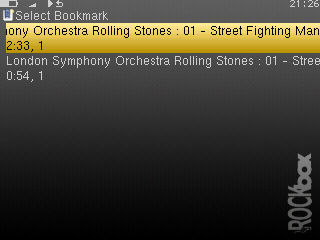
If the Save a list of recently created bookmarks option is enabled then you can view a list of several recent bookmarks here and select one to jump straight to that track. See section 7.7 for more details on configuring bookmarking in Rockbox.
Note: This entry is not shown in the Main Menu when the option is off and the option is off by default.
Browse the files on your player (see section 4.1).
Browse by the meta-data in your audio files (see section 4.2).
Go to the While Playing Screen and resume if music playback is stopped or paused and there is something to resume (see section 4.3).
The Settings menu allows to set or adjust many parameters that affect the way your player works. There are many submenus for different parameter areas. Every time you are setting a value of a parameter, and that value is selected from a list of some predefined available values, you can press Long Select, and the selection cursor will jump to the default value for the parameter. You can then confirm or cancel the value. This is useful if you have changed the value of the parameter from the default to some other value and would like to restore the default value.
The Sound Settings menu offers a selection of sound properties you may change to customise your listening experience. The details of this menu are covered in section 6.
The General Settings menu allows you to customise the way Rockbox looks and the way it plays music. The details of this menu are covered in section 7.
The Manage Settings option allows the saving and re-loading of user configuration settings, browsing the hard drive for alternate firmwares, and finally resetting your player back to initial configuration. The details of this menu are covered in section 11.3.
The Theme Settings menu contains options that control the visual apperance of Rockbox. The details of this menu are covered in section 8.
The Recording Settings menu allows you to configure settings related to recording. The details of this menu are covered in detail in section 9.
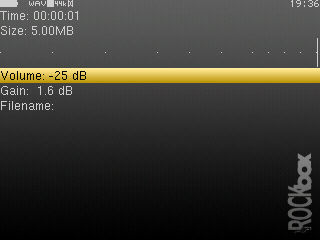
Entering the Recording option in the Main Menu brings up a screen in which you can choose to enter the Recording Screen or the Recording Settings (see section 9). The Recording Screen shows the time elapsed and the size of the file being recorded. A peak meter is present to allow you set gain correctly. There is also a volume setting, this will only affect the output level of the player and does not affect the recorded sound. If enabled in the peak meter settings, a counter in front of the peak meters shows the number of times the clip indicator was activated during recording. The counter is reset to zero when starting a new recording.
Note: When you start a recording, the hard disk will spin up. This will cause the peak meters to freeze in the process. This is expected behaviour, and nothing to worry about. The recording continues during the spin up.
The frequency and channels settings are shown on the last line.
The controls for this screen are:
|
This menu allows you to work with playlists. Playlists can be created in three ways. Playing a file in a directory causes all the files in it to be placed in a playlist. Playlists can be created manually by either using the Context Menu (see section 4.1.2) or using the Playlist menu. Both automatically and manually created playlists can be edited using this menu.
With this option you can load and run various plugins that have been written for Rockbox. There are a wide variety of these supplied with Rockbox, including several games, some impressive demos and a number of utilities. A detailed description of the different plugins is to be found in section 10.
This option shows RAM buffer size, battery voltage level and estimated time remaining, disk total space and disk free space.
Warning: It is not recommended that users access this menu unless instructed to do so in the course of fixing a problem with Rockbox. If you think you have messed up your settings by use of this menu please try to reset all settings before asking for help.
Whilst not strictly part of the Main Menu, it is worth noting that a few of the more commonly used settings are available from the Quick Screen. The Quick Screen screen is accessed with Long Menu and exited with Menu. It allows rapid access to the Shuffle and Repeat modes (section 7.1) and the Show Files option (section 7.3).