Edit a Form

Steps
-
Go to .
➊
➋
-
Click/Tap the ellipses for the form you want, and choose Edit.

-
Manage the fields of the form.
The Submit button is automatically added when the form has one or more fields.
-
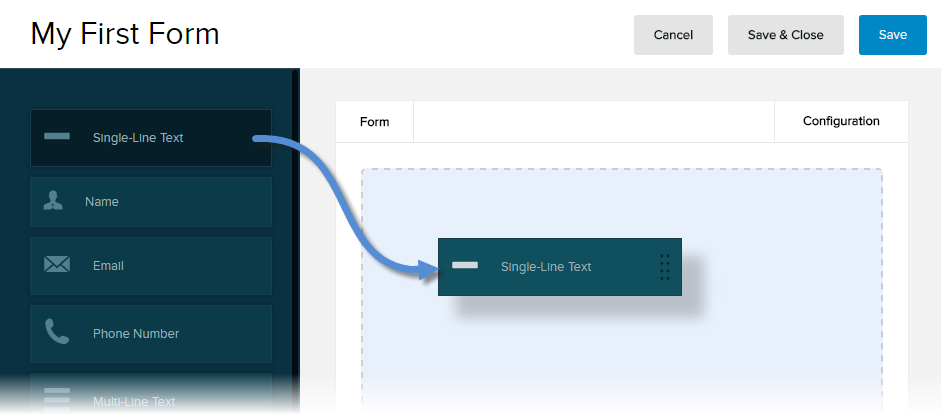
To add a new field, drag and drop a field type to the canvas, then configure its settings.
-
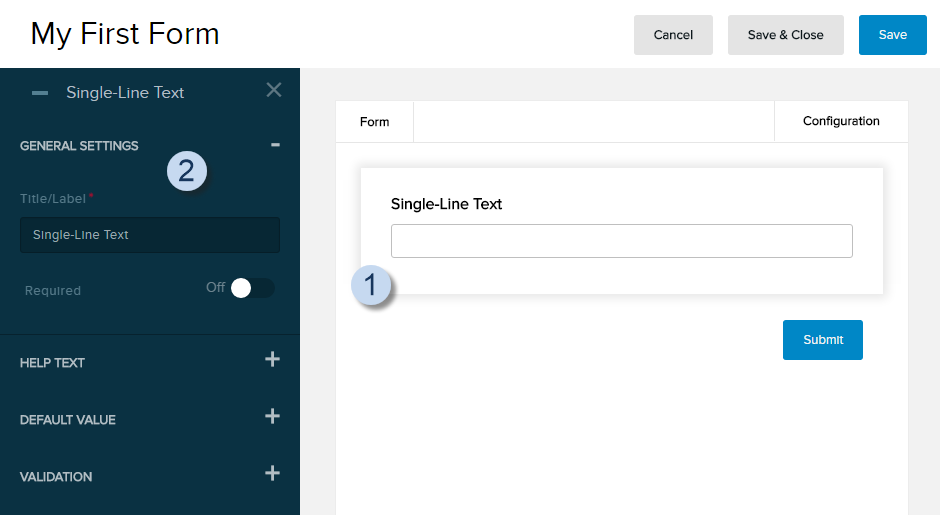
To edit a field, click/tap on the field in the canvas, then configure its settings.
-
To duplicate a field, hover over the field in the canvas, click/tap the duplicate icon, then configure the settings of the new copy.

-
To delete a field, hover over the field in the canvas, and click/tap the trash icon.

-
To add a new field, drag and drop a field type to the canvas, then configure its settings.
-
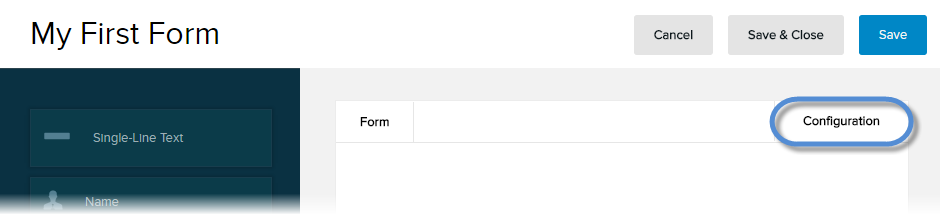
Configure the properties of the form.
-
Click/Tap the Configuration tab.
-
In the General Settings tab.
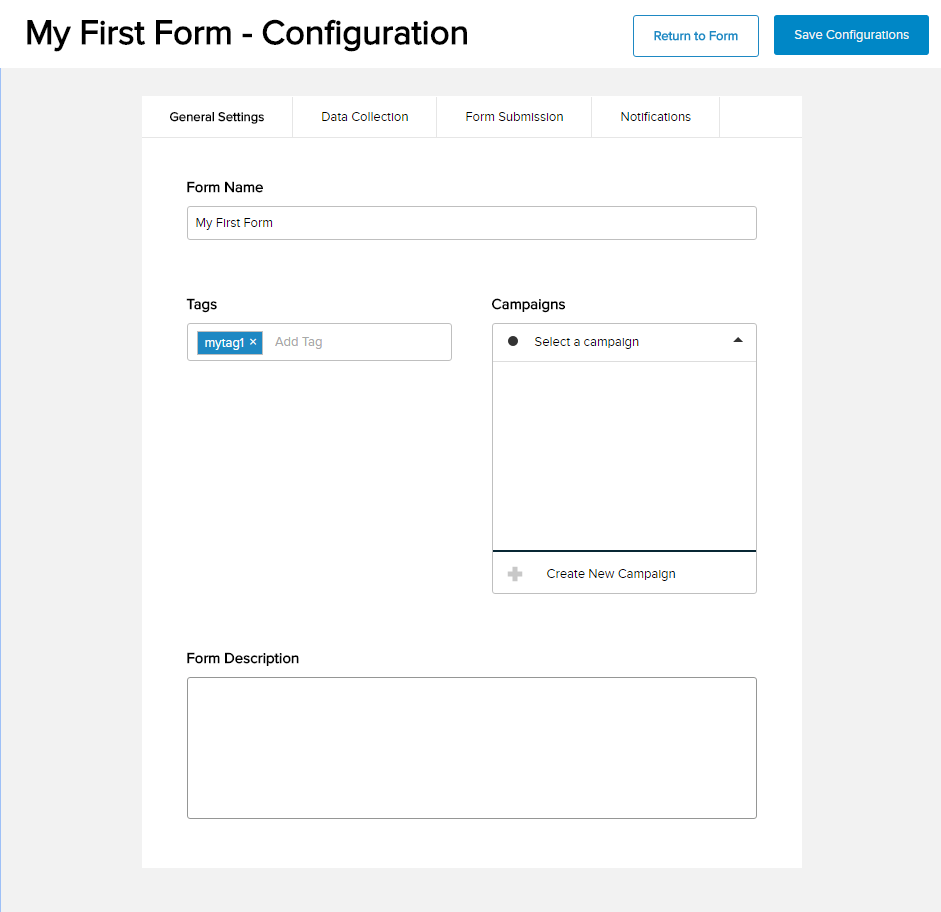
Field Description Form Name This value appears at the top of the page. Tags A comma-separated list of tags to associate with the form. You can also press Enter after typing each tag. Campaigns Choose or create a marketing campaign that you want this form to be part of. Form Description Information about the form. -
In the Data Collection tab.
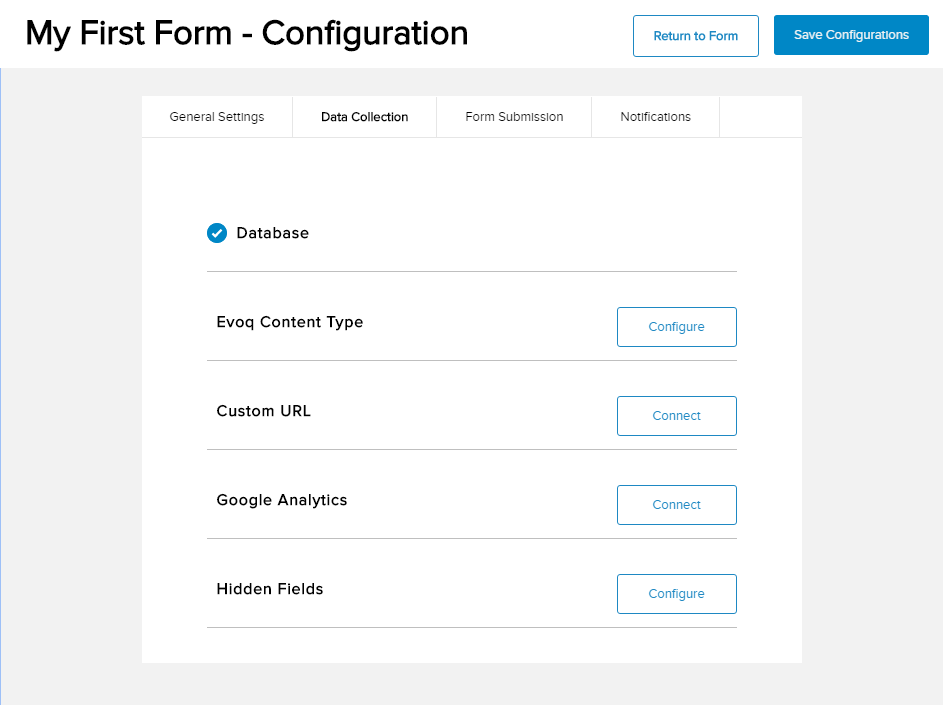
Field Description Evoq Content Type If configured, data in form submissions are converted into content items of the specified content type for use as structured content. To configure, choose the content type for the new content items that would be populated with data from the form submissions, then map the form fields to the content type fields. See Save Form Responses to Structured Content. Custom URL If connected, data in form submissions are sent to the specified Custom Endpoint URL for processing and storage. Google Analytics If connected, the form submissions are tracked using Google Analytics. To connect, click/tap Connect then fill in the information required by Google Analytics. - Tracking ID. This is provided by Google Analytics.
- Event Category. Leave as Form.
- Event Action. Leave as Submit, if you want the event to be logged only when the user submits the form.
- Event Label. The name of the event. Default: The name of the form.
- Event Value. A value associated with the event. Default: 0.
Hidden Fields If configured, the specified Field Identifier-Value pairs (max 10) would be returned with the user's completed form. See About Hidden Fields. -
In the Form Submission tab.
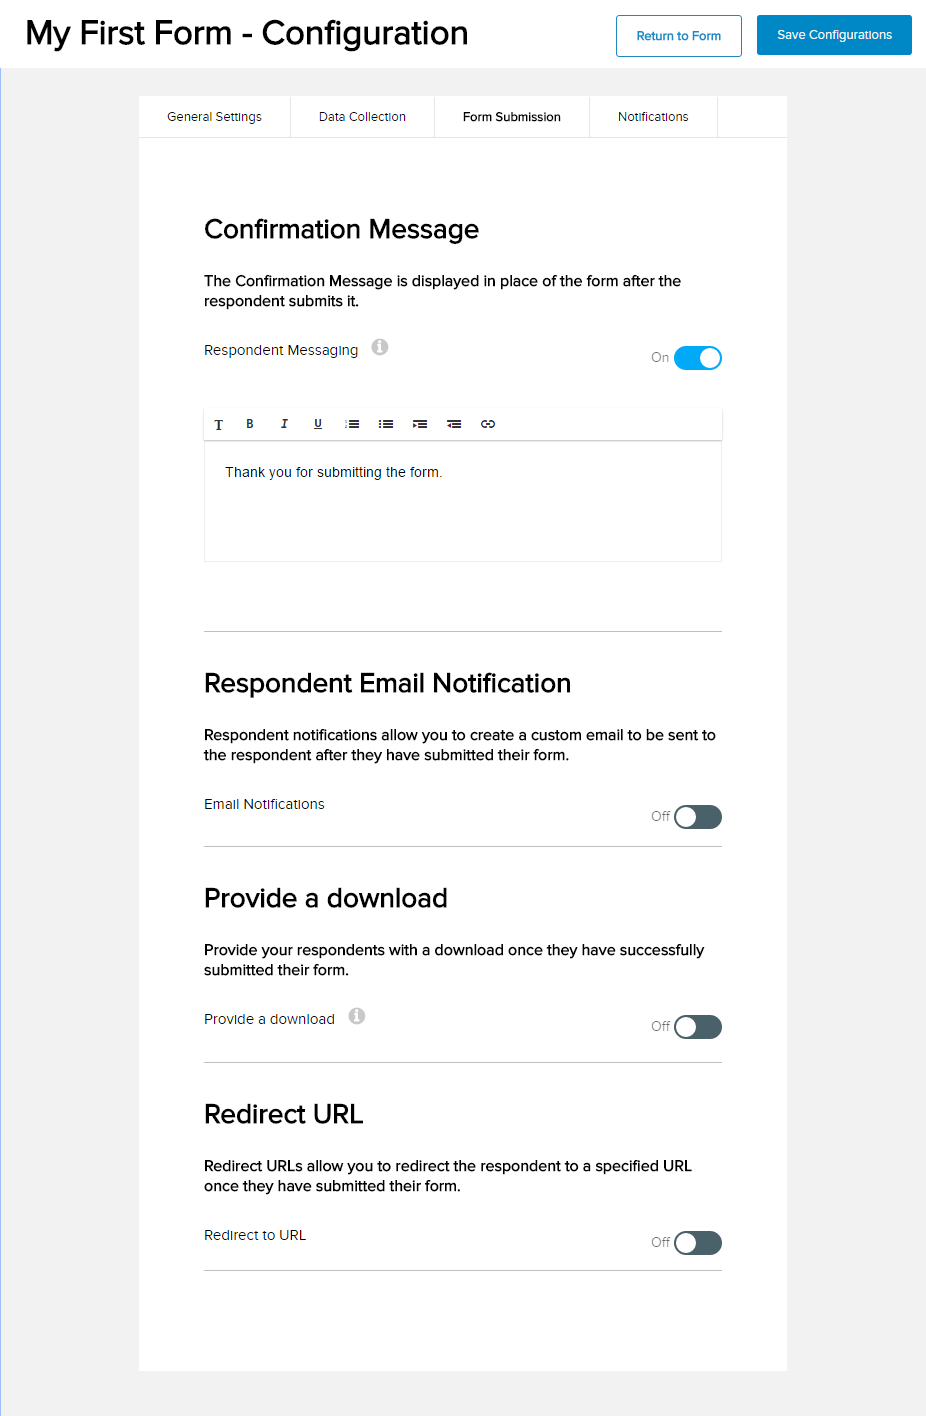
Field Description Confirmation Message If enabled (On), displays the specified message after the user submits the form. Respondent Email Notification If enabled (On), an email is sent to the user after submitting the form. If the form includes an email address field, the addressee (To:) would be prepopulated with the email address entered in that field. Provide a Download If enabled (On), allows the user to download the specified file(s) after the user submits the form. Redirect URL If enabled (On), the user is redirected to the specified URL after the user submits the form. You can optionally specify a delay. -
In the Notifications tab.
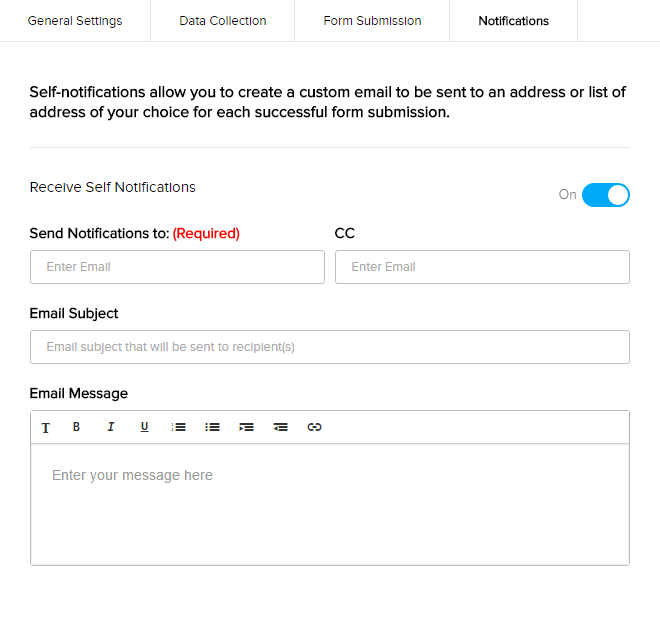
Field Description Receive Self Notifications If enabled (On), you can configure a custom email to be sent to the specified address(es) whenever a completed form is submitted.
-
Click/Tap the Configuration tab.