Post-Install Configuration
The following configuration steps should be performed after a successful new installation of Anaconda Enterprise.
Follow either the instructions for a browser installation (Option 1) or the instructions for an unattended installation (Option 2). Then follow the instructions for final configuration.
Option 1: Browser Installation
If the installation was performed using a browser, the post-install configuration UI will be available to guide you through many of the configuration steps.
NOTE: Please give the post-install UI a moment to start up. If you encounter an error immediately after clicking Continue at the end of the installation, please refresh your browser after a few seconds, and you should see the UI.
NOTE: When performing a browser-based installation, you must proceed through the post- install UI within 4 hours, or the installation UI will time out. If you would like to perform an unattended installation, please see Option 2 below.
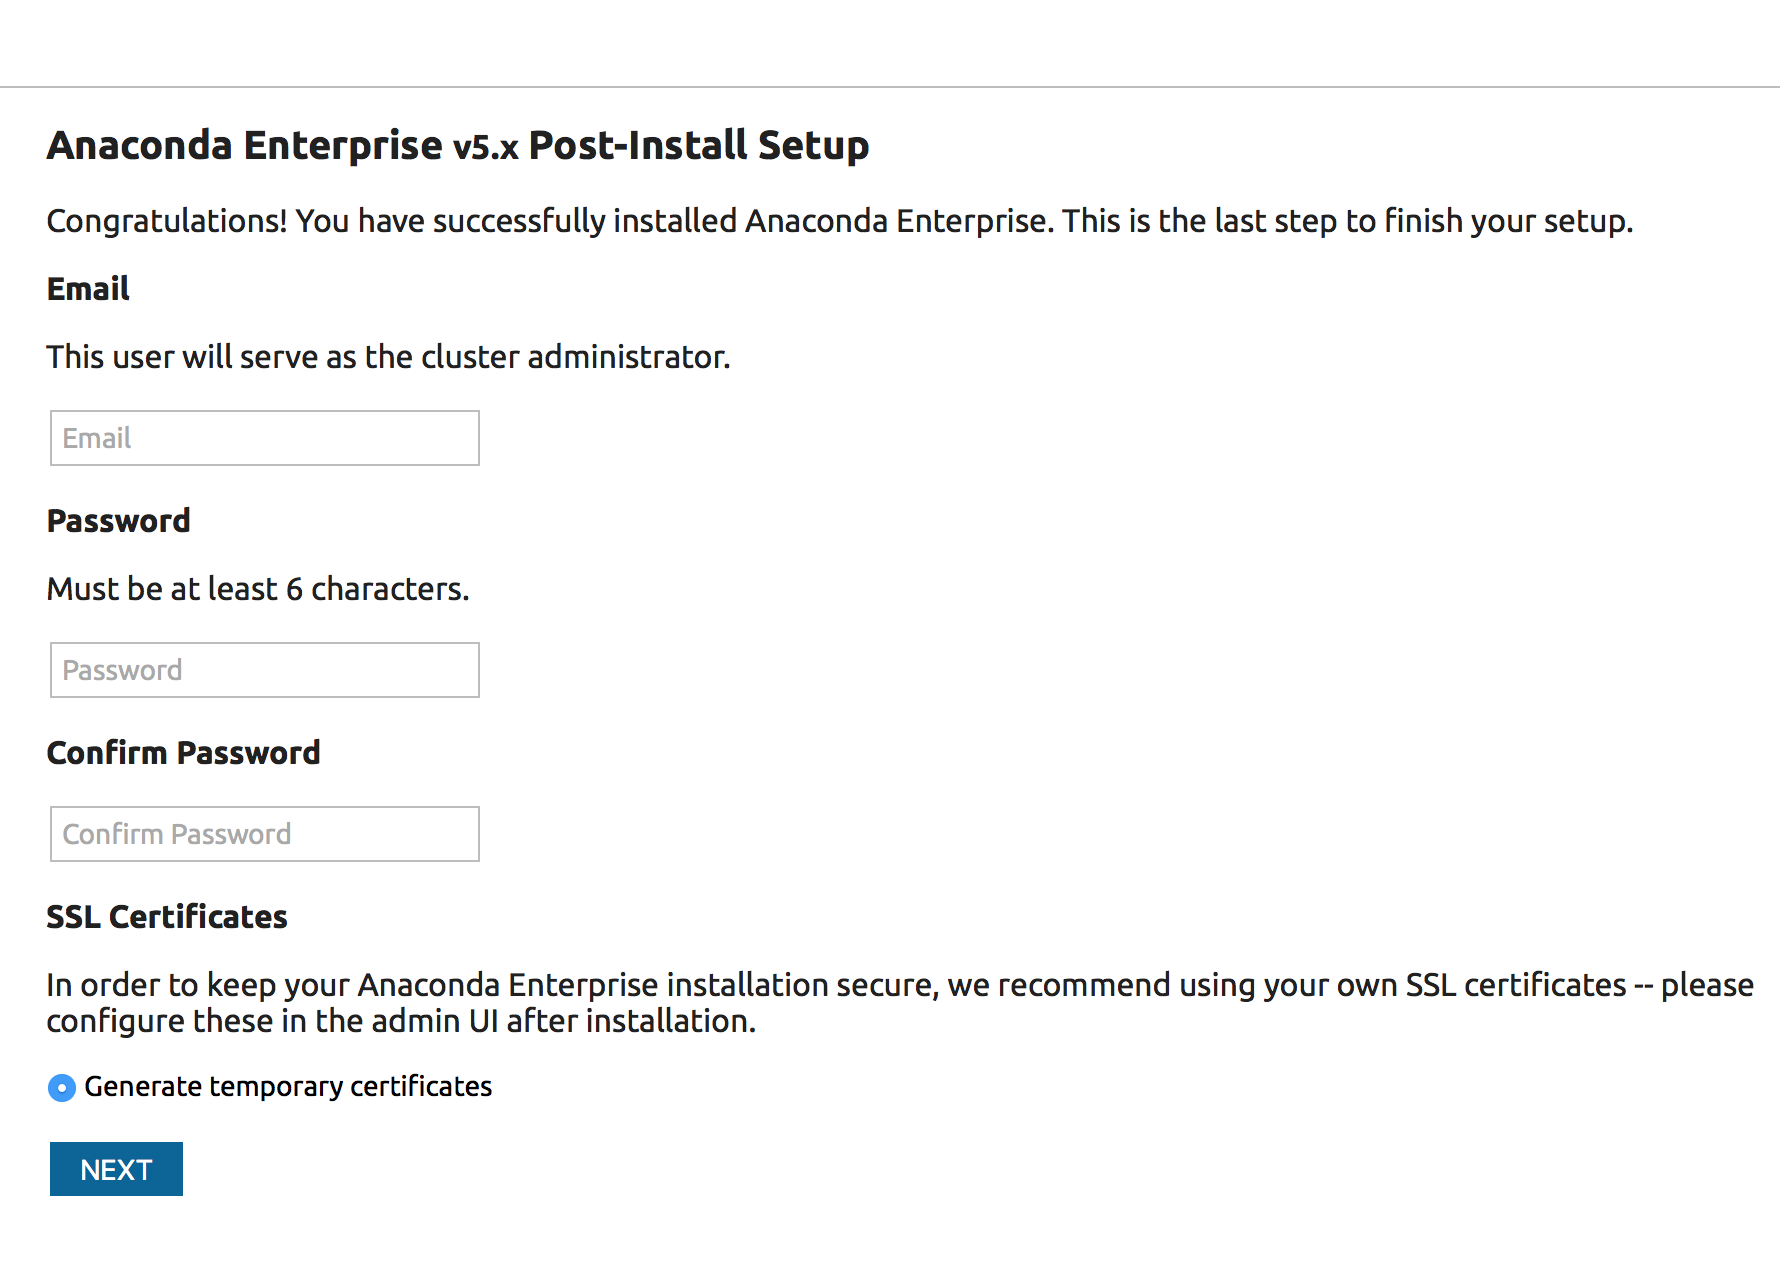
On the screen immediately after clicking Continue at the end of the installation, create the initial admin account credentials that you will use to log in to the Anaconda Enterprise Operations Center and click the Next button.
This installation path will generate self-signed SSL certificates that can be changed later in the Admin page of Anaconda Enterprise. Enter the fully-qualified domain at which the cluster will be accessed and click the Finish setup button.
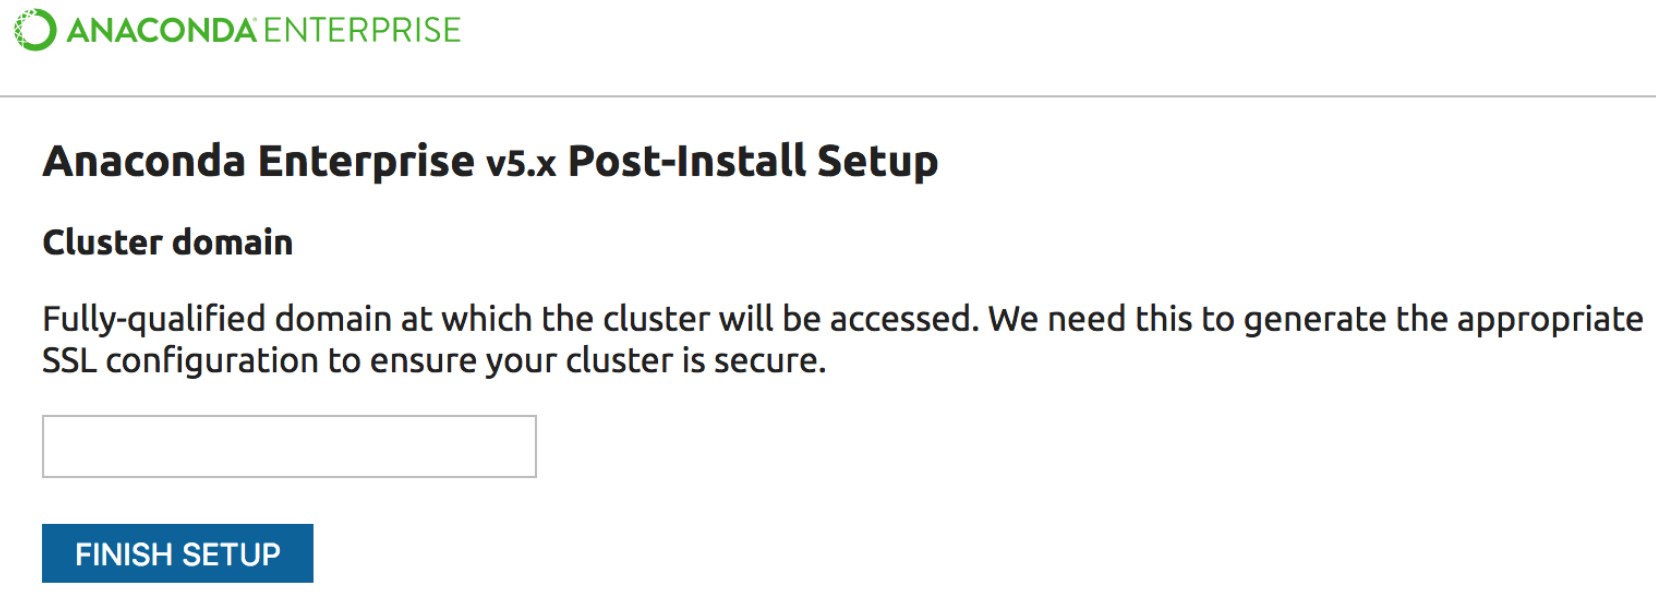
You will be taken to the Anaconda Enterprise Operations Center where you can login with the admin credential you created in the beginning of this section.
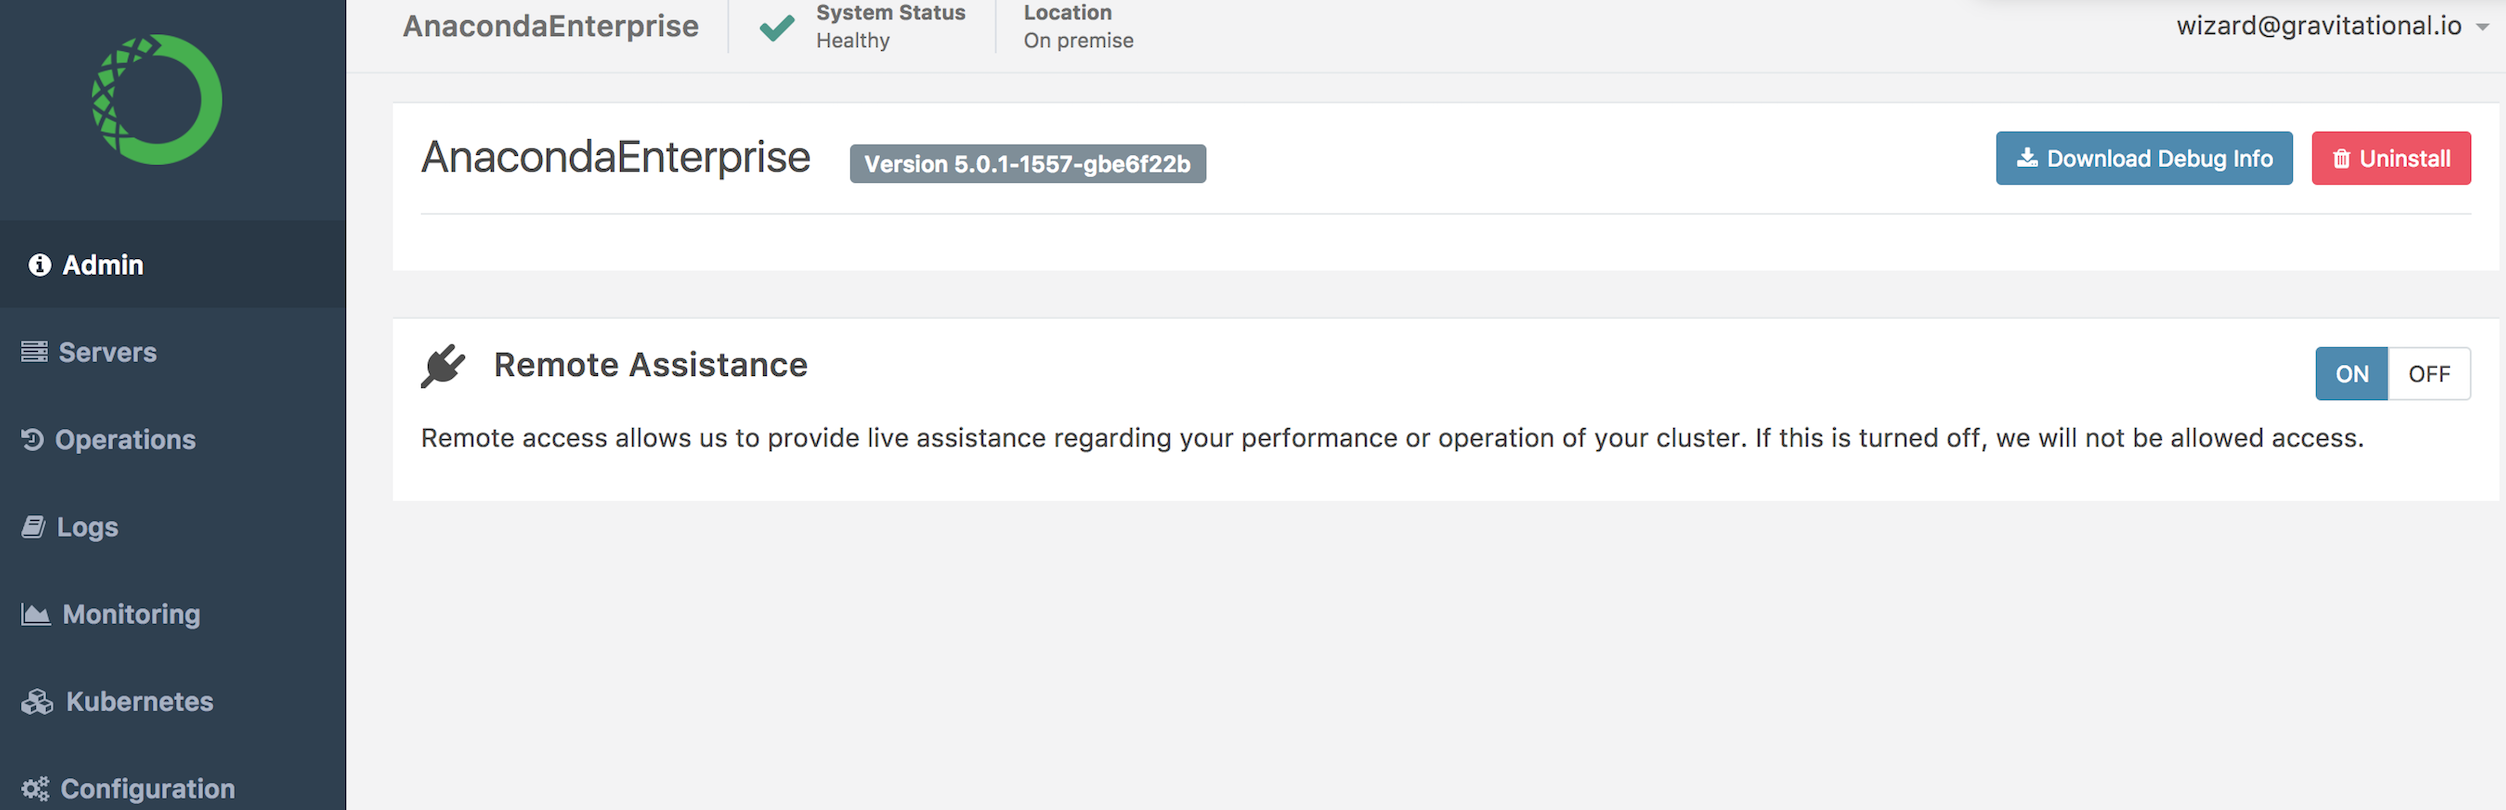
Continue to the Final Configuration section.
Option 2: Unattended Installation
After completing an unattended installation, you must configure SSL, your FQDN, default authentication data, and allowed authentication endpoints.
Configure SSL for Anaconda Enterprise
Generate self-signed temporary certificates. On the master node, run:
cd path/to/Anaconda/Enterprise/unpacked/installer
cd DIY-SSL-CA
bash create_noprompt.sh DESIRED_FQDN
cp out/DESIRED_FQDN/secret.yaml /var/lib/gravity/planet/share/secrets.yaml
Replace
DESIRED_FQDNwith the fully-qualified domain of the cluster to which you are installing Anaconda Enterprise.Saving this file as
/var/lib/gravity/planet/share/secrets.yamlon the Anaconda Enterprise master node makes it accessible as/ext/share/secrets.yamlwithin the Anaconda Enterprise environment which can be accessed with the commandsudo gravity enter.Update the
certssecretReplace the built-in
certssecret with the contents ofsecrets.yaml. Enter the Anaconda Enterprise environment and run these commands:$ kubectl delete secrets certs secret "certs" deleted $ kubectl create -f /ext/share/secrets.yaml secret "certs" created
Configure FQDN
To access Anaconda Enterprise, you’ll need to edit the platform configuration settings to configure the fully qualified domain name (FQDN).
You can access the platform configuration in the Anaconda Enterprise Operations Center by visiting this URL in your browser:
https://anaconda.example.com:32009NOTE: Always replace
anaconda.example.comwith the domain name you are using.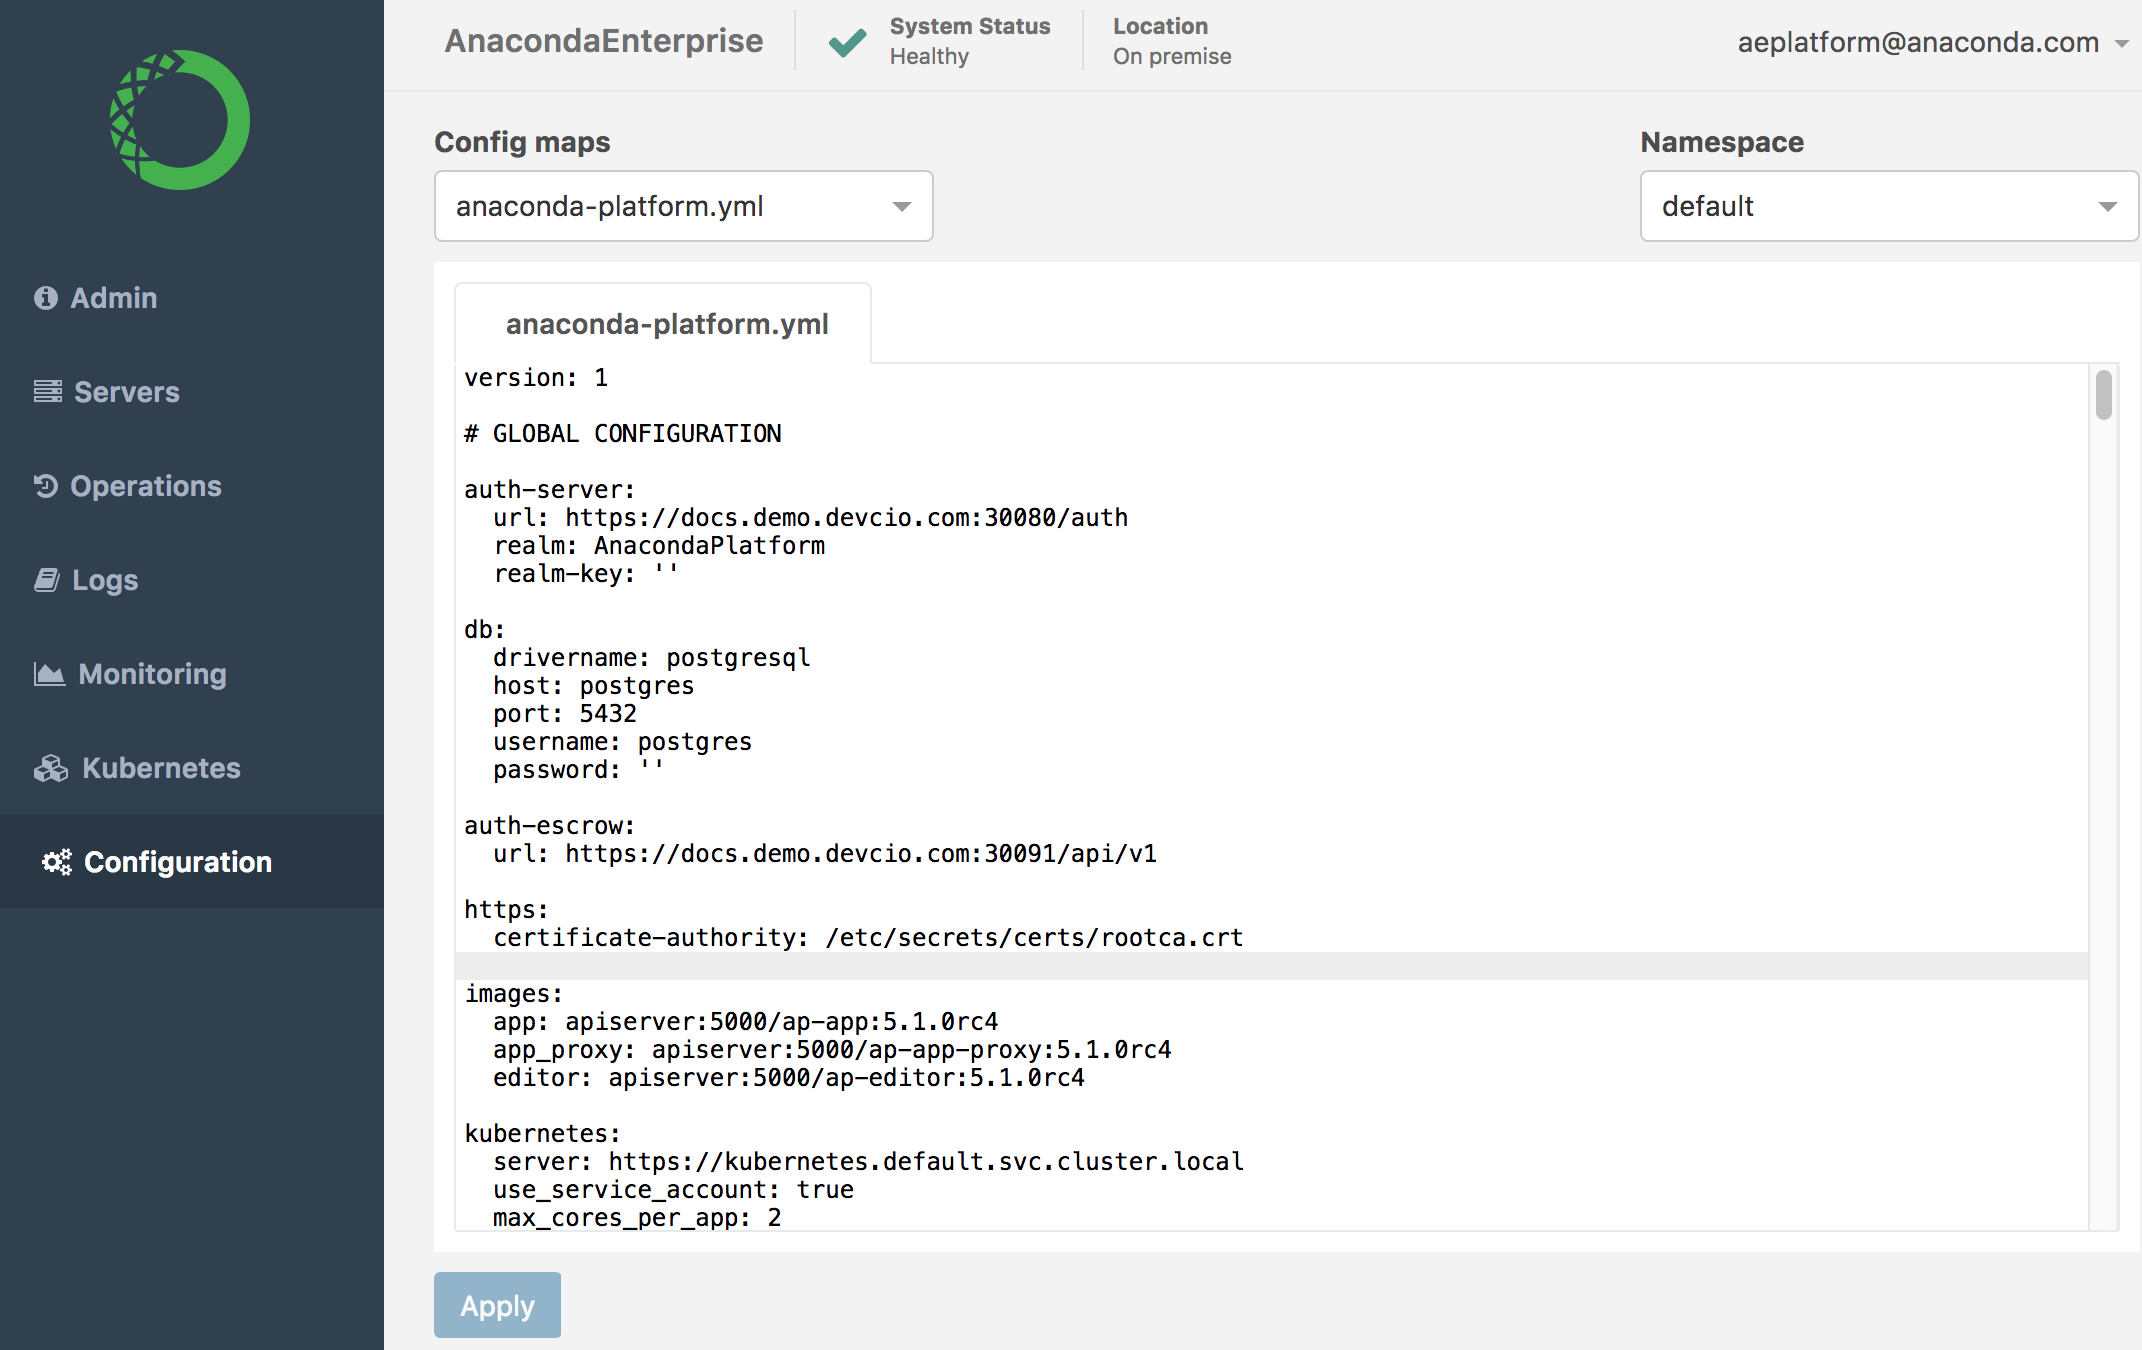
Default Authentication Data
In the configuration file, add the following default data location to the
authsection under theimport-filekey:auth: import-file: /anaconda_enterprise/auth/anaconda_platform/auth/test_data/prod-keycloak.json
Authentication Redirects and Allowed URLs
Now edit the redirect URLs in Anaconda Enterprise.
Access the authentication server on the Anaconda Enterprise cluster by visiting this URL in your browser:
https://anaconda.example.com:30080Access the Anaconda Enterprise Operations Center and login with the default username and password:
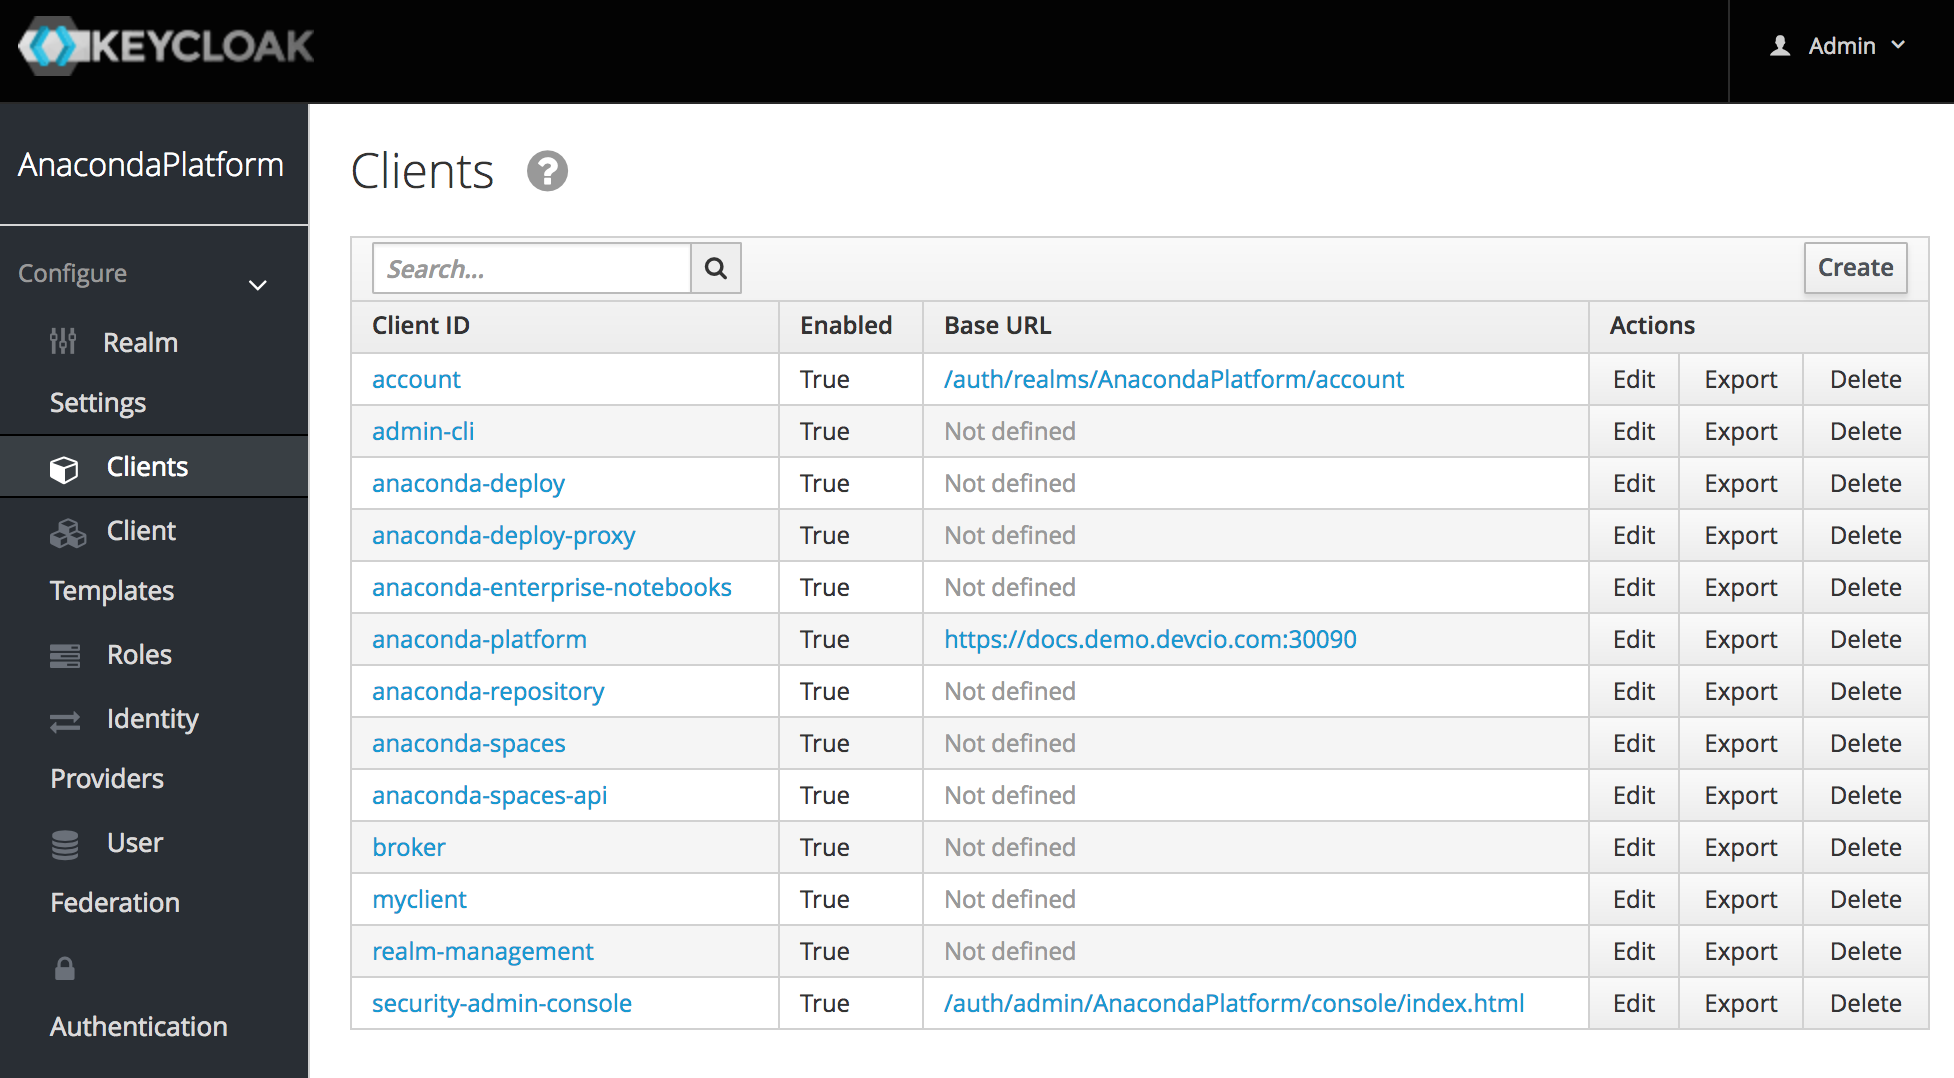
admin/admin. You’ll be asked to change the default password when you log in.Check to be sure that you are on the
AnacondaPlatformrealm, then in the left menu, click on the Clients configuration tab.Replace all URLs in the following client settings with the FQDN of the Anaconda Enterprise server:
anaconda-platform- Valid Redirect URIs:https://anaconda.example.com:30090/*anaconda-platform- Base URL:https://anaconda.example.com:30090anaconda-platform- Web Origins:https://anaconda.example.com:30090anaconda-spaces- Valid Redirect URIs:https://anaconda.example.com:*
You can also add/remove users from the Anaconda Enterprise authentication server. The authentication server
adminuser exists under themasterrealm, and all other Anaconda Enterprise users exist under theAnacondaPlatformrealm.
Both Options: Final Configuration
After completing either of the configuration paths above, follow these steps to complete the configuration.
Access Anaconda Enterprise in your browser
In your browser, access Anaconda Enterprise by visiting this URL:
https://anaconda.example.com:30090Test installation
You can test your install by:
- Creating a new project and starting an editing session
- Deploying a project
- Generating a token from a deployment
Setting the database Password
- Set a password in postgres.
- Connect to postgres pod:
kubectl exec -it postgres-<id> /bin/sh - Connect to database with psql:
psql -h localhost -U postgres - Set the password:
ALTER USER user_name WITH PASSWORD 'new_password';
- Connect to postgres pod:
- Open the Anaconda Enterprise Operations Center and navigate to the platform configuration page.
- Enter the password at
db.password. - Restart all the service pods:
kubectl get pods | grep ap- | cut -d' ' -f1 | xargs kubectl delete pods