Groups
Groups in Anaconda Enterprise allow you to manage a common set of
attributes and role mappings for a set of users. Users can be members of
zero or more groups. Users inherit the attributes and role mappings
assigned to each group. To manage groups go to the Groups left menu
item.
Groups
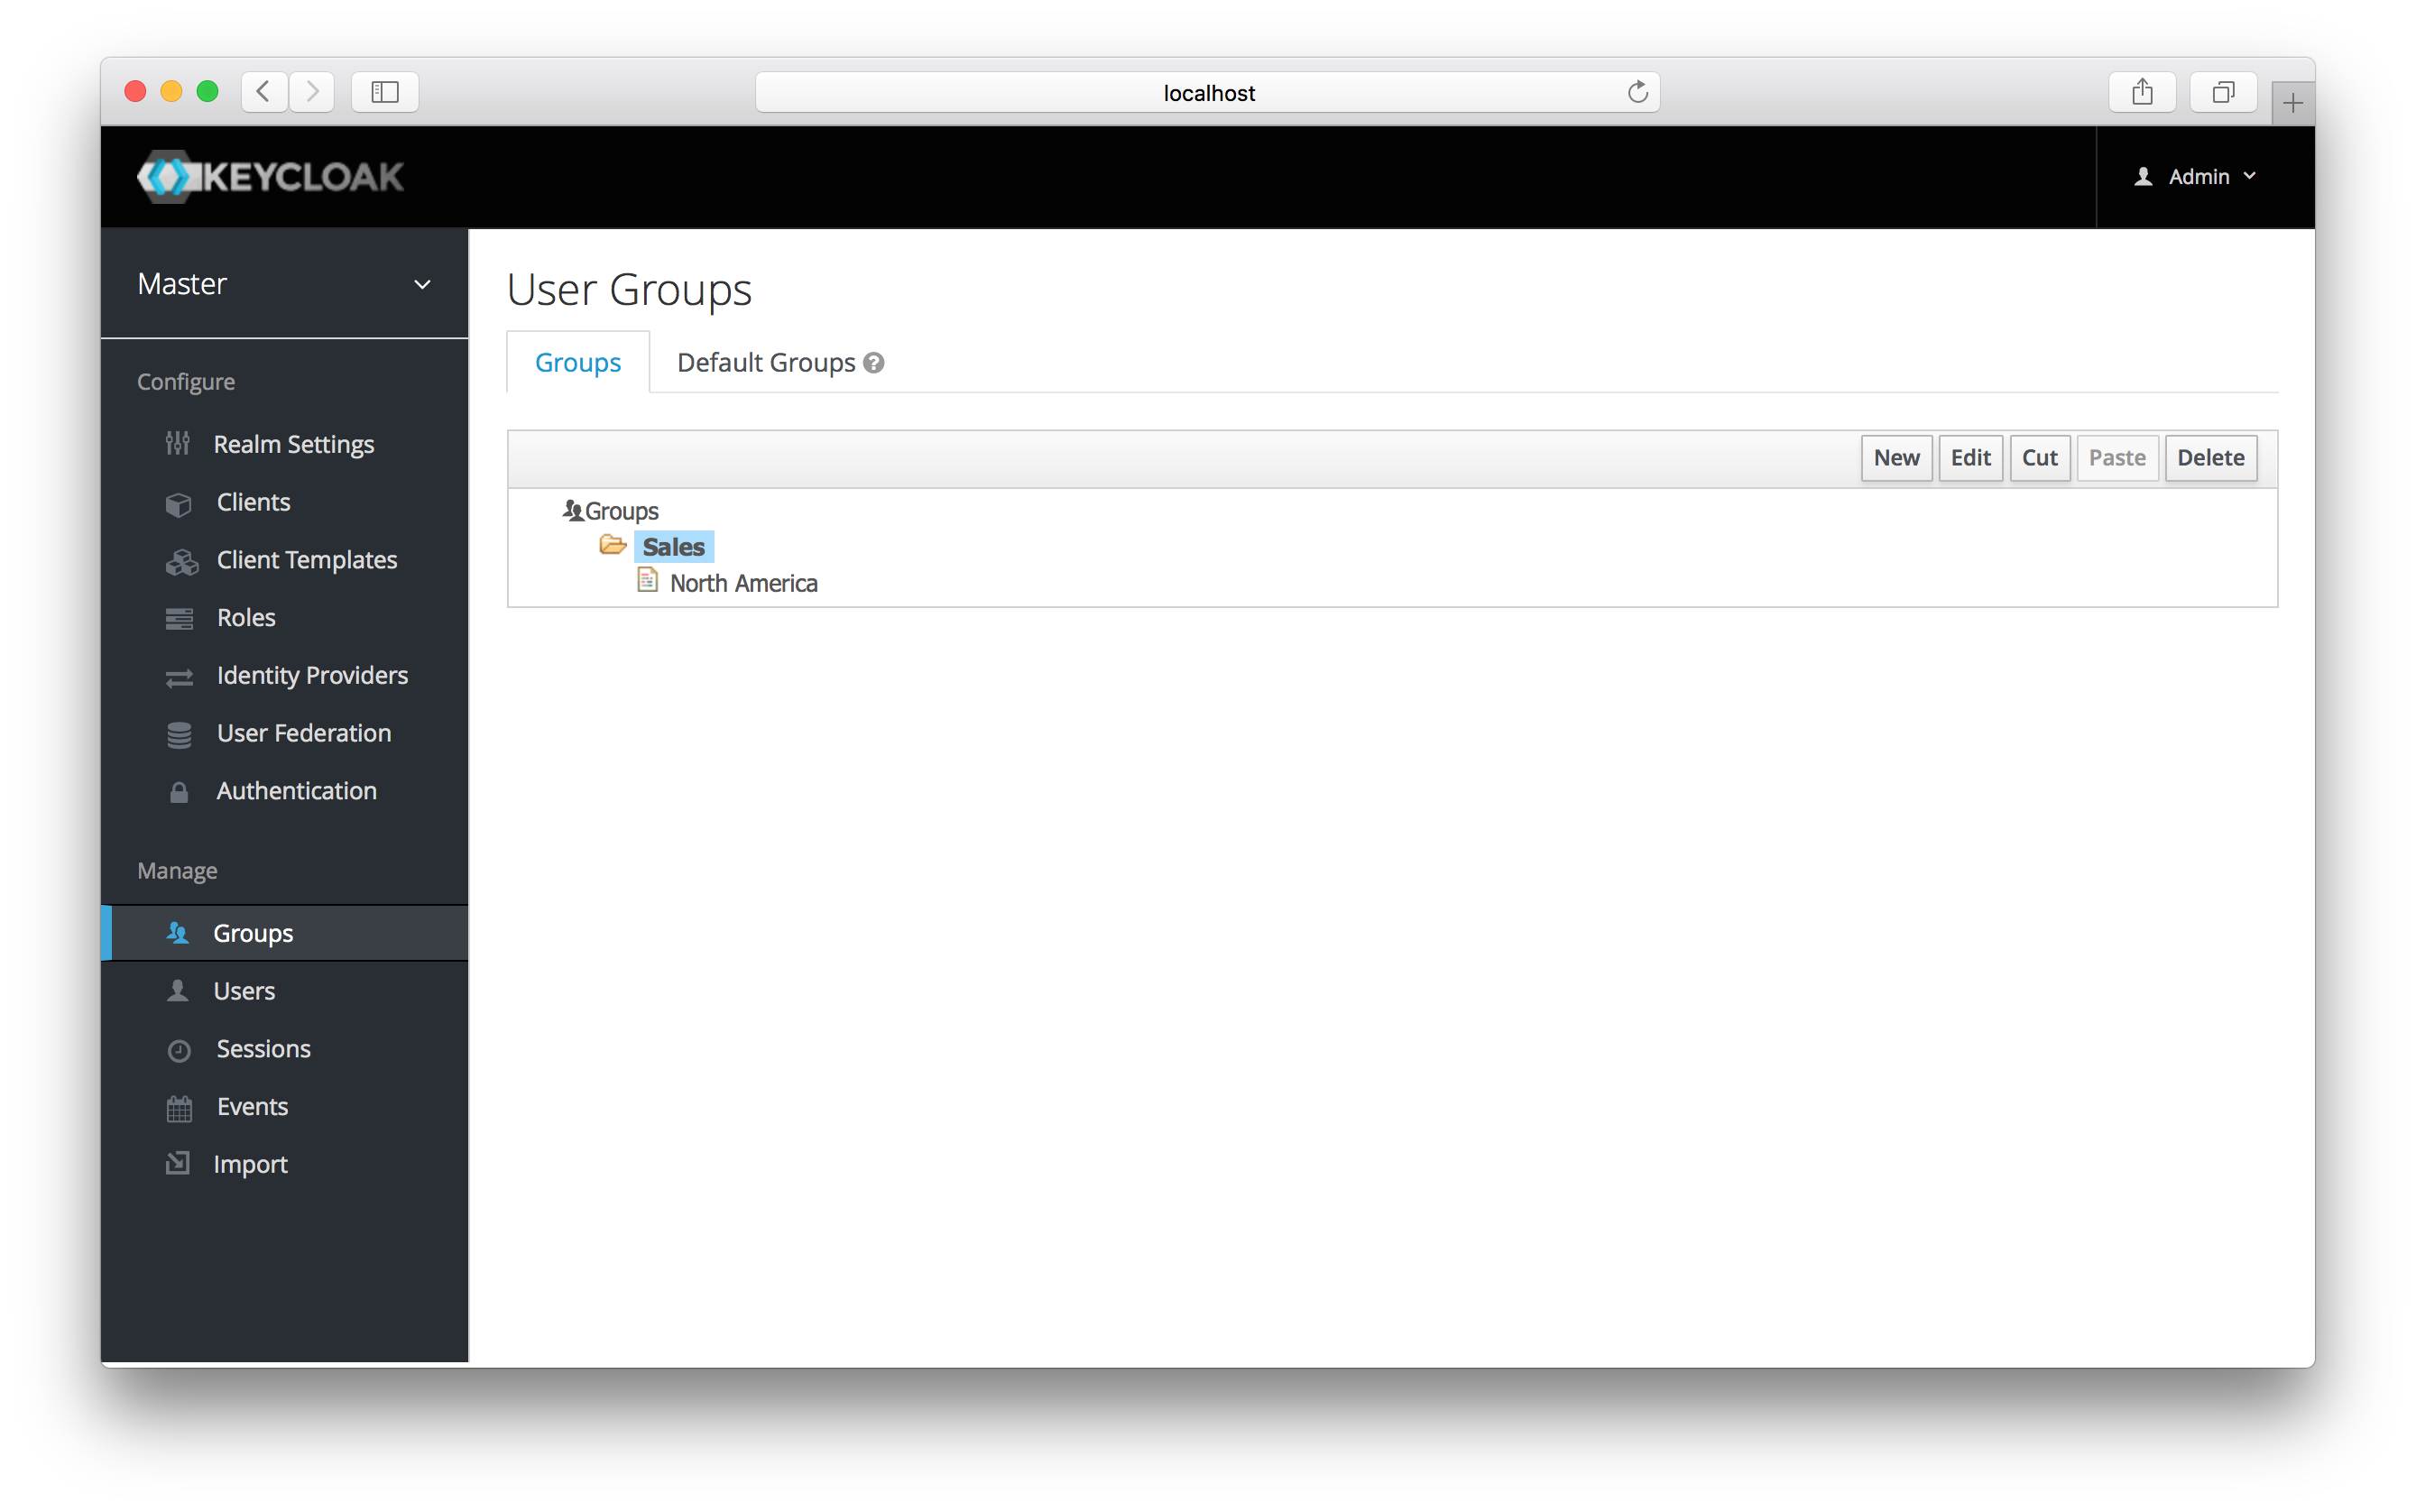
Groups are hierarchical. A group can have many subgroups, but a group
can only have one parent. Subgroups inherit the attributes and role
mappings from the parent. This applies to the user as well. So, if you
have a parent group and a child group and a user that only belongs to
the child group, the user inherits the attributes and role mappings of
both the parent and child. In this example, we have a top level
Sales group and a child North America subgroup. To add a group,
click on the parent you want to add a new child to and click New
button. Select the Groups icon in the tree to make a top-level
group. Entering in a group name in the Create Group screen and
hitting Save will bring you to the individual group management page.

Group
The Attributes and Role Mappings tab work exactly as the tabs
with similar names under a user. Any attributes and role mappings you
define will be inherited by the groups and users that are members of
this group.
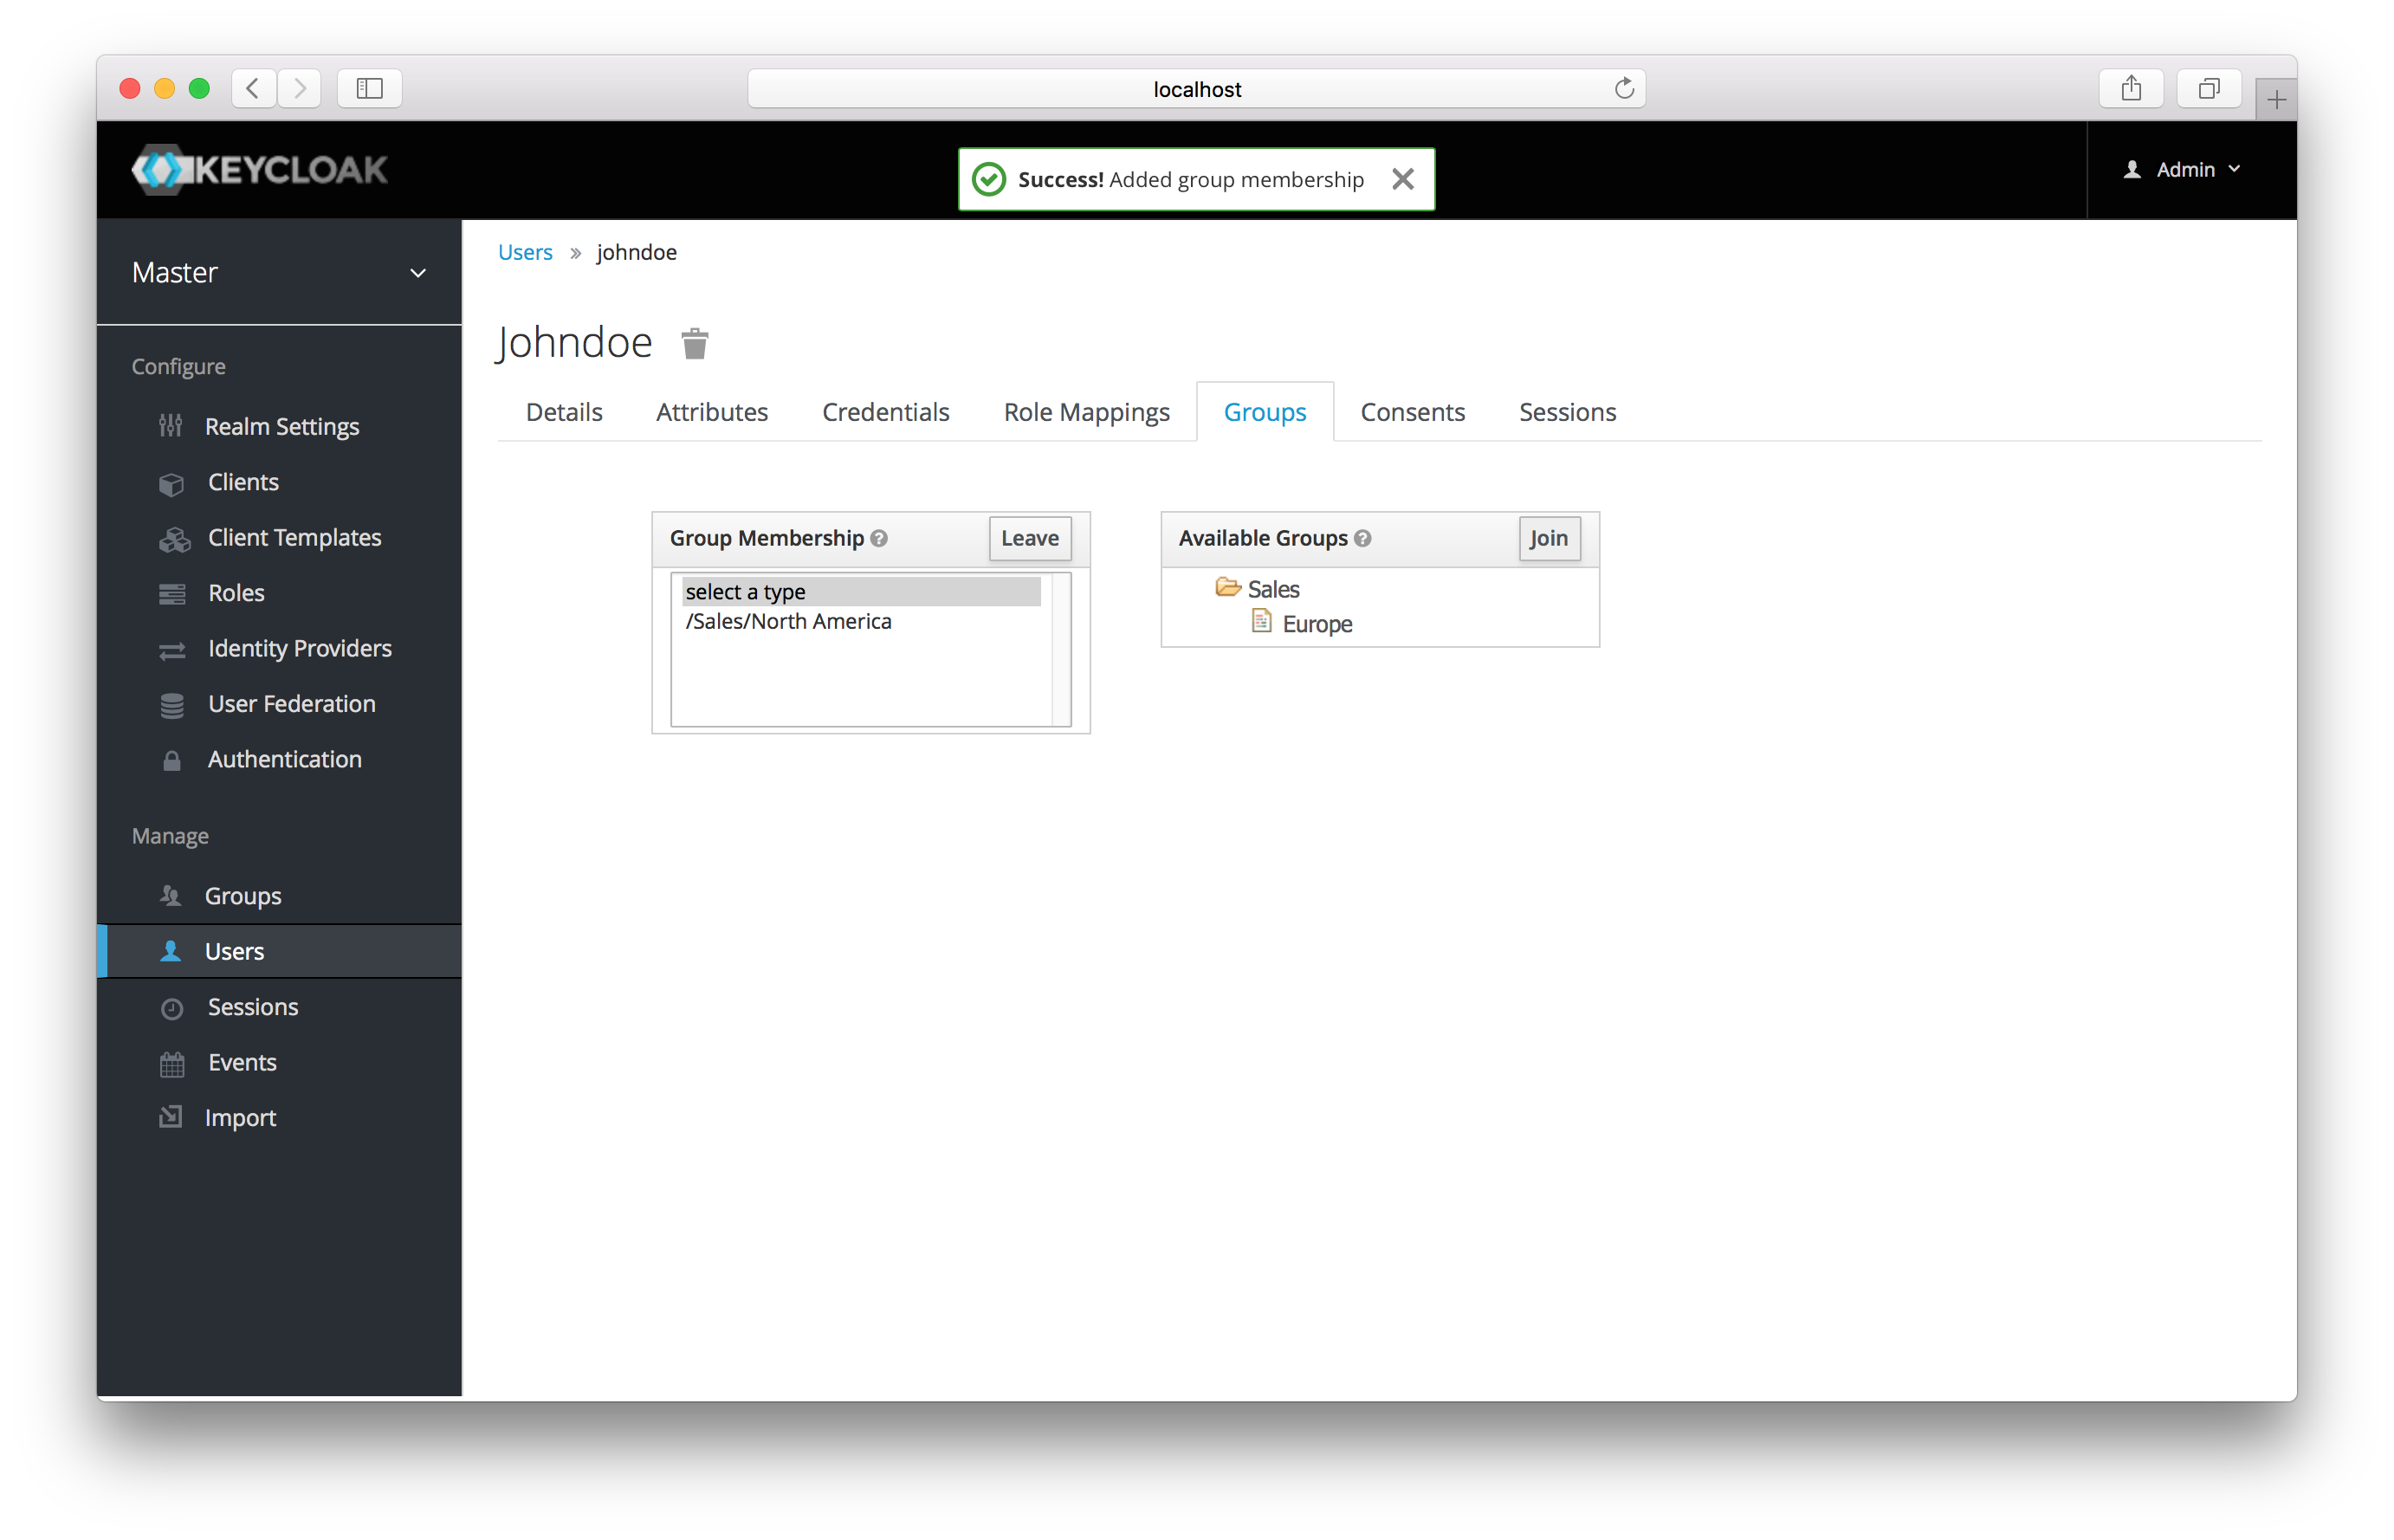
To add a user to a group you need to go all the way back to the user
detail page and click on the Groups tab there.
User Groups
Select a group from the Available Groups tree and hit the join
button to add the user to a group. Vice versa to remove a group. Here
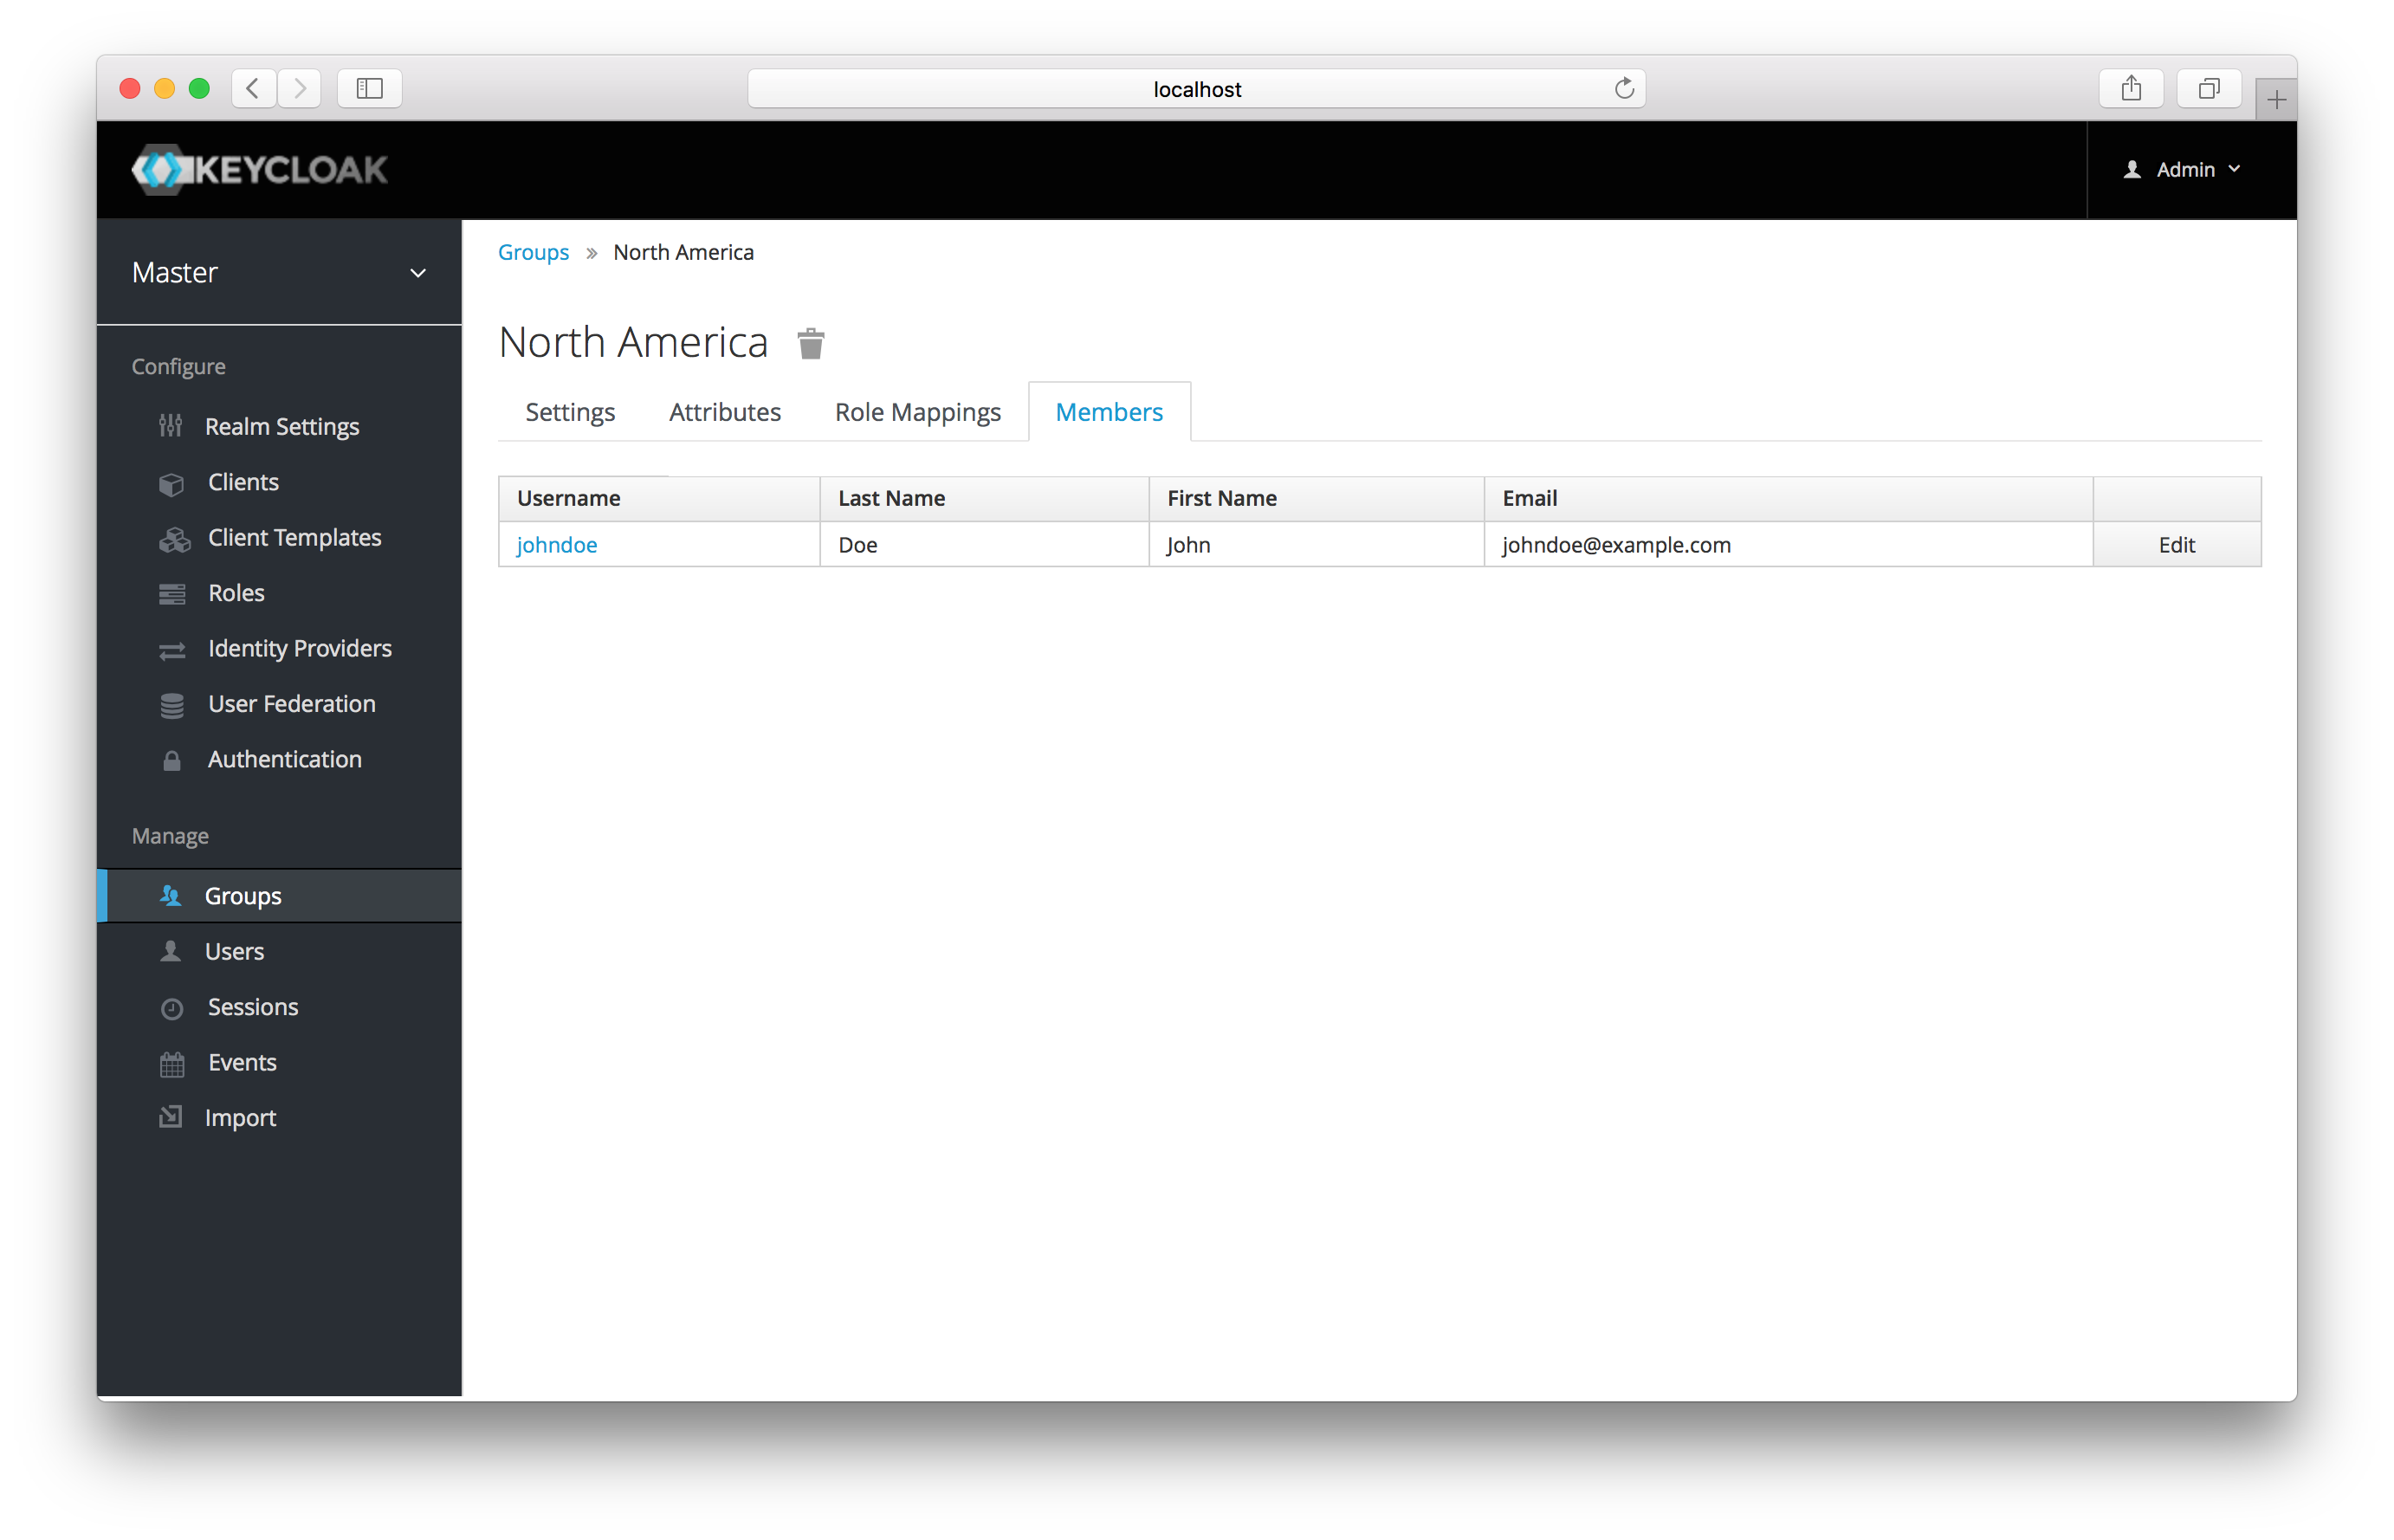
we’ve added the user Jim to the North America sales group. If you go
back to the detail page for that group and select the Membership
tab, Jim is now displayed there.
Group Membership
NOTE: When you set a group to be a default group, the change is applied only to users created after that action. To apply the change to all federated users, remove them by clicking the Remove imported button, then replace them by clicking the Synchronize all users button.