Roles
Roles identify a type or category of user. Typical roles that may exist in an
organization include admin, user, manager, and employee.
Assigning access and permissions to individual users can be too fine-grained and difficult to manage, so Anaconda Enterprise recommends assigning access and permissions to roles. There is a global namespace for roles, and each “client” (that is, service) also has its own dedicated namespace where roles can be defined.
Pre-defined Roles
Anaconda Enterprise comes with a set of roles that provide users access within the system. It’s a good practice to use these roles to assign access where necessary. See User Role Mappings for how to do this.
The built-in roles are:
- ae-admin
- Allows a user to act as an administrator for the platform, exposing administrative settings in the UI and access to the authentication Admin Console.
- ae-creator
- Allows a user to create new Projects.
- ae-deployer
- Allows a user to create new Deployments from Projects.
- ae-uploader
- Allows a user to upload Projects and Packages.
Realm Roles
Realm-level roles are a global namespace. You can see the list of built-in and created roles by clicking the Roles left menu item in the Admin Console.

To create a role, click Add Role on this page, enter the name and description of the role, and click Save.
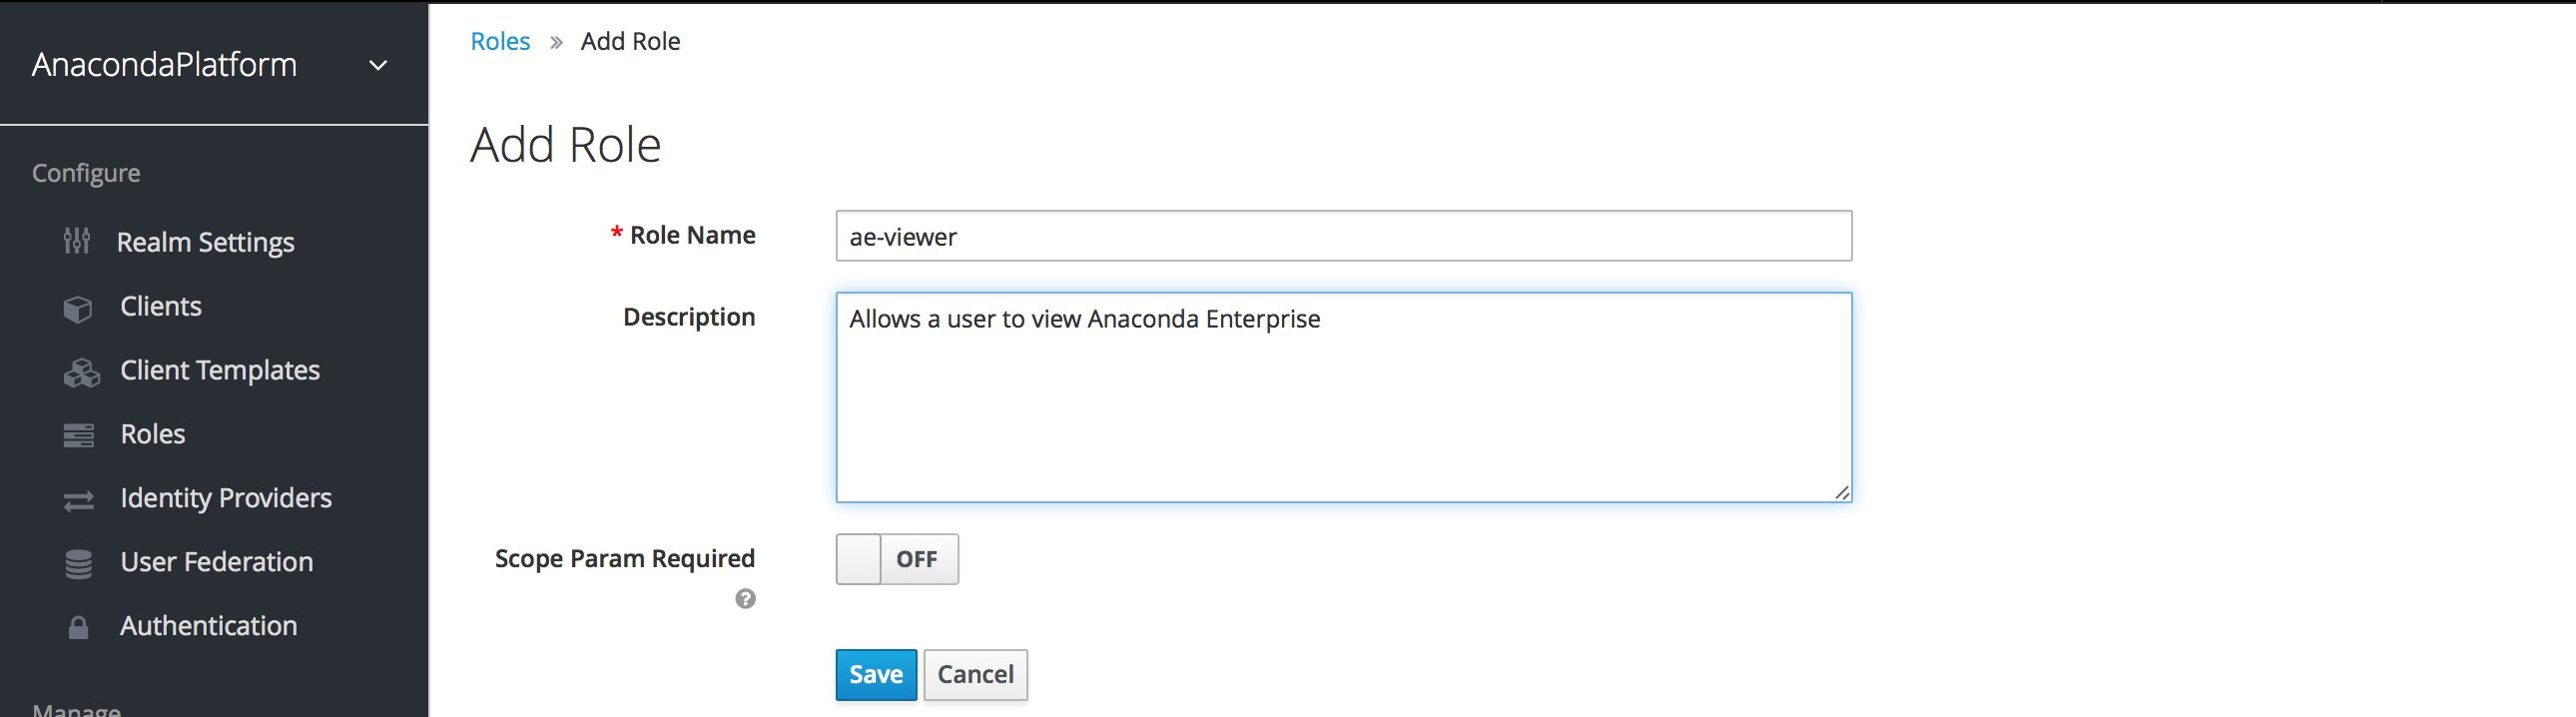
Roles can be assigned to a client automatically or require an explicit request.
If the client has to explicitly request a realm role, set the Scope Param
Required switch to On. The role must then be specified using the scope
parameter when requesting a token.
Multiple realm roles are separated by a space. EXAMPLE: scope=admin user
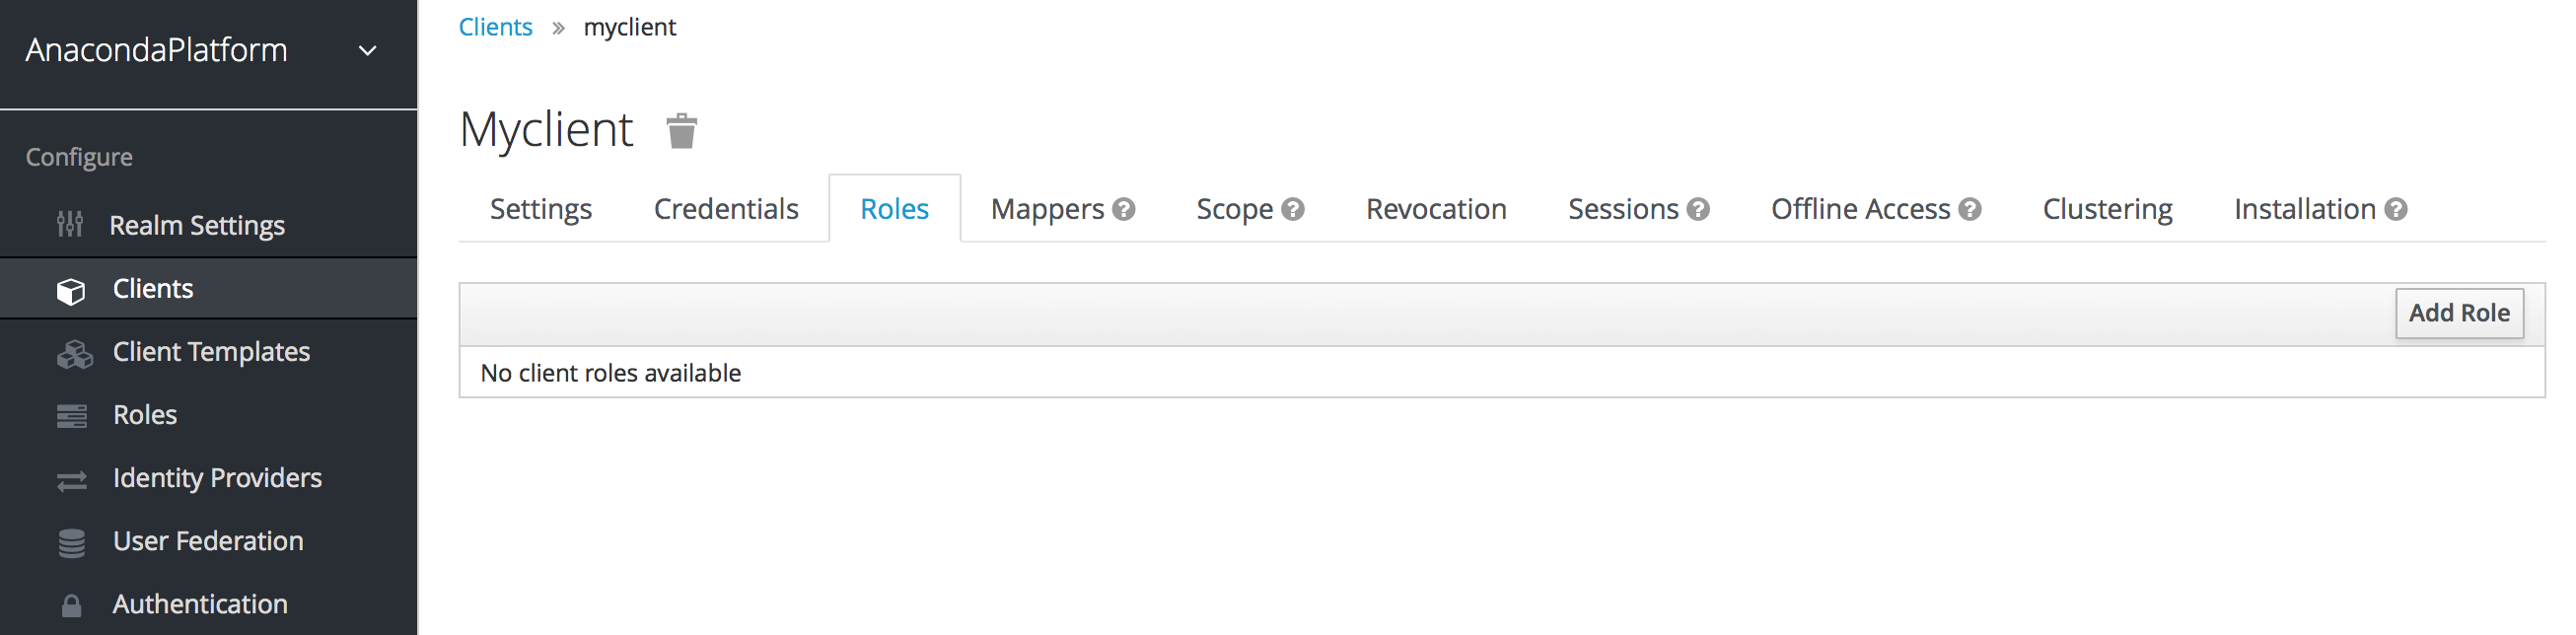
Client Roles
Client roles are little more than a namespace for each client (that is, component of Anaconda Enterprise). Each client has its own namespace. Client roles are managed under the Roles tab under each individual client.
If the client has to explicitly request another client’s role, the role must be
prefixed with the client ID when performing a request using the scope
parameter. EXAMPLE: If the client ID is account and the role is admin,
the scope parameter is scope=account/admin.
As with requesting realm roles, multiple roles are separated by spaces.
Composite Roles
Any realm or client level role can be turned into a composite role, a role that has one or more additional roles associated with it. When a composite role is mapped to the user, the user also gains the roles associated with that composite. This inheritance is recursive, so any composite of composites is also inherited.
To turn a regular role into a composite role, go to the role detail page and flip on the Composite Role switch.
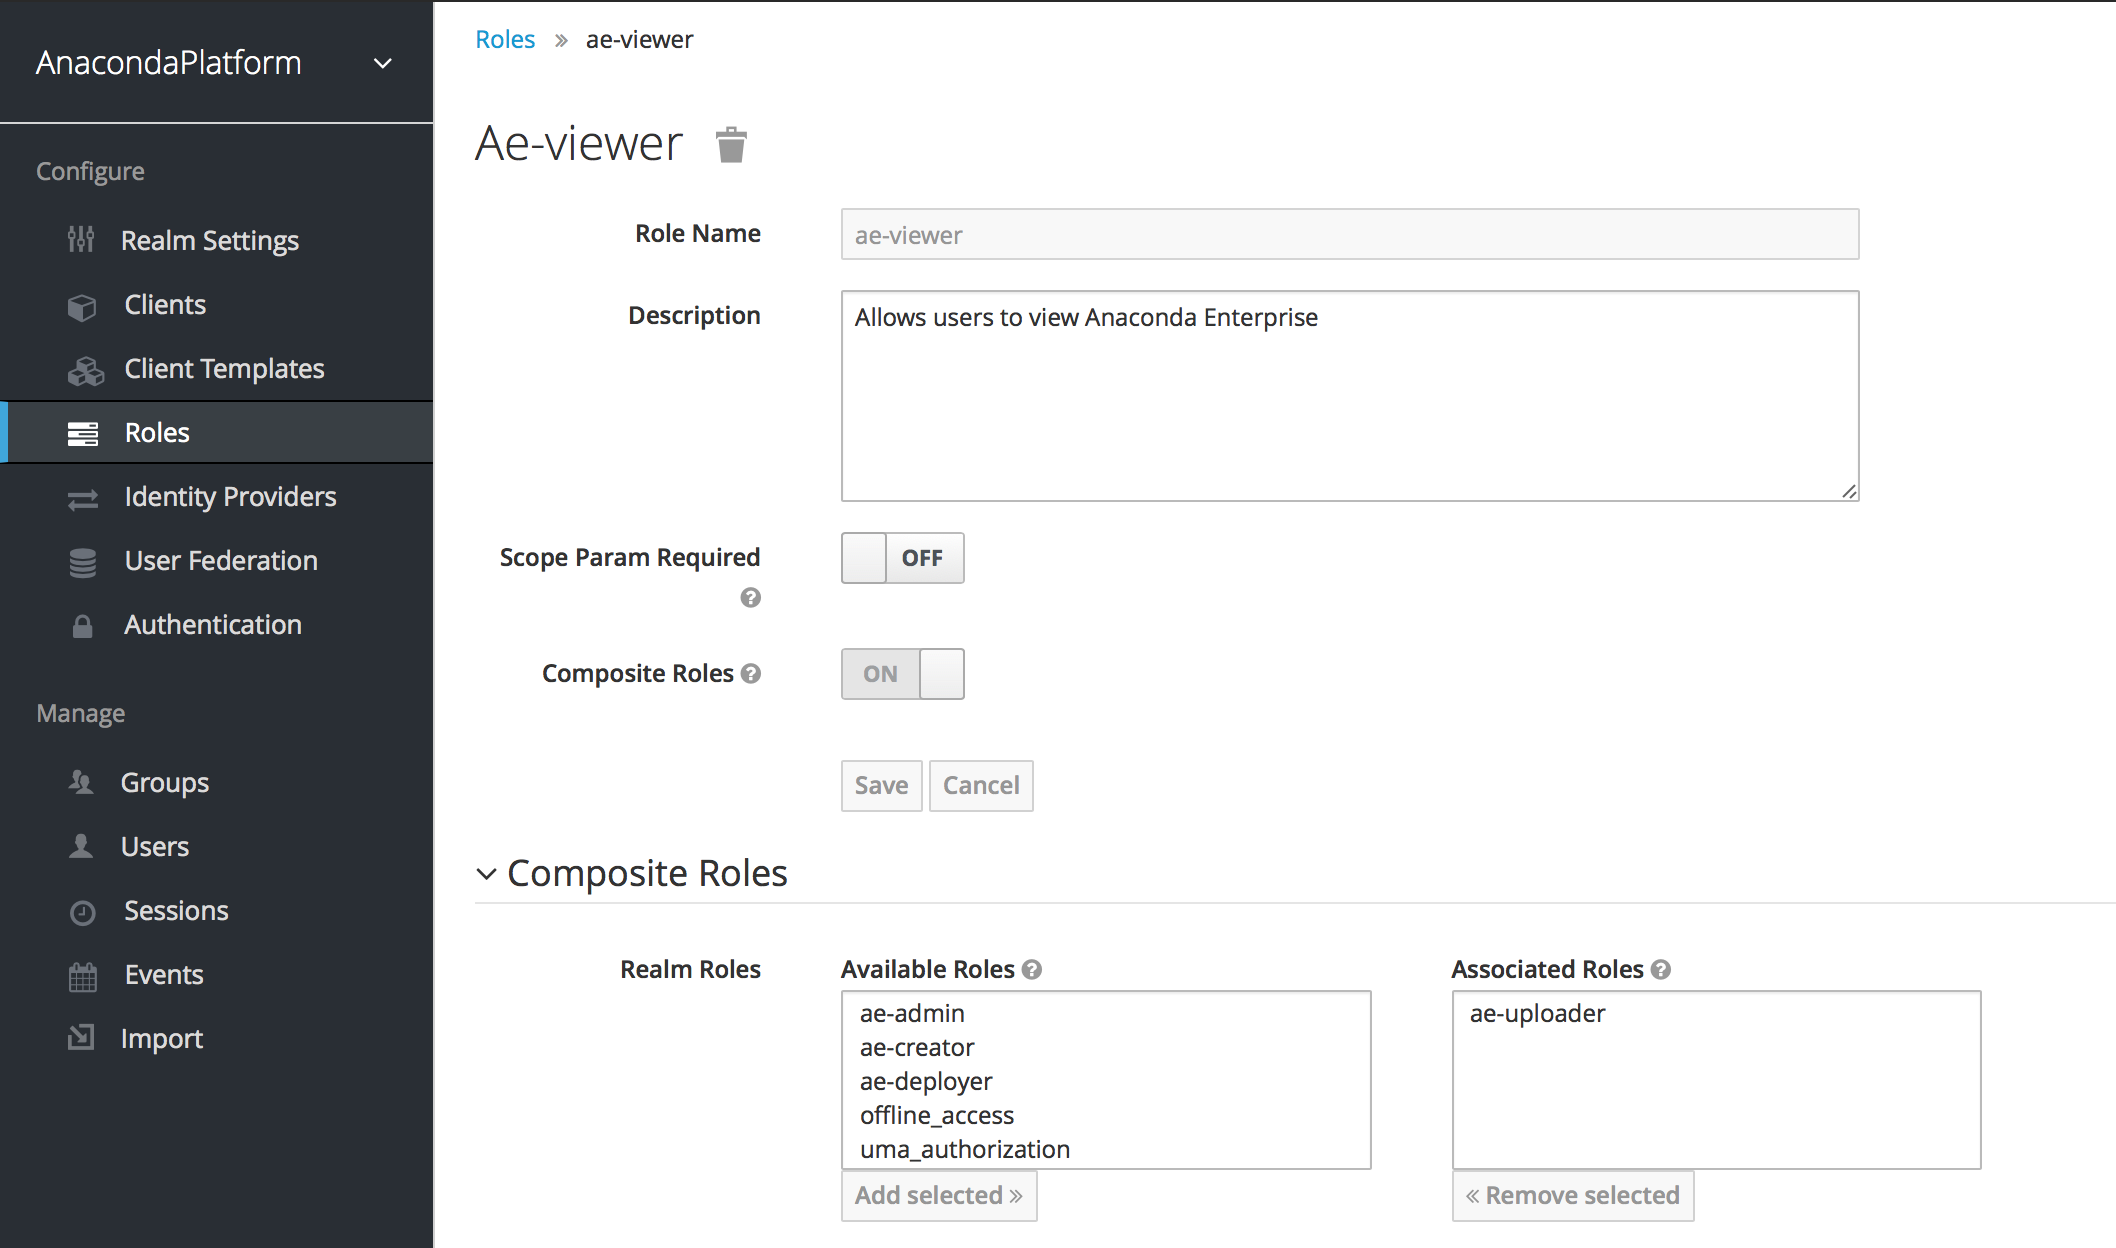
The role selection UI will display lower on the page and you’ll be able to
associate realm level and client level roles to the composite you are creating.
In this example, the ae-uploader realm-level role was associated with the
ae-viewer composite role. Any user with the ae-viewer role will now
also inherit the ae-uploader role.
NOTE: When tokens and SAML assertions are created, any composite will also have its associated roles added to the claims and assertions of the authentication response sent back to the client. See Client Scope for more detail.
User Role Mappings
User role mappings can be assigned individually to each user through the Role Mappings tab for that single user.
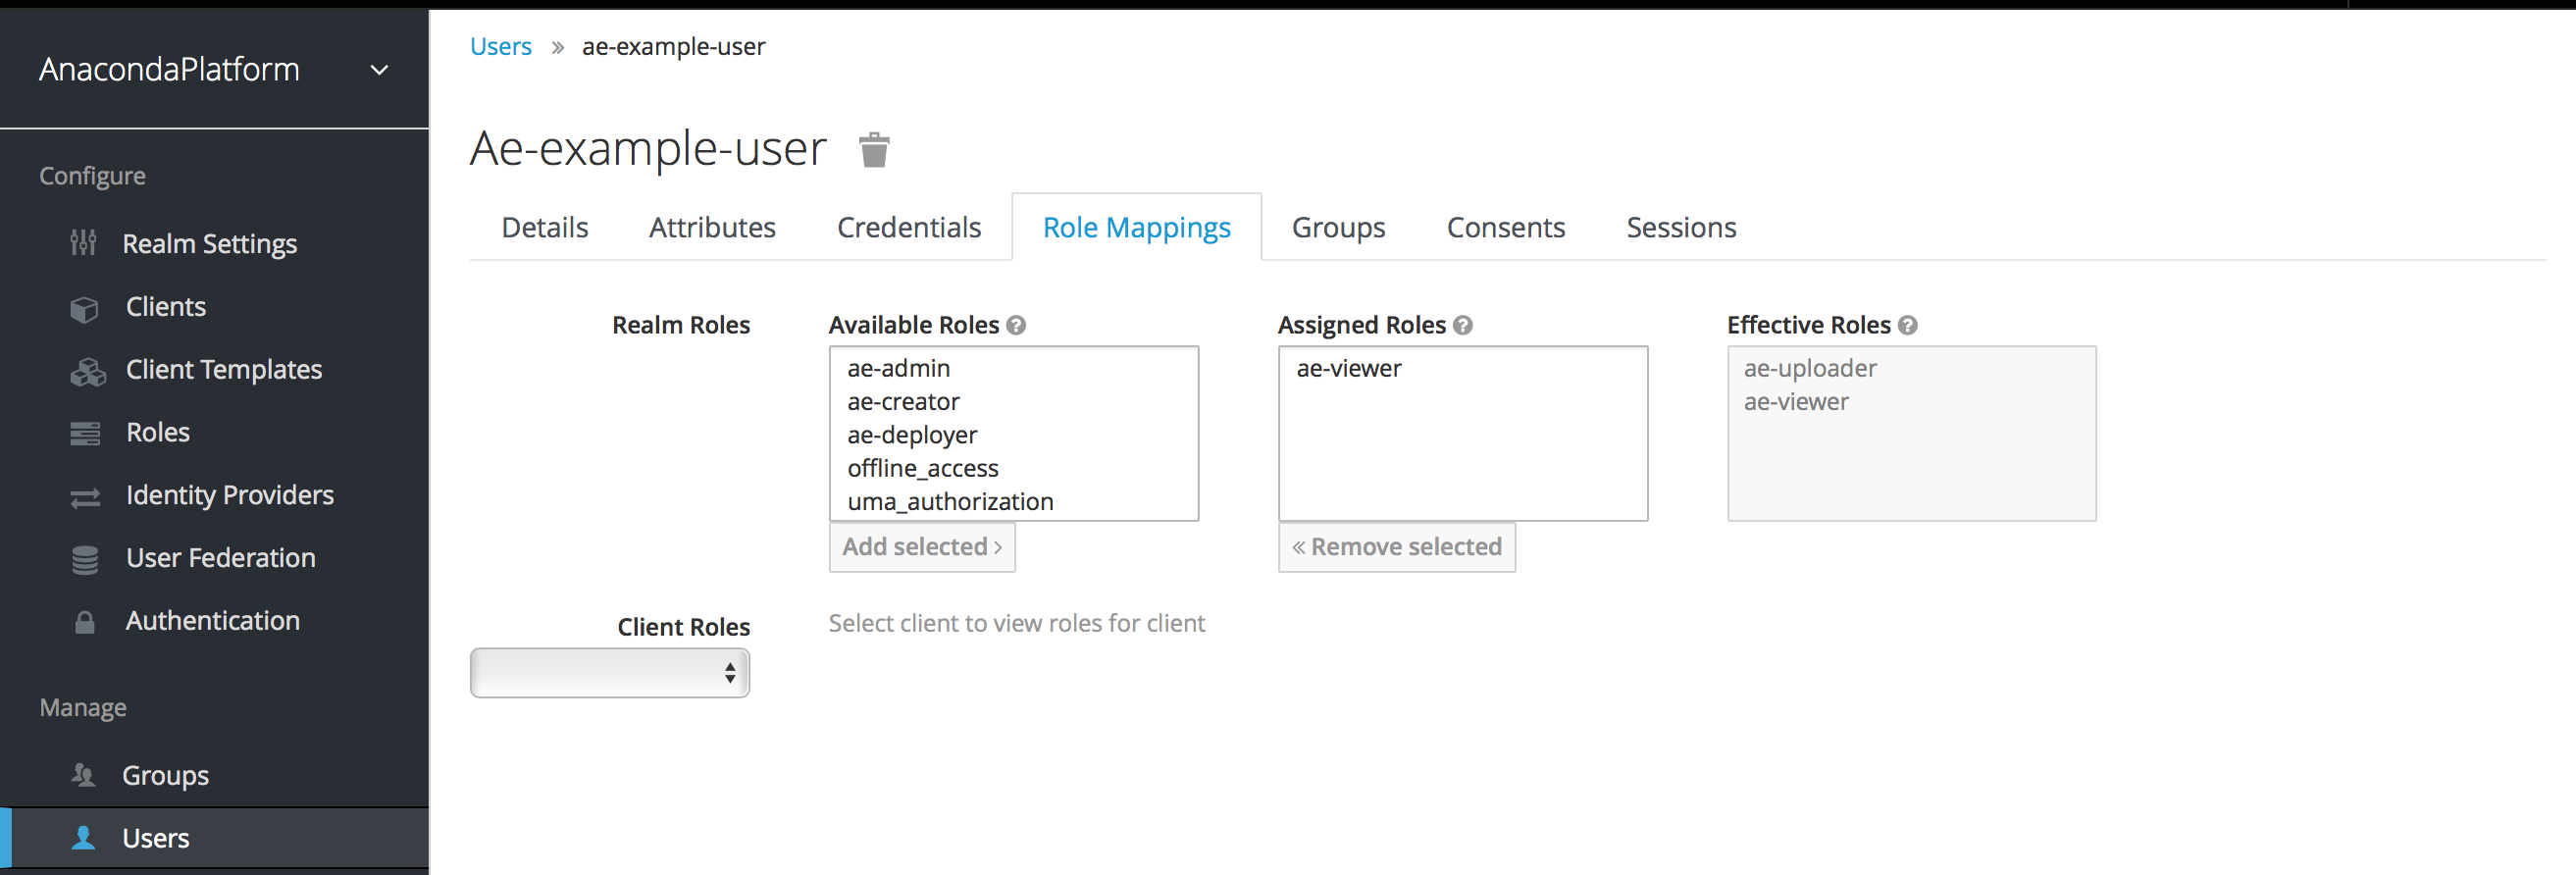
In the above example, we have assigned to the example user the ae-viewer
role we created in the Composite Roles section.
The Effective Roles list on the right includes all roles that are explicitly
assigned to the user and all roles that are inherited from composites. In this
example, note that the ae-uploader role that is associated with the
ae-viewer composite is shown in the Effective Roles list.
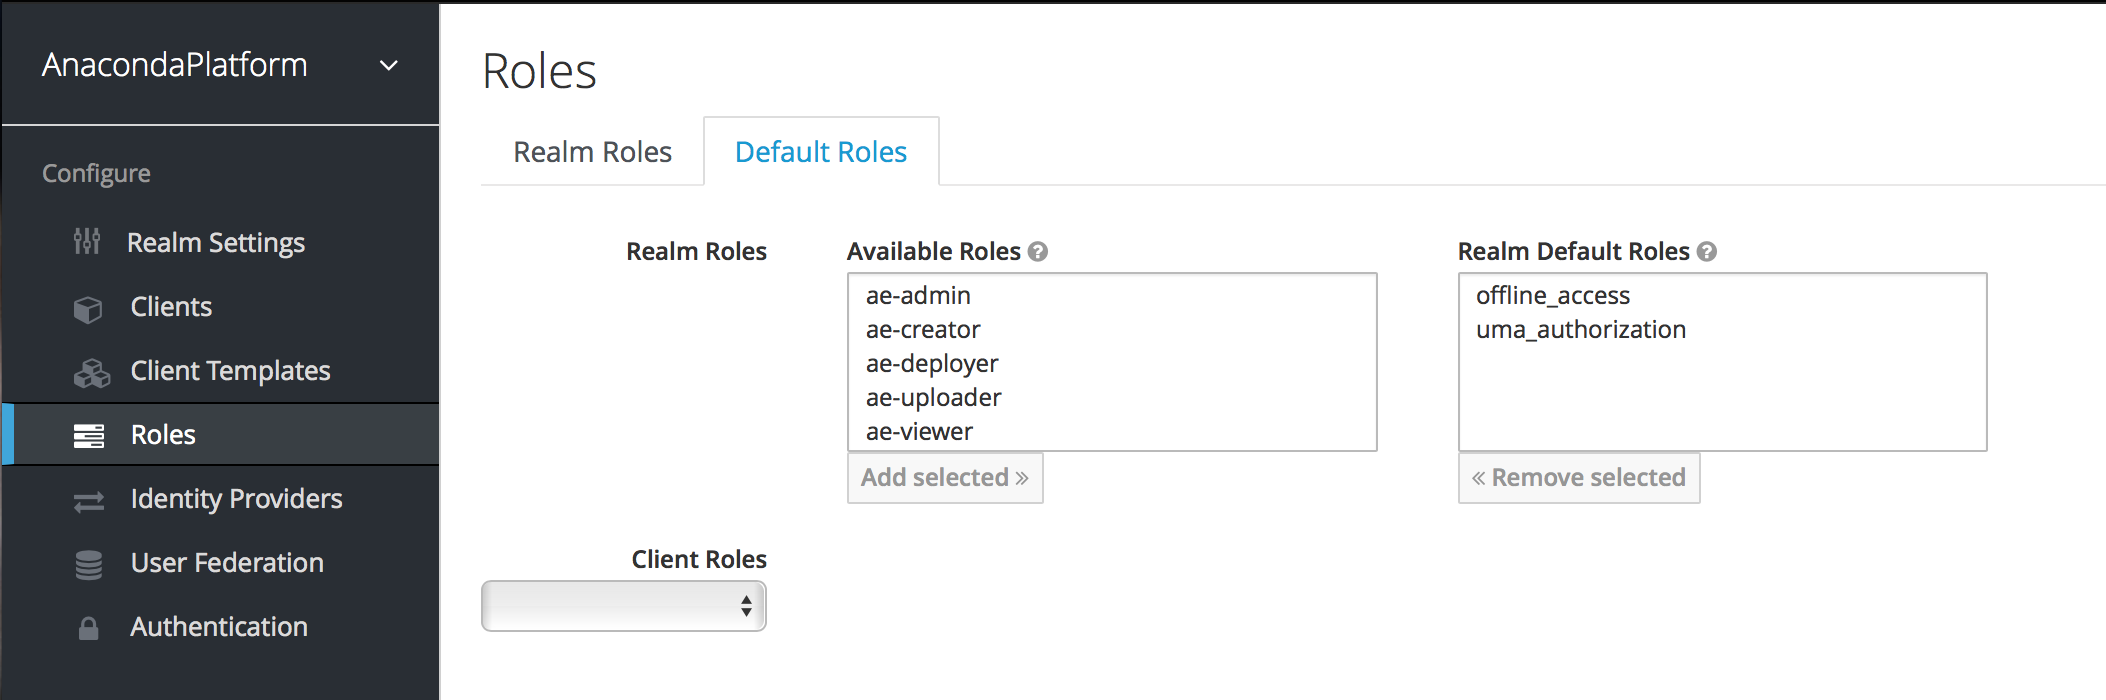
Default Roles
Default roles allow you to automatically assign user role mappings when any user is newly created or imported (for example, through LDAP).
To specify default roles go to the Roles left menu item and click the Default Roles tab.
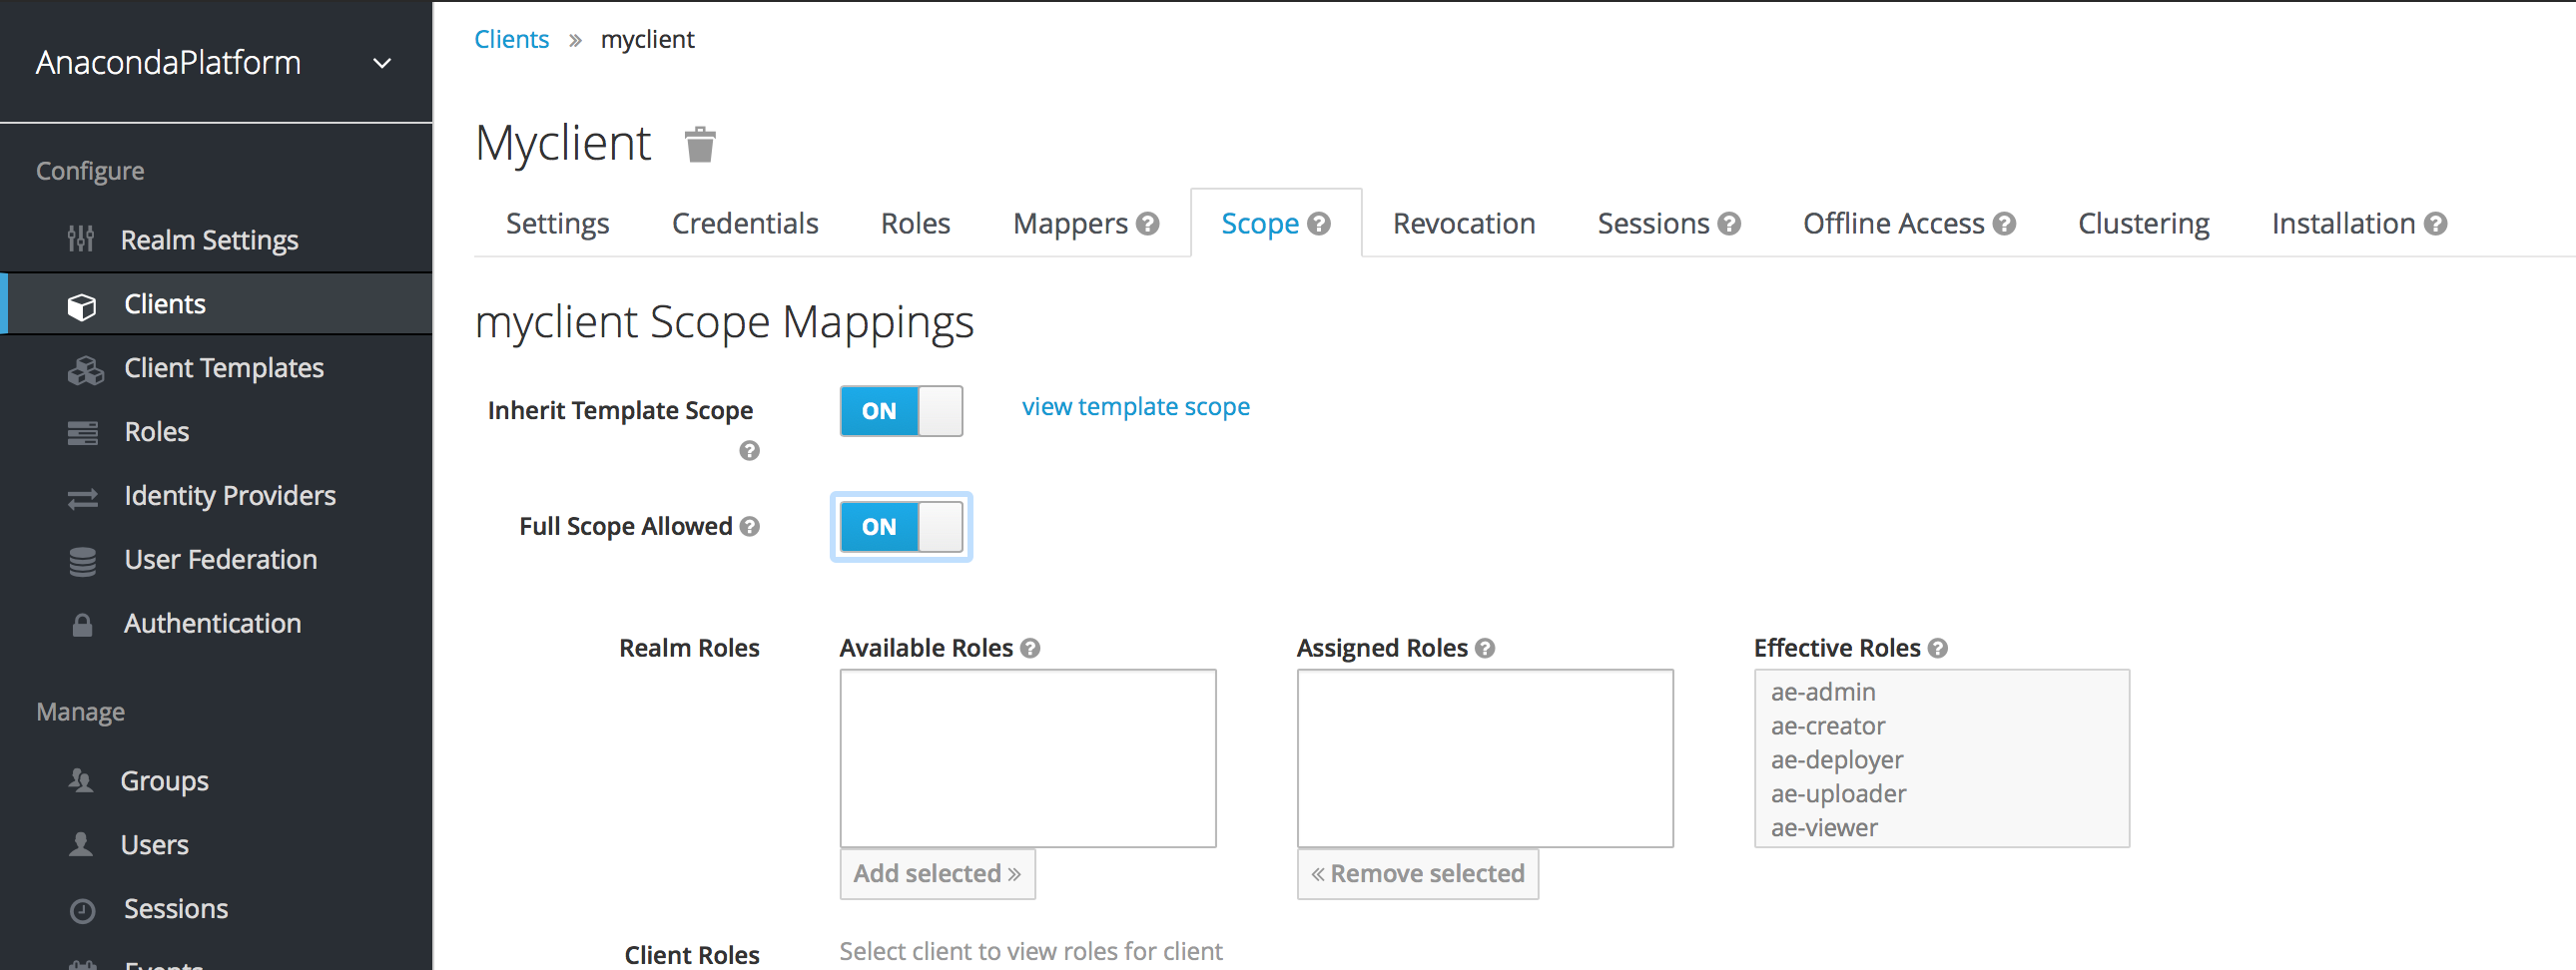
Client Scope
When an OIDC access token or SAML assertion is created, all the user role mappings of the user are, by default, added as claims within the token or assertion. Applications use this information to make access decisions on the resources controlled by that application. In Anaconda Enterprise, access tokens are digitally signed and the application can re-use tokens and invoke them on other remotely secured REST services. This means that if an application is compromised or a rogue client is registered with the realm, attackers can get access tokens that have a broad range of permissions and your whole network can be compromised. This is where client scope becomes important.
Client scope is a way to limit the roles that are declared inside an access token. When a client requests that a user be authenticated, the access token they receive back will only contain the role mappings you’ve explicitly specified for the client’s scope. This allows you to limit the permissions each individual access token has rather than giving the client access to all of the user’s permissions. By default, each client gets all the role mappings of the user.
You can view this in the Scope tab of each client.
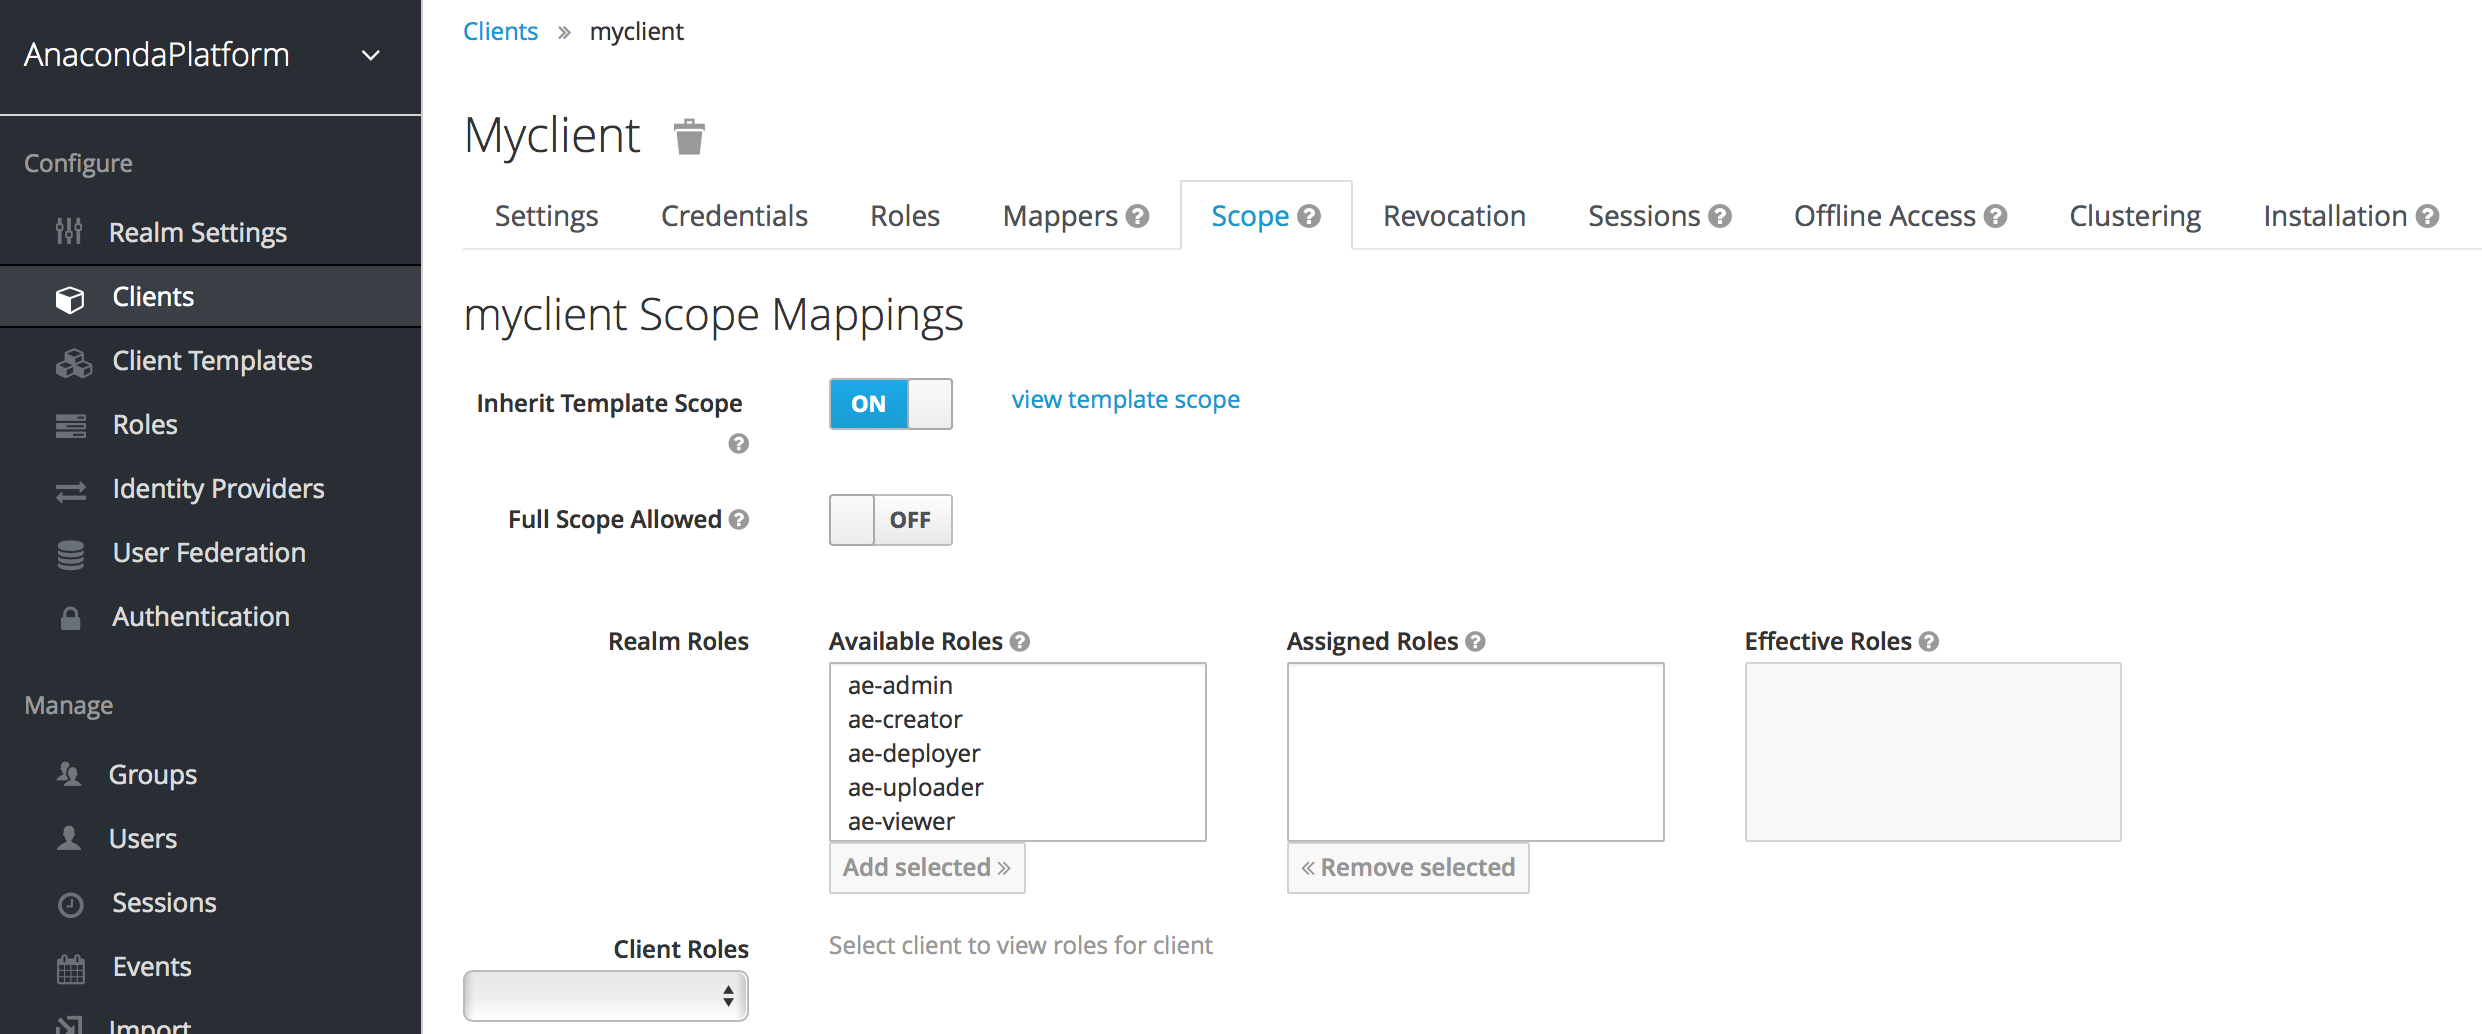
Note that it’s also possible to enable a client to gain all the available roles in the realm, by turning on the “Full Scope Allowed” switch. With this active, you can see that the effective roles of the scope include every declared role in the realm.