A dialog is usually a small window that appears in front of the current Activity. The underlying Activity loses focus and the dialog accepts all user interaction. Dialogs are normally used for notifications and short activities that directly relate to the application in progress.
The Android API supports the following types of Dialog objects:
AlertDialogProgressDialogDatePickerDialogTimePickerDialogIf you would like to customize your own dialog, you can extend the
base Dialog object or any of the subclasses listed above and define a new layout.
See the section on Creating a Custom Dialog below.
A dialog is always created and displayed as a part of an Activity.
You should normally create dialogs from within your Activity's
onCreateDialog(int) callback method.
When you use this callback, the Android system automatically manages the state of
each dialog and hooks them to the Activity, effectively making it the "owner" of each dialog.
As such, each dialog inherits certain properties from the Activity. For example, when a dialog
is open, the Menu key reveals the options menu defined for the Activity and the volume
keys modify the audio stream used by the Activity.
Note: If you decide to create a dialog outside of the
onCreateDialog() method, it will not be attached to an Activity. You can, however,
attach it to an Activity with setOwnerActivity(Activity).
When you want to show a dialog, call
showDialog(int) and pass it an integer that uniquely identifies the
dialog that you want to display.
When a dialog is requested for the first time, Android calls
onCreateDialog(int) from your Activity, which is
where you should instantiate the Dialog. This callback method
is passed the same ID that you passed to showDialog(int).
After you create the Dialog, return the object at the end of the method.
Before the dialog is displayed, Android also calls the optional callback method
onPrepareDialog(int, Dialog). Define this method if you want to change
any properties of the dialog each time it is opened. This method is called
every time a dialog is opened, whereas onCreateDialog(int) is only
called the very first time a dialog is opened. If you don't define
onPrepareDialog(), then the dialog will
remain the same as it was the previous time it was opened. This method is also passed the dialog's
ID, along with the Dialog object you created in onCreateDialog().
The best way to define the onCreateDialog(int) and
onPrepareDialog(int, Dialog) callback methods is with a
switch statement that checks the id parameter that's passed into the method.
Each case should check for a unique dialog ID and then create and define the respective Dialog.
For example, imagine a game that uses two different dialogs: one to indicate that the game
has paused and another to indicate that the game is over. First, define an integer ID for
each dialog:
static final int DIALOG_PAUSED_ID = 0;
static final int DIALOG_GAMEOVER_ID = 1;
Then, define the onCreateDialog(int) callback with a
switch case for each ID:
protected Dialog onCreateDialog(int id) {
    Dialog dialog;
    switch(id) {
    case DIALOG_PAUSED_ID:
        // do the work to define the pause Dialog
        break;
    case DIALOG_GAMEOVER_ID:
        // do the work to define the game over Dialog
        break;
    default:
        dialog = null;
    }
    return dialog;
}
Note: In this example, there's no code inside the case statements because the procedure for defining your Dialog is outside the scope of this section. See the section below about Creating an AlertDialog, offers code suitable for this example.
When it's time to show one of the dialogs, call showDialog(int)
with the ID of a dialog:
showDialog(DIALOG_PAUSED_ID);
When you're ready to close your dialog, you can dismiss it by calling
dismiss() on the Dialog object.
If necessary, you can also call dismissDialog(int) from the
Activity, which effectively calls dismiss() on the
Dialog for you.
If you are using onCreateDialog(int) to manage the state
of your dialogs (as discussed in the previous section), then every time your dialog is
dismissed, the state of the Dialog
object is retained by the Activity. If you decide that you will no longer need this object or
it's important that the state is cleared, then you should call
removeDialog(int). This will remove any internal references
to the object and if the dialog is showing, it will dismiss it.
If you'd like your application to perform some procedures the moment that a dialog is dismissed, then you should attach an on-dismiss listener to your Dialog.
First define the DialogInterface.OnDismissListener interface.
This interface has just one method,
onDismiss(DialogInterface), which
will be called when the dialog is dismissed.
Then simply pass your OnDismissListener implementation to
setOnDismissListener().
However, note that dialogs can also be "cancelled." This is a special case that indicates
the dialog was explicitly cancelled by the user. This will occur if the user presses the
"back" button to close the dialog, or if the dialog explicitly calls cancel()
(perhaps from a "Cancel" button in the dialog). When a dialog is cancelled,
the OnDismissListener will still be notified, but if you'd like to be informed that the dialog
was explicitly cancelled (and not dismissed normally), then you should register
an DialogInterface.OnCancelListener with
setOnCancelListener().
An AlertDialog is an extension of the Dialog
class. It is capable of constructing most dialog user interfaces and is the suggested dialog type.
You should use it for dialogs that use any of the following features:
To create an AlertDialog, use the AlertDialog.Builder subclass.
Get a Builder with AlertDialog.Builder(Context) and
then use the class's public methods to define all of the
AlertDialog properties. After you're done with the Builder, retrieve the
AlertDialog object with create().
The following topics show how to define various properties of the AlertDialog using the
AlertDialog.Builder class. If you use any of the following sample code inside your
onCreateDialog() callback method,
you can return the resulting Dialog object to display the dialog.

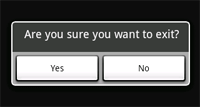
To create an AlertDialog with side-by-side buttons like the one shown in the screenshot to the right,
use the set...Button() methods:
AlertDialog.Builder builder = new AlertDialog.Builder(this);
builder.setMessage("Are you sure you want to exit?")
       .setCancelable(false)
       .setPositiveButton("Yes", new DialogInterface.OnClickListener() {
           public void onClick(DialogInterface dialog, int id) {
                MyActivity.this.finish();
           }
       })
       .setNegativeButton("No", new DialogInterface.OnClickListener() {
           public void onClick(DialogInterface dialog, int id) {
                dialog.cancel();
           }
       });
AlertDialog alert = builder.create();
First, add a message for the dialog with
setMessage(CharSequence). Then, begin
method-chaining and set the dialog
to be not cancelable (so the user cannot close the dialog with the back button)
with setCancelable(boolean). For each button,
use one of the set...Button() methods, such as
setPositiveButton(), that accepts the name for the button and a
DialogInterface.OnClickListener that defines the action to take
when the user selects the button.
Note: You can only add one of each button type to the AlertDialog. That is, you cannot have more than one "positive" button. This limits the number of possible buttons to three: positive, neutral, and negative. These names are technically irrelevant to the actual functionality of your buttons, but should help you keep track of which one does what.

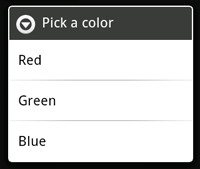
To create an AlertDialog with a list of selectable items like the one shown to the right,
use the setItems() method:
final CharSequence[] items = {"Red", "Green", "Blue"};

AlertDialog.Builder builder = new AlertDialog.Builder(this);
builder.setTitle("Pick a color");
builder.setItems(items, new DialogInterface.OnClickListener() {
    public void onClick(DialogInterface dialog, int item) {
        Toast.makeText(getApplicationContext(), items[item], Toast.LENGTH_SHORT).show();
    }
});
AlertDialog alert = builder.create();
First, add a title to the dialog with
setTitle(CharSequence).
Then, add a list of selectable items with
setItems(), which accepts the array of items to display and a
DialogInterface.OnClickListener that defines the action to take
when the user selects an item.

To create a list of multiple-choice items (checkboxes) or
single-choice items (radio buttons) inside the dialog, use the
setMultiChoiceItems() and
setSingleChoiceItems() methods, respectively.
If you create one of these selectable lists in the
onCreateDialog() callback method,
Android manages the state of the list for you. As long as the Activity is active,
the dialog remembers the items that were previously selected, but when the user exits the
Activity, the selection is lost.
Note: To save the selection when the user leaves or pauses the Activity, you must properly save and restore the setting throughout the Activity Lifecycle. To permanently save the selections, even when the Activity process is completely shutdown, you need to save the settings with one of the Data Storage techniques.
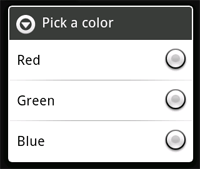
To create an AlertDialog with a list of single-choice items like the one shown to the right,
use the same code from the previous example, but replace the setItems() method with
setSingleChoiceItems():
final CharSequence[] items = {"Red", "Green", "Blue"};

AlertDialog.Builder builder = new AlertDialog.Builder(this);
builder.setTitle("Pick a color");
builder.setSingleChoiceItems(items, -1, new DialogInterface.OnClickListener() {
    public void onClick(DialogInterface dialog, int item) {
        Toast.makeText(getApplicationContext(), items[item], Toast.LENGTH_SHORT).show();
    }
});
AlertDialog alert = builder.create();
The second parameter in the
setSingleChoiceItems() method is an integer value for the checkedItem, which indicates the
zero-based list position of the default selected item. Use "-1" to indicate that no item should be
selected by default.

A ProgressDialog is an extension of the AlertDialog
class that can display a progress animation in the form of a spinning wheel, for a task with
progress that's undefined, or a progress bar, for a task that has a defined progression.
The dialog can also provide buttons, such as one to cancel a download.
Opening a progress dialog can be as simple as calling
ProgressDialog.show(). For example, the progress dialog shown to the right can be
easily achieved without managing the dialog through the
onCreateDialog(int) callback,
as shown here:
ProgressDialog dialog = ProgressDialog.show(MyActivity.this, "",
                        "Loading. Please wait...", true);
The first parameter is the application Context,
the second is a title for the dialog (left empty), the third is the message,
and the last parameter is whether the progress
is indeterminate (this is only relevant when creating a progress bar, which is
discussed in the next section).
The default style of a progress dialog is the spinning wheel. If you want to create a progress bar that shows the loading progress with granularity, some more code is required, as discussed in the next section.

To show the progression with an animated progress bar:
ProgressDialog(Context).setProgressStyle(int) and
set any other properties, such as the message.show() or return the ProgressDialog from the
onCreateDialog(int) callback.setProgress(int) with a value for
the total percentage completed so far or incrementProgressBy(int)
with an incremental value to add to the total percentage completed so far.For example, your setup might look like this:
ProgressDialog progressDialog;
progressDialog = new ProgressDialog(mContext);
progressDialog.setProgressStyle(ProgressDialog.STYLE_HORIZONTAL);
progressDialog.setMessage("Loading...");
progressDialog.setCancelable(false);
The setup is simple. Most of the code needed to create a progress dialog is actually
involved in the process that updates it. You might find that it's
necessary to create a second thread in your application for this work and then report the progress
back to the Activity's UI thread with a Handler object.
If you're not familiar with using additional
threads with a Handler, see the example Activity below that uses a second thread to
increment a progress dialog managed by the Activity.
 Example ProgressDialog with a second thread
This example uses a second thread to track the progress of a process (which actually just
counts up to 100). The thread sends a Message back to the main
Activity through a Handler each time progress is made. The main Activity then updates the
ProgressDialog.
package com.example.progressdialog;

import android.app.Activity;
import android.app.Dialog;
import android.app.ProgressDialog;
import android.os.Bundle;
import android.os.Handler;
import android.os.Message;
import android.view.View;
import android.view.View.OnClickListener;
import android.widget.Button;

public class NotificationTest extends Activity {
    static final int PROGRESS_DIALOG = 0;
    Button button;
    ProgressThread progressThread;
    ProgressDialog progressDialog;

    /** Called when the activity is first created. */
    public void onCreate(Bundle savedInstanceState) {
        super.onCreate(savedInstanceState);
        setContentView(R.layout.main);

        // Setup the button that starts the progress dialog
        button = (Button) findViewById(R.id.progressDialog);
        button.setOnClickListener(new OnClickListener(){
            public void onClick(View v) {
                showDialog(PROGRESS_DIALOG);
            }
        });
    }

    protected Dialog onCreateDialog(int id) {
        switch(id) {
        case PROGRESS_DIALOG:
            progressDialog = new ProgressDialog(NotificationTest.this);
            progressDialog.setProgressStyle(ProgressDialog.STYLE_HORIZONTAL);
            progressDialog.setMessage("Loading...");
            progressThread = new ProgressThread(handler);
            progressThread.start();
            return progressDialog;
        default:
            return null;
        }
    }

    // Define the Handler that receives messages from the thread and update the progress
    final Handler handler = new Handler() {
        public void handleMessage(Message msg) {
            int total = msg.getData().getInt("total");
            progressDialog.setProgress(total);
            if (total >= 100){
                dismissDialog(PROGRESS_DIALOG);
                progressThread.setState(ProgressThread.STATE_DONE);
            }
        }
    };

    /** Nested class that performs progress calculations (counting) */
    private class ProgressThread extends Thread {
        Handler mHandler;
        final static int STATE_DONE = 0;
        final static int STATE_RUNNING = 1;
        int mState;
        int total;

        ProgressThread(Handler h) {
            mHandler = h;
        }

        public void run() {
            mState = STATE_RUNNING;
            total = 0;
            while (mState == STATE_RUNNING) {
                try {
                    Thread.sleep(100);
                } catch (InterruptedException e) {
                    Log.e("ERROR", "Thread Interrupted");
                }
                Message msg = mHandler.obtainMessage();
                Bundle b = new Bundle();
                b.putInt("total", total);
                msg.setData(b);
                mHandler.sendMessage(msg);
                total++;
            }
        }

        /* sets the current state for the thread,
         * used to stop the thread */
        public void setState(int state) {
            mState = state;
        }
    }
}

If you want a customized design for a dialog, you can create your own layout
for the dialog window with layout and widget elements.
After you've defined your layout, pass the root View object or
layout resource ID to setContentView(View).
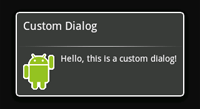
For example, to create the dialog shown to the right:
custom_dialog.xml:
<LinearLayout xmlns:android="http://schemas.android.com/apk/res/android"
              android:id="@+id/layout_root"
              android:orientation="horizontal"
              android:layout_width="fill_parent"
              android:layout_height="fill_parent"
              android:padding="10dp"
              >
    <ImageView android:id="@+id/image"
               android:layout_width="wrap_content"
               android:layout_height="fill_parent"
               android:layout_marginRight="10dp"
               />
    <TextView android:id="@+id/text"
              android:layout_width="wrap_content"
              android:layout_height="fill_parent"
              android:textColor="#FFF"
              />
</LinearLayout>
This XML defines an ImageView and a TextView
inside a LinearLayout.
Context mContext = getApplicationContext();
Dialog dialog = new Dialog(mContext);

dialog.setContentView(R.layout.custom_dialog);
dialog.setTitle("Custom Dialog");

TextView text = (TextView) dialog.findViewById(R.id.text);
text.setText("Hello, this is a custom dialog!");
ImageView image = (ImageView) dialog.findViewById(R.id.image);
image.setImageResource(R.drawable.android);
After you instantiate the Dialog, set your custom layout as the dialog's content view with
setContentView(int), passing it the layout resource ID.
Now that the Dialog has a defined layout, you can capture View objects from the layout with
findViewById(int) and modify their content.
A dialog made with the base Dialog class must have a title. If you don't call
setTitle(), then the space used for the title
remains empty, but still visible. If you don't want
a title at all, then you should create your custom dialog using the
AlertDialog class. However, because an AlertDialog is created easiest with
the AlertDialog.Builder class, you do not have access to the
setContentView(int) method used above. Instead, you must use
setView(View). This method accepts a View object,
so you need to inflate the layout's root View object from
XML.
To inflate the XML layout, retrieve the LayoutInflater with
getLayoutInflater()
(or getSystemService()),
and then call
inflate(int, ViewGroup), where the first parameter
is the layout resource ID and the second is the ID of the root View. At this point, you can use
the inflated layout to find View objects in the layout and define the content for the
ImageView and TextView elements. Then instantiate the AlertDialog.Builder and set the
inflated layout for the dialog with setView(View).
Here's an example, creating a custom layout in an AlertDialog:
AlertDialog.Builder builder;
AlertDialog alertDialog;

Context mContext = getApplicationContext();
LayoutInflater inflater = (LayoutInflater) mContext.getSystemService(LAYOUT_INFLATER_SERVICE);
View layout = inflater.inflate(R.layout.custom_dialog,
                               (ViewGroup) findViewById(R.id.layout_root));

TextView text = (TextView) layout.findViewById(R.id.text);
text.setText("Hello, this is a custom dialog!");
ImageView image = (ImageView) layout.findViewById(R.id.image);
image.setImageResource(R.drawable.android);

builder = new AlertDialog.Builder(mContext);
builder.setView(layout);
alertDialog = builder.create();
Using an AlertDialog for your custom layout lets you take advantage of built-in AlertDialog features like managed buttons, selectable lists, a title, an icon and so on.
For more information, refer to the reference documentation for the
Dialog and AlertDialog.Builder
classes.