13. Scanners
Additional Scanners may be enabled through the GOS-Admin-Menu. The GSM comes with the OpenVAS scanner configured by default. No other scanner is enabled.
Note
Starting with GOS 3.1.17 pilot users can choose additional scanners.
This feature will be available for all users through a later update.
To become a pilot user, contact the Greenbone Support.
To enable additional scanner please refer to section Enabling additional OSP Scanners.
This chapter shows the usage of these additional scanner modules.
13.1. w3af scanner
w3af is a Web Application Attack and Audit Framework. The project’s goal is to create a framework to help you secure your web applications by finding and exploiting all web application vulnerabilities.
Once you enabled the scanner using the GOS-Admin-Menu (see section Enabling additional OSP Scanners), you need to configure the w3af Scanner. Use the WebUI for the configuration. Select Configuration followed by Scanners.
You will see all currently enabled OSP Scanners:
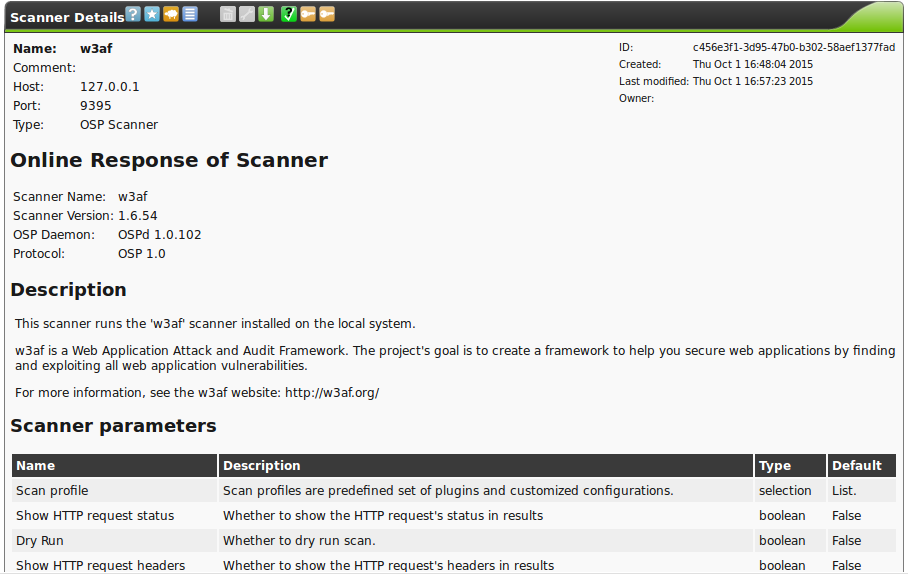
Select the w3af scanner. You will then be able to see the current configuration:
The default configuration may not be changed in this dialog. To setup and modify these parameters you need to create a appropriate scan configuration.
13.1.1. w3af scan configuration
Go to Configuration/Scan Configs. Create a new scan configuration and select w3af as base config:
This configuration may now be modified. The following parameters are available:
- profile
You can choose between these w3af profiles. The profiles are further documented on the w3af webpage http://w3af.org. These profiles are collections of configured w3af plugins.
- fast_scan
- audit_high_risk
- full_audit
- OWASP_TOP10
- bruteforce
- empty_profile
- web_infrastructure
- full_audit_spider_man
- sitemap
- http_request_status
This allows to toggle the respective functionality.
- http_request_headers
This allows to toggle the respective functionality.
- http_response_status
This allows to toggle the respective functionality.
- debug_mode
This allows to toggle the respective functionality.
- dry_run
This allows to toggle the respective functionality.
- use_https
This allows to toggle the respective functionality.
- seed_path
This defines the starting URL fir the w3af scanner.
- target_port
This setting allows to set another port for the webserver that the default port 80, like 8080 or 443.
13.1.2. w3af scan task
To scan a system you need to setup an appropriate task.
Go to Scan Management and create a new task.
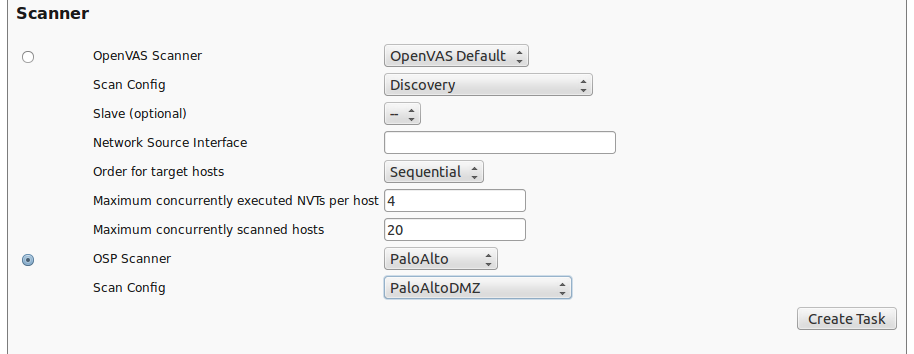
Enter the usual information at the top of the screen: name, target, alerts, schedule, etc. Scroll down and select the OSP scanner instead of the OpenVAS Scanner:
Create the scan and start the scan as usual.
13.2. PaloAlto Scanner
This OSP scanner module retrieves information from a PaloAlto next generation firewall appliance. The scanner may retrieve three different types of information from the firewall:
- The traffic logged by the firewall is used to identify ports with active services on the target.
- The traffic logged by the firewall is used to identify the protocols used by the target.
- The threats identified and logged by the firewall are searched for CVE references.
The PaloAlto firewall distinguishes 5 different severity classes. These classes are mapped to CVSS values as follows:
- Informational: 0.0
- Low: 3.0
- Medium: 5.0
- High: 8.0
- Critical: 10.0
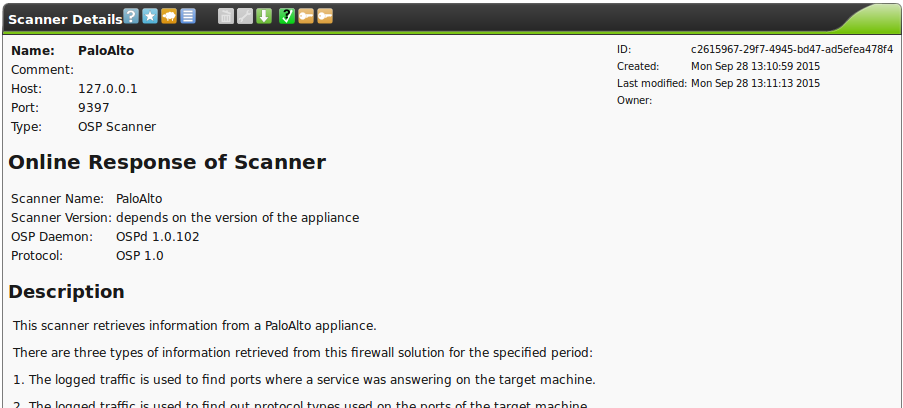
You can check wether the PaloAlto scanner is functional using Configuration/Scanners followed by selecting the PaloAlto scanner:
If the scanner is online you can verify the response of the scanner. If the scanner is not online you will see “Offline”.
13.2.1. PaloAlto Scanner Configuration
Several steps need to be taken to use the PaloAlto Scanner.
13.2.1.1. Scan Configuration
To use the scanner, you need to setup a scan configuration. Go to Configuration/Scan Configs.
Create a new scan configuration and select PaloAlto as base.
Here you can specify:
- dry_run
This will just do a dry run.
- period
For the time period the GSM will extract the logs from the PaloAlto appliance. The period should match the schedule the tasks are run at. If you run the task daily you should select last-24-hrs.
- debug_mode
This will output additional debug information.
- ca-certificate
This is the ca-certificate of the PaloAlto used to verify the appliance.
- address
This is the ip address of the PaloAlto appliance.
13.2.1.2. Target
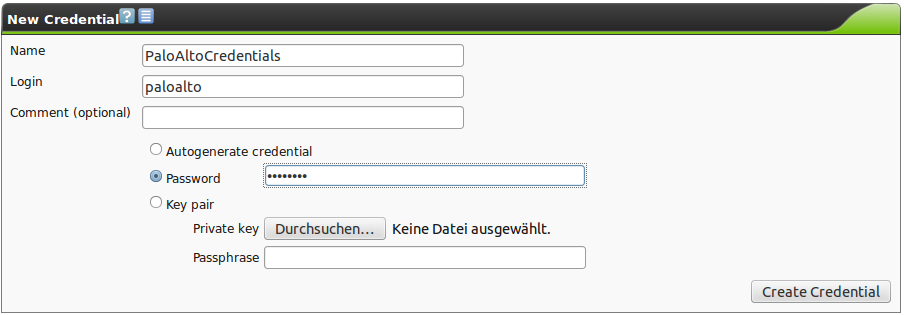
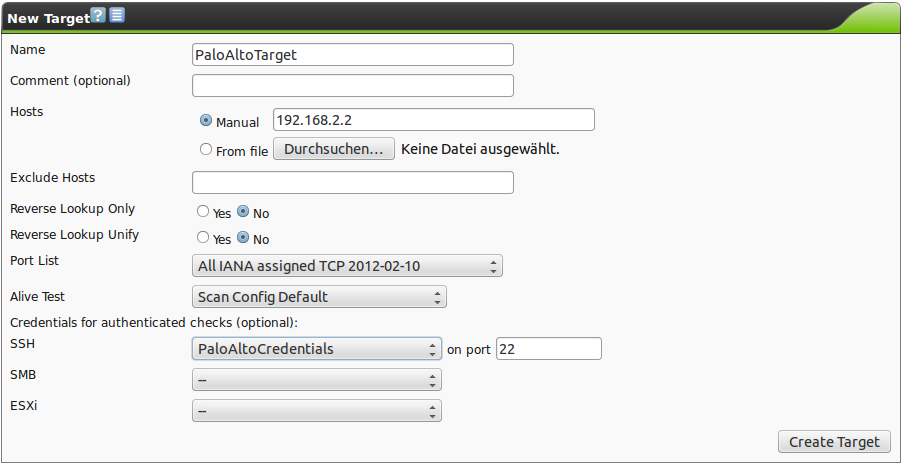
Now a specific target for the PaloAlto scan needs to be setup. Targets used in other scans may not be reused, because the login/password for accessing the PaloAlto firewall is configured using the credentials normally used for an authenticated scan.
First create the credentials for accessing the PaloAlto appliance (figure PaloAlto credentials).
Now create a target using these credentials (figure PaloAlto target).
13.2.1.3. Task
Once the scan configuration is in place you can setup a task using this scan configuration. Go to Scan Management/Tasks. Create a new task and select the OSP Scanner. Select PaloAlto and your scan configuration.
Start the task. Once the task is finished you may analyze the report.
13.2.2. PaloAlto Report
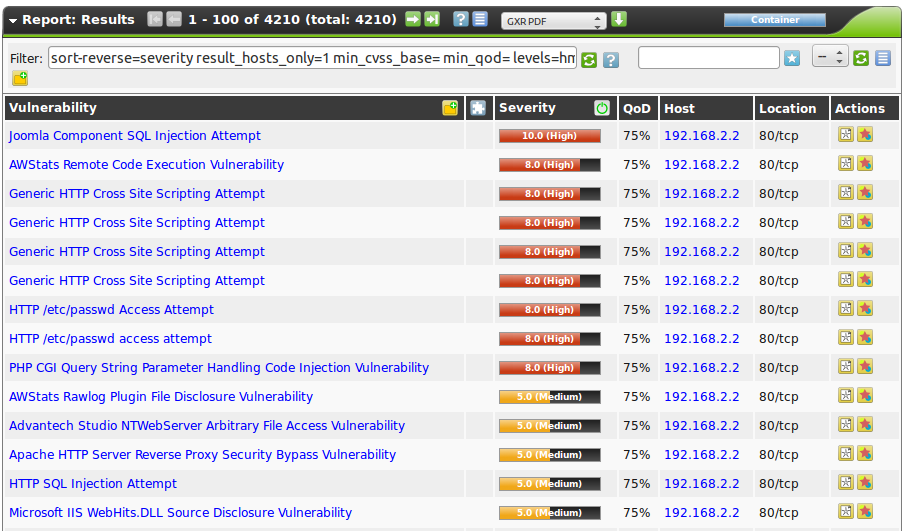
The report generated by the PaloAlto OSP scanner is very similar to the OpenVAS report although there are some differences. The PaloAlto next generation firewall includes an intrusion detection system and not a vulnerability scanner. Therefore the vulnerabilities presented in the report are not tested by the scanner. These are detected attacks done by some third party. The quality of the results depends very much on the tuning of the PaloAlto appliance.
The following image displays a sample report:
The PaloAlto next generation firewall logs the possible false positive alerts using the term “attempt”. As can be seen in the sample report there are several “Generic HTTP Cross Site Scripting Attempt” and “HTTP SQL Injection Attempt”.
The PaloAlto detects the attack and in many cases stopps the attack from reaching its target. Therefore it is most often not possible to deduct whether the target actually has the vulnerability or not.
This is why it makes sense to combine a regular vulnerability scan and IDS incidents within a vulnerability management solution.


