HAProxy
Installation
First of all, you have to install the HAProxy plugin (os-haproxy) from the plugins view.
First Step: Configure Backend Servers
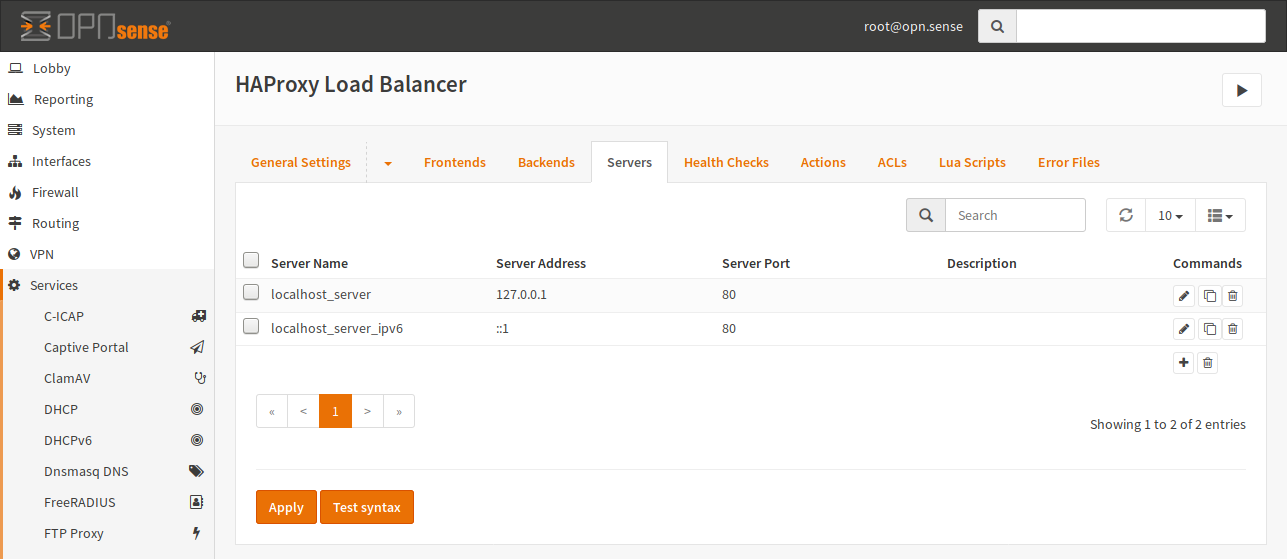
On the “Servers” page, click + to open a dialog to create a new server. A server consist of a name, IP and port. Create an entry for every Server you want to load balance.
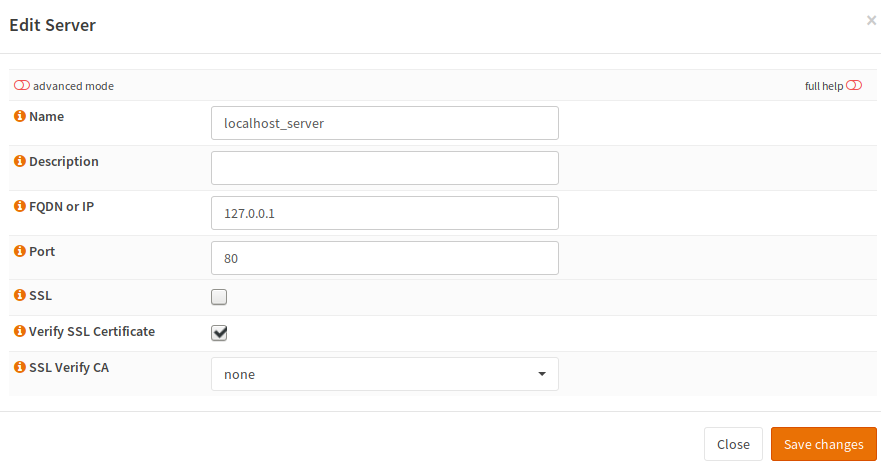
For a HTTP Backend, configure like this:
| Name | Name of this server |
| Description | Keep it empty |
| FQDN or IP | Enter the IP of your Server |
| Port | Port of the Server |
| SSL | Keep the default (disabled) |
| Verify SSL Certificate | Keep the default (checked) |
| SSL Verify CA | Keep the default (empty) |
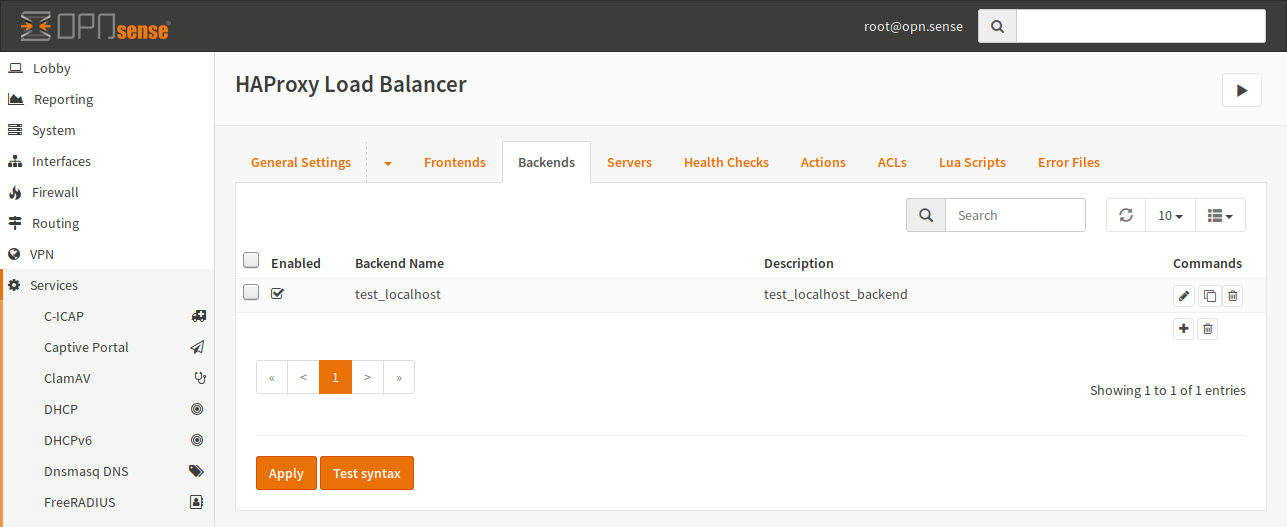
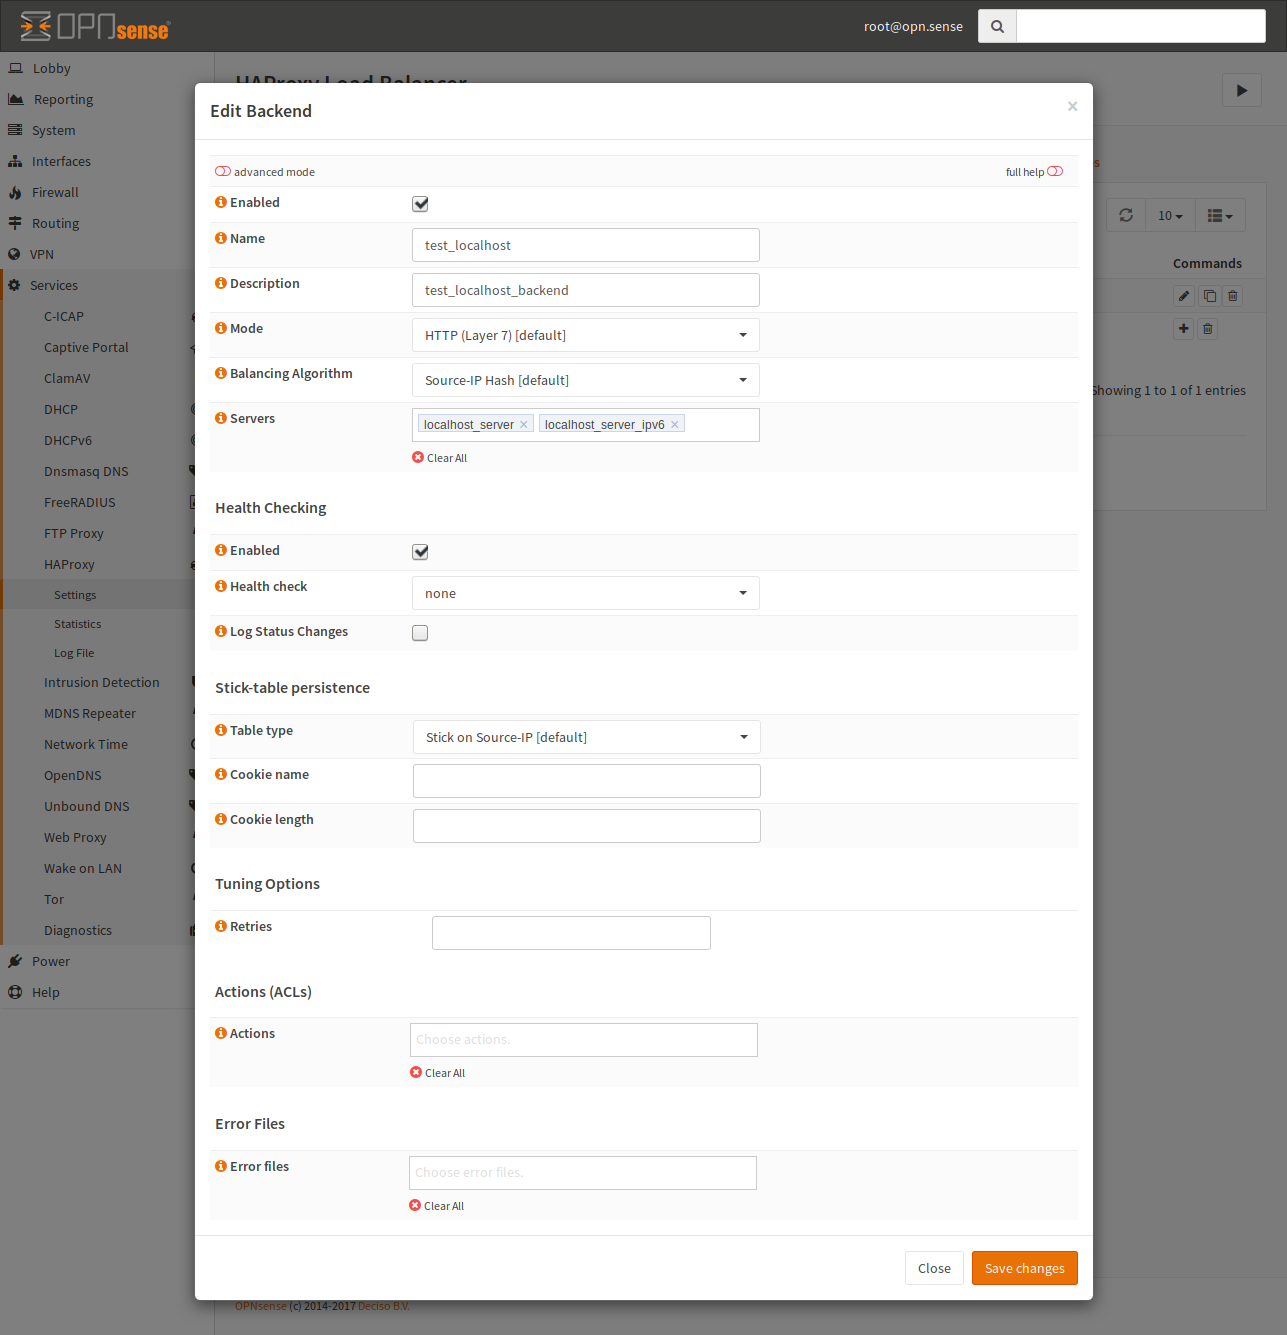
Second Step: Configure a Backend
Now, as we have the backend services, we can build a backend by combining them to groups of servers, which will serve the same service. For example if you are hosting a Webservice and want to scale horizontally, every server in the cluster will be a “Server”, but they will be combined to a so called “Backend”, so HAProxy can load balance between them.
To create a new Backend, click the +.
And fill out the form:
Note
The “Balancing Algorithm” field is important to care about as many web applications depend on a state. For example, if your web application stores session data on a local disk, you may get some trouble when using an algorithm like Round Robin. In such a case, the request of the same client always needs to be sent to the same backend servers. For example by default PHP stores session data in files while Ruby on Rails stores session information in a cookie by default. Please look up your web framework documentation for information how this is handled. Consider writeing files as problematic as well if there is no shared storage.
| Enabled | Enable the Backend (checked) |
| Name | Enter a name for the Backend |
| Description | Enter an optional description |
| Mode | Select the mode HTTP as this is an HTTP backend |
| Balancing Algorithm | Select an load balancing algorithm |
| Servers | Select the previously configured servers |
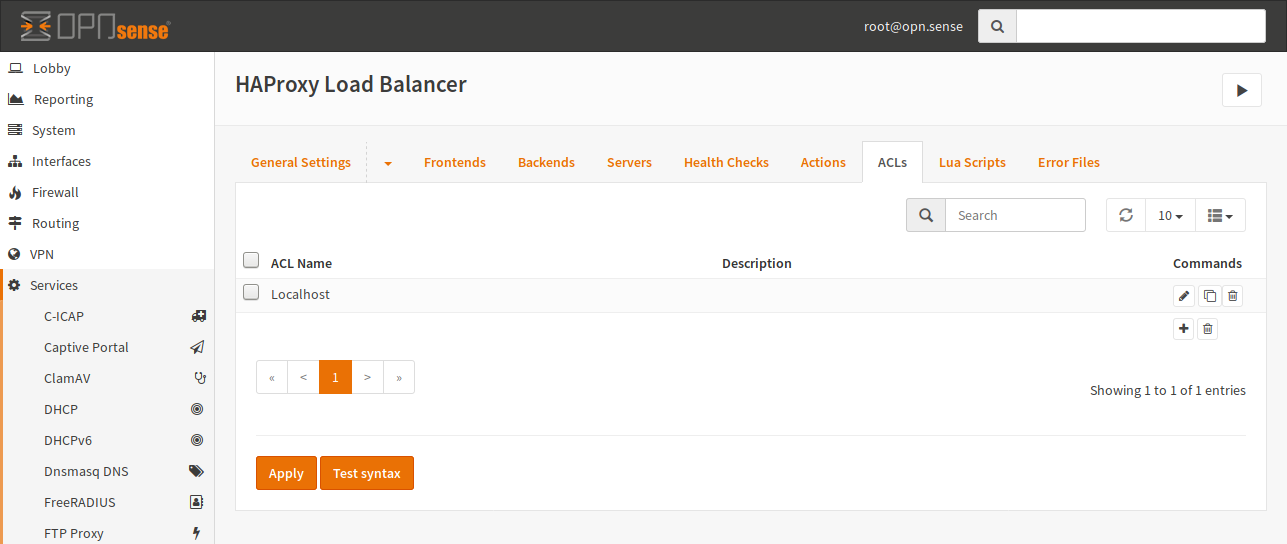
Third Step: Configure an ACL
In this step an ACL will has to be created which is later used to decide which traffic from a frontend belongs to which backend.
To create a new ACL, you have to create one by clicking the + button:
In the open modal dialog, the following form will show up:
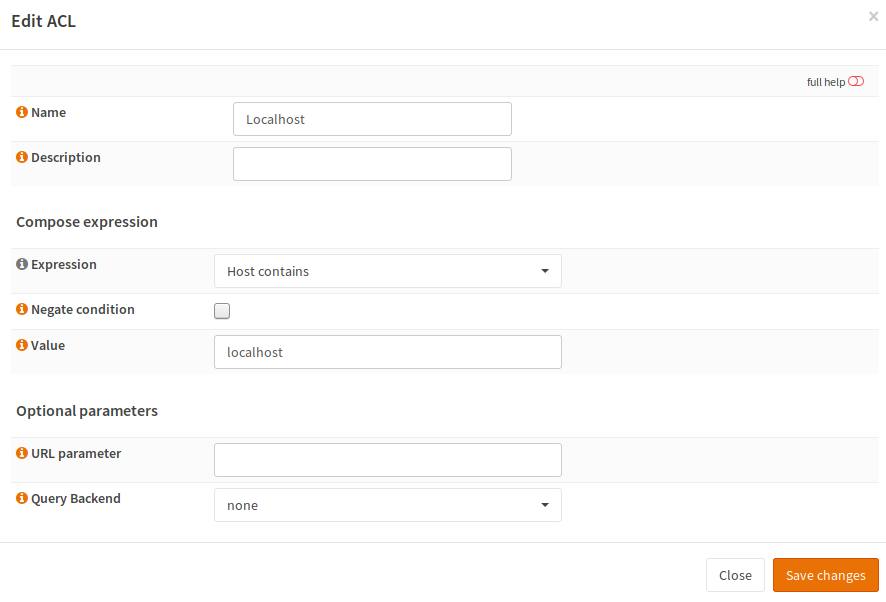
| Name | Choose a name for this ACL |
| Description | Keep it empty or choose one for your information |
| Expression | Select “Host contains” |
| Negate condition | Keep it unchecked |
| Value | Enter the (partial) hostname to compare |
Click “Save changes”.
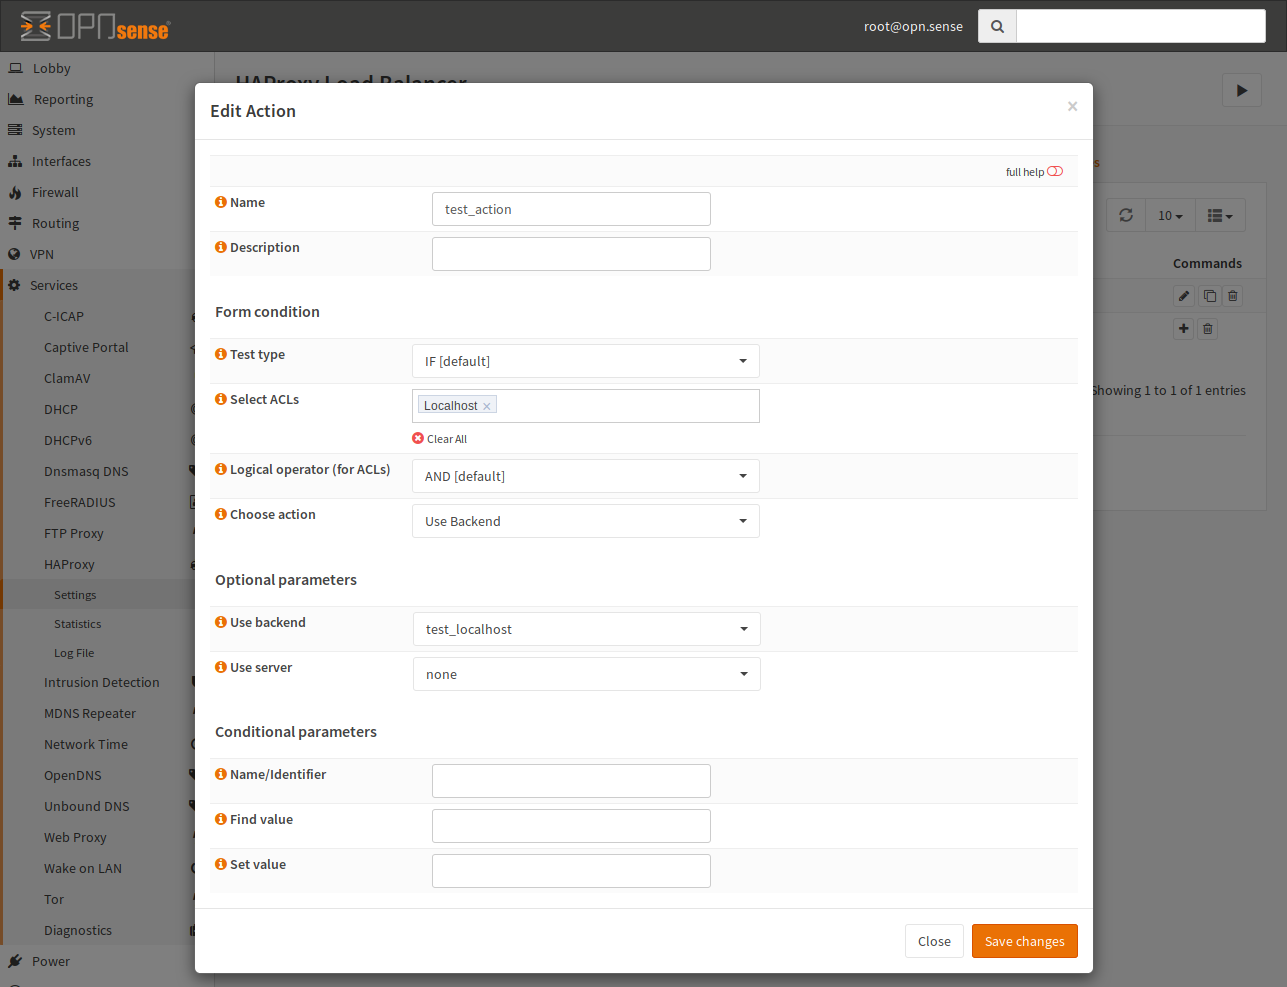
Fourth Step: Configure an Action
As promised in the previous step, the ACLs will be used. An Action will link multiple ACLs with a Backend. An Action is created using the + button.

A form dialog opens and we can fill it out like the following:
Note
You can map using multiple Hostnames to the same Backend by adding multiple ACLs and choosing the logical operator “OR”.
| Name | Choose a name for this Action |
| Description | You can add an optional description |
| Test Type | Keep it at the default (“IF”) |
| Select ACLs | Select the ACLs to be used |
| Logical operator | Keep the default (“AND”) |
| Choose action | Choose “Use Backend” |
| Use Server | Keep the default (“none”) |
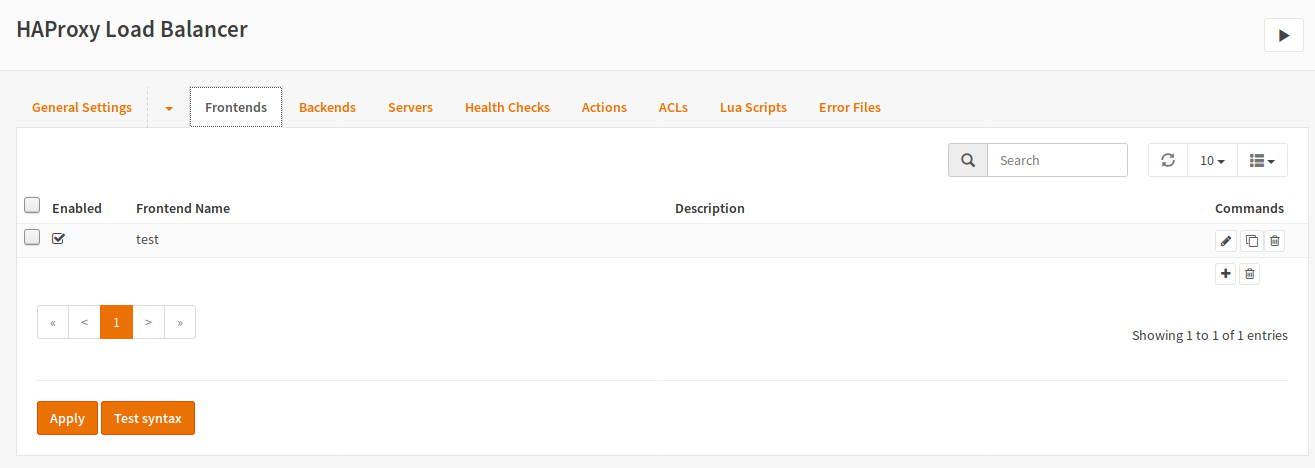
Fifth Step Configure a frontend
Now its nearly done. The only thing that needs to be configured for HAProxy is a Frontend. A Frontend is a a group of bound ports which are used for incoming connections. From this Frontend we need to know which backend the request will routed to. For this, the previously configured action is needed.
To create a new Frontend, click the + button:
The following modal dialog opens and the frontend can be set up:
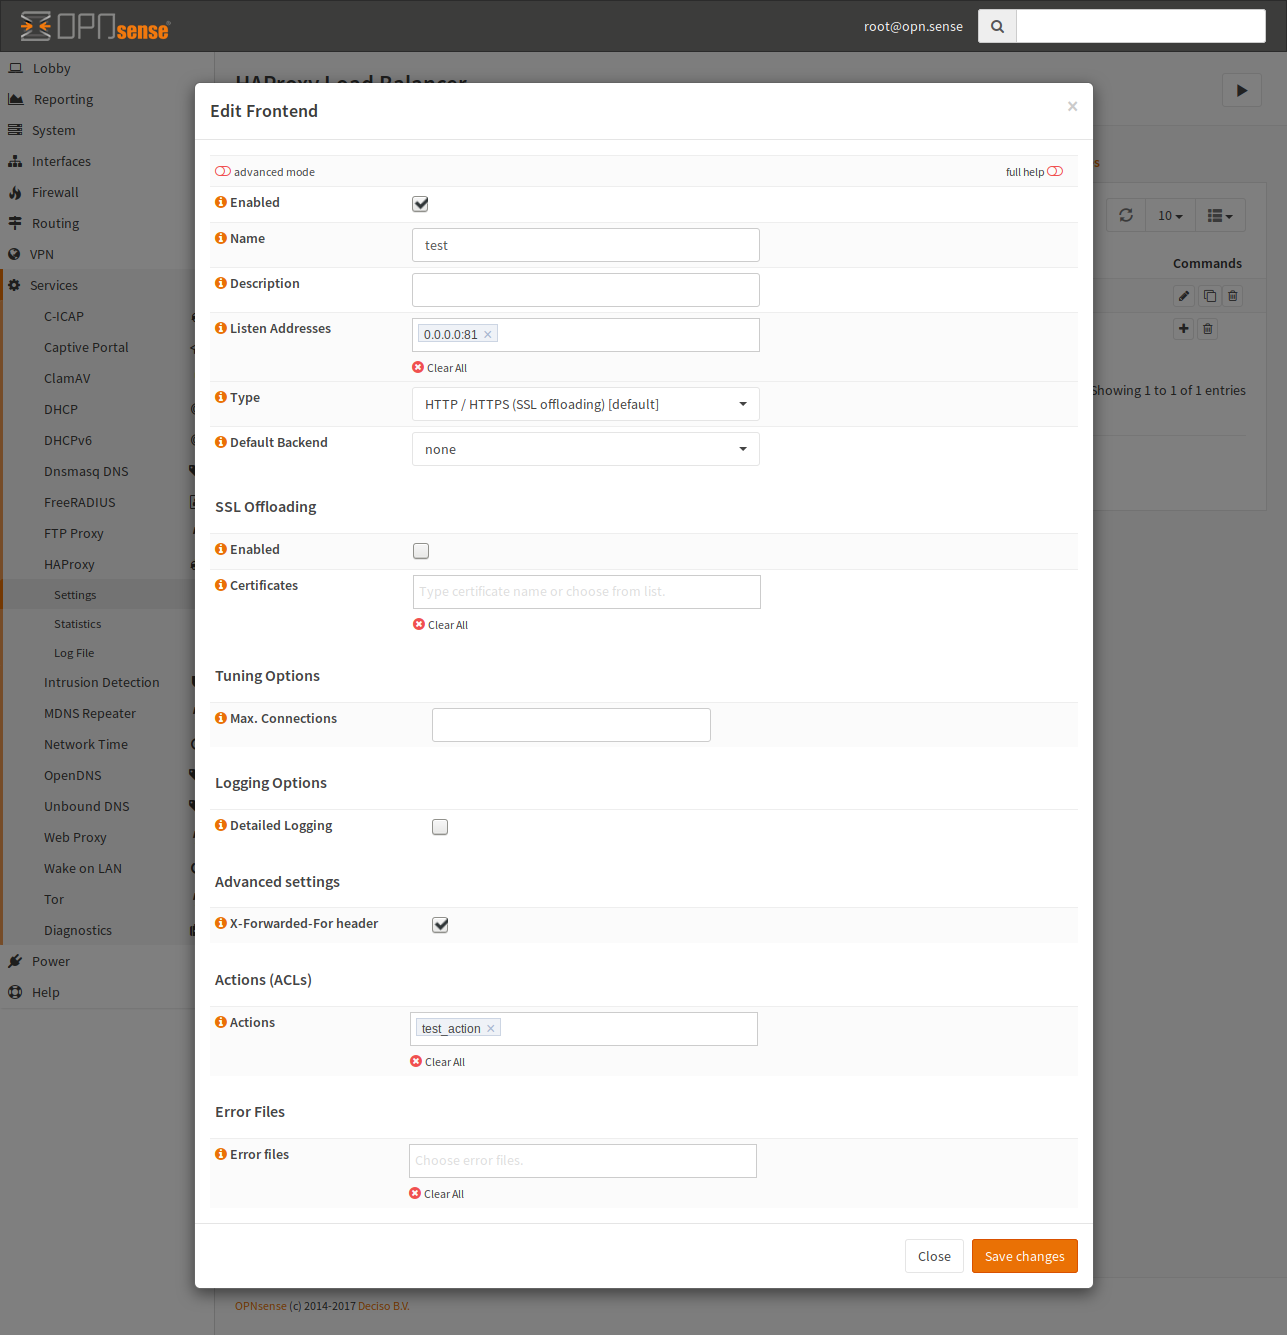
Warning
If you configure a port that is already in use, the configuration test will be successful but the start of HAProxy will fail silently. Please ensure that the used port is free - especially if the number conflicts with the web configuration of OPNsense.
General Settings
| Enabled | Checked |
| Name | Use any name |
| Description | You may keep it empty |
| Listen Address | Enter one or more host:port combinations, use 0.0.0.0:80 for HTTP via IPv4 |
| Type | Choose HTTP / HTTPS |
| Default Backend | Keep the default of “None” |
Advanced settings
Enbable the X-Forwarded-For-header so the backend will know the real IP of the client.
Actions (ACLs)
Here you have to configure the previously configured actions, so HAProxy knows where the requests should be sent to.
All other Options
Keep all other options at the default
Sixth step: Enable and start
This is the last step - on the General tab, we will enable the service after a config test.
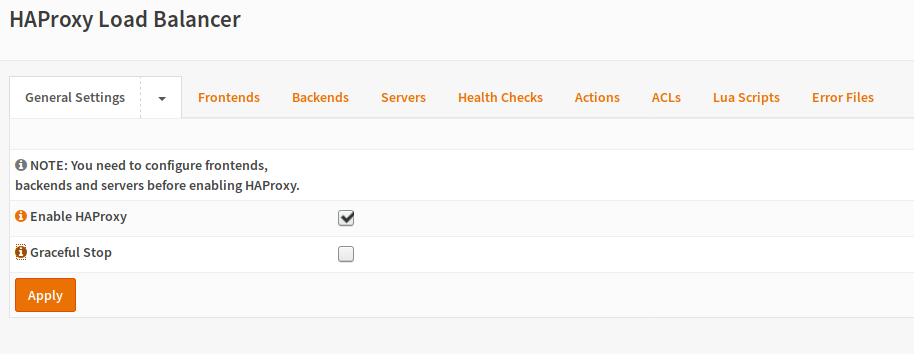
For that, the “Enable HAProxy” checkbox needs to be checked.
On this screen, check “Enable HAProxy” and click “Apply”. If everything went OK HAProxy will start. Now you need to configure firewall rules for accessing your HAProxy instance.