Setup SSL VPN site to site tunnel
Site to site VPN’s connect two locations with static public IP addresses and allow traffic to be routed between the two networks. This is most commonly used to connect an organization’s branch offices back to its main office, so branch users can access network resources in the main office.
Before you start
Before starting with the configuration of an OpenVPN SSL tunnel you need to have a working OPNsense installation wit a unique LAN IP subnet for each side of your connection (you local network need to different than that of the remote network).
Note
For the sample we will use a private ip for our WAN connection. This requires us to disable the default block rule on wan to allow private traffic. To do so, go to the Interfaces->[WAN] and uncheck “Block private networks”. (Don’t forget to save and apply)

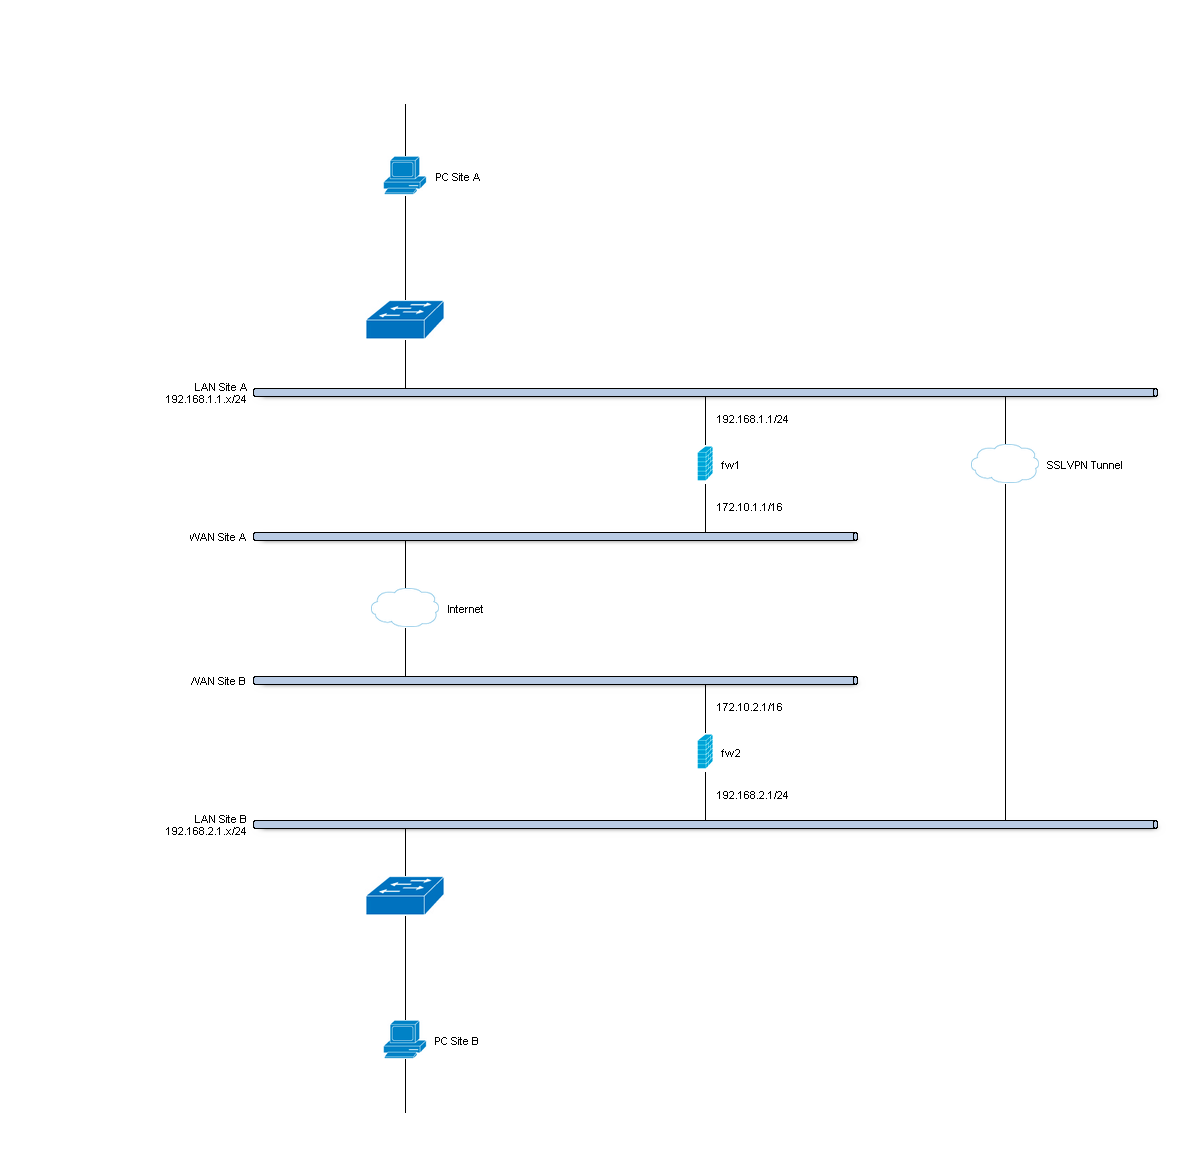
Sample Setup
For the sample configuration we use two OPNsense boxes to simulate a site to site tunnel, with the following configuration:
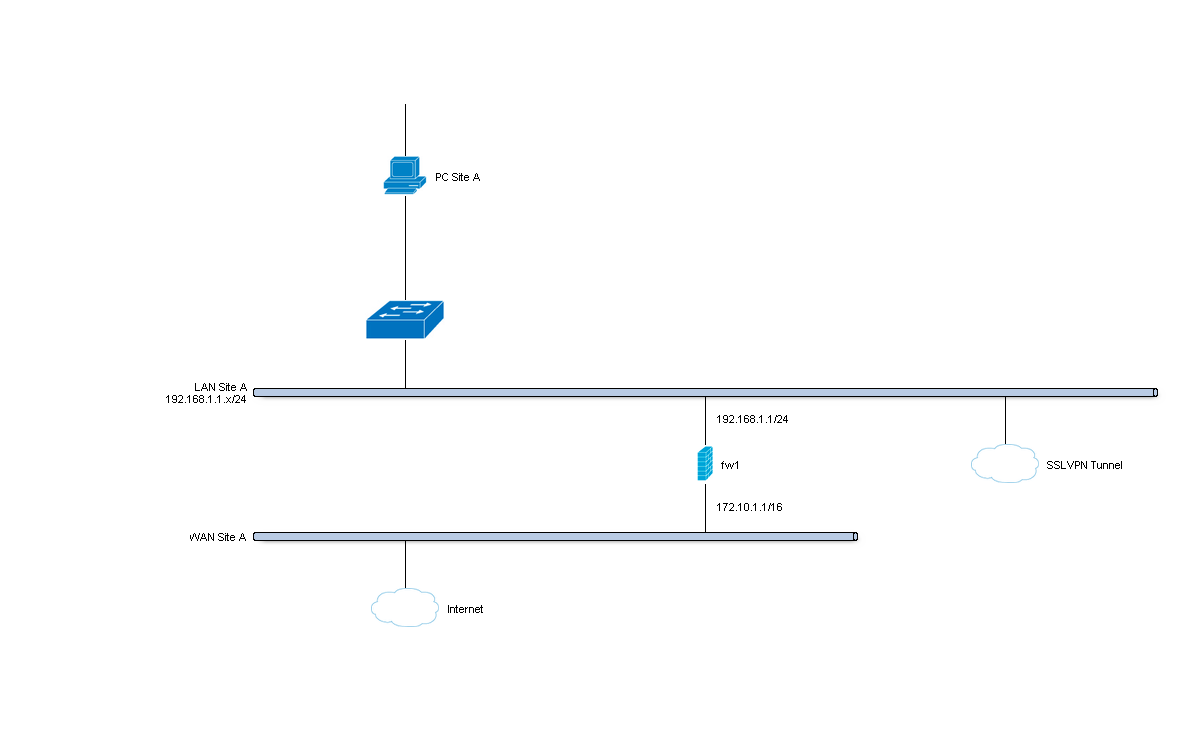
Site A - Server
| Hostname | fw1 |
| WAN IP | 172.10.1.1/16 |
| LAN IP | 192.168.1.1/24 |
| LAN DHCP Range | 192.168.1.100-192.168.1.200 |
| Tunnel Network | 10.10.0.0/24 |

Site B - Client
| Hostname | fw2 |
| WAN IP | 172.10.2.1/16 |
| LAN Net | 192.168.2.0/24 |
| LAN DHCP Range | 192.168.2.100-192.168.2.200 |
| Tunnel Network | 10.10.0.0/24 |
Step 1 - Add SSL Server
Adding a new SSL VPN server is relatively simple. We’ll start by adding a server that uses a shared key. This setup offers a good protection and it is easy to setup.
Go to VPN->OpenVPN->Servers and click on add server in to top right corner of the form.
For our example will use the following settings (leave everything else on its default):
Note
The setting Hardware Crypto is not used for new systems equipped with AESNI, when the aesni module is loaded it will be used automatically.
| Server Mode | Peer to Peer (Shared Key) |
| Protocol | UDP |
| Device Mode | tun |
| Interface | WAN |
| Local port | 1194 |
| Description | SSL VPN Server |
| Shared Key | Leave on enabled (checked) to create a new key |
| Server Certificate | SSLVPN Server Certificate (CA: SSL VPN CA) |
| DH Parameters Length | 4096 |
| Encryption algorithm | AES-256-CBC (256-bit) |
| Auth Digest Algorithm | SHA512 (512-bit) |
| Hardware Crypto | No Hardware Crypto Acceleration |
| IPv4 Tunnel Network | 10.10.0.0/24 |
| IPv4 Local Network/s | 192.168.1.0/24 |
| IPv4 Remote Network/s | 192.168.2.0/24 |
| Compression | Enabled with Adaptive Compression |
Click Save to add the new server.


Step 3 - Server Firewall Rules
To allow SSL VPN client connections, we should allow access to the OpenVPN server port on the WAN interface. When using multiple servers we need to open up each port.
For our configuration we only use one server accessible on UDP port 1194.
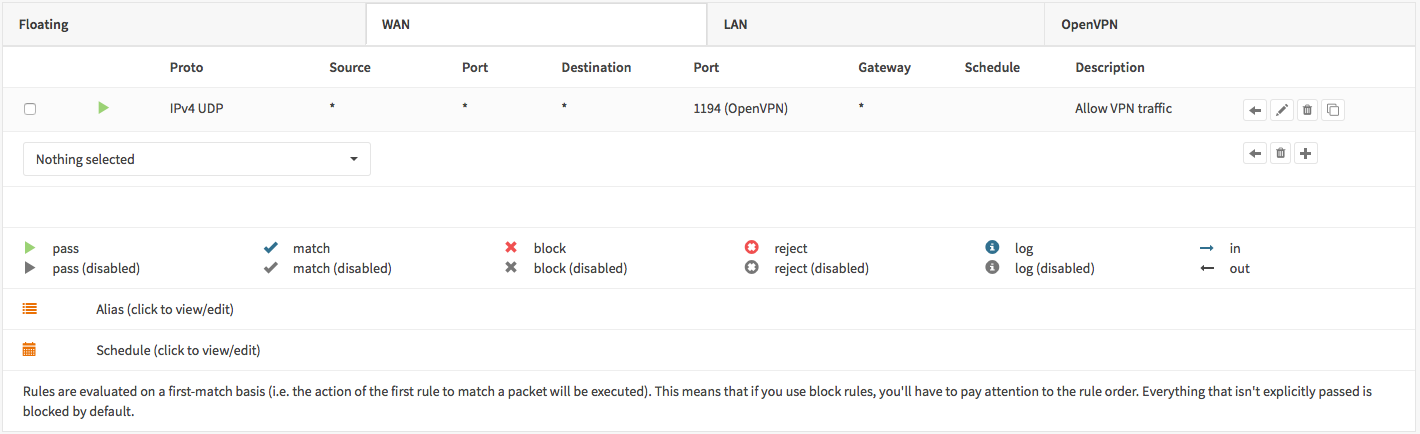
Next we also need to allow traffic from the VPN client network (192.168.2.0/24). For our example we will allow client to access anything on our local network(s), however you may decide just to allow traffic to one or more IP’s.
You are done configuring Site A.
Step 4 - Site B Client
Now we will have to setup the client. Login to the second firewall, go to VPN->OpenVPN->Clients and click on add client in the upper right corner of the form.
Now enter the following into the form (and leave everything else default):
| Server Mode | Peer to Peer (Shared Key) |
| Protocol | UDP |
| Device Mode | tun |
| Interface | WAN |
| Server host or address | 172.10.1.1 |
| Server port | 1194 |
| Description | SSL VPN Client |
| Shared Key | Uncheck to paste the shared key |
| ... | Paste your shared key |
| Server Certificate | SSLVPN Server Certificate (CA: SSL VPN CA) |
| DH Parameters Length | 4096 |
| Encryption algorithm | AES-256-CBC (256-bit) |
| Auth Digest Algorithm | SHA512 (512-bit) |
| Hardware Crypto | No Hardware Crypto Acceleration |
| IPv4 Tunnel Network | 10.10.0.0/24 |
| IPv4 Remote Network/s | 192.168.1.0/24 |
| Compression | Enabled with Adaptive Compression |
Now click on Save to apply your settings.
The Connection Status can be viewed under VPN->OpenVPN->Connection Status

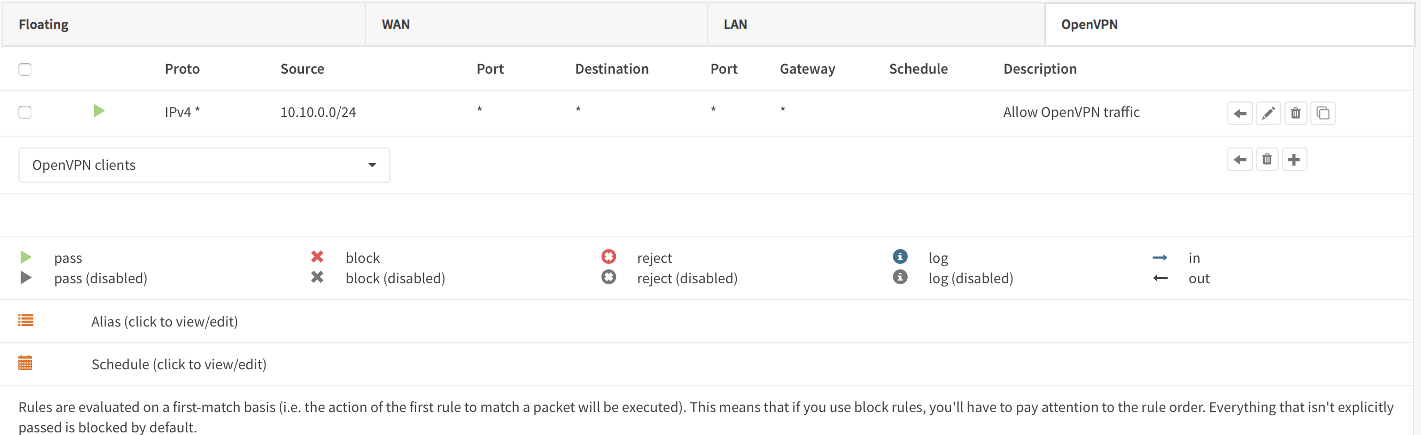
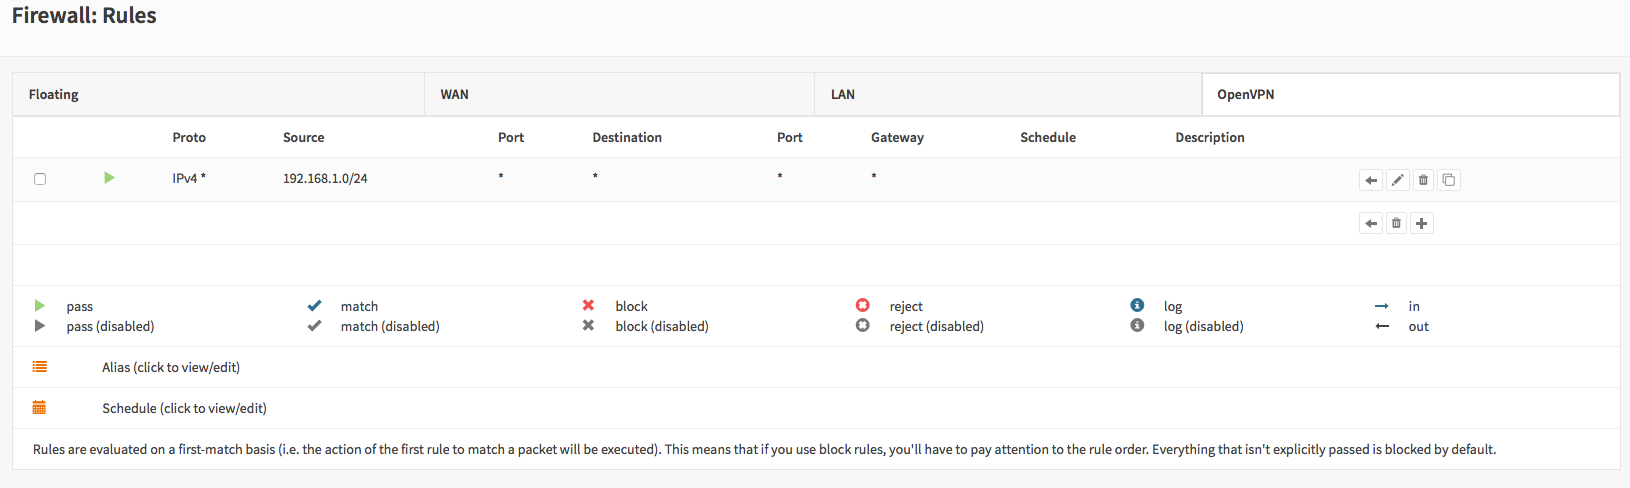
Step 5 - Client Firewall Rules
To allow traffic from the remote network just add a rule under Firewall->Rules OpenVPN tab.
Done