Setup Transparent Proxy
OPNsense offers a powerful proxy that can be used in combination with category based web filtering and any ICAP capable anti virus/malware engine. The proxy can be configured to run in transparent mode, this mean the clients browser does not have to be configured for the web proxy, but all traffic is diverted to the proxy automatically by utilizing Network Address Translation.
In this How To, we will explain the basic http as well as https (ssl bump) transparent proxy modes.
Warning
The Transparent SSL/HTTPS proxy mode uses a technique also called man-in-the-middle, only configure and use this if your know what you are doing. When configured wrong you may end up in lessing your security defenses significantly instead of enhancing them. Using a transparent https proxy can be a dangerous practice and may not be allowed by the services you use, for instance e-banking.
Step 1 - Basic Proxy Setup
To setup the transparent mode(s) a functional basic proxy setup is required. For basic configuration please refer to Setup Caching Proxy.
Step 2 - Transparent HTTP
Go to Services->Proxy->Administration
Then select General Forward Settings under the Forward Proxy Tab.
Select Enable Transparent HTTP proxy And Click Apply.
Step 3 - NAT/Firewall Rule
A simple way to add the NAT/Firewall Rule is to click on the (i) icon on the left of the Enable Transparent HTTP proxy option and click on add a new firewall rule.

For reference, these are the default settings:
| Interface | LAN |
| Protocol | TCP |
| Source | LAN net |
| Source port range | any - any |
| Destination | any |
| Destination port range | HTTP - HTTP |
| Redirect target IP | 127.0.0.1 |
| Redirect target port | other/3128 |
| Description | redirect traffic to proxy |
| NAT reflection | Enable (NAT + Proxy) |
| Filter rule association | Add associated filter rule |
The defaults should be alright, just press Save and Apply Changes.
Step 4 - CA for Transparent SSL
Before we can setup transparent SSL/HTTPS proxy we need to create a Certificate Authority. Go to System->Trust->Authorities or use the search box to get there fast.

Click on add or import ca in the upper right corner of the screen to create a new CA.
For our example we use the following data:
| Descriptive name | OPNsense-SSL |
| Method | Create an internal Certificate Authority |
| Key length (bits) | 2048 |
| Digest Algorithm | SHA256 |
| Lifetime (days) | 356 |
| Country Code | NL (Netherlands) |
| State or Province | Zuid Holland |
| City | Middelharnis |
| Organization | OPNsense |
| Email Address | spam@opnsense.org |
| Common Name | opnsense-ssl-ca |
Save
Step 5 - Transparent SSL
Go to Services->Proxy->Administration Then select General Forward Settings under the Forward Proxy Tab.
Select Enable SSL mode and set CA to use to the CA you have just created. Then Click Apply.
Step 6 - Configure No SSL Bump
This step is very important and requires careful consideration! To make sure that known sites are not bumped and keep their original security layer intact, one needs to add those including all subdomain to the SSL no bump sites field.
To enter a new item type in the field and hit enter to accept. start with a . (dot) to add all subdomains as well. Example: To add all of paypal.com , type .paypal.com and hit enter.
Note
Make sure that all banking sites and sites that you provide personal or login information for are added to this field. If you are not sure what to add, please reconsider using transparent SSL as its clearly not intended for you!
Step 7 - SSL NAT/Firewall Rule
A simple way to add the NAT/Firewall Rule is to click on the (i) icon on the left of the Enable SSL mode option and click on add a new firewall rule.
For reference, these are the default settings:
| Interface | LAN |
| Protocol | TCP |
| Source | LAN net |
| Source port range | any - any |
| Destination | any |
| Destination port range | HTTPS - HTTPS |
| Redirect target IP | 127.0.0.1 |
| Redirect target port | other/3129 |
| Description | redirect traffic to proxy |
| NAT reflection | Enable (NAT + Proxy) |
| Filter rule association | Add associated filter rule |
The defaults should be alright, just press Save and Apply Changes.
Step 8 - Configure OS/Browser
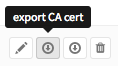
Since the CA is not trusted by your browser, you will get a message about this for each page you visit. To solve this you can import the Key into your OS and set as trusted. To export the Key go to System->Trust->Authorities and click on the icon to export the CA certificate. Of course one may choose to accept the certificate for each page manually, but for some pages that may not work well unless not bumped.
Import and change trust settings on your favorite OS. Per example on OSX it looks like this:

Warning
Again be very careful with this as your system will accept any page signed with this CA certificate. As long as no-one gains access to the private key that is no problem, but if any one can get a get a hold of it then all traffic can be decrypted except those in the do not bump list. You have been warned!
DONE