Serial Port
To utilize the serial port use the enclosed console cable.
Alternatively you can use a blue Cisco console cable (rollover-cable).
Should your system not come with a serial port you will require a USB-to-Serial adapter.
Ensure the use of a quality adapter.
Many cheap adapters can cause errors with the serial protocol.
Additionally such adapters might not be compatible with the drivers that come with Microsoft Windows operating systems.
To access the serial port you require a terminal application.
The application needs to be configured to a speed of 9600 Bits/s (Baud).
In Linux the command line command screen can be used.
It is sufficient to run the command providing the serial port.
screen /dev/ttyS0  #(for serial port)
screen /dev/ttyUSB0 #(for USB adapter)
Sometimes it does not work with the first serial port.
You have to experiment with the number (0, 1 or 2).
You can quit the command by entering CTRL-a \.
When starting the command it might be necessary to hit RETURN several times to get a command prompt.
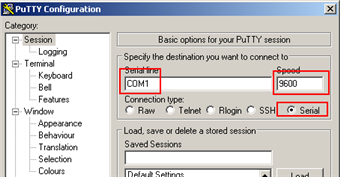
In Windows you can use the Putty application.
After starting putty you will select the options as per Figure Setting up the serial port in Putty.
Select the appropriate serial port also.
Startup
Once the appliance is fully wired and you are connected to the appliance via the console cable and have setup the terminal application (putty, screen or similar) you can power on the appliance.
The appliance will boot and depending on the exact model the first messages will be displayed in the terminal application after a short time period.

