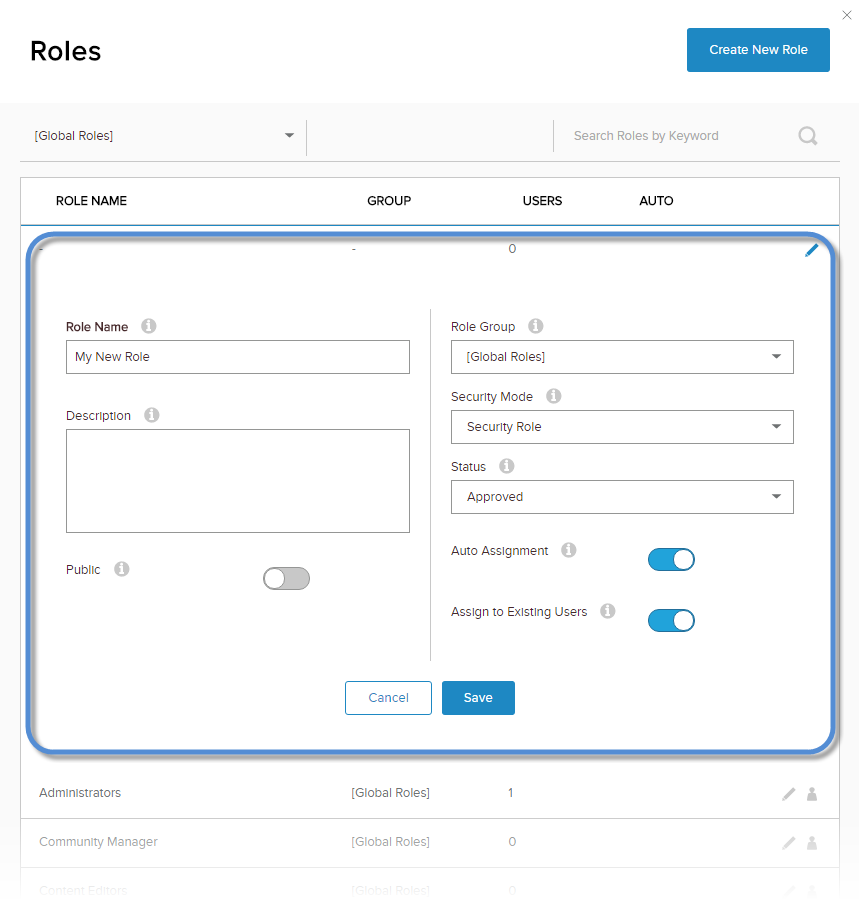
| Public |
If enabled, any registered user can subscribe to this role. |
| Role Group |
A role must belong to exactly one group. The [Global Roles] group contains all roles that do not belong to a custom group. |
| Security Mode |
- Security Role. The role is used to managed access to modules and pages of the site.
- Social Group. The role is used as a community that users can join and subscribe to. Available only in Evoq Engage.
- Both. The role is used both as a security role and as a social group. Use this mode when access to a certain area (modules and pages) of the website must be restricted to members of a community. Available only in Evoq Engage.
|
| Status |
- Pending. The role was created but not yet approved for use.
- Disabled. The role is not available.
- Approved. The role is available.
|
| Auto Assignment |
If enabled, new users are automatically added to this role. |
| Assign to Existing Users |
If enabled, all existing users are automatically added to this role. |