Create a Content Type
This video briefly demonstrates how to create a custom content type.
Prerequisites
Steps
-
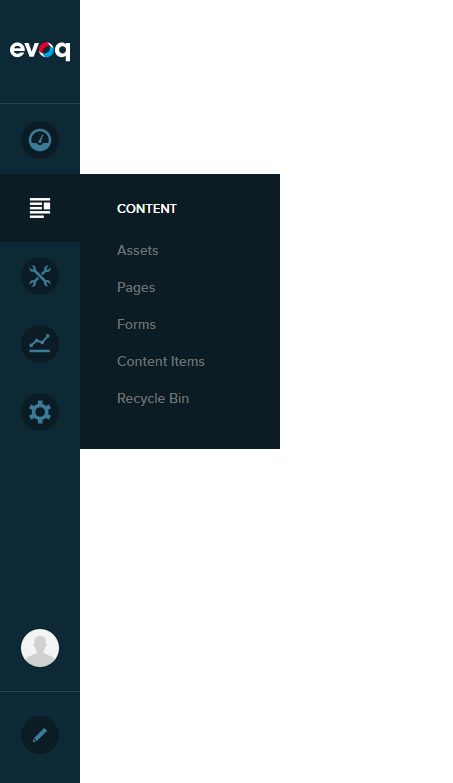
Go to Persona Bar > Content > Content Items.
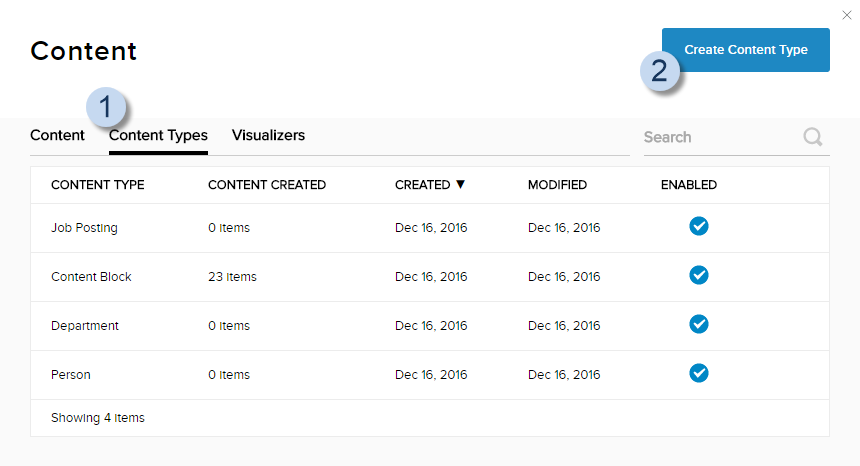
➊
➋
-
In the Content Types tab, click/tap Create Content Type.
-
Configure the content type.
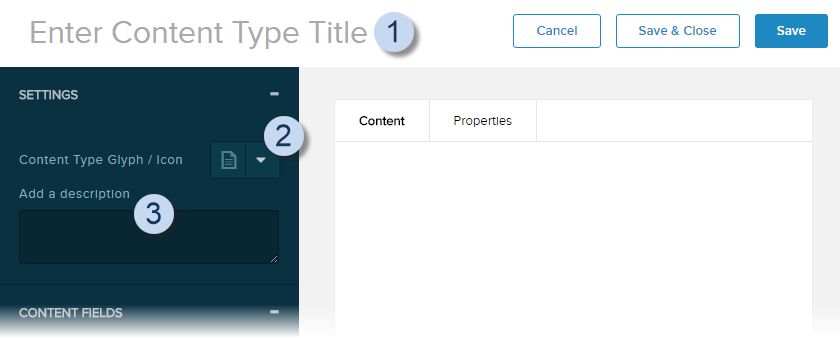
Field Description Content Type Name Can be edited at the top of the form where it is displayed. Content Type Glyph / Icon Expand the dropdown arrow to select or search. Add a description A short description of the content type. -
Manage the fields of the content type.
-
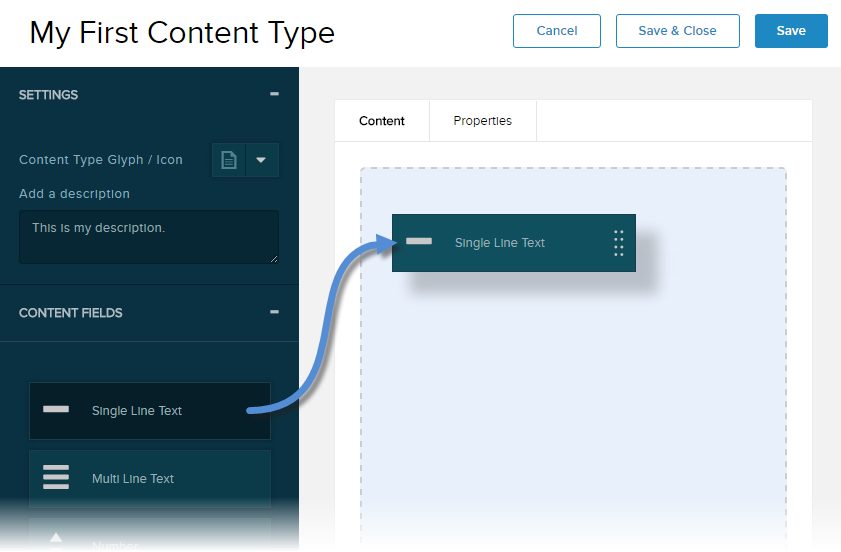
To add a new field, drag and drop a field type to the canvas, then configure its settings.
-
To edit a field, click/tap on the field in the canvas, then configure its settings.
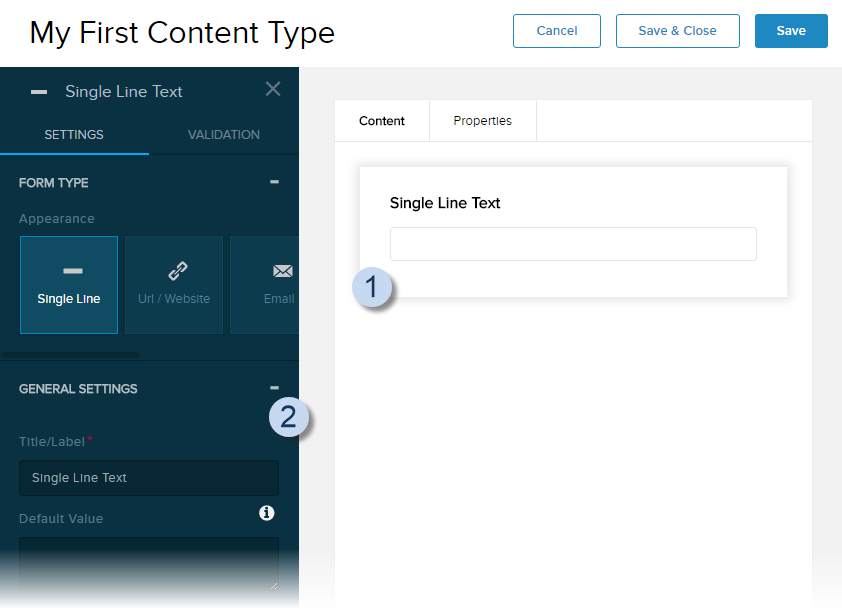
-
To duplicate a field, hover over the field in the canvas, click/tap the duplicate icon, then configure the settings of the new copy.
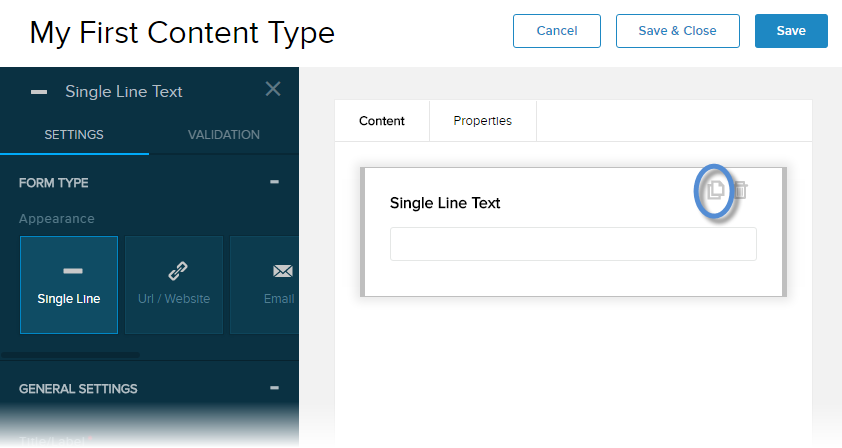
-
To delete a field, hover over the field in the canvas, and click/tap the trash icon.
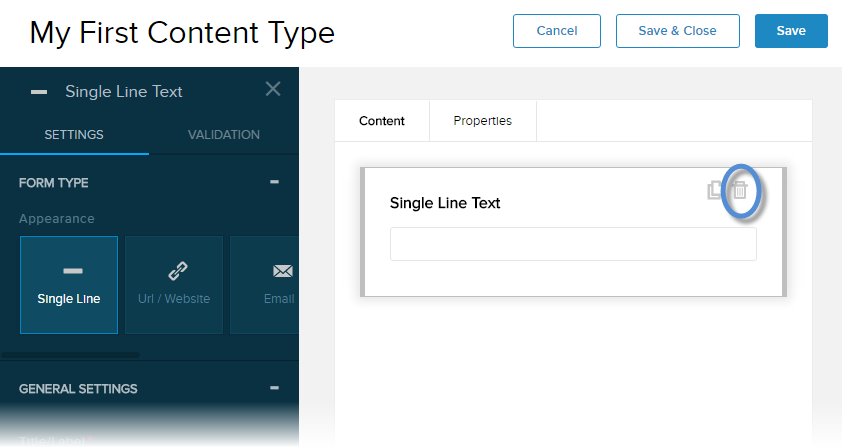
-
To add a new field, drag and drop a field type to the canvas, then configure its settings.
-
Configure the content type's properties.
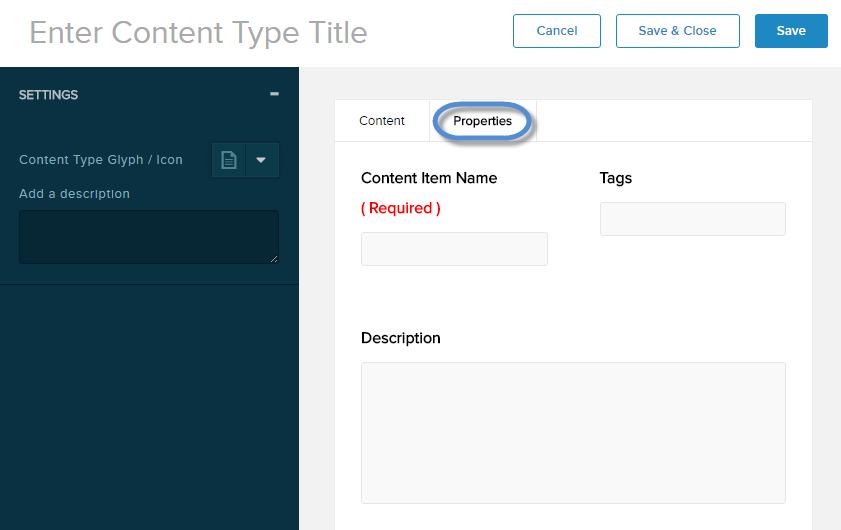
Field Description Content Item Name The word or phrase that describes each item of this content type. Example: A content item based on the Job Listing content type could be called job opening. Tags Words or phrases to be associated with the content items based on this content type. Description A short description of the content items based on this content type.
