Using Blue-Green Deployment to Reduce Downtime and Risk
Page last updated: October 12, 2015
This page assumes you are using cf CLI v6.
Blue-green deployment is a release technique that reduces downtime and risk by running two identical production environments called Blue and Green.
At any time, only one of the environments is live, with the live environment serving all production traffic. For this example, Blue is currently live and Green is idle.
As you prepare a new release of your software, deployment and the final stage of testing takes place in the environment that is not live: in this example, Green. Once you have deployed and fully tested the software in Green, you switch the router so all incoming requests now go to Green instead of Blue. Green is now live, and Blue is idle.
This technique can eliminate downtime due to application deployment. In addition, blue-green deployment reduces risk: if something unexpected happens with your new release on Green, you can immediately roll back to the last version by switching back to Blue.
Note: You can adjust the route mapping pattern to display a static maintenance page during a maintenance window for time-consuming tasks, such as migrating a database. In this scenario, the router switches all incoming requests from Blue to Maintenance to Green.
Blue-Green Deployment with Cloud Foundry Example
For this example, we’ll start with a simple application: “demo-time.” This app is a web page that displays the words “Blue time” and the date/time on the server.
Step 1: Push an App
Use the cf CLI to push the application. Name the application “Blue” with the subdomain “demo-time.”
$ cf push Blue -n demo-time
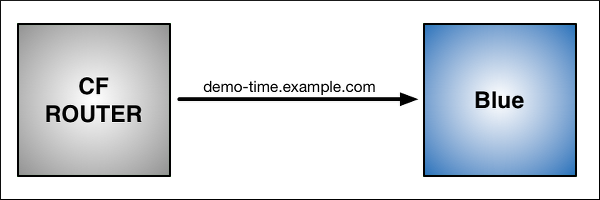
As shown in the graphic below:
- Blue is now running on Cloud Foundry.
- The CF Router sends all traffic for
demo-time.example.comtraffic to Blue.
Step 2: Update App and Push
Now make a change to the application.
First, replace the word “Blue” on the web page with “Green,” then rebuild the source file for the application.
Run cf push again, but use the name “Green” for the application and provide a
different subdomain to create a temporary route:
$ cf push Green -n demo-time-temp
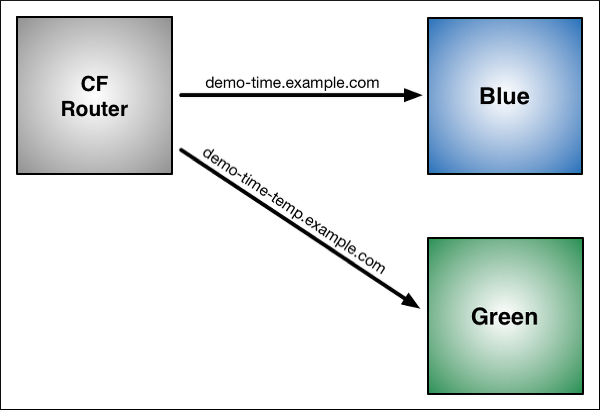
After this push:
- Two instances of our application are now running on Cloud Foundry: the original Blue and the updated Green.
- The CF Router still sends all traffic for
demo-time.example.comtraffic to Blue. The router now also sends any traffic fordemo-time-temp.example.comto Green.
Step 3: Map Original Route to Green
Now that both apps are up and running, switch the router so all incoming
requests go to the Green app and the Blue app.
Do this by mapping the original URL route (demo-time.example.com) to the Green
application.
$ cf map-route Green example.com -n demo-time
Binding demo-time.example.com to Green... OK
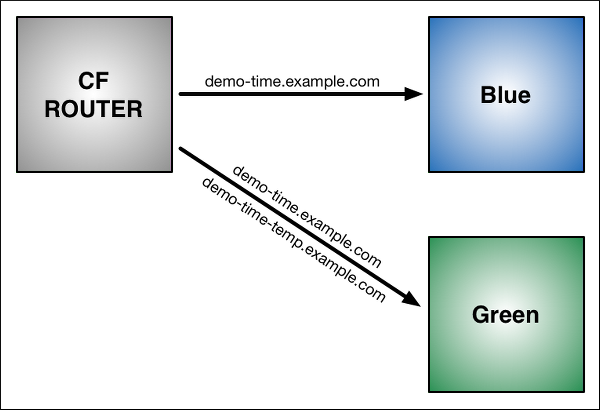
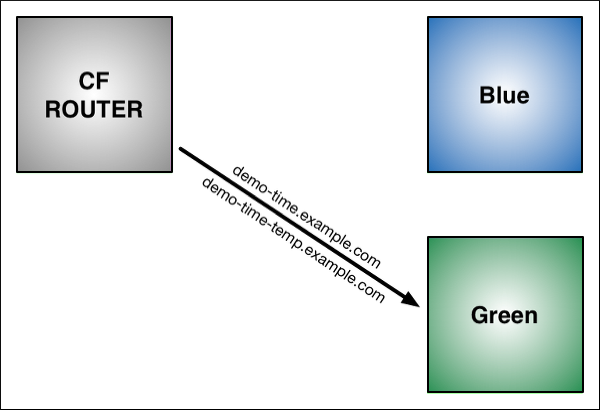
After the cf map-route command :
- The CF Router continues to send traffic for
demo-time-temp.example.comto Green. - The CF Router immediately begins to load balance traffic for
demo-time.example.combetween Blue and Green.
Step 4: Unmap Route to Blue
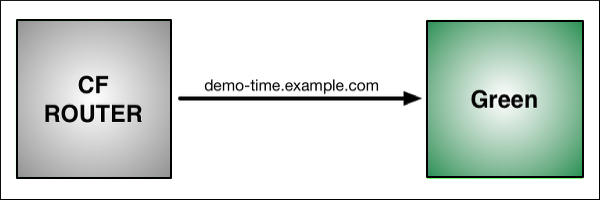
Once you verify Green is running as expected, stop routing requests to Blue
using the cf unmap-route command:
$ cf unmap-route Blue example.com -n demo-time
Unbinding demo-time.example.com from blue... OK
After cf unmap-route command:
- The CF Router stops sending traffic to Blue.
Instead, it routes all traffic to
demo-time.example.comto Green:
Step 5: Remove Temporary Route to Green
You can now use cf unmap-route to remove the route to demo-time-temp.example.com.
You can also decommission Blue, or keep it in case you need to roll back your
changes.