Using the cf CLI with an HTTP Proxy Server
Page last updated: December 11, 2015
If you have an HTTP proxy server on your network between a host running the cf CLI and your Cloud Foundry API endpoint, you must set HTTP_PROXY with the hostname or IP address of the proxy server.
The HTTP_PROXY environment variable holds the hostname or IP address of your proxy server.
HTTP_Proxy is a standard environment variable. Like any environment variable, the specific steps you use to set it depends on your operating system.
Format of HTTP_PROXY
HTTP_PROXY is set with hostname or IP address of the proxy server in URL
format: http_proxy=http://proxy.example.com
If the proxy server requires a user name and password, include the credentials:
http_proxy=http://username:[email protected]
If the proxy server uses a port other than 80, include the port number:
http_proxy=http://username:[email protected]:8080
Setting HTTP_PROXY in Mac OS or Linux
Set the HTTP_PROXY environment variable using the command specific to your
shell.
For example, in bash, use the export command.
Example:
$ export HTTP_PROXY=http://my.proxyserver.com:8080
To make this change persistent, add the command to the appropriate profile file
for the shell.
For example, in bash, add a line like the following to your .bash_profile or
.bashrc file:
  http_proxy=http://username:password@hostname:port;
  export $HTTP_PROXY
Setting HTTP_PROXY in Windows
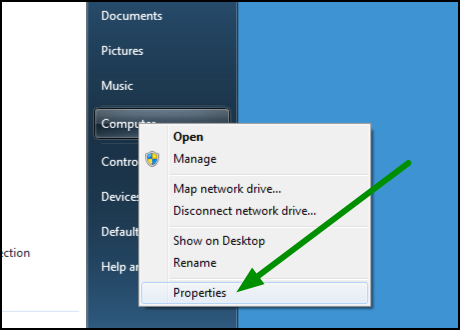
Open the Start menu. Right-click Computer and select Properties.
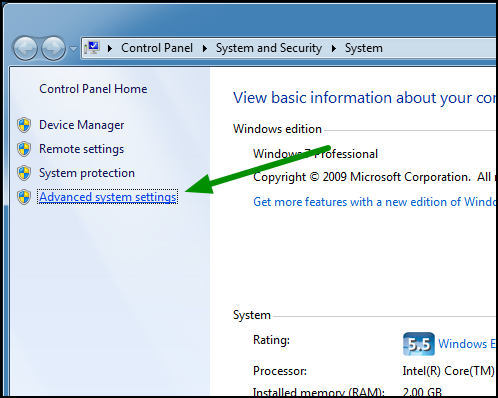
In the left pane of the System window, click Advanced system settings.
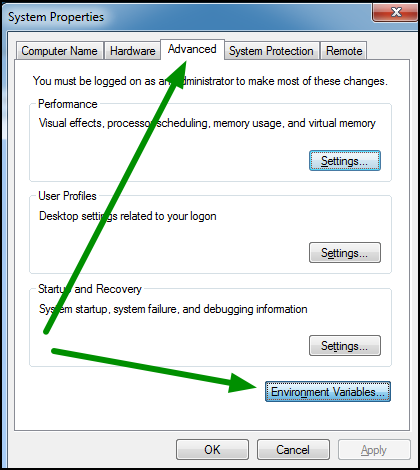
In the System Properties window, select the Advanced tab, then click Environment Variables.
In the Environment Variables window, under User variables, click New.
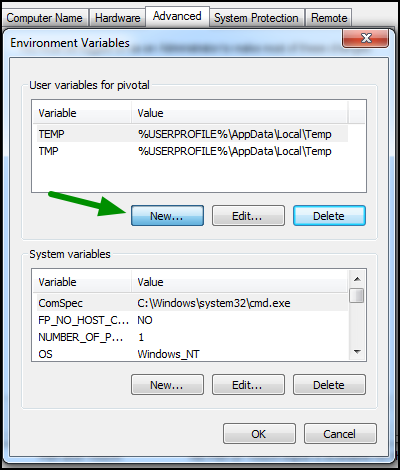
In the Variable name field, input
HTTP_PROXY. In the Variable value field, input your proxy server information.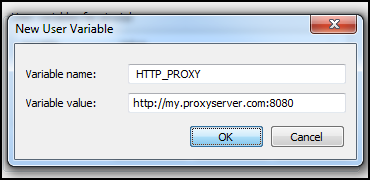
Click OK.