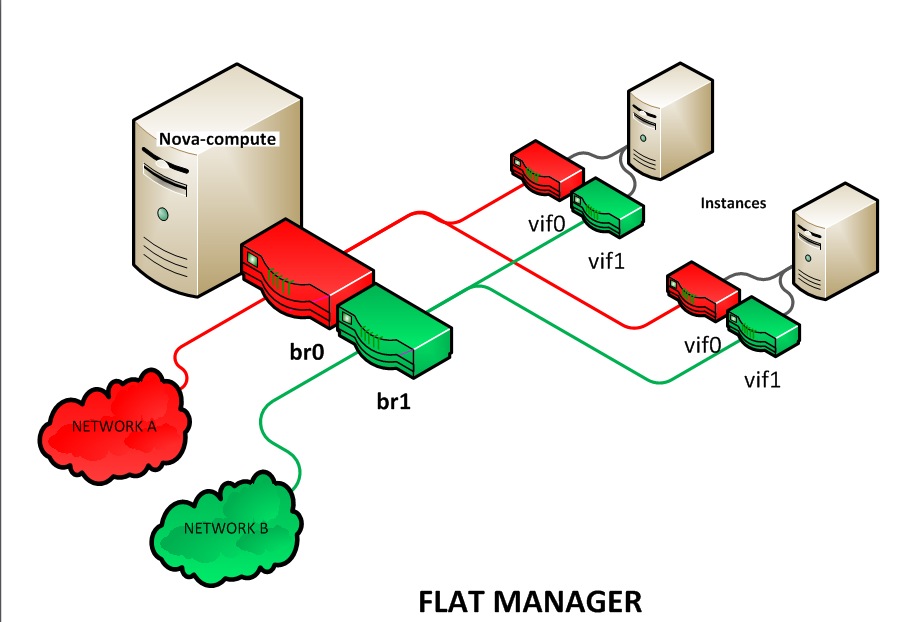
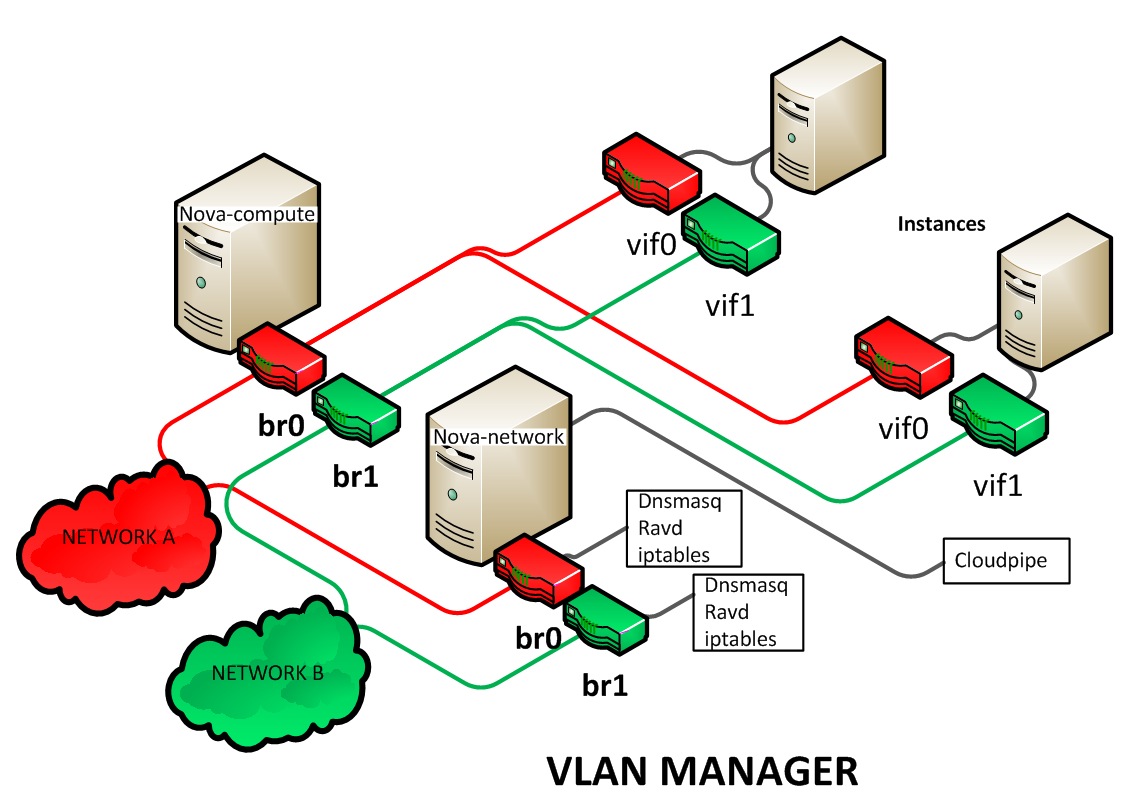
The multinic feature allows you to plug more than one interface to your instances, making it possible to make several use cases available:
SSL Configurations (VIPs)
Services failover/ HA
Bandwidth Allocation
Administrative/ Public access to your instances
Each VIF is representative of a separate network with its own IP block. Every network mode introduces its own set of changes regarding the multinic usage:
In order to use the multinic feature, first create two networks, and attach them to your tenant (still named 'project' on the command line):
$ nova network-create first-net --fixed-range-v4=20.20.0.0/24 --project-id=$your-project
$ nova network-create second-net --fixed-range-v4=20.20.10.0/24 --project-id=$your-project
Now every time you spawn a new instance, it gets two IP addresses from the respective DHCP servers:
$ nova list
+-----+------------+--------+----------------------------------------+
 |  ID |    Name    | Status |                Networks                |
 +-----+------------+--------+----------------------------------------+
 | 124 | Server 124 | ACTIVE | network2=20.20.0.3; private=20.20.10.14|
 +-----+------------+--------+----------------------------------------+
![[Note]](../common/images/admon/note.png) | Note |
|---|---|
Make sure to power up the second interface on the instance, otherwise that last won't be reachable through its second IP. Here is an example of how to setup the interfaces within the instance (this is the configuration that needs to be applied inside the image):
# The loopback network interface auto lo iface lo inet loopback auto eth0 iface eth0 inet dhcp auto eth1 iface eth1 inet dhcp |
![[Note]](../common/images/admon/note.png) | Note |
|---|---|
If the Virtual Network Service Neutron is
installed, it is possible to specify the
networks to attach to the respective
interfaces by using the
$ nova boot --image ed8b2a37-5535-4a5f-a615-443513036d71 --flavor 1 --nic net-id= <id of first network> --nic net-id= <id of first network> test-vm1
|


